How to Fix “Couldn’t Start” Error in Hogwarts Legacy?
The Hogwarts Legacy “Couldn’t start” error message often occurs due to permission conflicts. This happens when the game process does not have sufficient permissions to run in your Windows environments which results in it failing or crashing on startup.
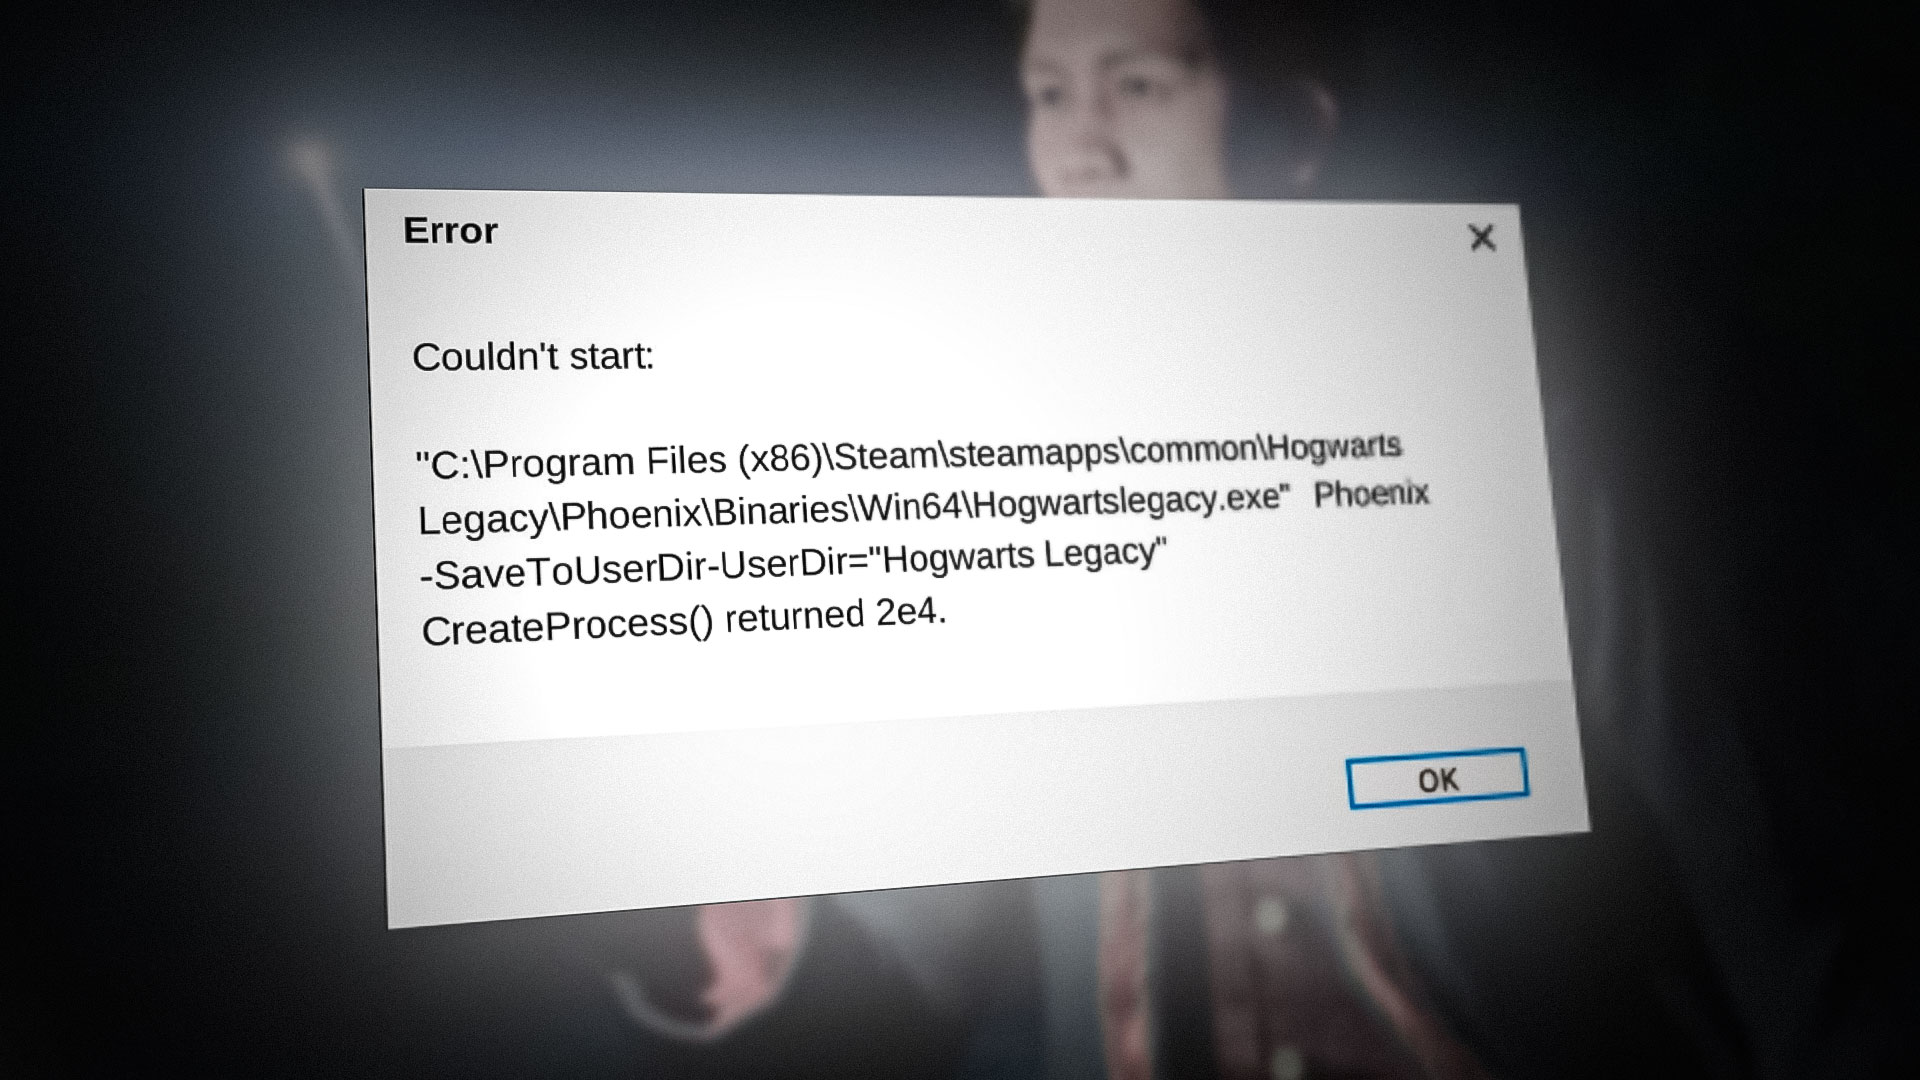
In most cases, this phenomenon is due to the interference of third-party services, such as the antivirus program on your computer. You can often resolve the error message by running the compatibility troubleshooter on the game executable and applying the suggested settings.
We will take you through a number of different methods that you can implement to mitigate the “Couldn’t start” error message.
1. Run Hogwarts Legacy as Admin
The first thing you should do when starting to troubleshoot the error message is to run the game with administrative privileges. Running the game with elevated privileges will provide it with the permissions it needs to run in your Windows environment smoothly, disallowing the intervention of other third-party apps running in the background.
To do this, you will have to run the Steam client or Epic Games Launcher as admin. In addition, you will need to edit the game’s executable properties to force it to run with admin permissions every time. Follow the instructions below to do this:
- First, search for the Steam client or Epic Games Launcher in the Start Menu. Click on the Run as administrator option.
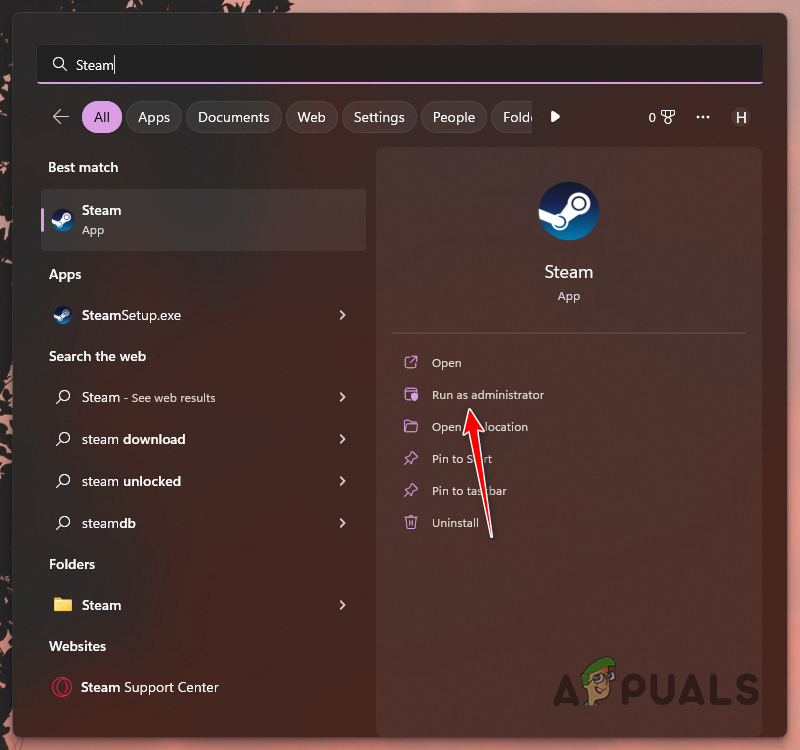
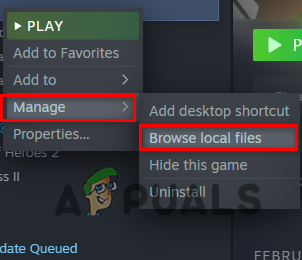
Opening Steam as Admin - After that, navigate to the installation folder of Hogwarts Legacy. On Steam, you can do this by right-clicking on the game and going to Manage > Browse local files.
Navigating to Game Installation Directory - Locate the game executable file and right-click on it, choose Properties.
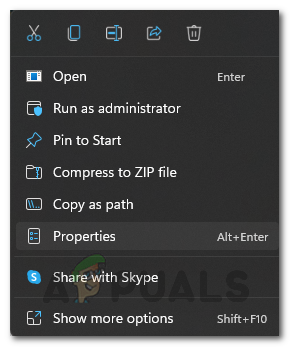
Opening Properties - On the Properties window, switch to the Compatibility tab.
- Tick the Run as administrator checkbox. If it was already ticked, untick it.
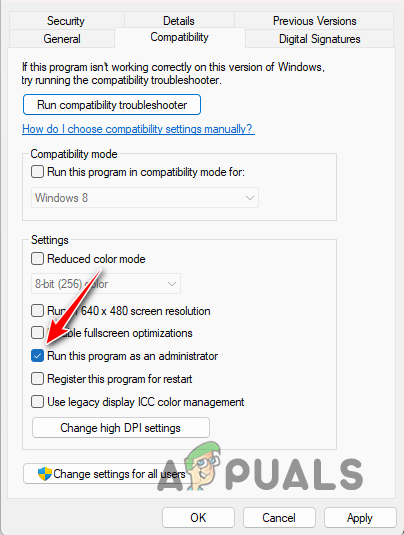
Running Game as Admin - Click Apply and hit OK.
- After that, open the game to see if the error message still occurs.
2. Run Compatibility Troubleshooter
Windows offers a built-in feature in the form of a compatibility troubleshooter that you can use on various apps. This essentially suggests different settings based on the programs to help them run better on your system.
You can use the compatibility troubleshooter on Hogwarts Legacy and use the suggested settings to resolve the error message in question. To do this, follow the instructions below:
- First, navigate to the installation directory of the game. You can right-click on the game in your Library and go to Manage > Browse local files on Steam.

Navigating to Game Installation Directory - After that, locate the game executable file on your system. Right-click on it and choose Properties.

Opening Properties - Switch to the Compatibility tab on the Properties window.
- Finally, click the Run compatibility troubleshooter option.
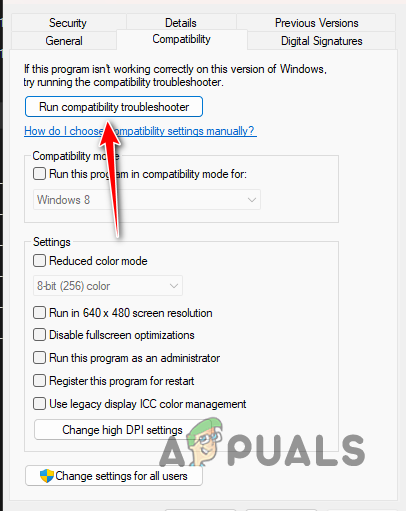
Running Compatibility Troubleshooter - Wait for it to complete and apply any recommended settings.
- After that, open the game to see if that fixes the issue.
3. Disable Third-Party Antivirus
Another reason that the error message occurs can be the third-party antivirus program installed on your computer. Security programs are commonly found to intervene with the other processes running on your system in an attempt to keep it safe.
In some instances, this can lead to a false positive causing the game process to crash before it even starts up properly. When this happens, you will have to disable the third-party antivirus program installed on your computer to see if that removes the issue.
If the error message goes away after disabling your security program, you can add the game executable file to the antivirus whitelist. This will prevent the antivirus from interfering with the game process and it should work properly with the security program running in the background. See if the problem persists after disabling your antivirus, jump to the next method below.
4. Verify Game Files
In some scenarios, the error message can be due to the game files on your system. This happens when you are either missing specific files or there is corruption in the game installation. In such an instance, you will have to scan and repair the game files to resolve the issue.
This can be done quite easily via the verify integrity of game files feature on Steam. A similar scan and repair feature exists on Epic Games Launcher as well that you can use. Follow the instructions below for your respective platform.
Steam
- First, open the Steam client on your PC.
- Navigate to the Library and right-click on Hogwarts Legacy. Choose Properties from the drop-down menu.

Opening Properties - Switch to the Local Files tab on the Properties window.
- There, click on the Verify integrity of game files option.
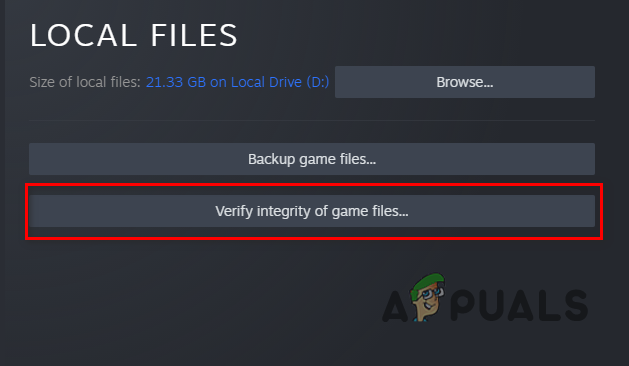
Verifying the Integrity of Game Files on Steam - Wait for it to complete and see if the problem goes away.
Epic Games Launcher
- Open the Epic Games Launcher app on your system.
- Go to your Library and click on the three-dots option under Hogwarts Legacy.
- From the drop-down menu, choose Manage.
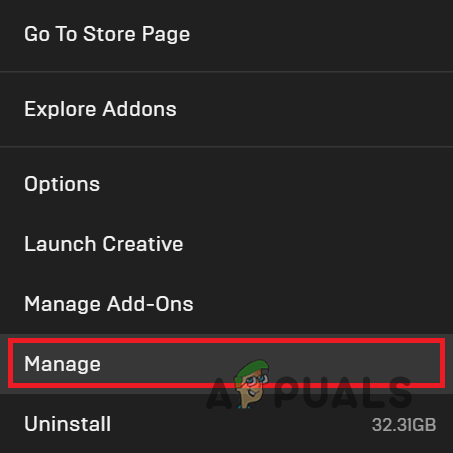
Navigating to Manage Menu - Finally, click on the Verify option to repair your game files.
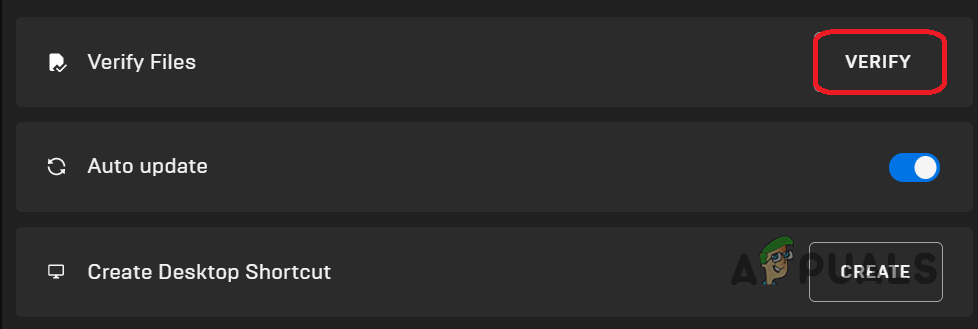
Verifying the Integrity of Game Files on Epic Games Launcher - Wait for it to complete.
- After that, open the game to see if the error message still occurs.
5. Change the Installation Directory
Finally, if none of the above methods circumvents the error message for you, the likely cause of the issue can be the installation directory of the game on your computer. In some instances, the game process will not be able to start properly if it is not able to access specific files or resources.
If this case is applicable, you will have to change the installation directory of the game on your computer. You can do this automatically if you own the game on the Steam client. In the case of Epic Games Launcher, you will have to adopt a manual approach.
Steam
- Open the Steam client on your computer.
- Click on the Steam option in the top-left corner and choose Settings from the drop-down menu.
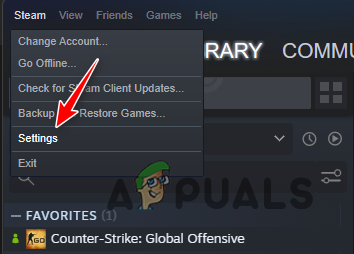
Navigating to Steam Settings - After that, switch to the Downloads tab on the Settings window.
- There, click on the Steam Library Folders option.
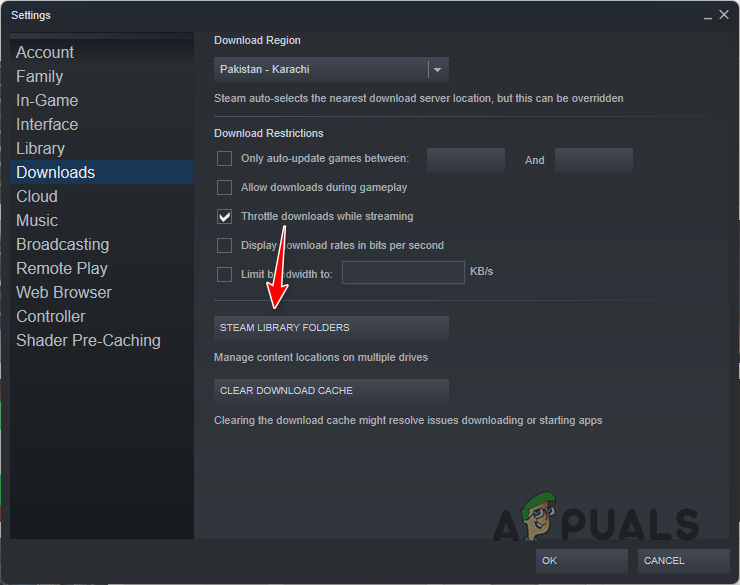
Navigating to Steam Library Folders - To move the installation directory, you will have to add a new Steam Library folder in a different partition. Click on the + icon to do this.
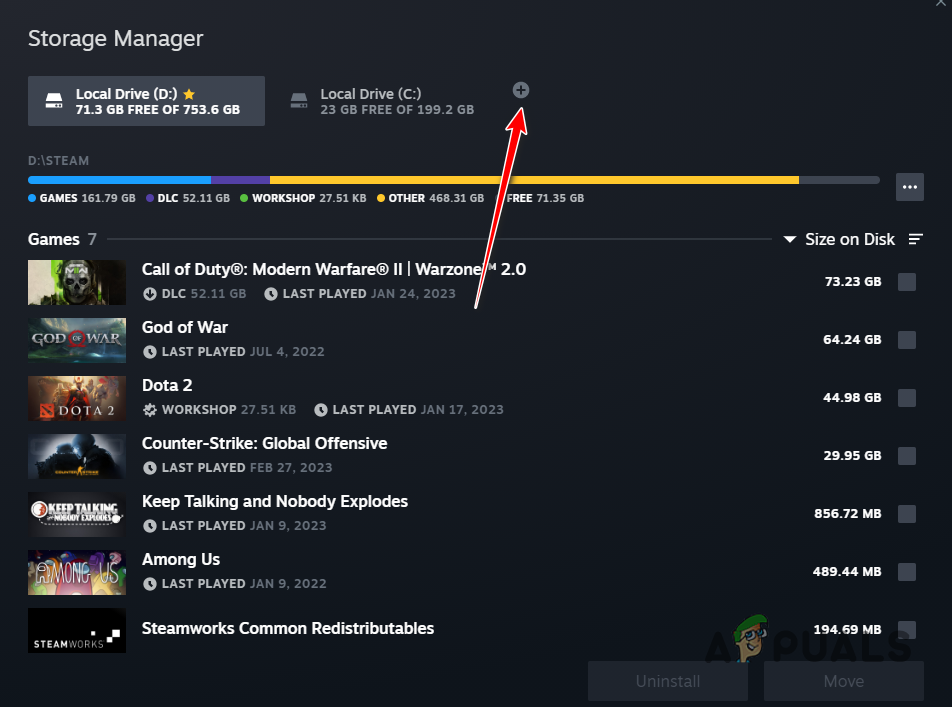
Adding New Steam Library Folder - After that, select Hogwarts Legacy from the list of games and click the Move option.
- Choose the new Steam Library folder created and click Move again.
- After that, see if the issue goes away.
- If the problem persists, you will have to uninstall the game completely and reinstall it into a new partition. Right-click on the game in the Library and choose the Manage > Uninstall option.
Epic Games Launcher
Start with copying the game files to a new location. After that, open the Epic Games Launcher client and uninstall the game. Once you do that, start downloading the game into a new location. Wait for the download process to reach 2-3%. At this point, pause the installation. Move the copied game files to the new installation directory. Finally, resume the installation again and wait for the app to detect the existing files. After that, launch the game to see if the issue goes away.


