How to Fix ‘Couldn’t Modify Partition Map’ in macOS
Some macOS users are reporting that they always end up seeing the ‘Couldn’t modify partition map‘ error when attempting to trigger a re-format on a partition affected by corruption. This is typically reported in situations where the macOS system ends up corrupting the partition map.
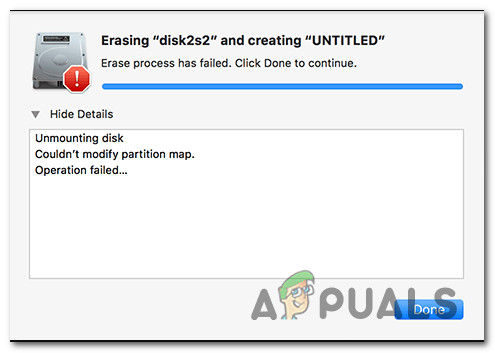
After analyzing this issue thoroughly, it turns out that there are several different scenarios that might end up triggering this error code on a macOS computer. Here’s a list of potential culprits that might be responsible for this issue:
- Missing / Corrupted Partition map – One of the most common scenarios that might cause this problem is an instance in which the required partition map is either missing or severely corrupted. If you find yourself in this particular scenario, you should be able to fix the issue by creating a new equivalent via Disk utility or directly via the Terminal app.
- SD Card uses is ‘Locked’ – Keep in mind that if you’re using an older SD card (especially from SanDisk) when encountering this issue, it’s possible that the operation fails because the external device is locked, so new info cannot be written on it. In this case, you need to flip the Locked/Unlocked switch in order to fix the issue.
- Corrupted OS files – Under certain circumstances, you can expect to see this issue occurring in situations where you’re actually dealing with some type of system file corruption that is affecting the reformatting operation. In this case, you should be able to fix the issue by initiating a repair disk operation via the Recovery Menu. If this fails, you should attempt to mont a healthy macOS state via the Time Machine utility.
Now that you are aware of every scenario that might trigger the Couldn’t modify partition map error, here’s a list of methods that might allow you to fix it:
Method 1: Creating a New Partition Map
As it turns out, a lot of affected users that were also dealing with this issue on macOS have managed to fix the issue by using Disk Utility to create a new partition map by forcing the utility to show all devices and erasing the problematic partition.
This is confirmed in situations where the Couldn’t modify partition map error is being caused by a system action that ends up corrupting the partition map.
Since there are 2 different ways that will allow you to do this, we’ve put together 2 different sub-guides that will walk you through the process of creating a new partition map.
Fell free to follow whichever one is closer to your preferred way of troubleshooting macOS issues:
A. Creating a New Partition Map via Disk Utility
Here’s are some quick step-by-step instructions that will walk you to the process of forcing the system to create a new partition map via Disk Utility:
- On the main dashboard of your macOS, open the Finder app and access the Utilities folder.
- Once you’re inside the utility folder, double-click on Disk Utility and wait for it to open.
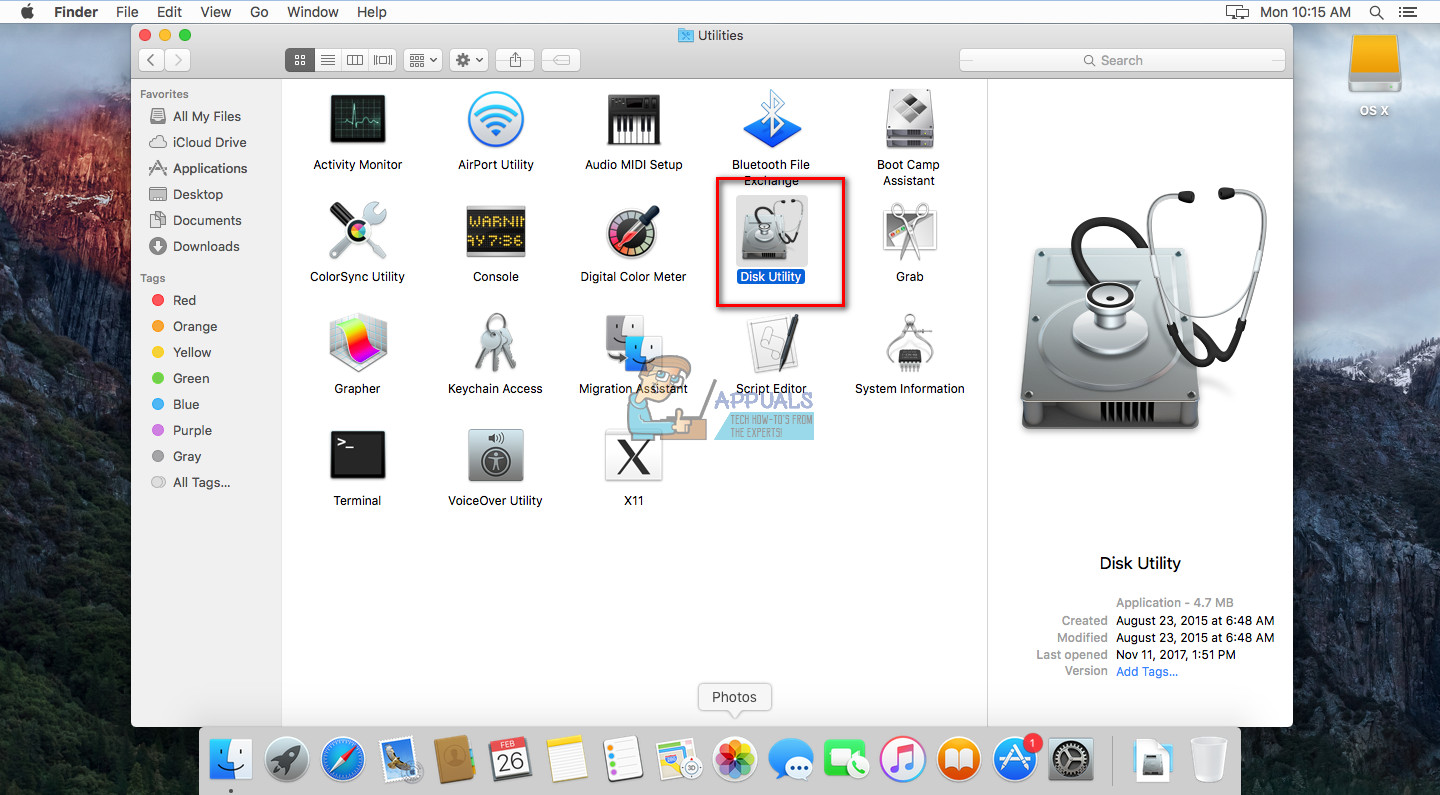
Opening Disk Utility - Once you’re inside the Disk Utility app, click on the action button of the app and make sure that the Show all Devices toggle is enabled.
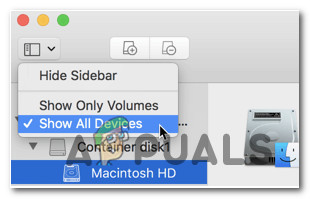
Forcing all devices to show up - Once the full list of devices becomes visible, you will be able to select the problematic device that’s causing the Couldn’t modify partition map error.
- When this happens, select the device in question, then right-click on it and click on Erase, after setting the Format to MS-Dos (FAT) and the Scheme to Master Boot Record.
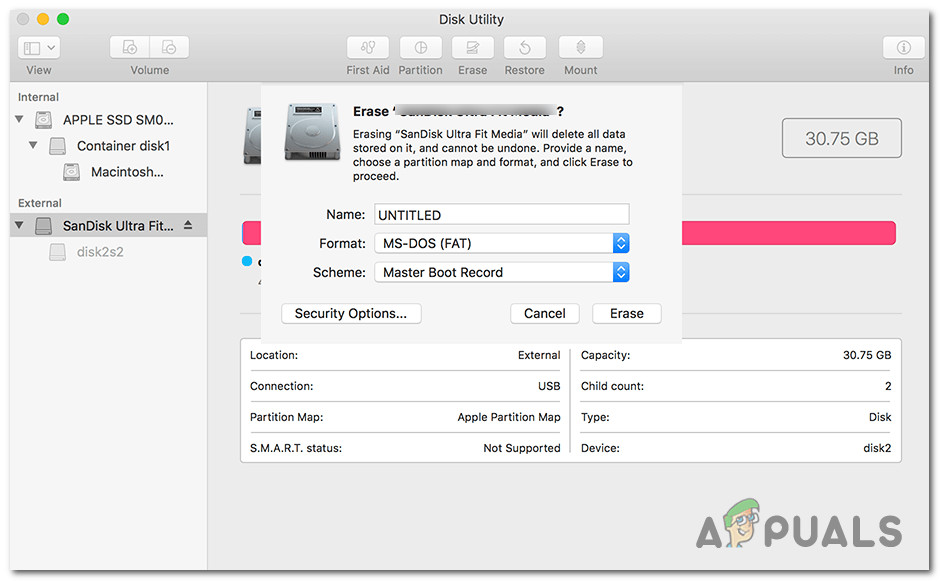
Erasing the Problematic device - Wait until the new partition map is created. You should see a similar screen to the image below – Once you see this, the problem should be resolved.
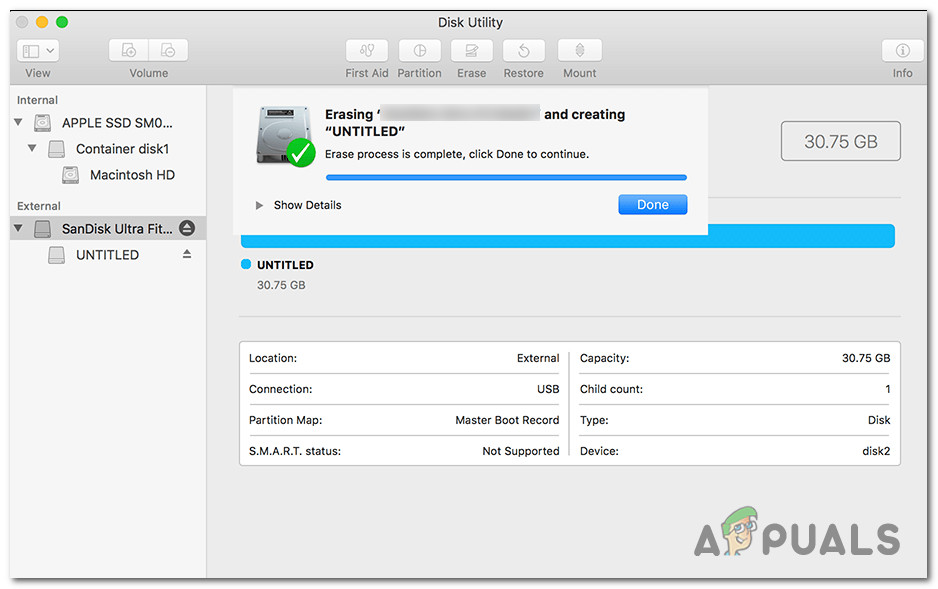
modifying the partition map via Disk Utility
B. Creating a New Partition Map from the Terminal App
If you’re comfortable with using Terminal commands, our recommendation is to follow the instructions below and create a new partition map via a series of commands:
- First things first, open the Finder app using the action bar at the bottom of your macOS.
Opening the Finder app - Once you’re inside the Finder app, click on Go (using the ribbon at the top), then click on Utilities from the context menu that just appeared.

Accessing the utility menu on macOS - Once you’re inside the Utilities screen and you see the list of entries, double-click on the Terminal app.
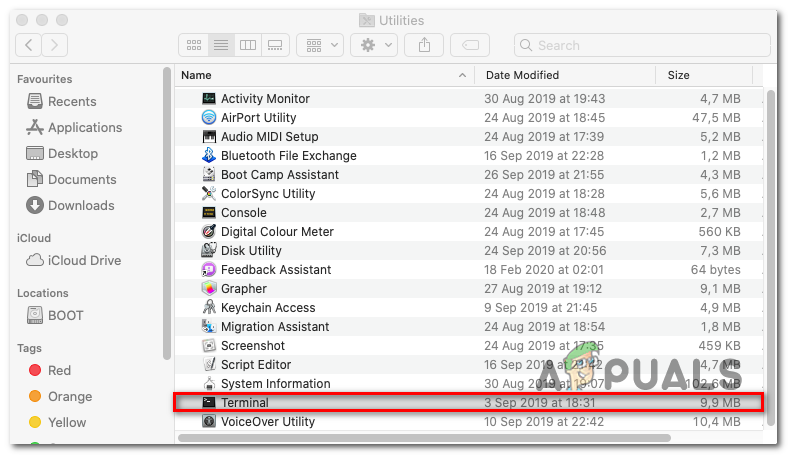
Accessing the Terminal utility Note: If you have a system-wide password, you will have to insert it at this point in order to grant admin access to the Terminal app.
- Once you’re inside the terminal app, type the following command to effectively identify the path of the drive that’s causing the Couldn’t modify partition map error:
diskutil list
- After you get the full list of devices, type the following command after modifying it accordingly to effectively erase the problematic device in order to reset the partition map:
diskutil eraseDisk ExFAT *DeviceName* /dev/disk2
Note: Keep in mind that DeviceName is just a placeholder. Replace it with the name of the problematic device that you previously fetched at step 4.
- Repeat the action that was previously triggering the Couldn’t modify partition map error and see if the problem is now fixed.
If the issue is still persisting, move down to the next potential fix below.
Method 2: ‘Unlocking’ the Micro-SD Card (if applicable)
If you’re encountering this issue while attempting to erase or re-format an SD card (via an SD adapter), you should consider the possibility that your SD card might be locked.
If this scenario is applicable, you should fix the issue by manually unlocking the SD card before retrying the operation. This is even more likely if you’re encountering this issue with an older SD card.
Note: Locked SD cards are pretty uncommon nowadays, but they were very common a few years back.
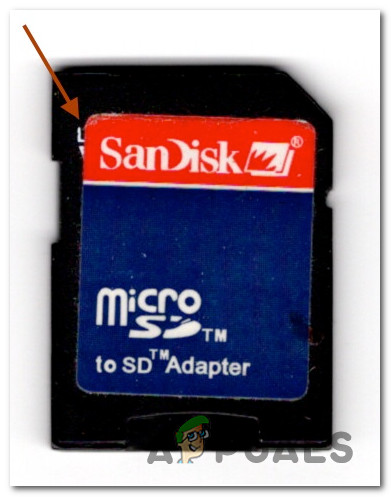
Keep in mind that some manufacturers might end up covering the Lock arrow pointing towards the switch with their label, so you might need to investigate your SD card thoroughly to discover the switch.
Once you manage to unlock the card, repeat the operation and see if the problem is now fixed.
In case this scenario was not applicable or the SD card was already unlocked, move down to the next method below for a different approach at fixing the Couldn’t modify partition map error.
Method 3: Initiate a Repair Disk from Recovery Mode
If you’re dealing with an underlying system corruption issue, you should also try booting your macOS computer into Recovery mode and initiate a repair disk on the affected drive via the Disk Utility app.
This is confirmed to work in situations where the Couldn’t modify partition map error is caused by a permission issue or by an underlying system file corruption case that cannot be resolved conventionally.
If this scenario is applicable, follow the instructions below to initiate a repair disk procedure directly from the Recovery menu of your macOS installation:
- Restart your macOS conventionally and hold Command + R while it boots up until you see the Apple logo – When you see the logo, let both keys go at the same time.
- Once you’re finally inside the macOS Utilities menu, choose Disk Utility from the list of available options.
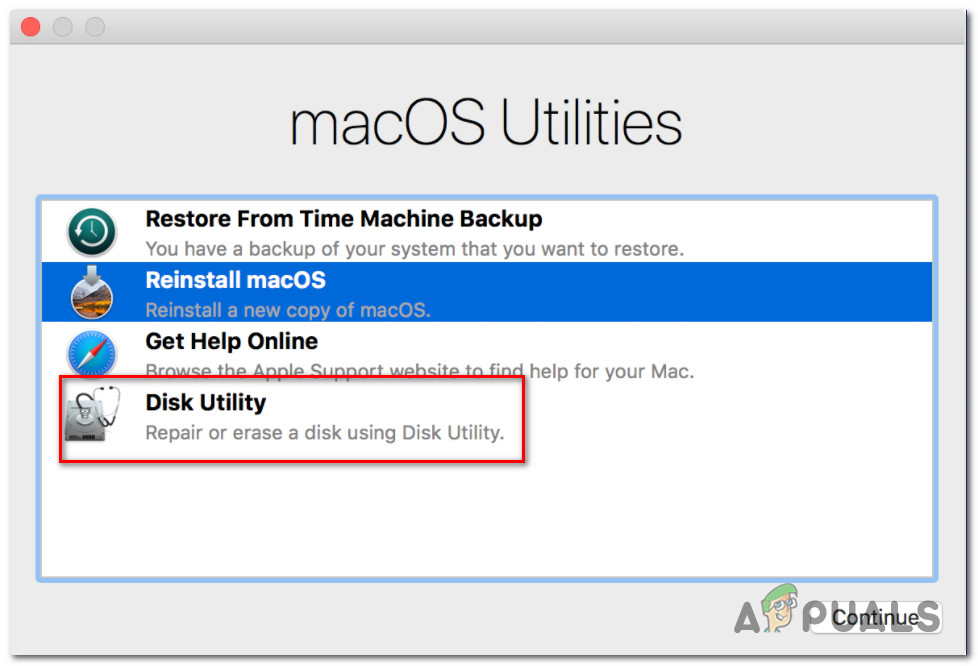
Opening the Disk Utility menu Note: If you get asked for your account password, insert it and press Enter to grant admin access.
- Once Disk Utility is finally open, select the affected drive that is triggering the error (from the left-hand section) and click on the First Aid icon (top of the screen).
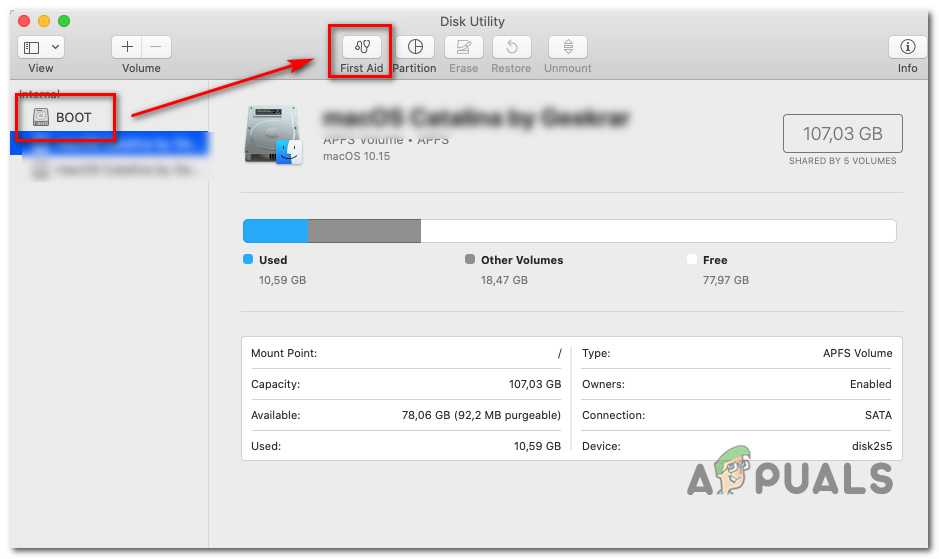
Running the First Aid utility on the Boot drive - At the confirmation prompt, click on Run to start the operation, then wait for the utility to finish checking the entire volume for errors. If an issue is discovered, the utility will attempt to repair the errors on the volume automatically.
- Once the First Aid scan is complete, restart your macOS and see if the problem is now fixed.
In case this problem is still not fixed, move down to the next method below.
Method 4: Using a Machine backup (if applicable)
If none of the methods above have worked for you as you’re still encountering the Couldn’t modify partition map error when attempting to trigger a reformat or repair, you’re probably dealing with a severe case of system file corruption.
In this case, you can avoid reinstalling your macOS installation, by mounting a previously created machine backup in order to restore it back to a previous point in time where everything was functioning properly.
Note: This method is only applicable as long as the issue is not rooted in a hardware issue. The instructions below will only be applicable if you already have a previously created Time Machine backup snapshot (either stored on a physical drive or on the cloud)
If the requirements above are met, follow the instructions below to restore your macOS files back to a healthy state in which this issue was not occurring:
- Start by making sure that the backup disk or flash disk is connected to your Mac.
Note: If the backup is stored via Time Capsule, ensure that your home router is correctly set up and that your macOS computer is currently connected to it. - Next, on your Mac, click on the Apple menu from the ribbon menu at the top, then click on System Preferences from the context menu that just appeared.
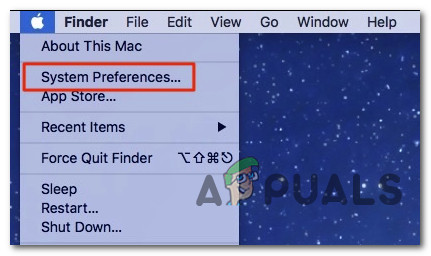
Accessing the System Preferences tab - Once you’re inside the System Preferences menu, go ahead and click on the Spotlight option from the list of available options.
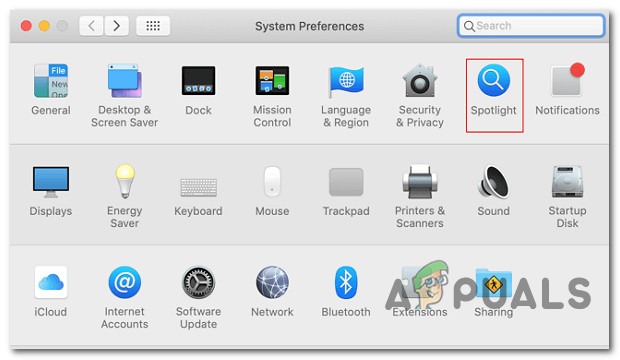
Accessing the Spotlight utility from the list of available options - Next, click on Migration Assistant, then click on From a Mac, Time Machine backup, or startup disk toggle from the list of options.
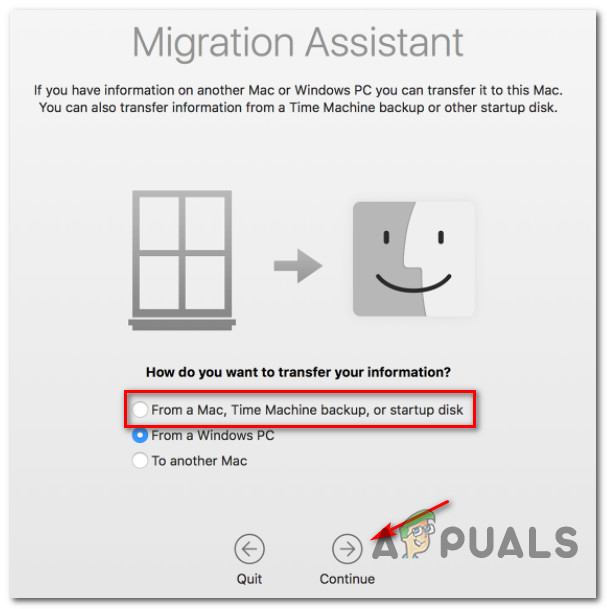
Using the Migration assistant - Next, follow the remaining prompts to start the operation of restoring your healthy Mac state.
- Once the operation is complete, repeat the action that was previously causing the issue and see if the problem is now fixed.


Enabling “Show All Devices” and creating a new partition map really did the job. Thanks for the article!