How to Completely Uninstall BlueStacks
BlueStacks, more accurately known as the BlueStacks App Player, is an application for the Windows Operating System that enables computers to successfully run apps designed for the Android Operating System. BlueStacks is one of the very few bridges between PCs running on Windows and the Android OS in existence and is also arguably the best one. Using the BlueStacks App Player is pretty easy, and so is installing it. However, users often run into problems when trying to uninstall BlueStacks for whatever reason. The most common problem faced by Windows users trying to uninstall BlueStacks is the program not being entirely uninstalled from their computers.
![]()
Even after users affected by this issue uninstall BlueStacks from their computer, some of the program’s files or registry keys/values are left behind. These leftovers not only take up disk space (no matter how little) but also prevent BlueStacks from being reinstalled in the future. Thankfully, though, uninstalling BlueStacks and making sure you uninstall it entirely is not only entirely possible but is also a pretty straightforward process. However, it should be noted that you can go about completely uninstalling BlueStacks in different ways – you can either do it manually or use a troubleshooter designed specifically for this purpose.
How to Completely Uninstall BlueStacks Manually
First and foremost, you can completely uninstall BlueStacks manually by uninstalling the application from your computer and then going ahead and deleting any and all files that the program left behind in its wake. If you wish to use this method to completely uninstall BlueStacks from your computer, you need to:
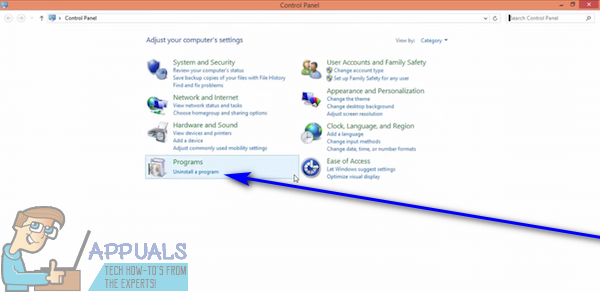
- Right-click on the Start Menu or press the Windows Logo key + X to open the WinX Menu, and click on Control Panel in the WinX Menu.
- Click on Uninstall a program under Programs.
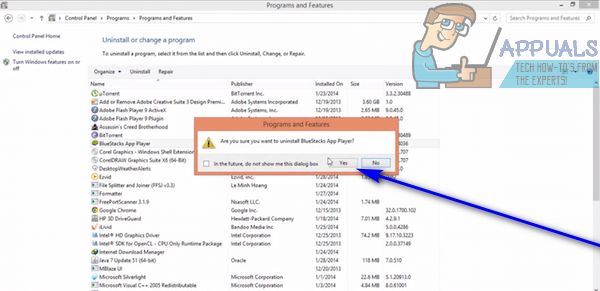
- Locate and right-click on BlueStacks App Player, click on Uninstall, confirm the action in the resulting popup and go through the uninstallation wizard all the way to the end to uninstall the application.
- Navigate to X:\ProgramData (X being the drive letter corresponding to the partition of your computer’s hard drive that Windows is installed on), locate and click on the BlueStacksSetup folder to select it, press Delete, and confirm the action in the resulting popup.
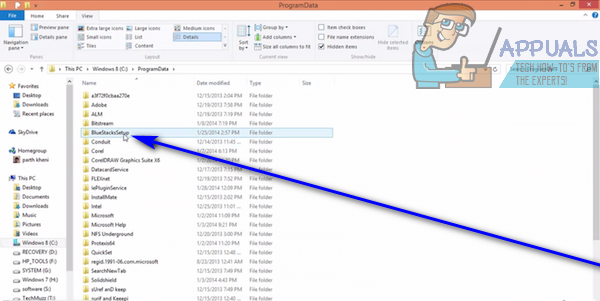
Note: The ProgramData folder is almost always hidden, so you are going to have to have File Explorer show all hidden files and folders to see it. - Press the Windows Logo key + R to open a Run dialog, type %temp% into the Run dialog and press Enter, press Ctrl + A to select everything in the folder, press Delete, and confirm the action in the resulting popup.
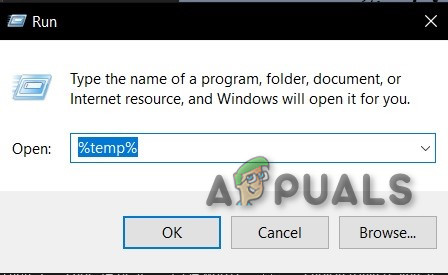
%temp% command in Run Command - Press the Windows Logo key + R to open a Run dialog, type regedit into the Run dialog and press Enter to launch the Registry Editor, and navigate to the following directory in the left pane of the Registry Editor:
HKEY_LOCAL_MACHINE > SOFTWARE > BlueStacks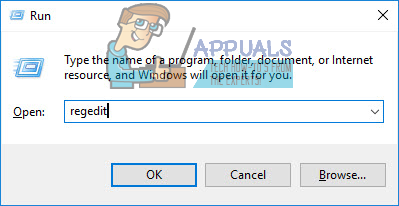
- In the left pane of the Registry Editor, click on the BlueStacks sub-key under the SOFTWARE key to have its contents displayed in the right pane.
- Select everything you see in the right pane of the Registry Editor, press Delete, and confirm the action in the resulting popup.
Once you do so, you will have successfully and completely uninstalled BlueStacks from your computer.
How to Completely Uninstall BlueStacks using a Troubleshooter
BlueStacks, the company behind the BlueStacks App Player, is aware that the program fails to be completely uninstalled from Windows computers in some cases. That being the case, the folks at BlueStacks have developed a troubleshooter designed specifically for the purpose of uninstalling the BlueStacks App Player from a Windows computer in its entirety. You can use this troubleshooter if you would like to completely uninstall BlueStacks from your computer, and here’s exactly how you can do so:
- Make sure you have quit the BlueStacks App Player and it is not running.
- Click here to download the troubleshooter.
- Wait for the troubleshooter to be downloaded.
- Navigate to where the troubleshooter was downloaded to and double-click on it to run it.
- If asked to give the troubleshooter permission to run and make changes to your computer, click on Yes.
- Follow the onscreen instructions all the way through to the very end of the troubleshooter, at which point it should display a message stating that the “Process has been finished.” When you see this message, you are done and the BlueStacks App Player has been successfully and entirely uninstalled from your computer, so click on OK to dismiss the message.

Thax