How to Completely Remove Windows 7 and Install Ubuntu?
Whether you’ve finally decided to make the jump to a pure Linux environment or you’re revitalizing a laptop with a damaged install of Windows 7, you can completely remove everything currently installed on the drive and replace it with the new operating system. Most Ubuntu installation instructions focus primarily on how to dual-boot Ubuntu, but this is by no means a requirement. You can just as easily eliminate the old operating system. You’ll first want to make sure you’ve used Windows Explorer or the Windows command line to copy everything you want to keep to a USB memory stick or a cloud storage account.
While you won’t need to zero out your drive in most cases, what you’ll be doing is enough to render your data useless. This is also a great way to clean malware off an installation since you’ll be exterminating the old matrix. The installation instructions are identical for any of the variants of Ubuntu that feature graphical shells. This includes pure Ubuntu, Xubuntu, Lubuntu, Kubuntu and Ubuntu-MATE.
Removing Windows 7 and Replacing it With Ubuntu
Assuming you’ve been able to successfully burn an ISO image of your preferred flavor of Ubuntu to a USB memory stick or SDHC card, you can either select install or try Ubuntu from the menu. If you select Try Ubuntu you can make sure all of your attached hardware works out of the box, which it will in many cases. You’re also capable of doing a few terminal tricks from this environment.
When you’re installing either Ubuntu, Xubuntu, Lubuntu or Ubuntu-MATE, you can actually hold down the CTRL, ALT and T keys to open up a terminal window. You can then type sudo bash to get a root prompt, or simply try using sudo before any command you’d like to run as the root user. If you want to use the terminal, then you can try using sudo fdisk -l to see all the volumes attached to your system. You can also open the GNOME Disks Utility from the LX, Whisker or Dash menu.
Spot the drive that has your existing Microsoft Windows installation, and make sure that all the partitions on it are completely stopped. Once they are, you can use sudo cfdisk /dev/sdLetter#, replaced with sda, sdb or whatever valid device file represents your drive, to repartition it. Use the arrow keys in cfdisk to highlight the partitions you want to remove and then select delete.
Create any new partitions that you’d like, now that the ones containing Windows 7/8/8.1/10 are gone. While Ubuntu creates three partitions on MBR drives, you actually don’t need to if you just want to create a swap partition and an active one for the / mount point. Once you’re ready, highlight the [ Write ] box and then push the enter key. Type yes and push enter then quit the program.
As soon as you’re back in the installer, select the “Something Else” option. Double-click on each partition and tell the installer which mount point you’d like to assign to each partition. You may only want to have an active partition and a swap partition. Ubuntu’s installer won’t restructure your drive completely until you approve these changes.
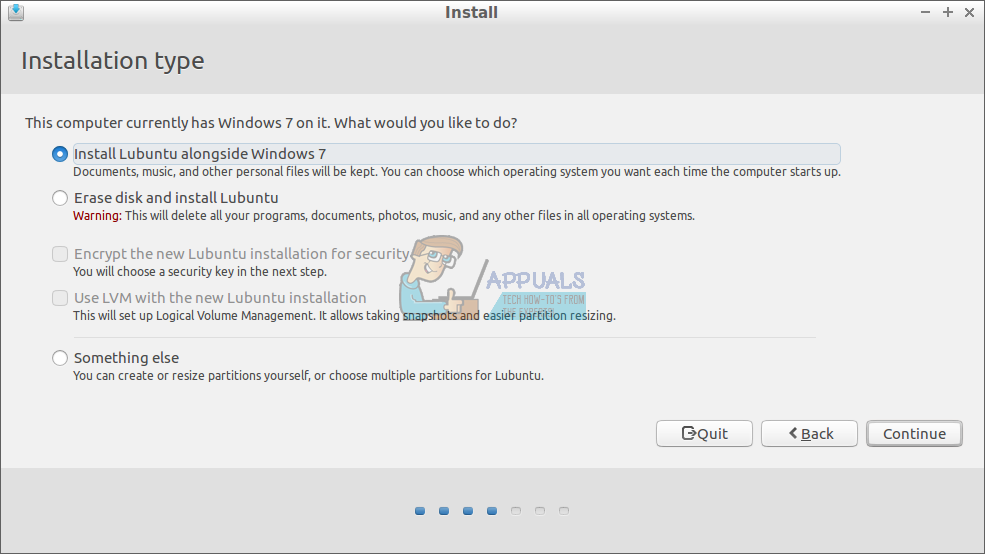
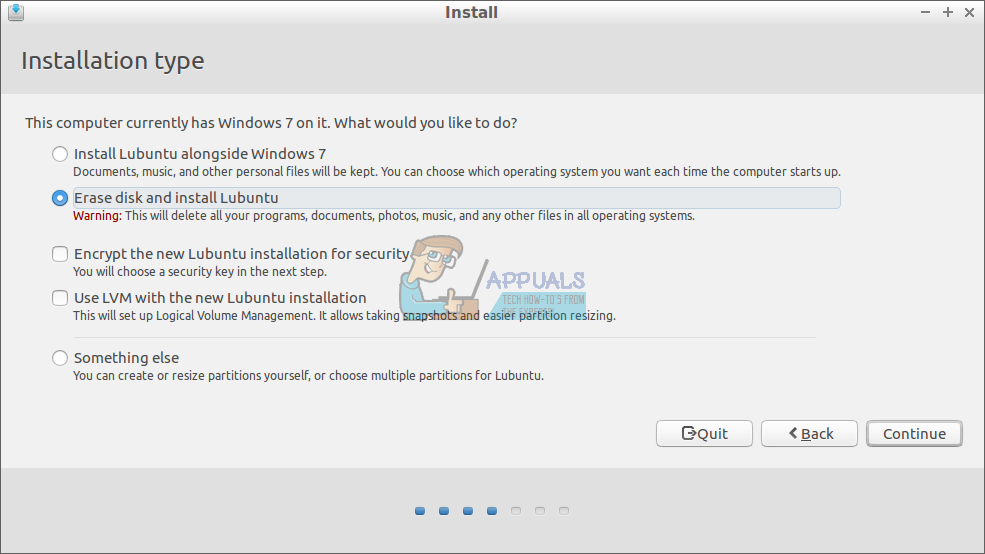
Assume instead that you just went straight into the installer without doing any of this. It will tell you that it detects Windows 7 on the computer in question. You can select “Erase Disk and Install *buntu” from this menu to completely remove your old Windows installation.
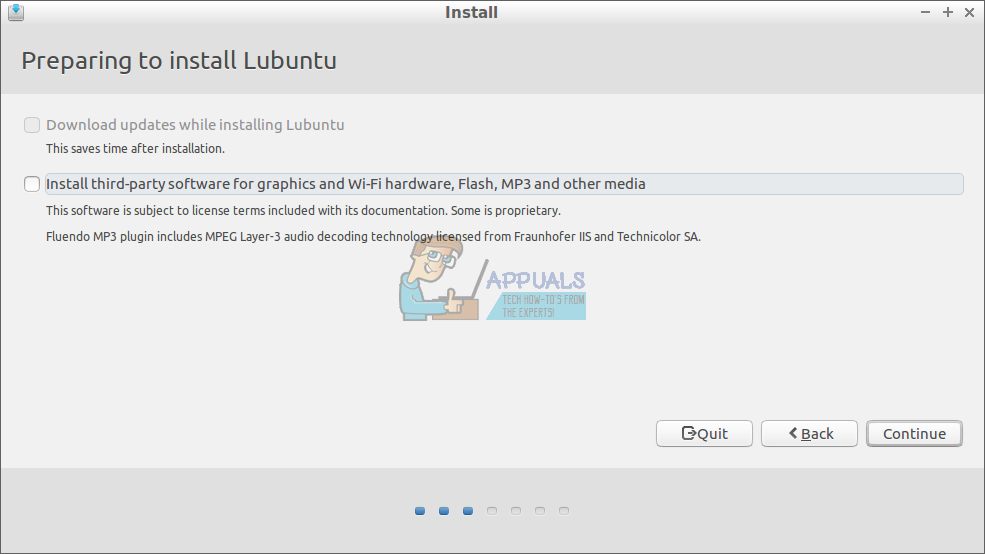
When the installer ultimately asks you whether to install third-party software and download updates, you should respond in the affirmative to both. Since Ubuntu doesn’t always have a commercial driver that Windows might, this should keep your hardware working well. It will also ensure you have the ability to play MP3 files. You’ll still need to install a MIDI sound-font later to truly have all the functionality of Windows.
You can still select “Something Else” even if you didn’t do anything before in the terminal. You’ll be given a graphical representation of all the volumes attached to your system. Look out for volumes formatted to the NTFS structure, since this is what Windows 7 prefers for boot devices.
Windows 7 generally creates an extra hidden partition in either the front or back of the driver, which will also contain an NTFS structure. If you didn’t build your computer, then you’ll potentially also get the option to delete partitions that contain diagnostic software packages. You can safely delete this software, since the memtest86 routines Ubuntu ships with does the same job. Rewriting your operating system would probably void out your warranty anyway.
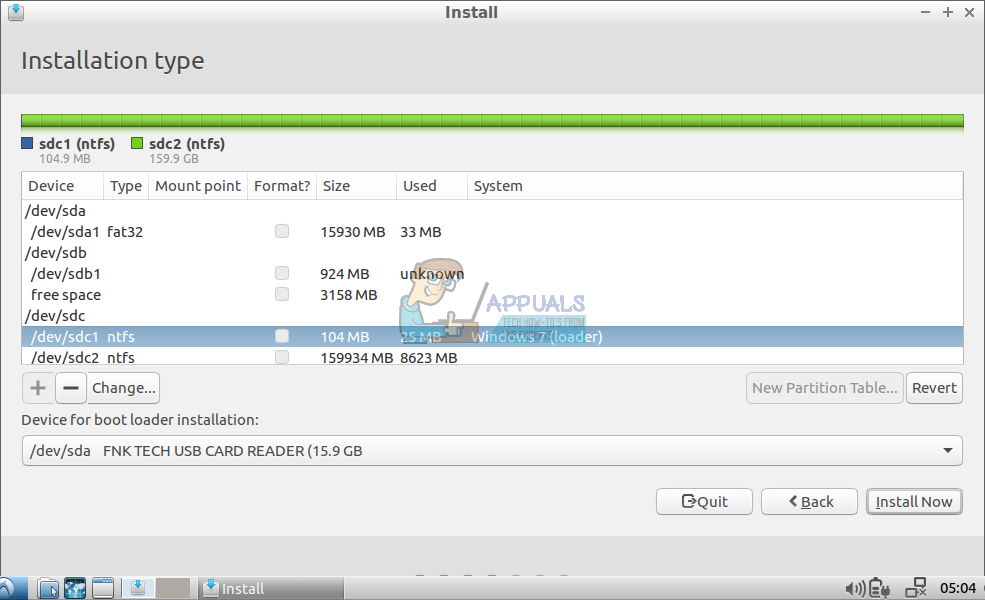
Double-click on any partition you’d like to redefine. You could also delete a partition with the minus button or add a new one. You’ll need to specify a primary area and a swap area at the least. While you can select several different structures for your primary partition, it’s advisable to go with ext4 in most cases.
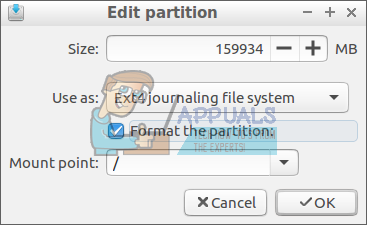
Make sure you select “Format the partition” to eliminate the old code, and select a mount point for it. The installation will then proceed completely as normal after that. The installer will prompt you to restart at the end, and you’ll then need to remove the installation media when prompted. Finally, you’ll boot off your former Windows 7 drive.

At some point during the installation, you might be given a warning about partitions that are in use. Pay close attention to the device file the installer names, since this might actually point to the install media or an attached USB memory stick. Likewise, many smaller netbook computers actually have an attached SDHC or microSDXC reader, which could contain a valid partition table as well. In most cases unmounting these partitions won’t be an issue, but you’re probably not going to want to install your operating system to an SD card sitting in a slot if you were trying to replace Windows 7.