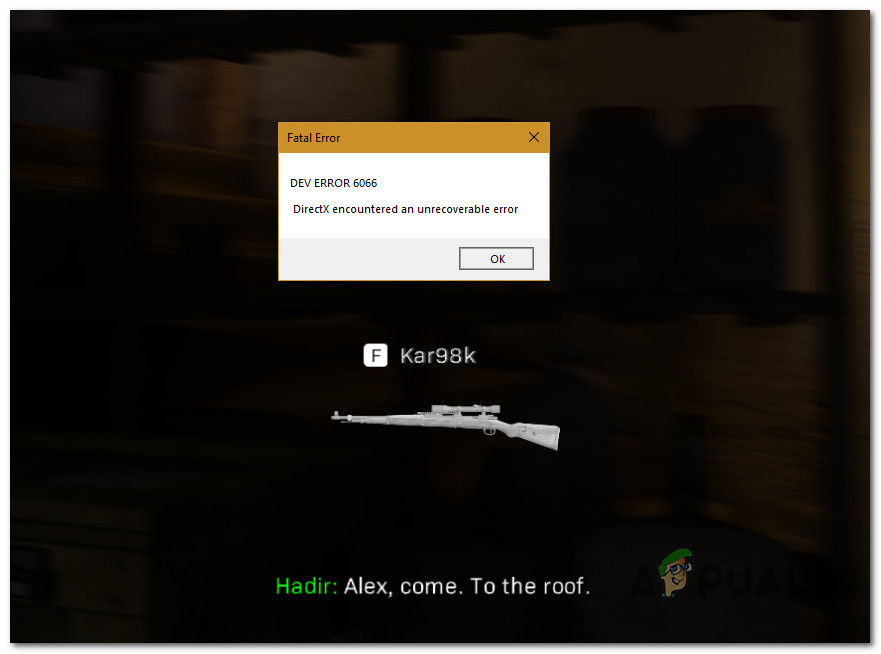
How to Fix DEV ERROR 6066 in Call of Duty MW/Warzone?
Dev Error 6066 is encountered when Call of Duty: Warzone players attempt to launch the game on PC or when they’re in the middle of a multiplayer game. The issue is exclusive to PC and is confirmed to appear on both Windows 10 and Windows 11.
Before troubleshooting, you should first ensure that your GPU has enough VRAM to support the rendering of COD Warfare. If your system specs are sufficient, other potential causes include a potential 3rd party interference, game file corruption, outdated GPU drivers, unstable overclocking or a situation where a second monitor is forcing the game to run on the integrated GPU.
Here’s are several confirmed fixed that should help you fix the issue:
1. Check the minimum specifications
Before you move to more down to all the other confirmed fixes below, start by cross-referencing your PC specks against the minimum requirements of Call of Duty Warzone.
Start by consulting the image below and check if you meet the minimum GPU, CPU, RAM, HDD, and Network requirements.

If everything looks good, dive deeper into your GPU specs before moving down to the next method below.
One of the most common causes that will trigger this 6066 DEV error is insufficient VRAM.
Note: Remember that VRAM is a special type of RAM designed specifically for GPU. It has nothing to do with regular RAM.
Call of Duty Warzone requires a minimum of 2 GB of VRAM to function properly on Windows 10 and Windows 11. If your GPU is below that threshold, you will not be able to get past the 6066 DEV error even if you follow every other fix featured below.
Here’s a quick guide on checking the available VRAM on your current GPU:
- Press the Windows key + R to open up a Run dialog box.
- Next, type ‘dxdiag’ inside the text box, then press Ctrl + Shift + Enter to open up the DirectX Diagnostic tool with admin access.
Open the DirectX Diagnostics tool - Click Yes to grant admin access when the User Account Control (UAC) is prompted.
- Inside the DirectX Diagnostic Tool, use the vertical menu at the top to click on Display 1 (or the main display you use when attempting to play the game).
- With the main display selected, go under Device and check the Display Memory count.
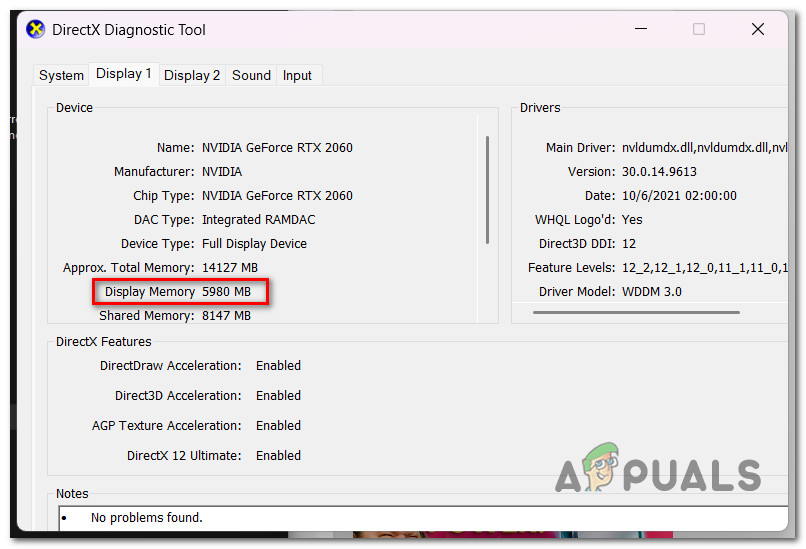
Checking the available display memory Note: If the Display Memory count is over 2000 MB, you are above the threshold, and your GPU should be able to handle the game. If not, you will not be able to play the game unless you upgrade to a better GPU. There are modded drivers that might help you if you’re just below the limit, but our recommendation is to avoid them since most of them are riddled with malware, and the game experience will be poor since your specs are below the recommended values.
If your GPU has more than enough available VRAM to play the game, but you’re still experiencing the 6066 DEV error, move to the first fix below.
2. Perform a Clean boot
Call of Duty Warzone may be affected by a huge variety of third-party programs, making it challenging to pinpoint the exact origin of the problem. Overlay programs, system optimization suites, and overprotective security suites are at the top of the list.
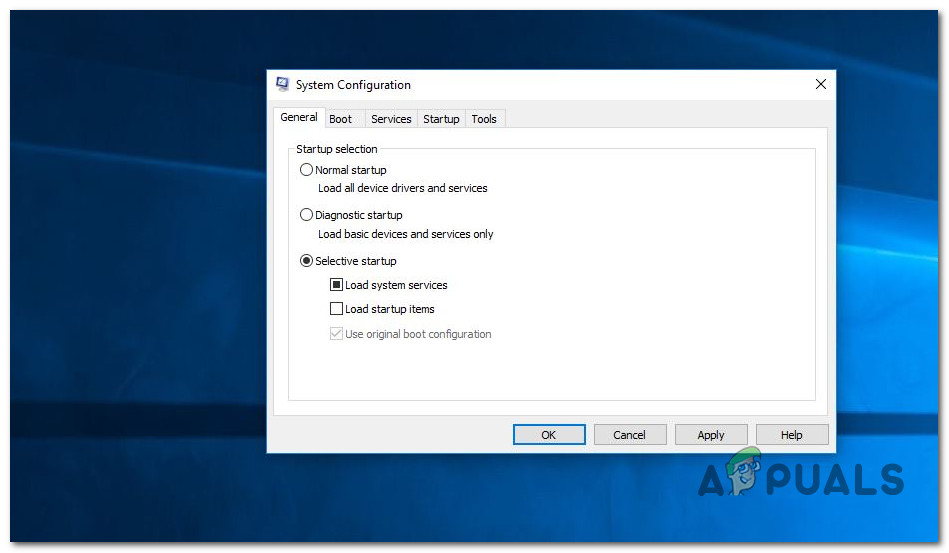
Because of this, the best course of action is to discover the culprits by restarting your computer in clean mode and determining whether the problem is still present.
Note: A clean boot will force your PC to start without third-party services and processes.
If the issue no longer occurs while in clean boot mode, it’s clear that a 3rd party process or service is some home triggering the 6066 DEV error.
For detailed instructions on achieving a clean boot state on Windows 11, follow the steps outlined in this article. If you’re on Windows 10 still, use this guide instead.
Once a clean boot state is achieved, launch COD Warzone and see if the issue is still occurring.
If you can launch the game normally, start re-enabling all the processes 3rd party processes that you previously disabled until you successfully identify the culprit.
If the problem is still occurring even when you clean boot, move down to the next method below.
3. Scan & Repair the Call of Duty: Warzone
If you already made sure that there’s no interfering process or service causing this issue, the next thing you should troubleshoot is a potential file corruption affecting the game.
Fortunately, you can use the Scan & Repair feature on Battle.Net to scan & repair your game installation folder in case it’s affected by file corruption. This operation will examine every game file & associated dependency and replace every corrupted file with a healthy equivalent.
Follow the instructions below to begin a Warzone game repair procedure using the in-game Battle.Net settings:
- Make sure Call of Duty is turned off and not running in the background.
- Open Battle.Net and sign in with the game-related username and password.
Sign into your Battle.net account - In the left-hand section of the main Battle.Net interface, pick the game you want to choose.
- Select Scan and Repair from Settings (the gear symbol) to check the file integrity and fix Call of Duty (from the context menu that just appeared).
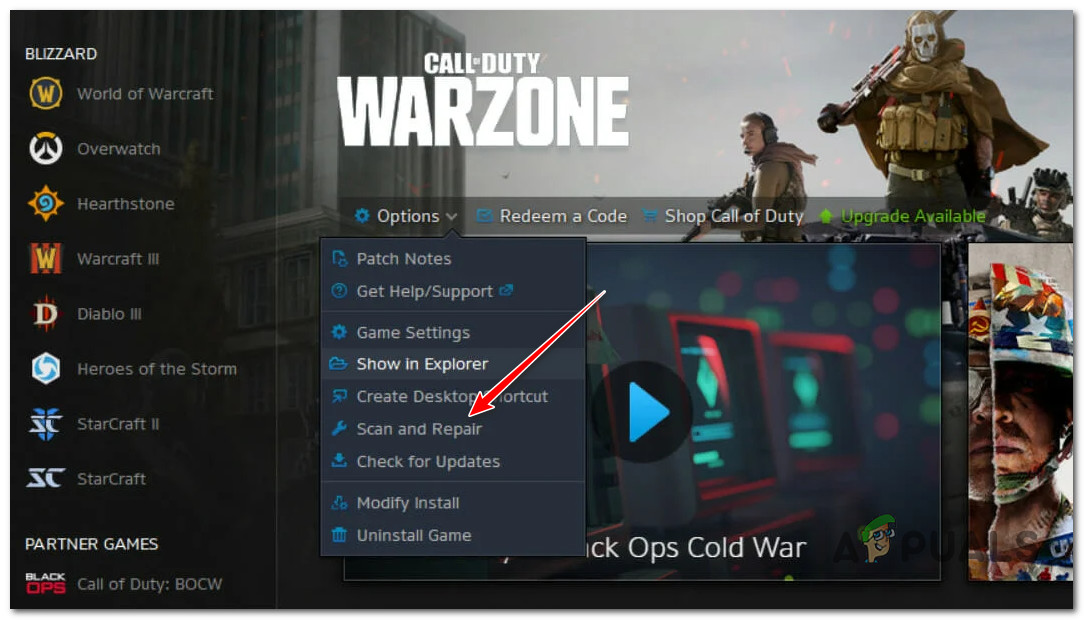
Scan and Repair Warzone - Confirm the procedure at the next screen, then wait patiently while the scan and repair are completed.
When the process is finished, restart the game to see if the problem has been fixed.
If the problem still exists, scroll down to the next suggested solution below.
4. Unplug the second monitor (if applicable)
If you’re using a two-monitor setup, you can expect to deal with this issue as you launch the game on a monitor using the integrated GPU (instead of the dedicated solution).
This issue is frequent with laptop models that are automatically wired to use the dedicated GPU on the main display and the integrated GPU on the secondary display. If you configured the game to run on the secondary display on a setup like this, you would most likely experience the error 6066 as the integrated GPU doesn’t have the required VRAM to render the game.
One simple fix in this particular case is to unplug the secondary display. This will automatically force the game with the most powerful GPU available.
Note: If this method is successful, reconfigure the game to run on your main display, so the primary GPU is used.
If this fix was not applicable or it didn’t fix the issue, move down to the next method below.
5. Update the GPU driver to the latest version
If you haven’t updated your GPU drivers in a while, there’s a chance you are seeing the 6066 DEV error code because you are missing a new physics module dependency that Call of Duty Warzone requires.
This issue is confirmed to occur with both Nvidia and AMD graphic cards.
If you get this error a couple of seconds after you launch the game, it’s likely that your GPU drivers are out of date, and the game can’t run without the required dependencies.
You can address this problem by updating both the GPU drivers and the physics module that controls how the game works.
If you haven’t updated your GPU drivers recently, delete your current GPU drivers and reinstall the most recent ones before trying to run COD Warzone again:
- Press the Windows key + R to open the Run box.
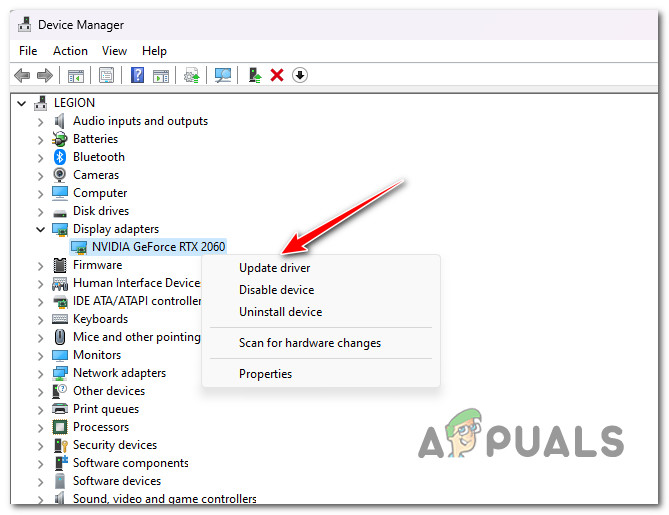
- Type “devmgmt.msc” into the run text box and press the Enter key to get to Device Manager.
Open up Device Manager - Once you’re in Device Manager, scroll down through the list of installed devices to expand the drop-down menu for Display Adapters.
- Update the driver by clicking on Update driver after right-clicking on your GPU card.
Update the GPU Driver Note: If your computer has both a dedicated GPU and an integrated GPU, you need to update the drivers for both.
- Choose the option “Search automatically for new driver software” from wizard that just appeared.
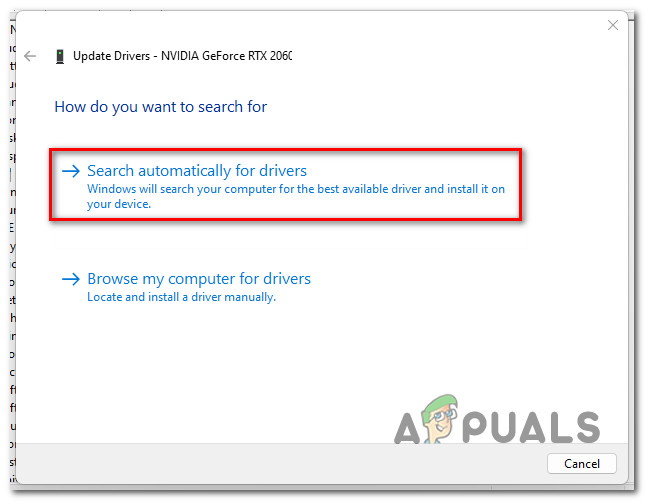
Searching for drivers automatically - If the scan is done and a new driver version is recommended, follow the instructions on the screen to install it via Device Manager.
- Restart your computer and launch COD: Warzone again and see if the Dev Error 6066 is now fixed.Note: If Device Manager couldn’t find a new GPU driver version, you’ll need to use the proprietary software that came with your graphics card to update your current graphics drivers. Use one of the following tools depending if you have an NVIDIA or AMD graphics card:
GeForce Experience – Nvidia
Adrenalin – AMD
If the same kind of problem is still happening or if your GPU drivers are already up to date, move on to the next method.
6. Revert overclocking (if applicable)
If you are using MSI Afterburner (or similar overclocking software) and have overclocked your GPU, you might get the COD Warzone 6066 DEV error because your system is unstable.
If you are actively overclocking your GPU, you might be able to fix the issue by reverting all overclocked frequencies to their original settings.
If you’re using MSI Afterburner, you can get rid of the profiles you’ve previously made.
Note: Before you delete the profiles you’ve made in the MSI Afterburner app, take a screenshot or write down the settings you’ve made in case you need them later.
Follow the steps below to revert any GPU overclocking made inside MSI Afterburner:
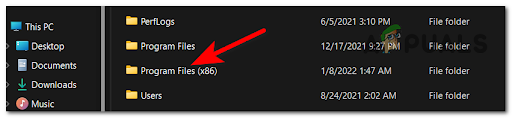
- Open File Explorer and go to the disk where you installed MSI Afterburner. Then go to the Program Files (x86) folder (or wherever you have the app installed).
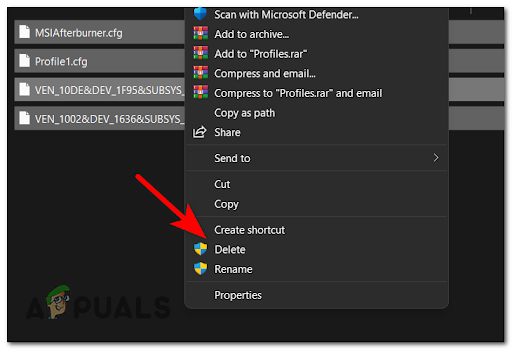
Accessing the Program Files menu - Open the MSI Afterburner folder and go to the Profiles folder.

Accessing the Profiles menu - Choose all the files inside the Profiles folder and delete them.
Deleting the Contents of the Profile menu - Now restart your computer to allow the overclocked values to revert to their defaults and see if the 6066 DEV error is fixed.


