How to Clear Queue on Spotify Mobile and Desktop
If you’re someone who listens to music based on your mood or vibe, you probably have a lot of songs lined up on Spotify. However, when you create a new queue, it might mix with your previous one, leaving you listening to the same tracks you heard last time.
That’s why in this article, we’ll walk you through simple and easy methods to clear your queue on Spotify—no matter which device you’re using. Let’s get started!
Queuing Songs on Spotify
If you’re not familiar with it, the Spotify Queue is one of the great features you get with a premium subscription. It lets you arrange songs in the order you want them to play. Simply put, when you add a track to your queue, it’s set to play next, right after the current song ends.
Adding Songs to Your Queue
Queuing songs on Spotify lets you control what plays next—whether you want just one more song or a whole lineup of your favorites. This works on both the mobile app and desktop versions of Spotify, and you can queue as many tracks as you like.
↪ Mobile App
If you’re using the Spotify mobile app and want to add songs to your queue.
- Open your Spotify app and tap on the currently playing song at the bottom.
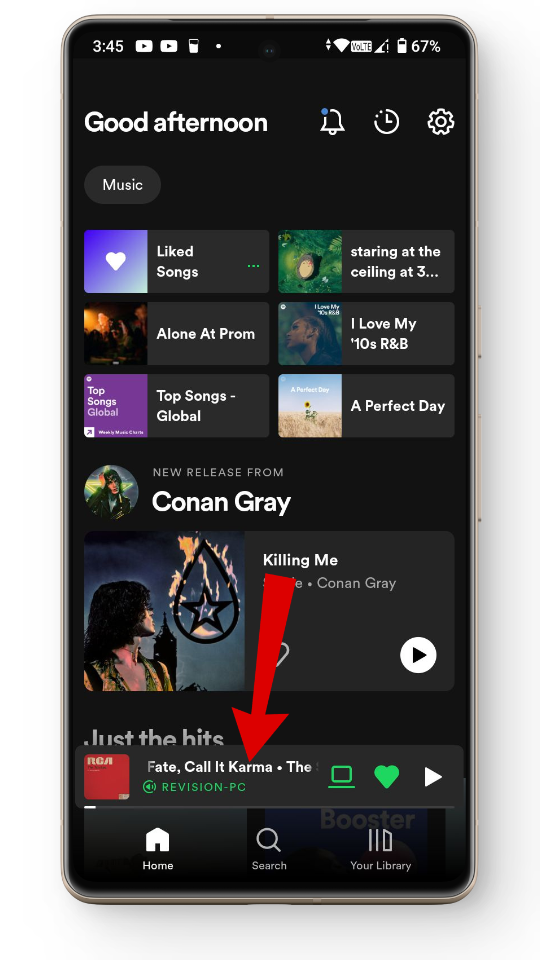
Tap on your current playing song - Tap the three dots icon in the upper right corner.
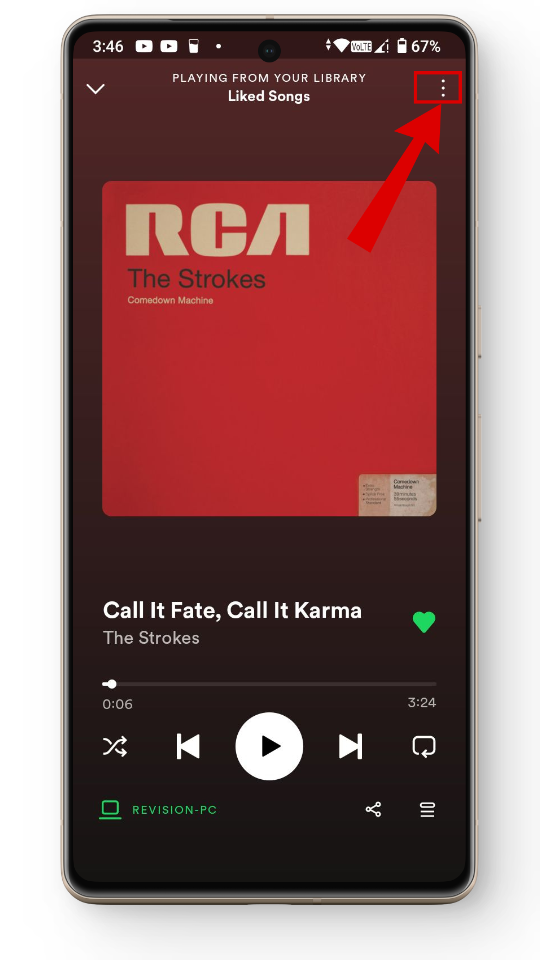
Tap on the three dots - From the menu, select “Add to queue.”
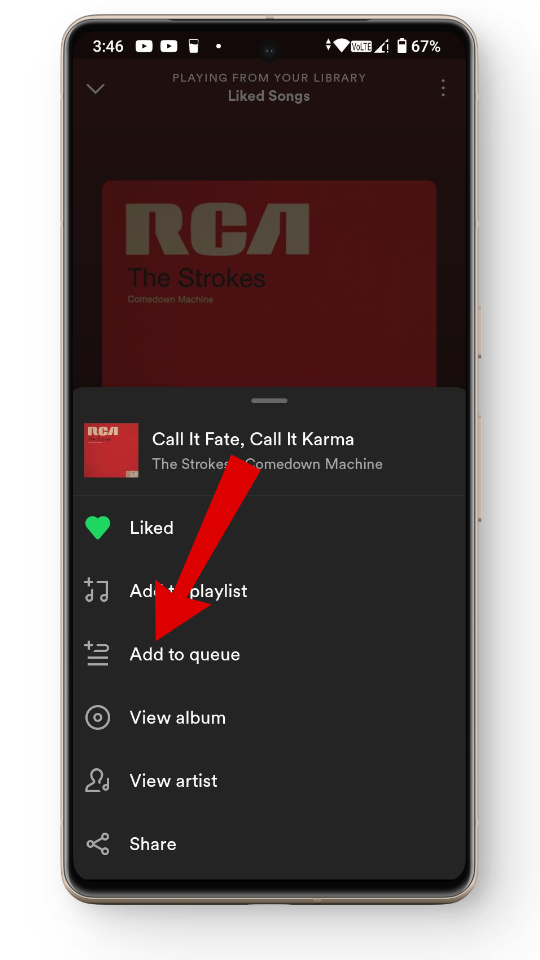
Tap on the Add to queue option
↪ Desktop App
You can also add songs to your queue on the desktop app.
- Open your Spotify app on your computer and click the three-line (queue) icon next to the player.
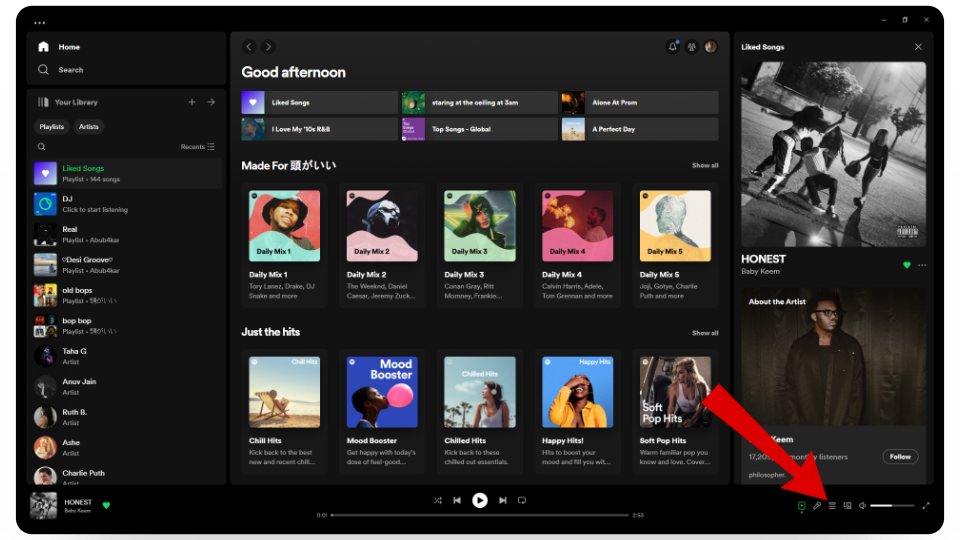
Click on the vertical three line icon - In Now Playing, hover over the song you want, then click the three dots.
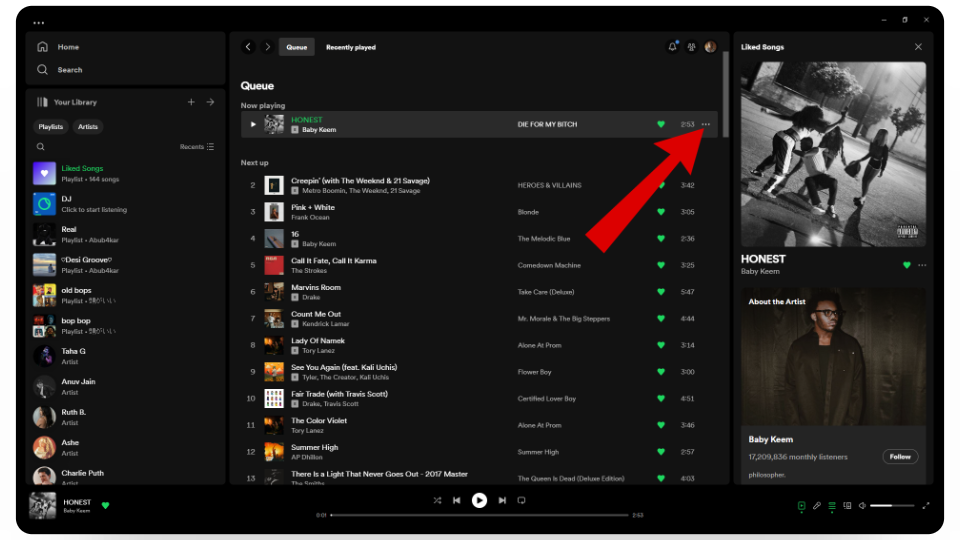
Click on the three dots - Select the “Add to queue” option.
Select add to queue - Your selected song will now be added to your queue.
Your new queue should appear like this
How To Remove Queues on Spotify Mobile App
If you want to start a new queue from scratch or just want to remove a few songs, you can clear your Spotify queue any time using the mobile app.
1. Remove Individual Songs
If you’re not in the mood for a certain song that’s coming up next, you can easily remove it so the following track plays instead.
- Open the Spotify app and tap the currently playing song at the bottom.
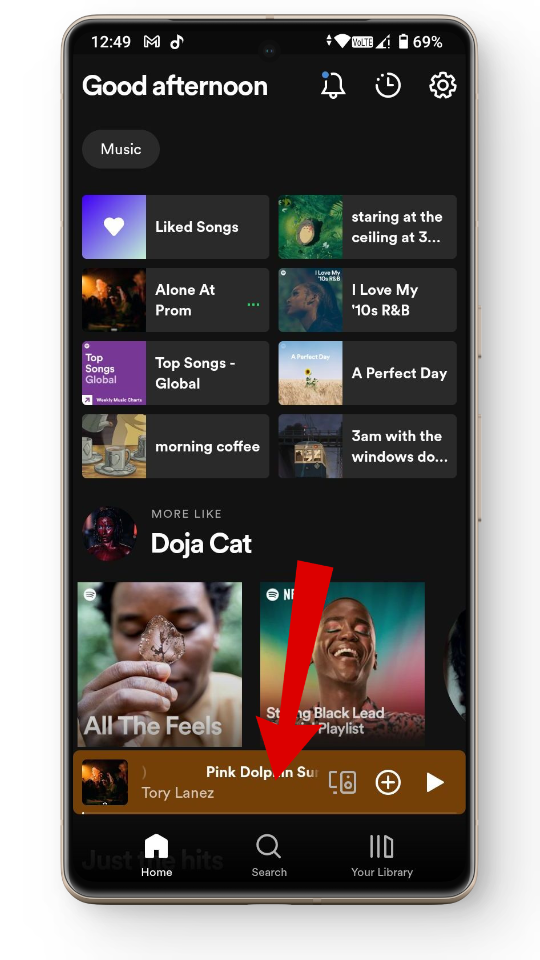
Tap on your current playing song - This opens the Playing View section. Tap the three-line (queue) icon to access your queue.
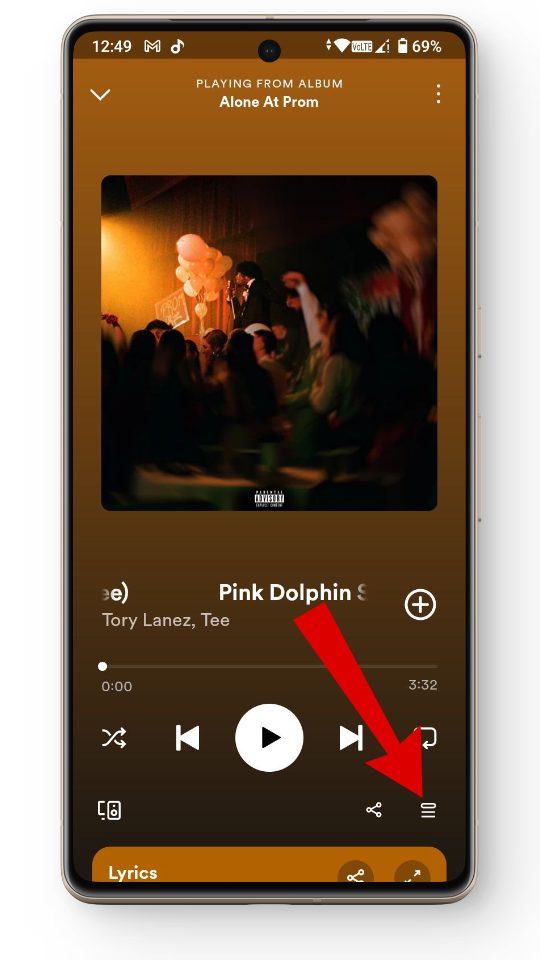
Tap on three vertical line icon - Here you’ll see sections: “Now Playing“, “Next in Queue“, and “Next From“. The one we need is Next in Queue.
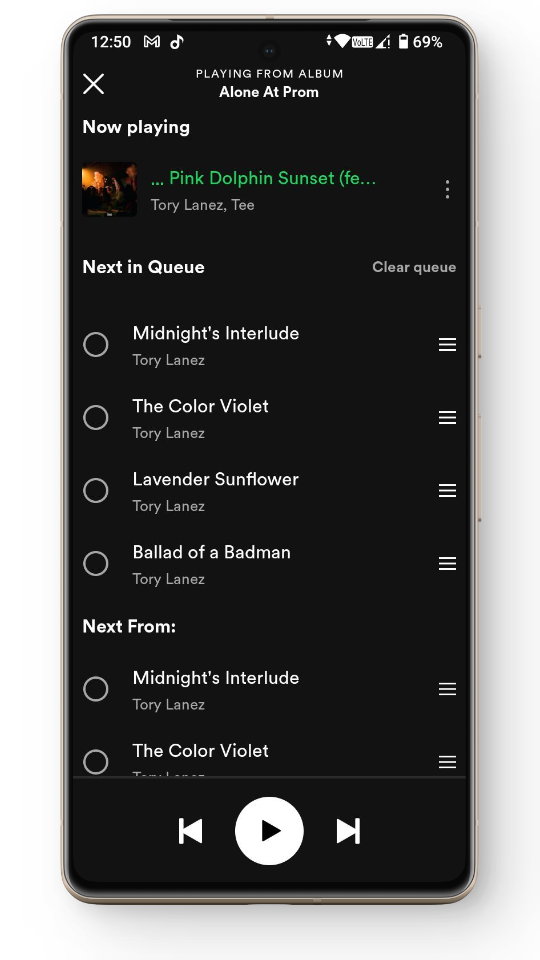
Queue tab on Spotify mobile - Next to each song in the queue, you’ll see a small circle.
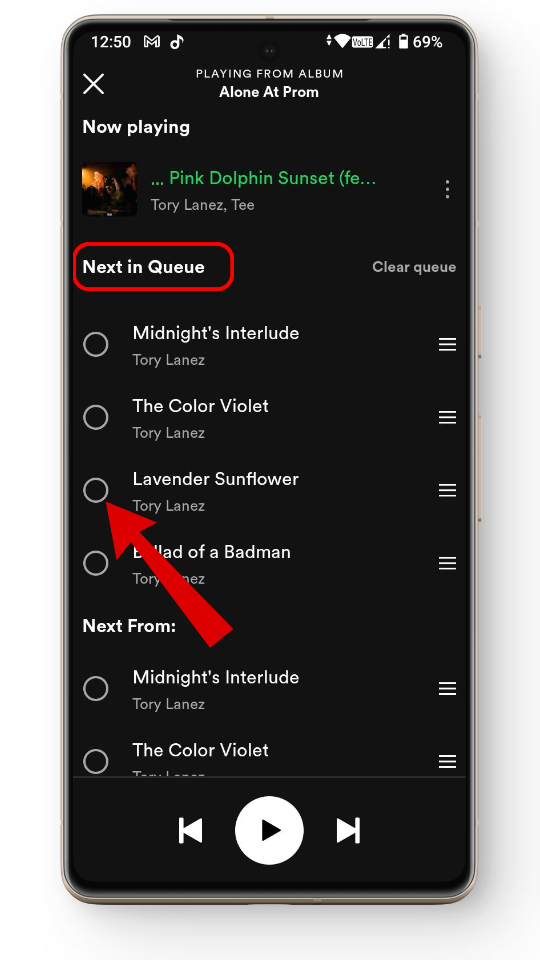
Look for the small circle next to your song - Tap the circle. You’ll see options appear, including “Remove” and “Add to queue“.
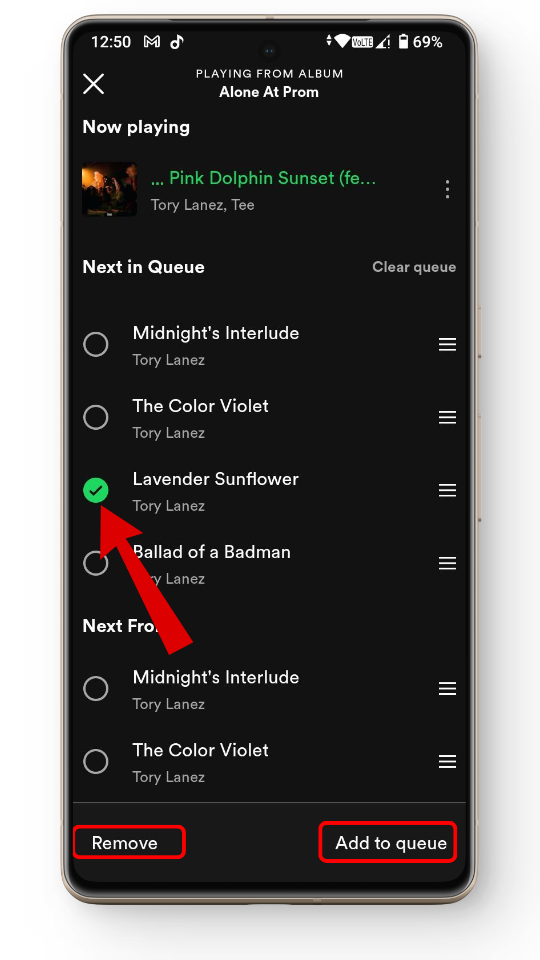
Tap on the small circle - Tap “Remove” to take that song out of your queue.
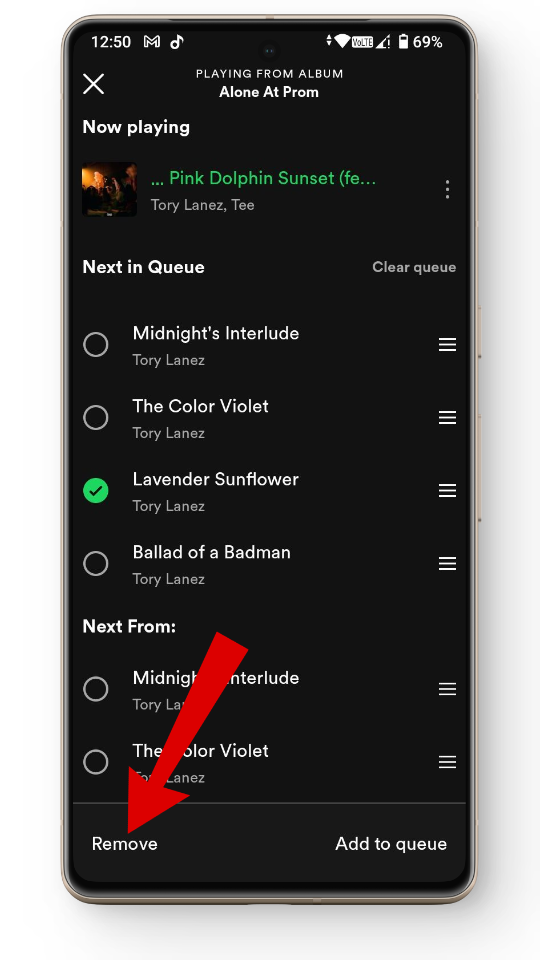
Tap on remove - That’s it! That song is now removed, and the rest of your queue will play as normal.
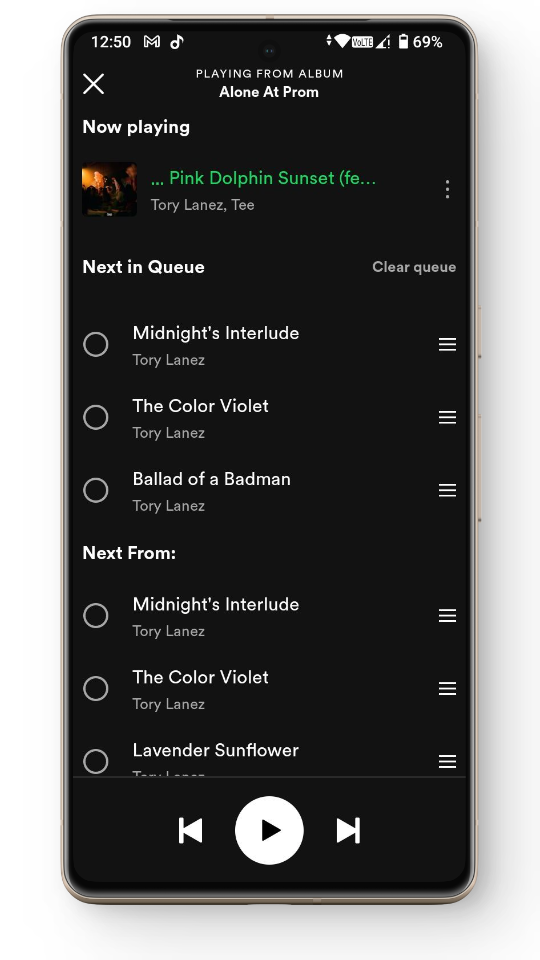
Your selected song should be removed from the queue
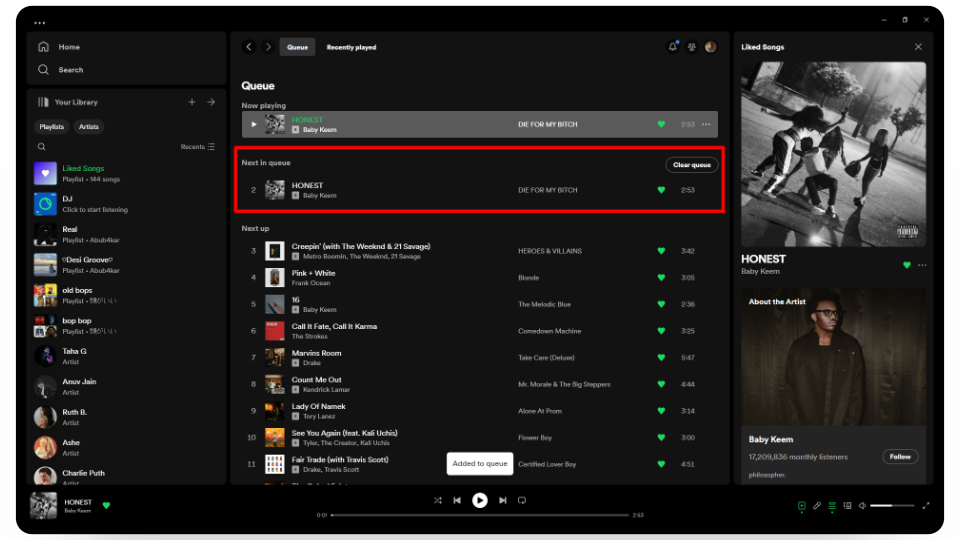
2. Clear Queues
If you want a clean slate, you can also clear your entire queue and start fresh.
- Go to the Queue tab by tapping the three-line icon.

Head to the queue tab - Next to Next in Queue, tap “Clear Queue“.
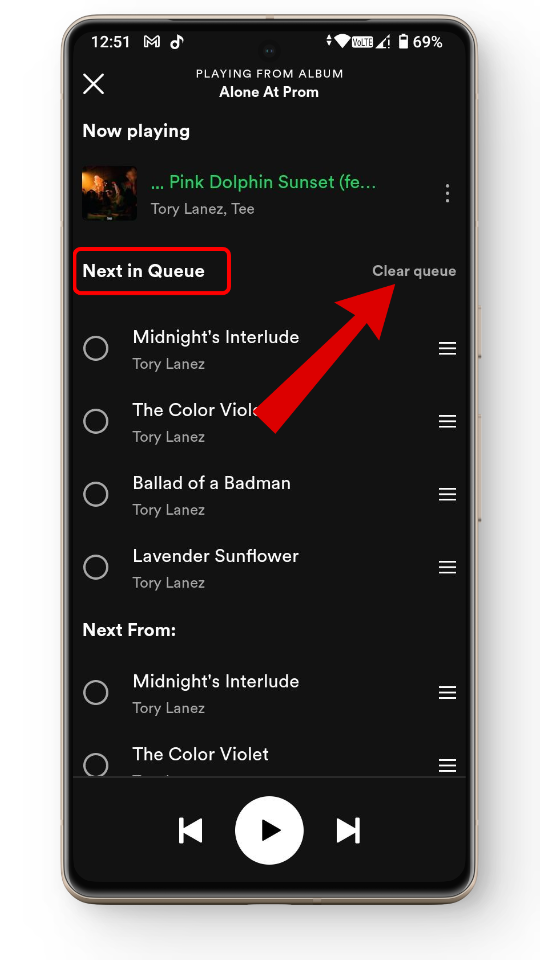
Tap on clear queue - Once you do this, your entire queue will vanish, and you’ll have space to add new tracks.
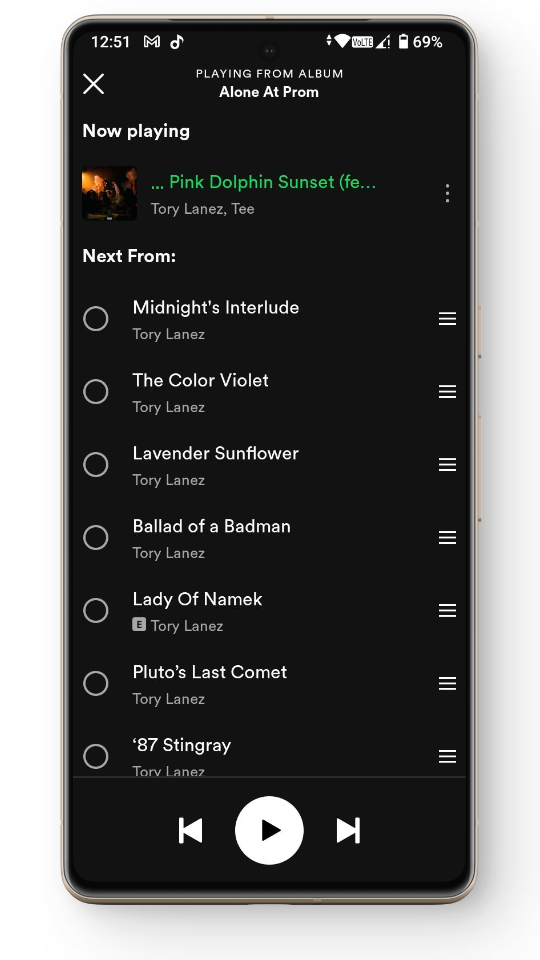
Your queue should now be cleared
How To Remove Queues on Spotify Desktop App
Just like on the Spotify mobile app, you can also manage your queue using the desktop app’s Queue tab with just a few clicks.
1. Remove Individual Songs
On the desktop app, it’s easy to remove individual songs from your queue and make room for new favorites.
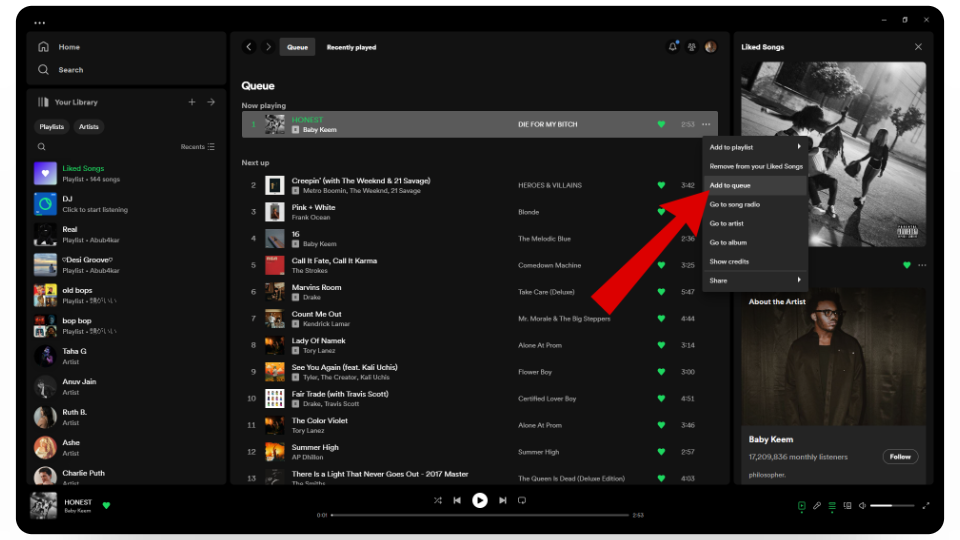
- Open the Spotify desktop app and click the three-line queue icon next to the song that’s playing.
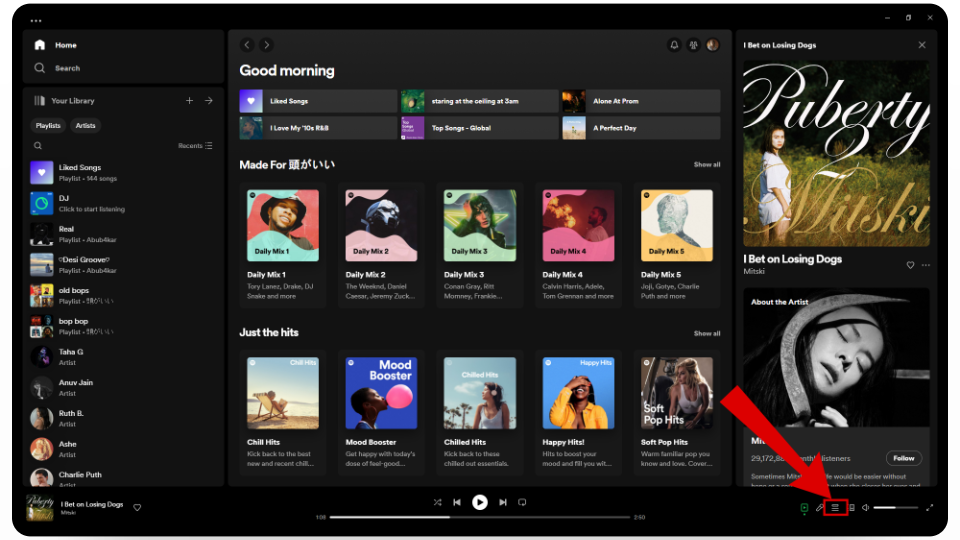
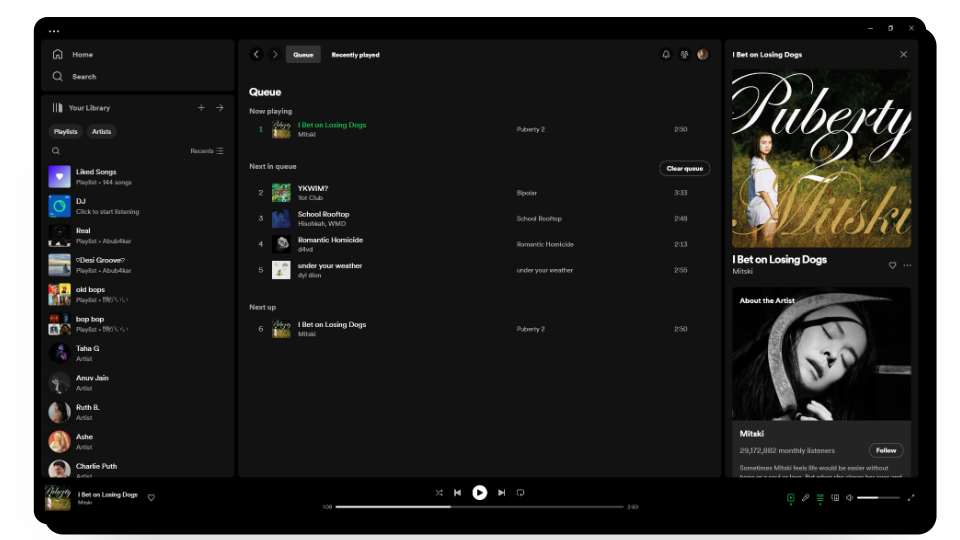
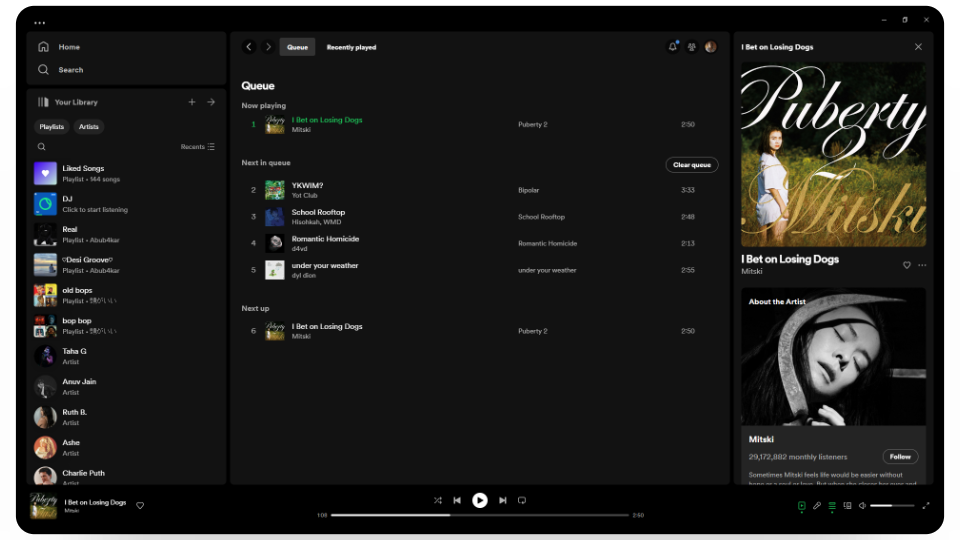
Click on the three vertical line icon - In the Queue tab, you’ll see options similar to the mobile version: Now Playing, Next in Queue, and Next Up.
Queue tab - Under “Next in Queue“, hover over the song you want to remove and click the three dots.
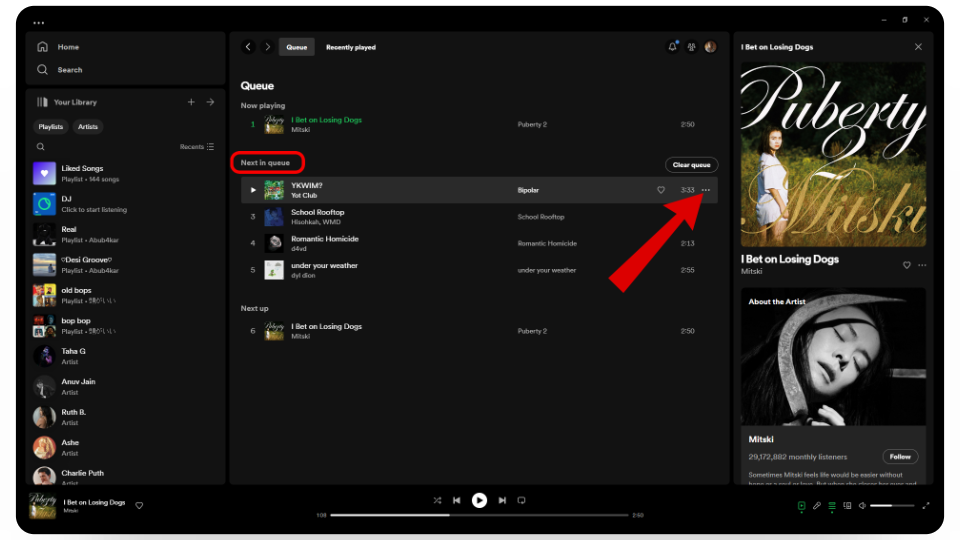
Click on the three dots - A menu will pop up. Click the “Remove from queue” option.
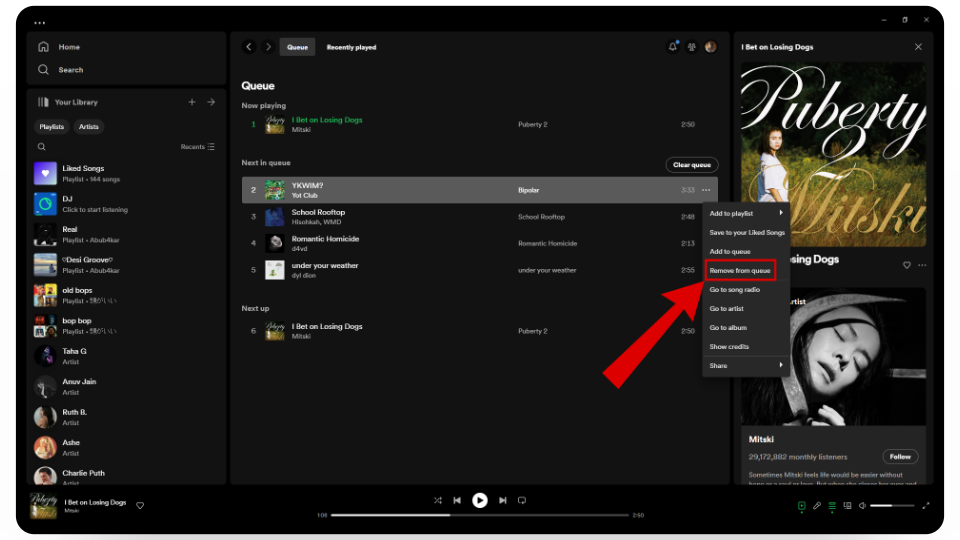
Click on remove from queue option - That song will disappear from your queue and the rest will play as normal.
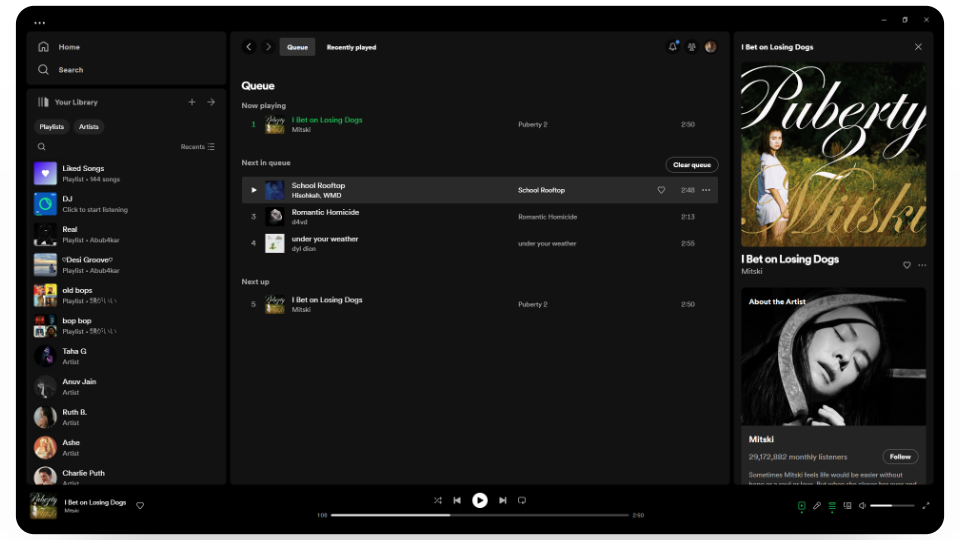
The track should now be removed from the queue
2. Clear Queues
If your queue is too long or you just want a different vibe—maybe some jazz or another style—you can easily clear your queue and start again.
- Click the Queue section using the three-line icon.
Open up the queue tab - Next to the Next in Queue title, you’ll see the “Clear queue” button.
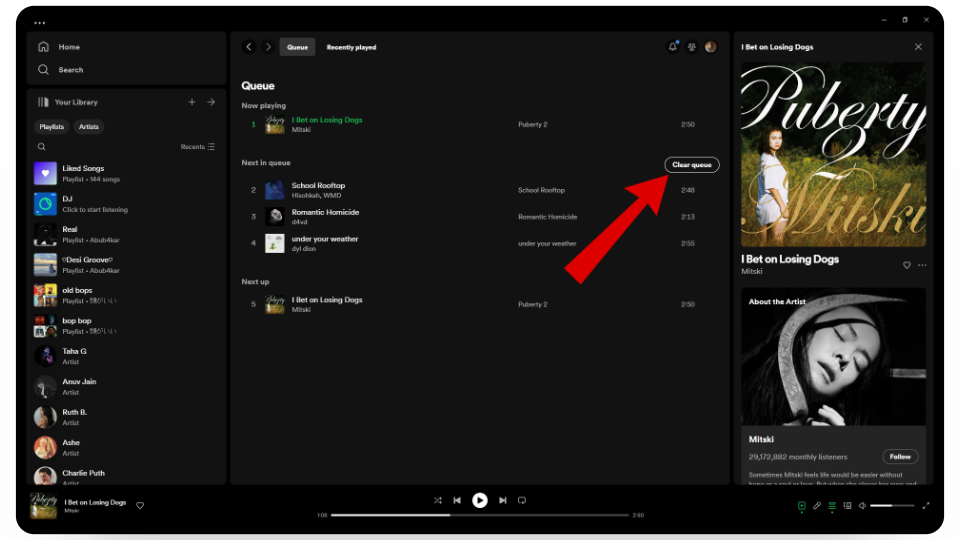
Press on the clear queue button - Click it and a confirmation message will appear. Press Yes.
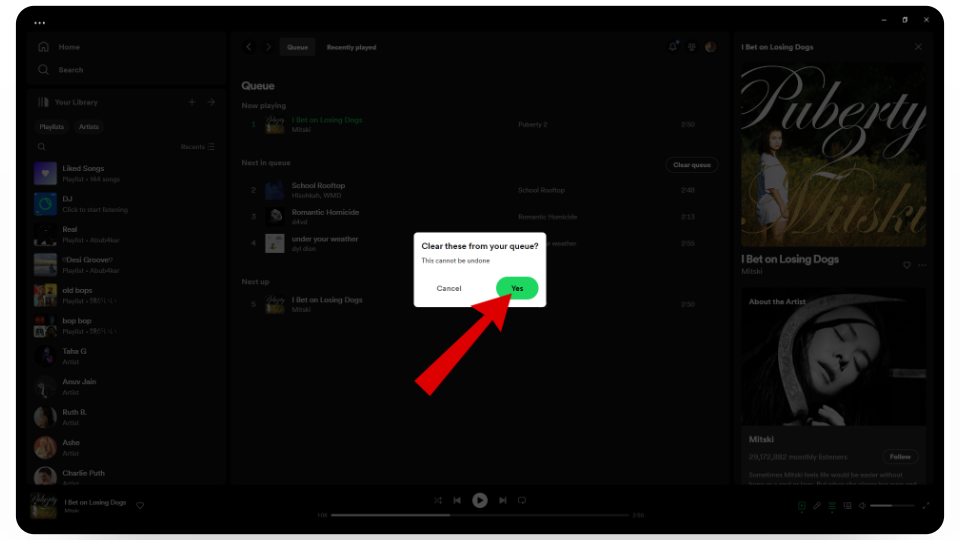
Click on the Yes button
- Your current queue will be cleared and all songs in it will be removed.

You can now create a new queue