Fix: Cannot Start ‘Remote Desktop Service’ after Installing Windows Updates
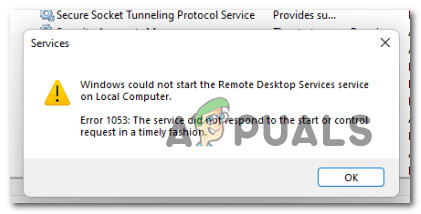
Some Windows users are discovering that they’re unable to Remote Desktop Service. This service remains disabled regardless if the Remote Desktop Service is called upon action by an app or application or if they try to start it manually via the Services screen. When affected users attempt to open this service, they get the following error ‘Windows could not start the Remote Desktop Service service on Local Computer’. This problem is confirmed to occur on both Windows 10 and Windows 11.
After investigating this particular issue, it turns out that there are a lot of underlying causes that might ultimately be responsible for this type of error. Here’s a short list of scenarios that you should be on the lookout for:
- Remote assistance is disabled on the target computer – The first thing you need to do when troubleshooting this particular issue is to access the PC where you want to use the Remove Desktop service and make sure that Remote assistance is allowed.
- Custom scaling is enabled – As a best practice, you should always disable custom scaling before attempting to use remote assistance as the computer you are trying to connect to remotely might not be compatible with this scaling feature.
- IPv6 protocol inconsistency – If you are attempting to connect to a target PC with an older operating system, it might be wise to disable the IPv6 protocol so that the RDP connection relies on IPv6. This will avoid the unpleasantries where a network inconsistency forces the remote desktop connection service to remain disabled.
- RDP Protocol is hard coded to remain disabled – As it turns out, one popular reason why you might experience this problem is a scenario in which the Remove Desktop connection is actually disabled on the local computer via a registry key. If this scenario is applicable, you can enable RDP by modifying the fDenyTSConnections.
- GPO is blocking the RDP component – Another real possibility is that a group policy object (GPO) is actually blocking the connection and overriding the computer-level settings. You can check this by running a CMD command and fixing the issue (if it turns out to be true) by opening the Local Groupo policy editor and modifying the ‘Allow users to connect remotely by using Remote Desktop Services’ policy.
- Enable the RDP services – There are actually two very important service dependencies that need to be enabled when you try to start the main Remote Desktop service. Make sure you enable both the Remote Desktop Services (TermService) and Remote Desktop Services UserMode Port Redirector (UmRdpService) before trying to launch the main service.
- RDP Listener is disabled – Another reason why you might be unable to enable the main Remote Desktop connection is when the RDP listener is actually disabled at a system level. If this scenario is applicable, you can get the issue fixed by running a series of commands to import a cmdlet that will ensure that the RDP listener always stays enabled.
- Incorrect RDP listener port – In order for this connection to be successful, you need to ensure that there’s only one RDP listener port that is used on both the local and the remote computer. If the ports don’t match, ensure that both of them are using the 3389 port.
- RDP listener port overlap – There’s also an off chance where another application is trying to use the same port as the RDP listener. In this case, you need to run a CMD scan to check if that’s the case and treat the conflict if needed.
- The firewall is blocking the RDP port – Although you should not have this issue with the Windows firewall, there are documented cases where a firewall on the affected computer is actually blocking the RDP port. In this case, you can investigate the issue and establish a port exception in case the firewall is indeed blocking the RDP port.
- Corrupted Windows account – A corrupted Windows account can also be responsible for this particular issue. Just to be sure your current account is not causing the issue, create a new Windows account (it can be local) and launch the remote desktop service once again.
- 3rd party program interference – There are a lot of moving parts that might end up interfering with the RDP port and thus breaking the remote desktop service. If you want to exclude a 3rd party program or service interference from your culprit list, you should boot in Safe mode and try opening the service once again. If the error doesn’t return, it’s clear that you’re dealing with some kind of 3rd party interference.
- System file corruption – As it turns out, this problem can also be indirectly caused by some type of system file corruption that is inhibiting the RDP connection. In this case, the first thing you need to do is perform SFC and DISM scans in quick succession. If this fails, you can also go for a clean install or repair install.
- KB4284826 is installed – This is a bad MS update that is notoriously known for effectively breaking the RDP component. If your system recently installed this Windows Update, uninstall it from your Windows computer and use a specialized utility to hide it (to make sure it doesn’t get reinstalled again).
Now that we went over every potential cause that will cause the ‘Windows could not start the Remote Desktop Service service on Local Computer’ error, let’s go over a series of fixers that other affected users have successfully used to get to the bottom of this issue.
1. Enable Remote Assistance on target PC
When resolving this specific issue, you must first log into the PC where you wish to use the Remove Desktop service and confirm that Remote assistance is permitted.
This functionality needs to be enabled on both the local and the remote computer in order for the Remote Dekstop component to work properly.
Several affected users have confirmed that they managed to fix the ‘Windows could not start the Remote Desktop Service service on Local Computer’ error by accessing the System Properties screen and enabling Remote assistance.
Follow the instructions below for step-by-step instructions on how to do this:
- Start by pressing the Windows key + R to open up a Run dialog box.
- Next, type ‘sysdm.cpl’ and press Ctrl + Shift + Enter to open up the System Properties screen with admin access.
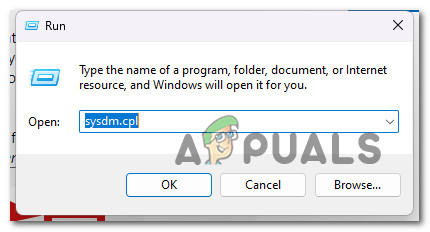
Accessing the System Properties screen - Once you’re inside the System Properties screen, move click on the Remote tab from the menu at the top.
- Next, go under Remote Assistance and check the box associated with Allow Remote Assistance connections to this computer.
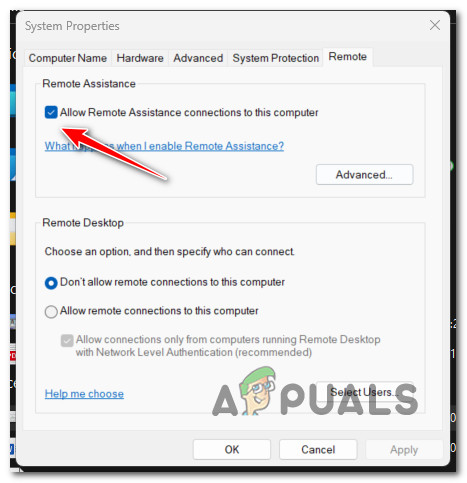
Enable Remote Assistance from System Properties - Next, go over to the Remote Desktop section, then change the toggle to Allow remote connections to this computer.
- Finally, check the box associated with Allow connections only from computers running Remote Desktop with Network Level Authentication and click Apply to save the changes.
- Once the changes have been saved, reboot your PC and repeat the action that was causing the ‘Windows could not start the Remote Desktop Service service on Local Computer’ error previously.
If the problem is still not resolved or Remote assistance was already enabled, move down to the next method below.
2. Disable Custom Scaling
Prior to attempting to use remote assistance, it is usually a good idea to disable custom scaling because the computer you are connecting to remotely might not support this scaling option.
Note: To make a computer easier for people to see and use, the Windows 10 display scaling system changes the size of text, icons, and navigational elements. For both your Windows 10 device and any external displays, you can change the display scale. Despite the fact that this function is excellent, it is known to interfere with the RDP component, thus it is advisable to turn it off if you intend to access computers remotely.
If you suspect that custom scaling is enabled on your PC, follow the instructions below for step-by-step instructions on disabling this function from the local Windows computer:
- Press the Windows key + I key to open up the Settings menu on your Windows computer.
- From the side menu on the left, click on System, then click on Display from the menu on the right.
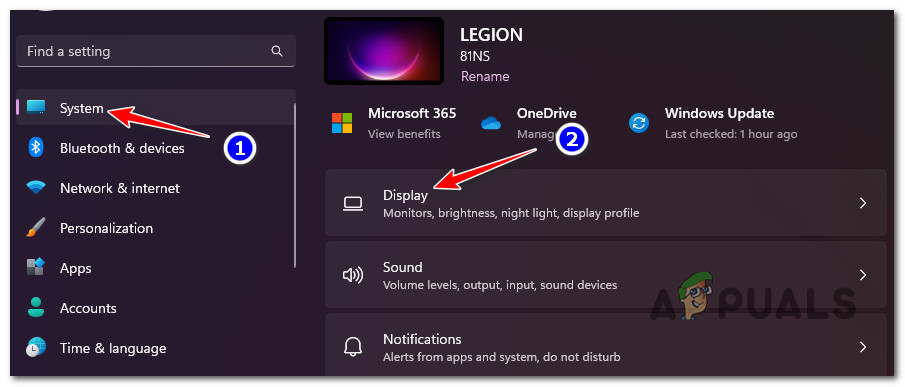
Open up the Display menu - Next, scroll down in the right-hand menu and click on Turn off custom scaling and sign out.
- Wait until you are signed out, then sign in again and try to use the remote desktop function once again.
If it’s still not working, move down to the next method below.
3. Disable IPv6 protocol
Disabling the IPv6 protocol will force the RDP connection to use IPv6 if you are trying to connect to a target PC with an outdated operating system. This will prevent the unpleasantness of having the remote desktop connection service remain disabled due to a network inconsistency.
Note: On newer Windows versions (Windows 10 and Windows 11), the OS will prefer using IPv6 over IPv4.
If you haven’t tried this fix yet, disable the IPv6 protocol temporarily and see if the problem is now fixed:
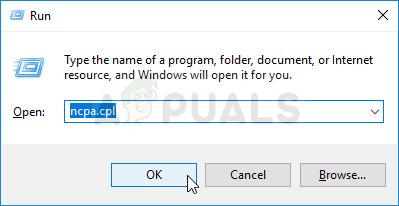
- To bring up the Run dialog box and turn off IPv6, type Windows key + R.
- After that, enter “ncpa.cpl” in the text field to open the Network Connections menu.
Open the Network connections menu - Right-click the network adapter you’re using in the Network Connections menu, and then select Properties from the context menu that displays.
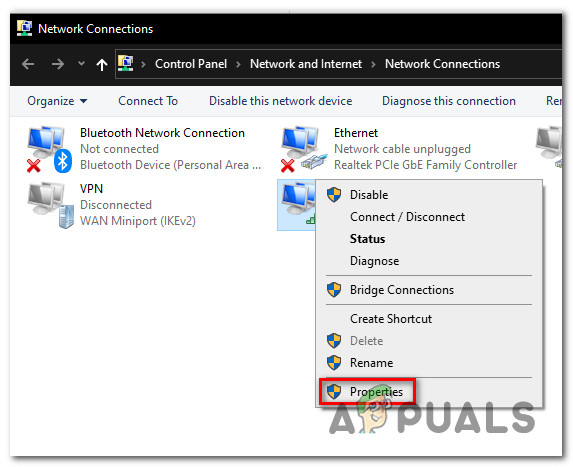
Accessing the Properties screen of your active network Note: To give admin access, select Yes when User Account Control (UAC) asks you to.
- Select the Networking tab on your network adapter’s Properties page.
- After that, de-check the box next to Internet Protocol Version 6 (TCP / IPv6) by navigating to the bottom of the list of items.
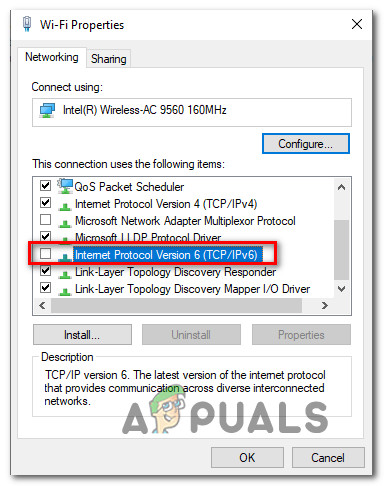
Disable the IPv6 protocol - After saving your modifications, click Ok. Restart your computer to see if the problem is still there.
If you’re still dealing with the same ‘Windows could not start the Remote Desktop Service service on Local Computer’, move down to the next method below.
4. Enable RDP protocol via Registry Editor
It turns out that a scenario in which the Remove Desktop connection is truly deactivated on the local computer via a registry value is a common cause why you could encounter this issue. If this circumstance applies, changing the fDenyTSConnections will enable RDP.
Important: Pay close attention to the directions in this section. The wrong modification of the register can result in serious issues. Create a backup of the registry before you begin editing it so you can restore it if something goes wrong.
Use a network registry connection to access a distant computer’s RDP protocol status and make changes:
- Press Windows key + R to open up a Run dialog box.
- In the run dialog box that appears, type ‘regedt32 and press Ctrl + Shift + Enter to open up the Registry Editor utility with admin access.
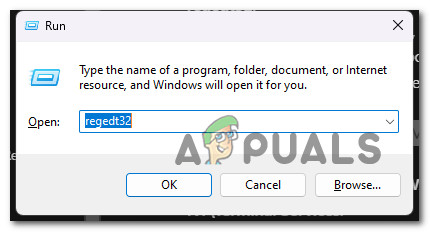
Open the Registry Editor utility - At the User Account Control window, click Yes to grant admin access.
- Once you are inside the Registry Editor, choose File, then select Connect Network Registry in the Registry Editor.
- Enter the remote computer’s name in the Select Computer dialog box, click Check Names, and then click OK.
- Next, navigate to the following location using the side menu on the left:
HKEY_LOCAL_MACHINE\SYSTEM\CurrentControlSet\Control\Terminal Server
- Once you’re inside the correct location, double-click on fDenyTSConnections.
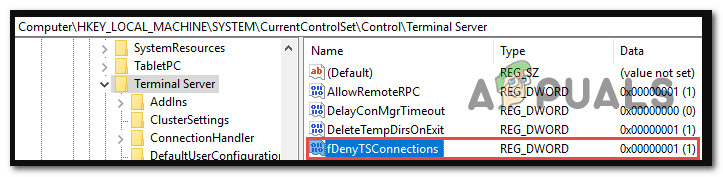
Access the fdenyconnections value - If the value of fDenyTSConnections is set to 1, change it to 0, then click Ok to save the changes.
- Next, navigate to the following location:
HKEY_LOCAL_MACHINE\SOFTWARE\Policies\Microsoft\Windows NT\Terminal Services
- Once you’re inside the correct location, double-click on fDenyTSConnections and change its value from 1 to 0 before saving the changes.
- Reboot all your involved PCs and see if the problem is now fixed.
If you’re still dealing with the same ‘Windows could not start the Remote Desktop Service service on Local Computer’, move down to the next method below.
4. Modify the local group policy
Another plausible explanation is that the connection is being blocked and the computer-level settings are being overridden by a group policy object (GPO). Run a CMD command to verify this, and if it is accurate, open the Local Groupo policy editor and change the policy that says “Allow users to connect remotely by using Remote Desktop Services.”
A GPO may be overriding computer-level settings if you are unable to enable RDP through the user interface or if the value of fDenyTSConnections changes back to 1 after you make a modification.
Open a Command Prompt window as an administrator and type the following command to check the group policy settings on a local computer:
gpresult /H c:\gpresult.html
Open gpresult.html when this command has finished running. Locate the policy Allow users to connect remotely in the following location:
Computer Configuration\Administrative Templates\Windows Components\Remote Desktop Services\Remote Desktop Session Host\Connections
- RDP connections are not barred by Group Policy if the setting for this policy is set to Enabled.
- Check Winning GPO if the setting for this policy is disabled. This GPO is the one preventing RDP connections.
If you previously discovered that a local group policy is blocking the remote connectivity, follow the instructions below to modify the blocking GPO via the Local Group Policy Editor:
- Press Windows key + R to open up a Run dialog box.
- Next, type ‘gpedit.msc’ and press Ctrl + Shift + Enter to open up the Local Group Policy Editor with admin access.
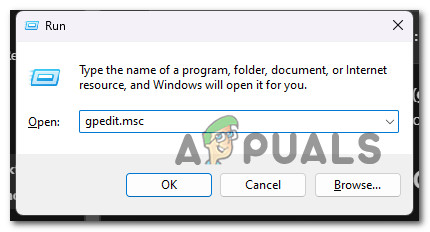
Open the Gpedit utility - At the User Account Control, click Yes to grant admin access.
- Once you’re inside the Local Groupo Policy Editor, navigate to the following location using the menu on the left:
Computer Configuration > Administrative Templates > Windows Components > Remote Desktop Services > Remote Desktop Session Host > Connections
- Once you arrive in the correct location, move over to the right-hand side menu and double-click on Allow users to connect remotely by using Remote Desktop Services.
- From the individual policy editor page, set the policy either to Enabled or Not configured to prevent it from blocking the remote connection function.
- Reboot your PC and see if the problem is now fixed.
If you’re still dealing with the same ‘Windows could not start the Remote Desktop Service service on Local Computer’ error, move down to the next method below.
5. Enable the service dependencies
When attempting to launch the main Remote Desktop service, two crucial service requirements need to be enabled. Before attempting to start the primary service, make sure the Remote Desktop Services (TermService) and Remote Desktop Services UserMode Port Redirector (UmRdpService) are both enabled.
You can check if this is the source of your issue by accessing the Services screen and making sure that both of these services are enabled.
Follow the instructions below for specific steps on how to do this:
- Press Windows key + R to open up a Run dialog box.
- Next, type ‘services.msc’ inside the text box, then press Ctrl + Shift + Enter to open up the Services screen with admin access.
- At the User Account Control (UAC) window, click Yes to grant admin access.
- Once you’re inside the Services screen, search for the following services and make sure that both are running:
Remote Desktop Services (TermService)
Remote Desktop Services UserMode Port Redirector (UmRdpService)

Check if both dependencies are enabled - If any of the services are not running, right-click on each of them and click on Start.
- Once both services are started, repeat the action that was previously causing the error and see if the ‘Windows could not start the Remote Desktop Service service on Local Computer’ error message is now avoidable.
If you’re still unable to enable to connect remotely to other PCs, move down to the next method below.
6. Check if the RDP listener is enabled
The main Remote Desktop connection might also not be able to be enabled if the system’s RDP listener is genuinely disabled. If the situation described above applies, you can resolve the problem by executing a set of commands to import a cmdlet that will make sure the RDP listener is always enabled.
Note: Pay close attention to the directions in this section. The wrong modification of the register can result in serious issues. Make a backup of the registry before you begin editing it so you can restore it if something goes wrong.
We’ll utilize a PowerShell instance with administrative rights for this method. You can also use a command prompt with administrative privileges for a local machine. However, PowerShell is used in this process because the same cmdlets function locally and remotely.
Here’s what you need to do:
- Press Windows key + R to open up a Run dialog box.
- Next, type ‘powershell’ inside the text box, then press Ctrl + Shift + Enter to open up an elevated Powershell.
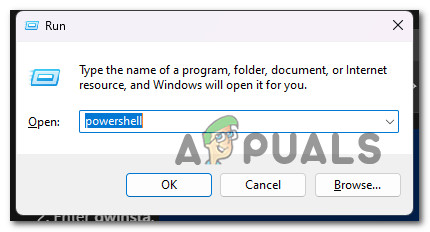
Access the Powershell window - When you’re prompted by the User Account Control, click Yes to grant admin access.
- Once you’re inside the Powershell window, type the following cmdlet to connect to a remote computer:
Enter-PSSession -ComputerName <computer name>
Note: Computer name is a placeholder. Replace this placeholder with the actual name of the computer.
- Next, enter the following code and press Enter to run a diagnostic:
quinsta
- Once the diagnostics are in, go through the results. The RDP listener is operational if the list contains rdp-tcp with a status of Listen.
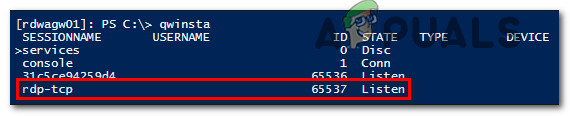
Verify the status of the rdp-tcp port - In case the RDP listener is already open, disregard the following steps and move directly to the other method below. On the other hand, if the status of rdp-tcp shows as Disc (Disconnected), continue with the remaining steps.
- Access the registry on a computer with the same operating system version as the impacted computer by logging in to it and opening up the Registry Editor with admin access (Windows key + R, type ‘regedit’ and press Enter)
Open up the Registry Editor - Once you’re inside the Registry Editor, use the menu on the left to navigate to the following location:
HKEY_LOCAL_MACHINE\SYSTEM\CurrentControlSet\Control\Terminal Server\WinStations\RDP-Tcp
- To create a .reg file, export the entry. To do this, right-click the entry in Registry Editor, choose Export, and then type a filename for the exported settings.
- Transfer the exported.reg file to the impacted machine.
- Now on the problematic computer, use the following command in the same Powershell prompt to import the Registry entry you previously exported:
cmd /c 'regedit /s c:\<filename>.reg' Restart-Service TermService -Force - Retrying the remote desktop connection will verify the setup. Restart the impacted computer if you are still unable to connect.
If the problem is still not fixed, move down to the next method below.
7. Modify the RDP listener port
You must make sure that both the local and remote computers are using the same RDP listener port in order for this connection to work. Make sure they are both utilizing port 3389 if the ports don’t match.
The RDP listener must be open on port 3389 on both the local (client) and remote (target) computers. This port shouldn’t be used by any other programs.
If you’re not sure which port is being used, follow the instructions below to check the current usage and modify the current RDP listener port if needed:
- Press Windows key + R to open up a Run dialog box. Next, type ‘regedit’ inside the text box, then press Ctrl + Shift + Enter to open up the Registry Editor to admin access.

Open up the Registry Editor - At the User Account Control, click Yes to grant admin access.
- Once you’re inside the Registry Editor, use the menu on the left to navigate to the following location:
HKEY_LOCAL_MACHINE\SYSTEM\CurrentControlSet\Control\Terminal Server\WinStations\<listener>
- Next, double-click on PortNumber and see the value. If it’s different than 3389, change it accordingly.
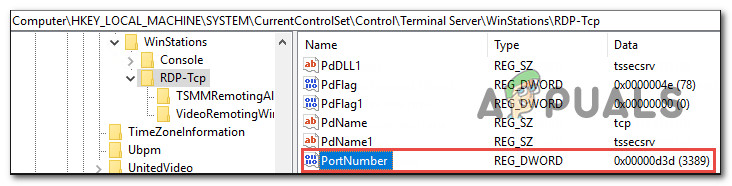
Change the port number accordingly - Once you made sure that the used port is 3389, click Yes to save the changes, then restart the Remote Desktop Services service and see if the problem is now fixed.
I the same kind of issue is still occurring, move down to the next method below.
8. Ensure that there’s no application port overlap
Additionally, there is a remote possibility that another program is attempting to use the same port as the RDP listener. In this situation, you should conduct a CMD scan to see if that’s the case and, if it is, resolve the dispute.
Use a PowerShell instance with administrative rights for this procedure. You can also use a command prompt with administrative privileges for a local machine. However, PowerShell is used in this process because the identical cmdlets function both locally and remotely.
Here’s what you need to do to make sure that there’s no application port overlap that’s indirectly causing the ‘Windows could not start the Remote Desktop Service service on Local Computer’:
- Press Windows key + R to open up a Run dialog box.
- Next, type ‘powershell’ inside the text box, then press Ctrl + Shift + Enter to open up an elevated Powershell window with administrative access.
Access the PowerShell window - At the User Account Control (UAC), click Yes to grant admin access.
- Once you’re inside an elevated Powershell window, type the following command and press Enter to get a report on the usage of the 3389 port:
cmd /c 'netstat -ano | find "3389"'Note: The process identifier (PID) for the process or service using that port appears under the PID column.
- Next, to determine which application is using the designated RDPport(3389), enter the following command:
cmd /c 'tasklist /svc | find "<pid listening on 3389>"'

Checking for the TCP port - Look for a record containing the PID number connected to the port (from the netstat output). The right column displays the services or processes connected to that PID.
- If a program or service other than Remote Desktop Services (TermServ.exe) is using the port, one of the following techniques will help you resolve the conflict:
- Set up a separate port for the other application or service (recommended).
- Remove the other program or service.
- Change the port RDP uses, then restart the Remote Desktop Services service (not recommended).
If this method was not helpful in your case, move down to the next method below.
9. Prevent the firewall from blocking the RDP port (if applicable)
Although the Windows firewall should prevent you from experiencing this problem, there have been reported instances where the affected computer’s firewall has actually been found to be blocking the RDP port. If the firewall is actually blocking the RDP port in this situation, you can look into the problem and create a port exception.
In order to find out if this scenario is applicable, the best course of action is to use the psping tool to test whether you can reach the affected computer port.
Here’s how to do this:
- Open your default browser and navigate to https://live.sysinternals.com/psping.exe to download the psping tool and install it.
- Next, press the Windows key + R to open up a Run dialog box. Next, type ‘cmd’ inside the text box and press Ctrl + Shift + Enter to open CMD with admin access.

Open Command Prompt - At the User Account Control (UAC), click Yes to grant admin access.
- Once inside Command Prompt, change to the directory in which you installed the psing tool and run the following command:
psping -accepteula <computer IP>:3389
- Depending on the result, draw the following conclusion:
- Connecting to <computer IP>: The remote computer is reachable.
- (0% loss): All attempts to connect succeeded.
- The remote computer refused the network connection: The remote computer is not reachable.
- (100% loss): All attempts to connect failed.
- If the connection is not reachable or all attempts to connect have failed, it’s clear that this problem is caused by your firewall. If these suspicions have been confirmed, you can either establish a whitelisting rule or you can disable the overprotective firewall altogether.
If this didn’t allow you to resolve the issue, move down to the next method below.
10. Start the Remote Desktop Service in Safe Mode
There are a lot of moving parts that might end up interfering with the RDP port and thus breaking the remote desktop service. If you want to exclude a 3rd party program or service interference from your culprit list, you should boot in Safe mode and try opening the service once again.
If the error doesn’t return, it’s clear that you’re dealing with some kind of 3rd party interference.
In this case, you can attempt to boot in safe mode with Networking and attempt to start the remote desktop service while you’re certain that there’s no potential interference that’s causing this behavior.
Here’s how to do this:
- Press the Windows key to bring up the Start menu, then choose Restart while holding down the Shift key (while keeping the Shift key pressed).
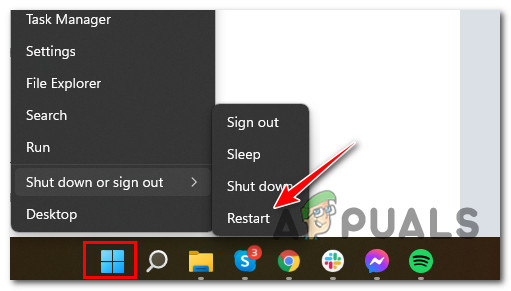
Boot in Safe Mode - After restarting, your computer will go directly to the Recovery menu.
- Choose Troubleshoot from the drop-down menu once you’ve finally reached the recovery menu.
- From the drop-down option in the Advanced Options menu, choose Startup Settings.
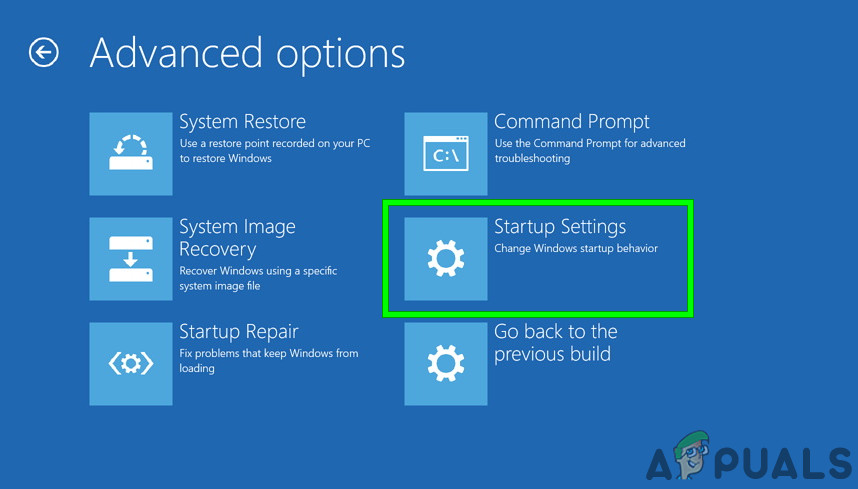
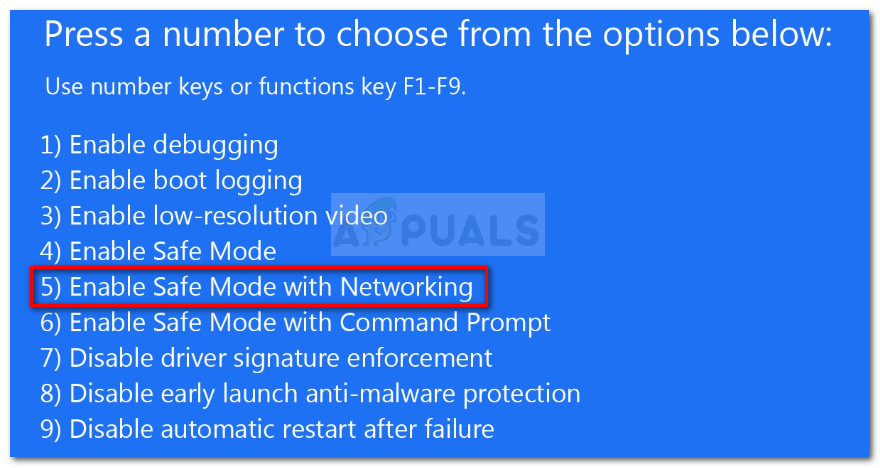
Accessing the Startup Settings menu - On the subsequent page, press F5 to launch your computer in Safe Mode with Networking.
Safe Mode with Networking - Once your PC boots in safe mode, type ‘services.msc’ inside the text box, then press Ctrl + Shift + Enter to open up the Services screen with admin access.
- At the User Account Control (UAC) window, click Yes to grant admin access.
- Once you’re inside the Services screen, search for the following services and make sure that both are running:
Remote Desktop Services (TermService)
Remote Desktop Services UserMode Port Redirector (UmRdpService)
Check if both dependencies are enabled - See if you can enable both of these services without seeing the ‘Windows could not start the Remote Desktop Service service on Local Computer’.
If the same kind of issue is still occurring, move down to the next method below.
11. Create a new Windows Account
This same problem may also be caused by a corrupted Windows account. Create a new Windows account (it can be local) and restart the remote desktop service to be sure your present account is not the problem.
It’s important to note that this action will remove all corrupted dependencies connected to your current user profile.
The method below will help you create a new user account to avoid the ‘Windows could not start the Remote Desktop Service service on Local Computer’when attempting to open the Remote Desktop service:
- To launch the Run dialog box, press the Windows key + R.
- Next, enter “ms-settings:otherusers” in the text field, followed by Enter, to launch the Family & Other People tab in the Settings app.
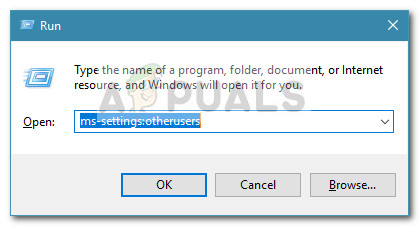
Access the Other Users tab - From the Family & other users menu, choose Add someone else to this PC on the Other users page.
- Complete the remaining steps to create a new Windows account, restart your computer, then sign in using the new account to see if the remote service can be started normally.
If the same kind of issue is still occurring, move down to the next method below.
12. Uninstall the KB4284826 Windows Update
This is a terrible MS update that is infamous for really breaking the RDP component. If your system just installed this Windows Update, uninstall it from your Windows computer and conceal it with a specialist tool (to prevent a subsequent installation).
A number of users who handled this issue themselves found that removing the KB4284826 feature update and restarting their machine helped them solve the issue.
Note: Since Microsoft has previously made a solution for this bug, it shouldn’t happen again when WU installs this feature update.
The recently installed Windows feature update can be removed by following the steps below:
Important: We have also provided additional steps that will enable you to conceal the update and stop it from installing in the future.
- To enter the Run dialog box and access the Programs and Features screen, first hit the Windows key + R. Put “appwiz.cpl” in the text field and hit Enter.
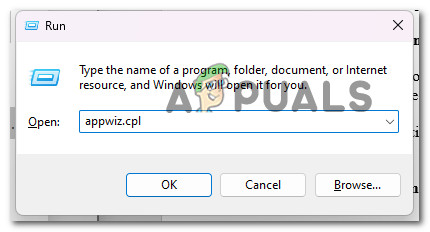
Open up Programs and Features - After entering the Programs and Features menu, choose View installed updates from the vertical menu on the left.
- Locate the most recent update on the Installed Updates page and right-click on it. Uninstall can be selected from the context menu.
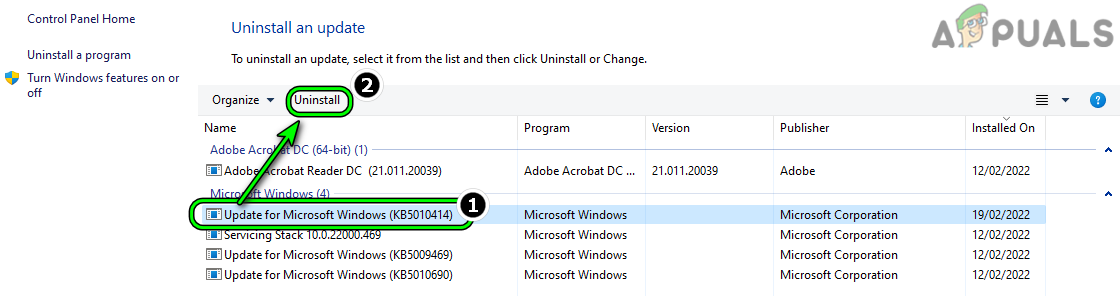
Uninstall Windows Updates - To start deleting the update, select Yes when asked for confirmation. Allow the uninstalling process to complete.
- Restarting your computer once the update has been removed is not recommended. Instead, go to the Microsoft Show or Hide troubleshooter’s official download website.
- The utility we’ll be using right now should begin downloading immediately. Open the .diagcab file and select Advanced when the process is complete.
- After that, before selecting Next, choose the checkbox next to Apply Repairs Automatically.
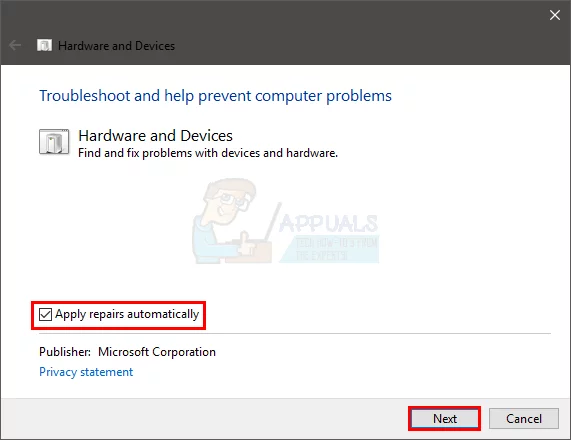
Apply repairs automatically - To identify which pending updates are not installed, the program will scan your machine. Click Hide Updates from the list of choices on the following screen to hide updates.
- On the next screen, check the box next to the KB4284826 update, then click Next. This will prevent Windows Update from trying to install the update again in the future.
- To see if the issue has been fixed, reboot your PC one last time.
Move on to the procedure below that is listed next if the same type of problem is still present.
13. Deploy SFC and DISM scans
It turns out that the system file corruption that is impeding the RDP connection could also be a secondary source of this issue. In this situation, you should immediately follow an SFC scan with a DISM scan.
The damaged files that are impeding the remote connection and resulting in the error “Windows could not start the Remote Desktop Service service on Local Computer” should be attempted to be replaced in this case.
Perform quick succession scans using SFC (System File Checker), DISM (Deployment Image Servicing and Management).
For comprehensive instructions on how to do this, refer to the list of steps below:
- To open the Run dialog box, press the Windows key + R.
- Next, type “cmd” into the Run box and press Ctrl + Shift + Enter to launch a Command Prompt with admin privileges.

Open up an elevated Command Prompt - When the User Account Control asks you to provide admin access, choose Yes.
- Type the following command at the elevated CMD prompt and press Enter to begin an SFC scan:
sfc /scannow
Note: It’s important to remember that System File Checker runs entirely locally and doesn’t require an active internet connection. It functions by replacing any damaged files with their healthy counterparts from a locally cached repository of backup system files.
- After the SFC scan is finished (regardless of the results), do a DISM scan from the same elevated CMD window:
DISM /Online /Cleanup-Image /RestoreHealth
Important: Keep in mind that DISM is a more recent technology and that you must always have access to the Internet. This is important because DISM will use a part of WU to find healthy substitutes for the damaged files that need to be replaced.
- Restart your computer one last time to see if the issue has been resolved.
Continue to the final approach below if you’re still experiencing “Windows could not start the Remote Desktop Service service on Local Computer.”
14. Perform a clean install or repair install
You certainly have a major corruption issue if you’ve tried every option suggested in this post so far and are still receiving the error message “Windows could not start the Remote Desktop Service service on Local Computer.”
You must restart every component of Windows in this scenario to guarantee that every instance of defective system files is removed.
Most users go for the drastic solution, a clean install, which completes the task while also erasing all personal data, including programs, games, media, and documents.
If you want to take a less drastic action to upgrade your Windows components without damaging any of your personal belongings, you should select a repair install (games, apps, images, papers, etc.). Through this method, you can maintain all of your personal data.


