How to Turn Ringer Off on MacBook – 4 Easy Methods
 Reviewed by Huzaifa Haroon
Apple is renowned for its seamlessly integrated device ecosystem, allowing users to experience smooth functionality across all of their products. A prime example of this is the ability to take calls and messages from your iPhone on your Mac. While this feature is convenient, you may not always want calls and messages forwarded to your Mac, as it can become distracting or disruptive in certain environments.
If you wish to control these notifications, you have the option to turn off the ringer on your Mac. This comprehensive guide will walk you step-by-step through the various methods to silence or disable these alerts, ensuring you maintain your preferred level of focus and privacy.
The term “ringer,” when used in the context of Apple devices, refers to the sound or vibration alert that notifies you about incoming calls or notifications. Although “ringer” usually applies to iPhones and iPads, the concept also extends to Macs that receive call and notification alerts, even though there is no dedicated ringer switch on Mac devices.
The following sections outline several ways to silence calls, messages, and other notifications individually and collectively on your MacBook. We’ll cover each category step-by-step:
- Call Notifications
- Messages
- All Notifications and Audio
1. Silencing Call Notifications
To stop your MacBook from ringing for incoming calls routed through Continuity, you need to adjust FaceTime settings, as all such calls on Mac are managed via the FaceTime app.
Method 1: Silencing FaceTime Notifications on Mac
Disabling notifications for FaceTime will effectively prevent your MacBook from ringing or showing alerts when you receive calls forwarded from your iPhone.
- Open System Settings by clicking on the Apple menu > System Settings.

Accessing System Settings in macOS - Click on Notifications and locate “FaceTime“.

FaceTime Notification Settings in macOS - Select FaceTime and switch off “Allow Notifications“.

Disabling FaceTime Notifications on macOS - Once toggled off, all FaceTime notifications (including incoming calls) will be silenced.
Method 2: Disable Call Routing to Mac from iPhone
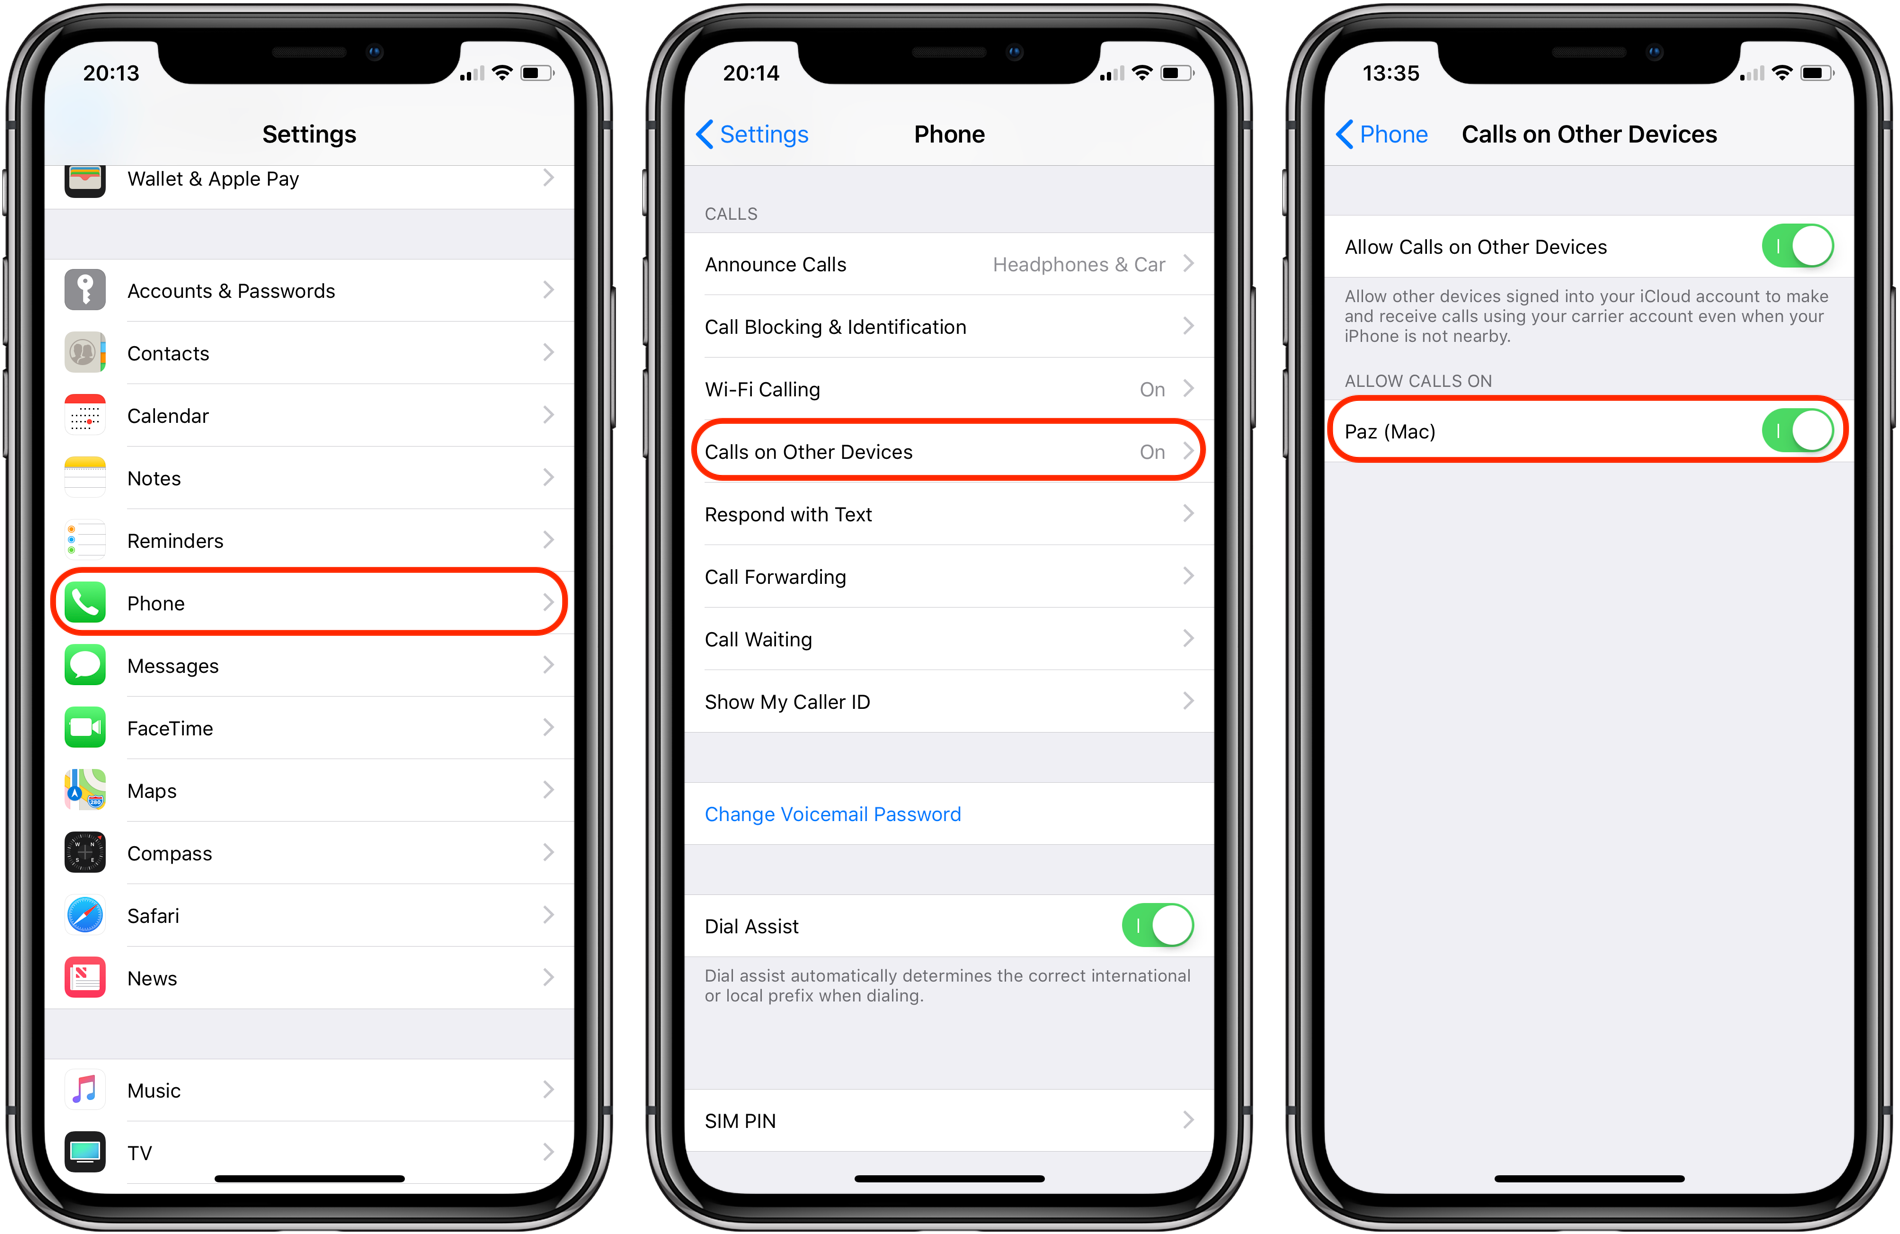
Instead of disabling all FaceTime notifications on your Mac, you can turn off only the call forwarding feature directly from your iPhone. This method prevents calls from appearing on your Mac without affecting other FaceTime functionalities.
- Open the Settings app on your iPhone.
- Scroll down and tap Phone.
- Select Calls on Other Devices.
- Turn off the toggle for your Mac (or any device you wish to remove) to stop calls from routing there.
2. Turning off Message Notifications
Disabling the ringer for Messages on your MacBook ensures that you will not be disturbed by incoming texts, whether from iMessage or standard SMS forwarded via your iPhone.
Method 1: Silencing “Messages” App Notifications on Mac
- Open System Settings via the Apple menu > System Settings.

Accessing System Settings in macOS - Go to Notifications and locate “Messages“.

Messages Notifications in macOS’ Settings - Select Messages and switch off “Allow Notifications“.

Disabling Messages Notifications in macOS - This will silence all notifications and sounds from the Messages app.
Method 2: Signing into a Different Apple ID
Another approach to silencing all notifications is to use a different Apple ID on your Mac. However, this method is not generally recommended, as it will prevent data such as contacts, photos, and notes from syncing between your devices. Apple’s ecosystem is designed for consistency across devices logged in with the same Apple ID.
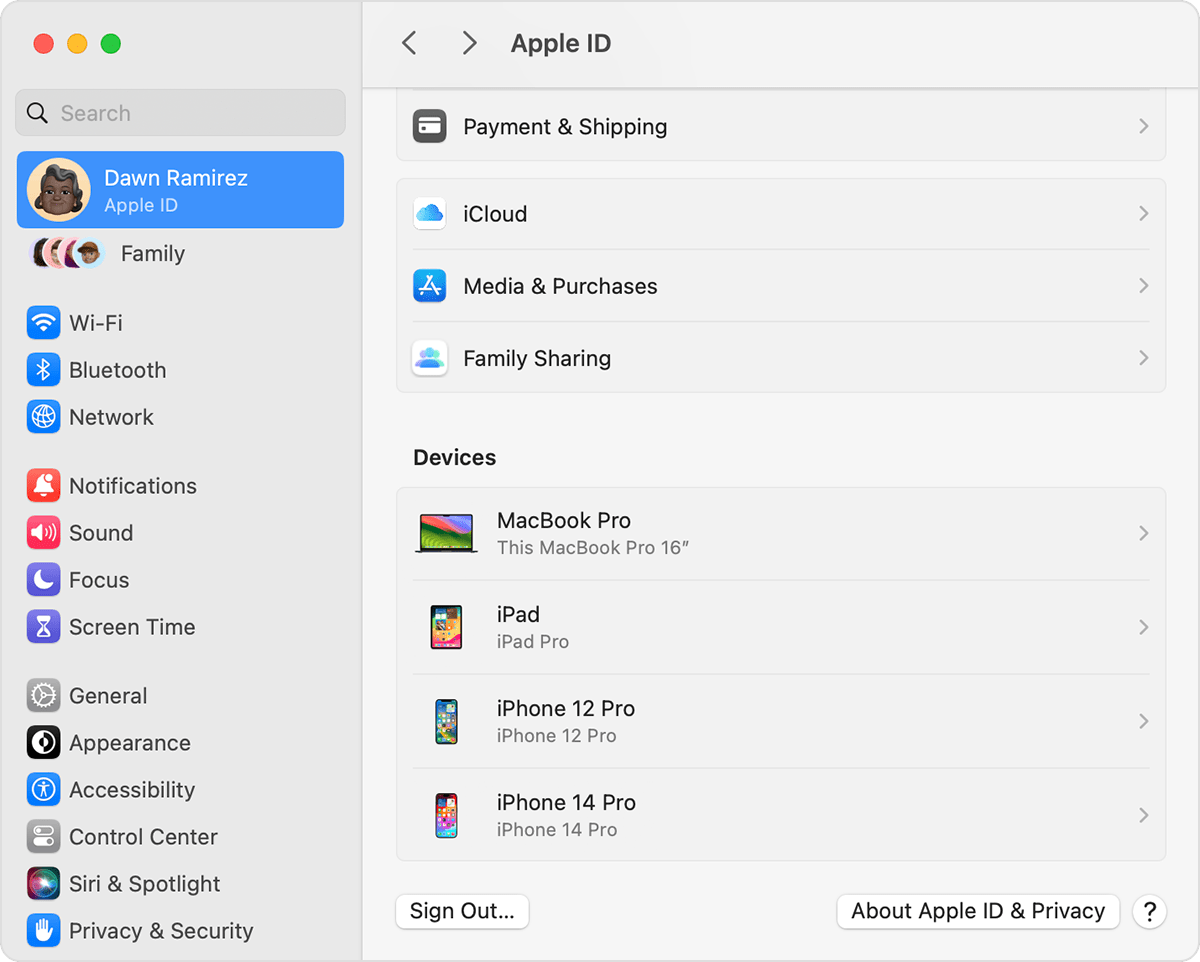
Additionally, any purchases made on one Apple ID will not be accessible from another account. Using multiple accounts can disrupt the seamless integration Apple users typically enjoy. It is only advisable if separation of data is necessary for your workflow.
If you still wish to proceed, Apple provides an official guide for using different Apple IDs across devices.
3. Silencing All Notifications (Calls, Messages & Audio)
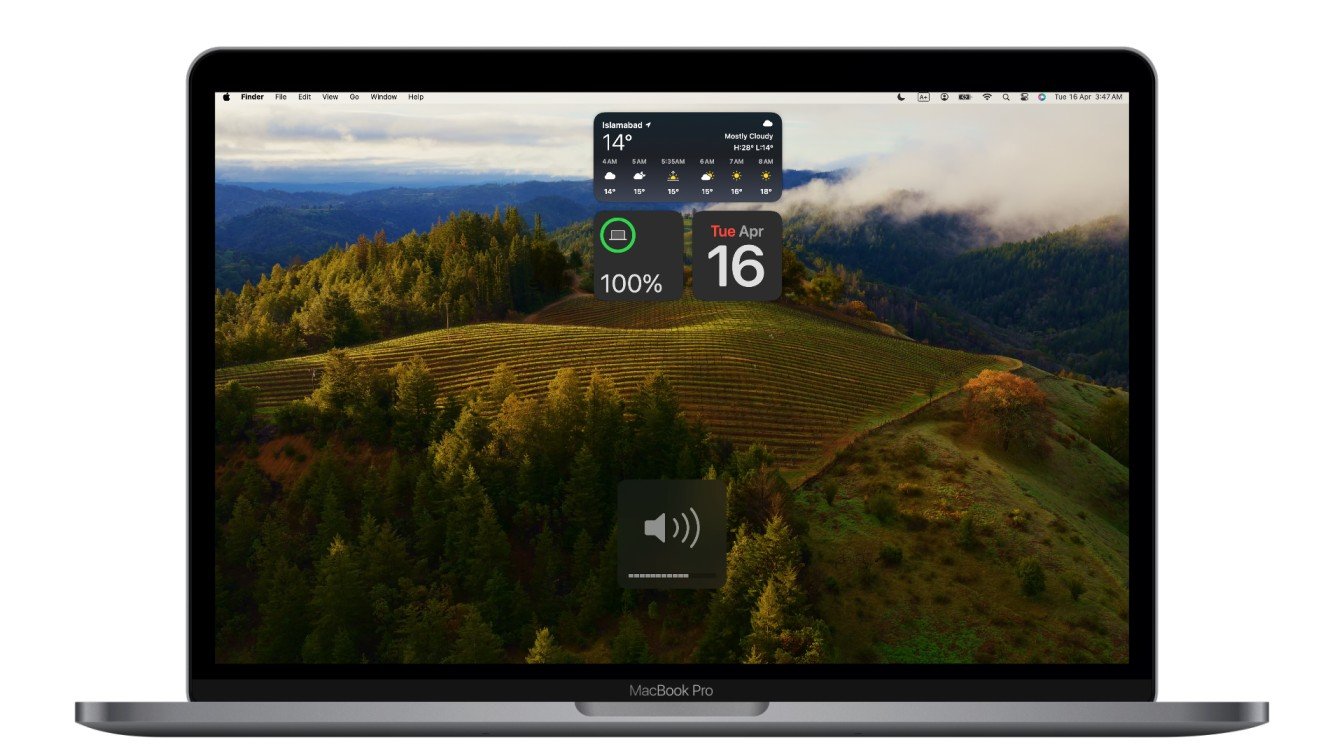
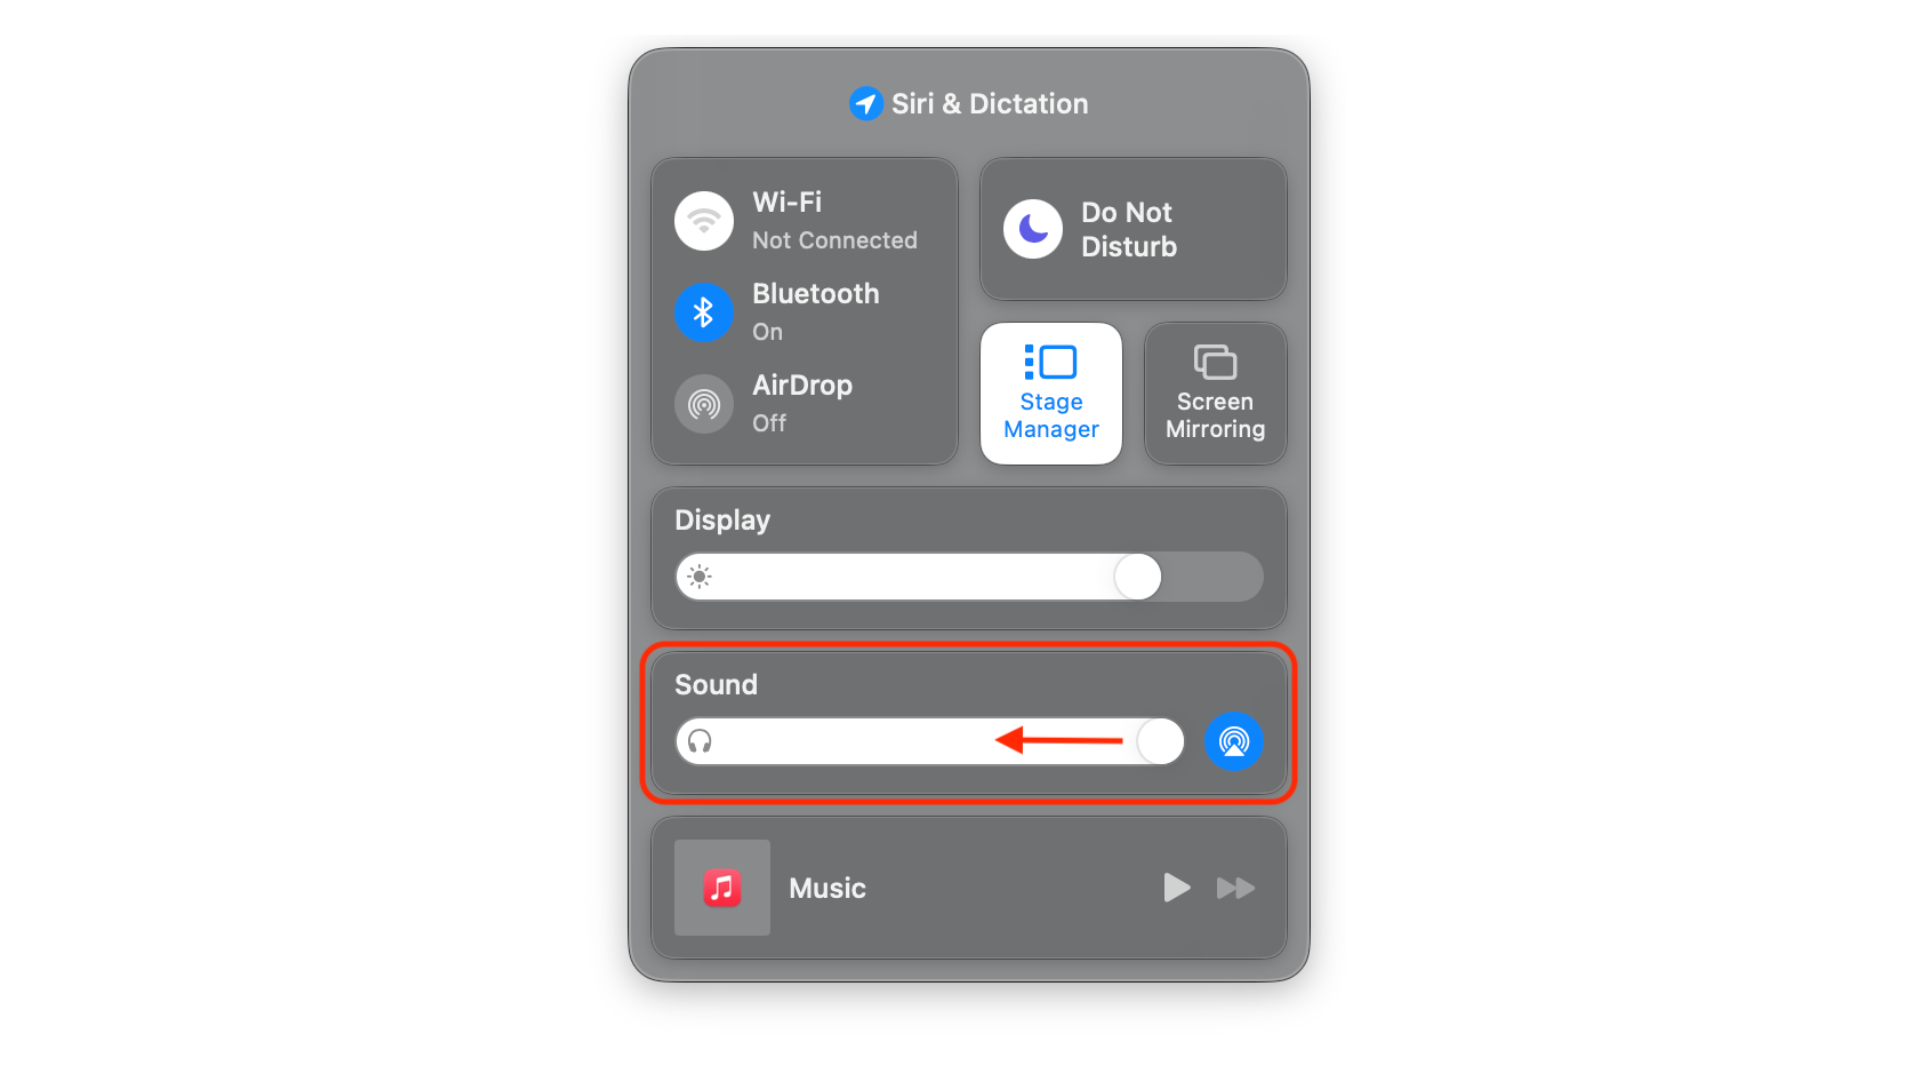
If you want to mute every sound on your MacBook—including notifications, calls, and alerts—you can silence your device’s audio entirely. This method is particularly effective if you require complete quiet, for example, during meetings or presentations. Here’s how you can do it:
- Open the Control Center on your Mac.
- Find the Sound section (below the Display/Brightness slider).
- Drag the volume slider all the way to the left to mute system audio.
For older MacBook Pro models equipped with a Touch Bar, you can tap the Mute button on the Touch Bar to instantly silence all audio and notification sounds.
 Reviewed by Huzaifa Haroon