How to Fix ‘Recovery Server Could Not Be Contacted’ Error on macOS
When attempting to install or reinstall macOS, users may encounter the error message “The recovery server could not be contacted.” This issue arises when the Mac is unable to connect with Apple’s servers to download the required software or updates.

This error is common during macOS Recovery, a feature that allows users to reinstall the last version of macOS on their Mac, upgrade to the most recent compatible macOS, or install the version that originally came with their Mac.
The problem is often due to network issues such as incorrect settings or unreliable internet connections. However, Apple’s servers being down or the intended macOS version being unsupported or unavailable for download may also contribute to the issue.
1. Confirm you are connected to the Internet
An unstable or unreliable internet connection could be the primary cause of the error. Ensure that your connection is functional and stable.
For those using a wired connection, try unplugging and replugging the Ethernet cable. If on Wi-Fi, check the stability of your connection via the Wi-Fi icon in the top right corner of the screen.

A faster network connection will enable you to access the Apple Recovery Server more quickly.
2. Check your date and time settings
Inaccurate date and time settings can also cause the error. If your device has been unused for a while or has lost power, ensure the date and time are correct.
- Go to the Apple menu, then select System Preferences.
- Click on Date & Time and ensure Set Date and Time automatically is enabled.
- In the Time Zone tab, check Set time zone automatically using current location.

Check your date and time settings
To adjust the time and date in Recovery Mode:
- Dismiss the error by clicking on the OK button, then return to the macOS Utilities window.
- From the top menu bar, select Utilities and then Terminal.
- In Terminal, type in the command sudo ntpdate -u time.apple.com and press Enter.

If this doesn’t resolve the issue, manually set the correct date and time as follows:
- Open Terminal.
- Type date to check the current settings.
- If the date and time are incorrect, manually set them using the format mmddhhmmyy. For instance, type date 060710002023 for June 10th, 2023, at 07:00 AM.
- Close Terminal and attempt to reinstall macOS via the Reinstall macOS option.
3. Use Terminal Commands to Update macOS
Terminal commands can be a faster alternative to updating macOS compared to the Mac App Store. Using Terminal might also sidestep the “recovery server could not be contacted” error during an update.
- Open Terminal from within Utilities.
- Enter the command softwareupdate -l and press Enter.

Use the Terminal Command to update macOS - To install a specific macOS version, type softwareupdate –install ‘label’ and replace ‘label’ with the desired version, such as softwareupdate –install ‘macOS Sonoma’.
4. Reinstall macOS from a USB Drive
If you have trouble accessing the Mac App Store or an internet connection, using a bootable USB drive can help you reinstall macOS. To create a bootable installer:
Step 1: Format the USB flash drive to FAT32 or a compatible file system for your Mac.
Step 2: Download the appropriate macOS version file from the official Apple website or another authorized source.
Step 3: Create a bootable USB installer with an external drive featuring at least 15GB of available space.

Follow these steps to create your USB installer:
- Launch Disk Utility, using the shortcut Command + Spacebar, and start typing “Disk Utility”.
- For individuals using High Sierra or later, ensure the external root drive is displayed by selecting Show All Devices from the View dropdown menu.

Reinstall macOS from a USB drive - Select the root drive, not the volume, in the sidebar.
- Format the drive as Mac OS Extended (Journaled) and choose GUID Partition Map for the scheme.
- Name your drive accordingly, such as “macOS” or “USB”.
- Click Erase and wait as Disk Utility configures the drive. This may take a few minutes.
- Upon completion, click Done.
- Open Terminal using the shortcut Command + Spacebar, type “Terminal”, and paste the corresponding command for your chosen macOS version.
- Hit Enter and input your password when prompted.
- Allow Terminal to access your USB drive when asked.
- Terminal will erase the drive and copy the installer files. Once finished, you will see the message Copy Complete.
Step 4: Begin the installation
- Insert the USB drive into the Mac.
- Reboot your Mac. For Intel-powered Macs, hold the Option key; for M1 Macs, press and hold the power button until you see boot options.
- Select the USB drive in the Startup Manager to boot from it.
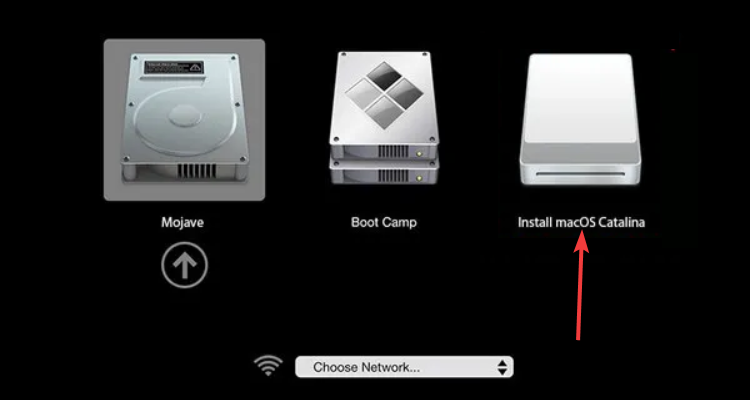
- Choose Install macOS and click Continue to initiate the installation.
5. Format the Disk and Reinstall macOS
If you continue experiencing issues, consider erasing your disk and performing a clean install of macOS. This approach often resolves the problem.
- Shut down your Mac and then turn it back on.
- Immediately hold the Option + Command + R keys until you see the Apple logo.
- In Recovery Mode, select Disk Utility and identify the drive you wish to format.
- Click the Erase tab, choose the desired format, usually Mac OS Extended (Journaled), and click Erase.

Format the Disk and reinstall macOS - After erasing, return to the macOS Utilities window and select Reinstall macOS.
- Complete the installation by following the on-screen prompts.
For additional support, contact the Apple Support team.


