Slow Internet in Windows 10? Try these methods to Improve it
Internet speeds on Windows 10 computers often get much slower right after you start the computer or reconnect to Wi-Fi, even though other devices on the same network are fine. There is no specific error message, but Windows’ network system slows things down, especially when background tasks are running.
The most common reason is the Windows Auto-Tuning feature, which can cause problems with some routers. Other reasons include background services like Windows Update, Delivery Optimization, and data collection (telemetry)
1. Disable Peer-to-Peer Updates.
P2P, or Peer to Peer, is a technology introduced by Microsoft to transfer Windows Update to other computers over the internet and even on the local network. According to the affected users, this feature consumes high bandwidth from the internet to deliver Windows updates to another computer, which might not be ideal if you have a minimal data plan.
- Click the Start Menu and type “Settings.
- Open Settings and navigate to Update & Security.
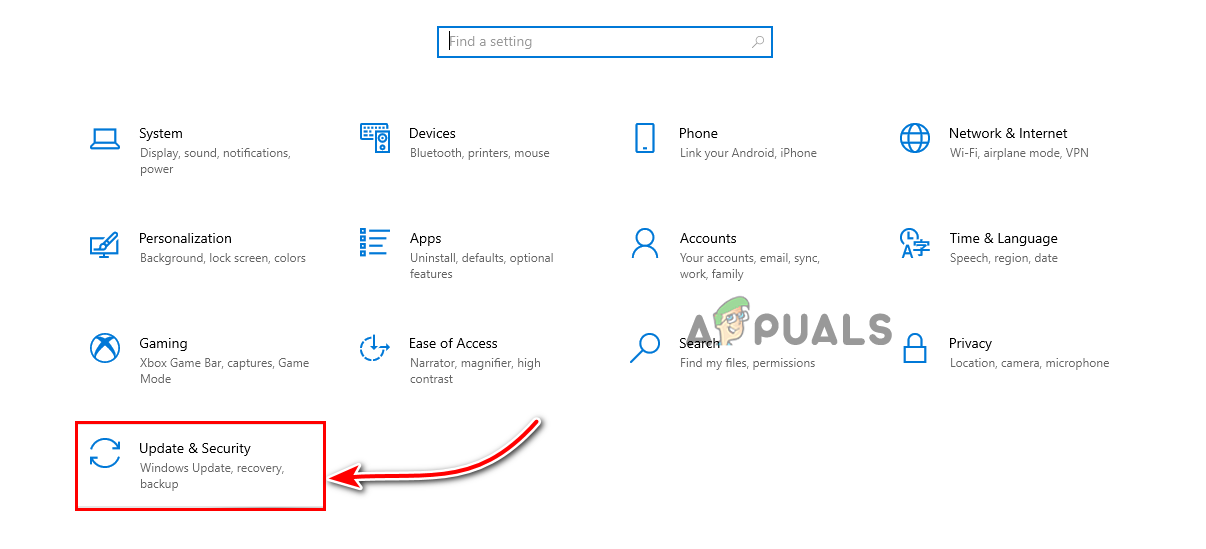
Click on Update and security - Scroll down to the Advanced options and navigate to them.
- Click on Delivery Optimization.

Click on Delivery Optimization - Now, disable the “Allow Downloads From Other PCs” button by toggling it off.
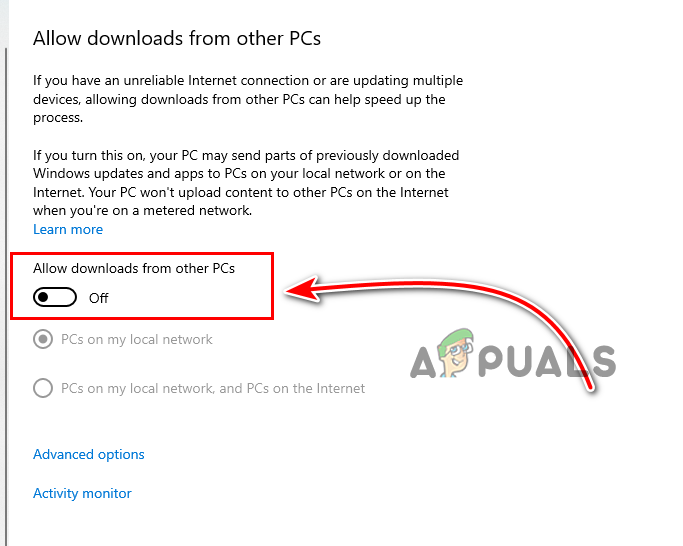
Turn Off Allow downloads from other PCs - Once completed, check whether the slow internet issue on Windows 10 has been resolved.
2. Modify the Network Bandwidth Settings.
Windows 10 reserves maximum bandwidth from the internet. According to calculations, Windows reserves approximately 20 percent, which means that the remaining 80 percent is available for users. However, you can customize network bandwidth settings by enabling the limit reservable bandwidth option, which will limit maximum bandwidth for crucial tasks.
- To modify network settings, right-click the taskbar and select Task Manager.
- Once the Task Manager is opened, click on ‘File‘ and select ‘Run New Task.’
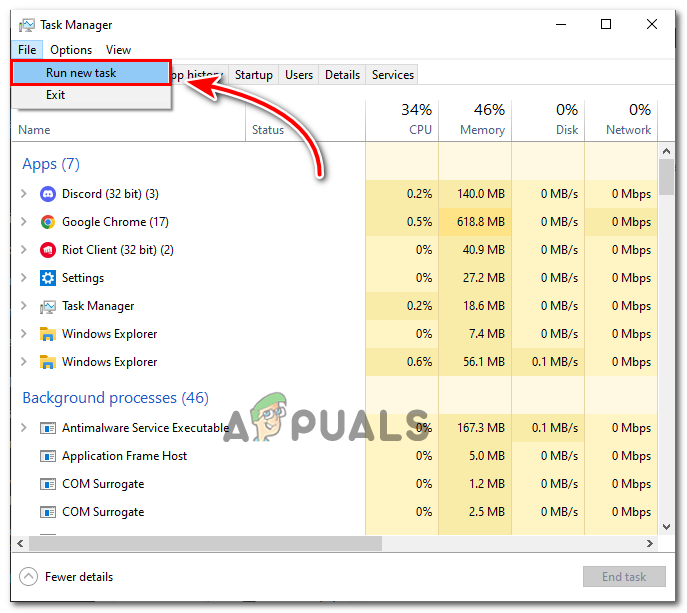
Click on Run new task - Type “gpedit.msc” and check the box labeled “Create this Task with Administrative Privileges,” then press Enter.
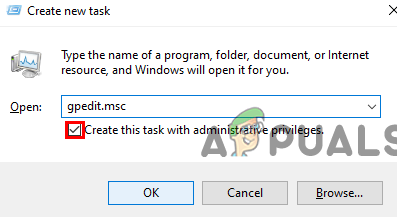
Run Command to Open Local Group Registry Editor - Navigate to the following path:
Computer Configuration > Administrative Templates > Network > QoS Packet Scheduler
- Double-click on ‘Limit Reservable Bandwidth‘ in the right pane.
- Click on the “Enabled” button and change its bandwidth value to 0.
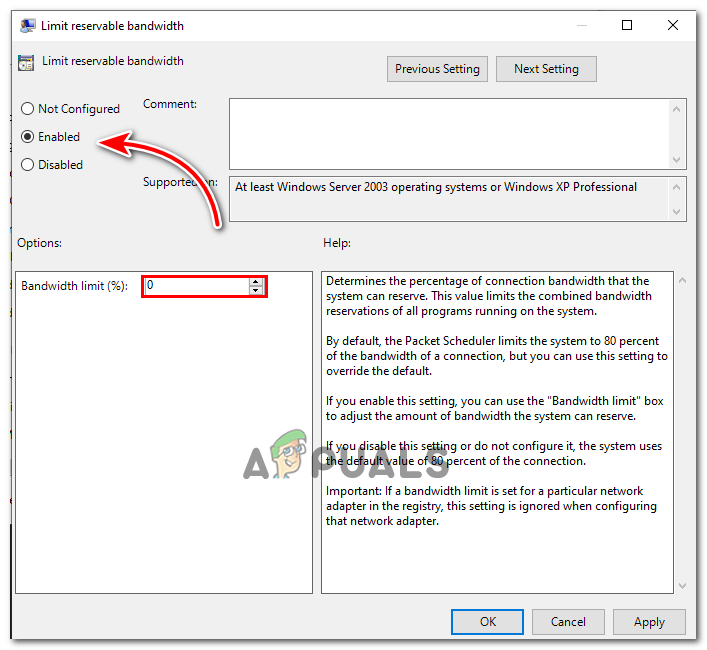
Enable Limit Reservable Bandwidth - Click Apply and then click OK to save the changes
- Once done, check if the slow internet issue is fixed.
3. Close the Running Background Applications.
If your computer runs multiple programs while you are not using them, it can consume high bandwidth and drain your battery. Make sure to close any unnecessary applications running in the background when you require high bandwidth from your internet.
- To close the unnecessary applications, right-click the taskbar and select Task Manager from the listed options.
- Now, select the application and click the “End Task” button from the bottom right.
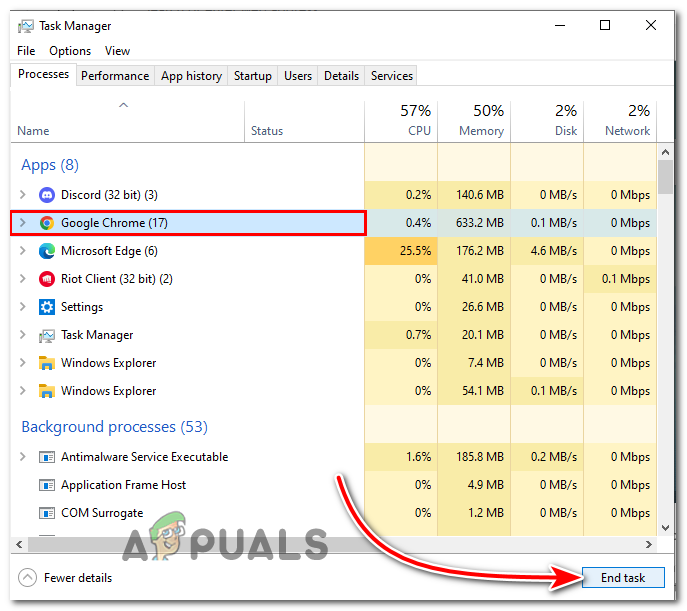
Select Unnecessary Application and Click on End task
4. Disable Windows Auto-Tuning.
Windows Auto-Tuning was designed to enhance the performance of applications. Windows Auto-Tuning receives TCP data over the network to enable efficient data transfer. As it turns out, slow internet can be caused by the enabled Windows Auto-Tuning feature.
- To disable Windows Auto-Tuning, click the Start Menu and type ‘command prompt’ into the search bar.
- Right-click on the command prompt and choose “Run as Administrator.
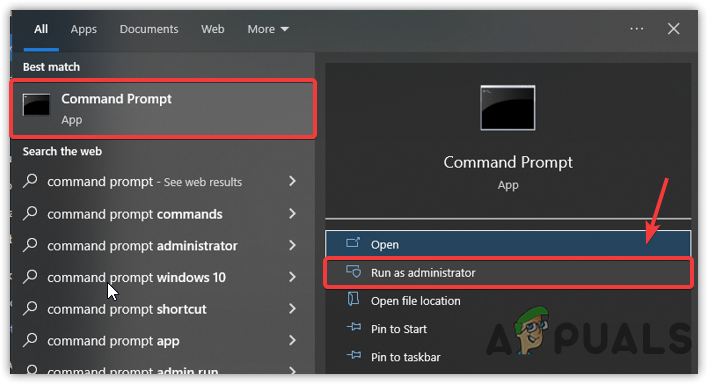
Run in Administrator Mode - Click ‘Yes‘ when asked for permission.
- Once the command prompt loads up, enter the following command and press Enter.
netsh interface tcp show global
- If the Receive Window Auto-Tuning Level is normal, then insert the additional command mentioned below.
netsh int tcp set global
- Now, check if the issue still lingers; if it does, then follow more steps.
5. Disable Large Send Offload.
LSO, or Large Send Offload, is a technique used to improve network performance. However, it allows background processes to consume a high bandwidth of the internet, which might cause slow internet.
LSO, or Large Send Offload, is a technique used to improve network performance. However, it allows background processes to consume a high bandwidth of the internet, which might cause slow internet.
- Press the Windows and R keys simultaneously to open a Run dialog box.
- Type “devmgmt.msc” and press Enter.
- Once the page loads, expand the Network Adapter, and right-click on your network driver to select Properties.
- Go to the Advanced tab, find and select “Large Send Offload (IPv4).
- Once you have selected, click “Disabled” on the right and press “OK.
- Now check if the slow internet speed has been resolved.
6. Use an Open-Source DNS.
An automatic DNS is set by default in Windows. There is nothing to do with the DNS to improve network performance. However, the DNS is not directly related to how fast your browser loads web pages, but it can have an indirect effect. So, we can potentially boost internet speed to browse the web even faster than before.
- To change DNS settings, open Settings by pressing Windows + I on the keyboard.
- Navigate to Network & Internet, and click on “Change Adapter Options.
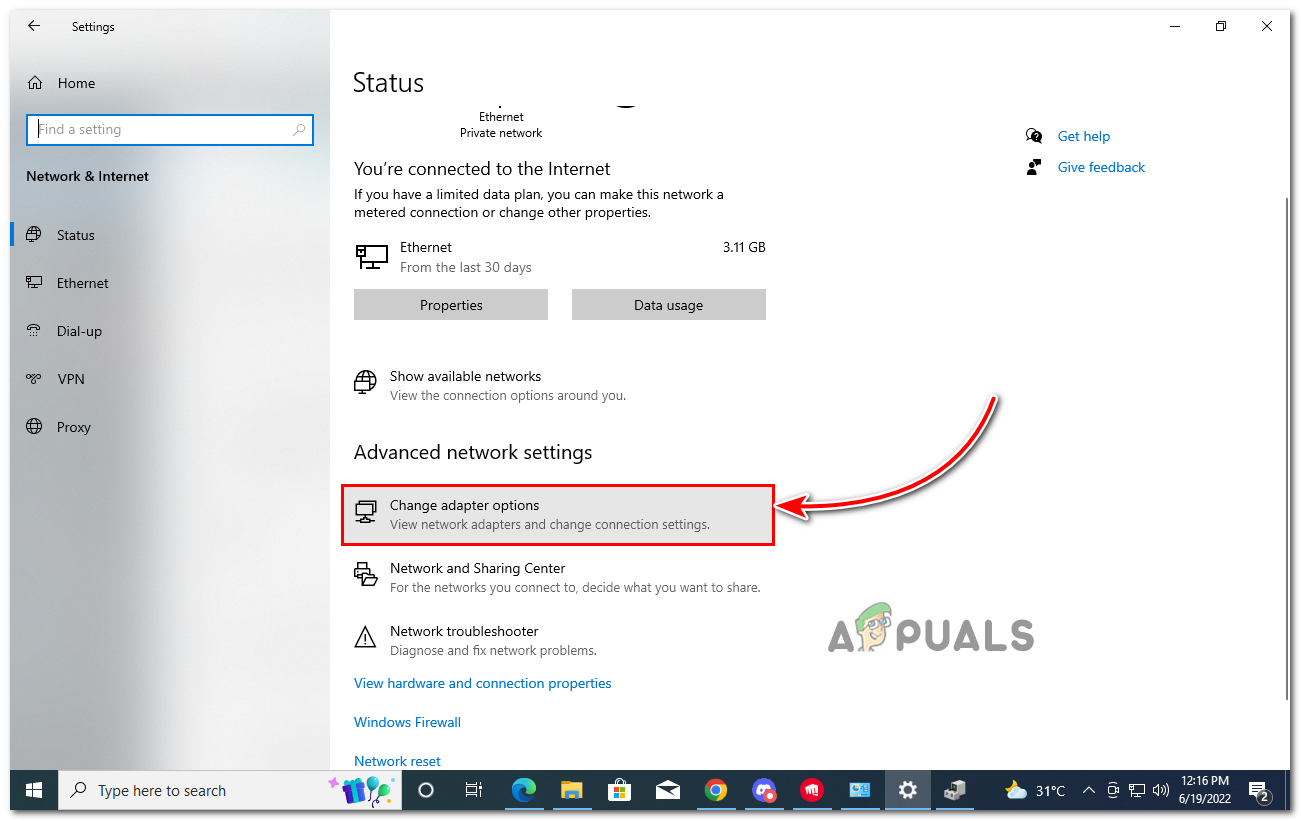
Click on Change Adapter Options - You will be redirected to the control panel. Now, right-click on your connection and select ‘Properties‘.
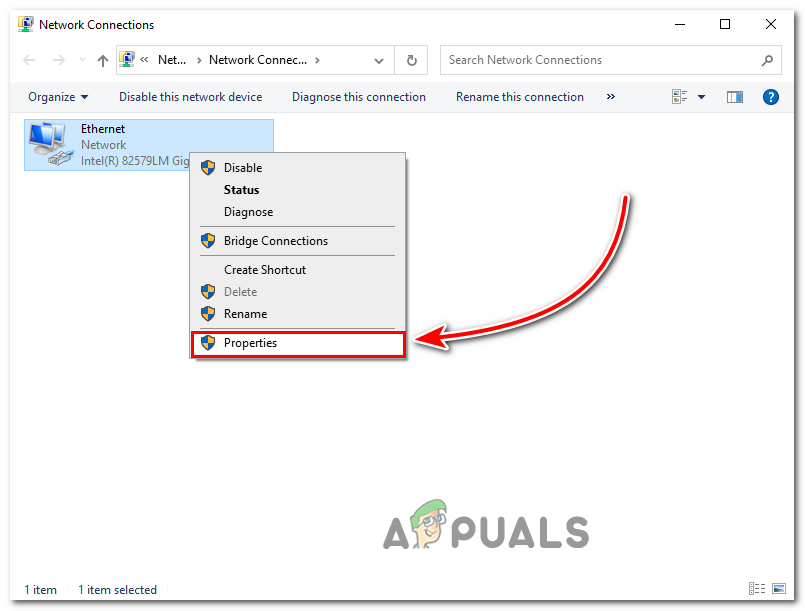
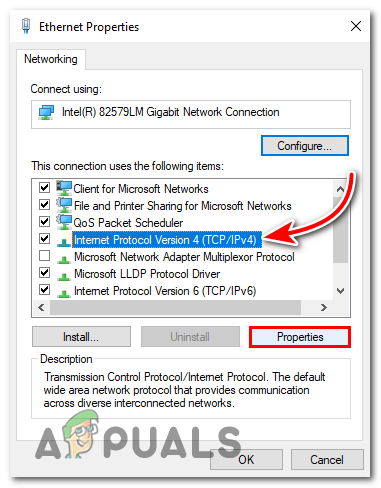
Click on Properties - Select Internet Protocol Version 4 (TCP/IPv4), and click Properties.
Internet Protocol Version 4 (TCPIP4) - Now, click the radio button named “Use the Following DNS Addresses.
- Insert the following DNS into both boxes.
8.8.8.8
8.8.4.4
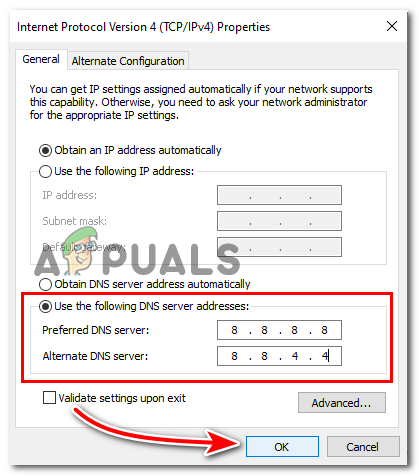
Change TO Google DNS - Once done, click “OK” and see if the issue is resolved.
7. Reinstall the Network Drivers.
If the above methods fail to fix the slow internet problem, it might be related to the network drivers. The network driver can easily become corrupted or defective; you may need to reinstall it in order to fix this issue.
- To reinstall network adapters, press the Windows and X keys simultaneously.
- Click on “Device Manager” from the listed options.
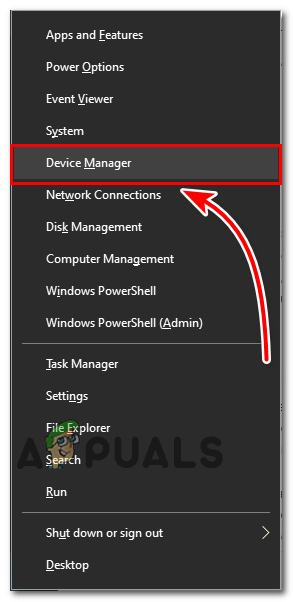
Click on Device Manager - Once it is opened, right-click on the network adapter and select ‘Uninstall Device‘.
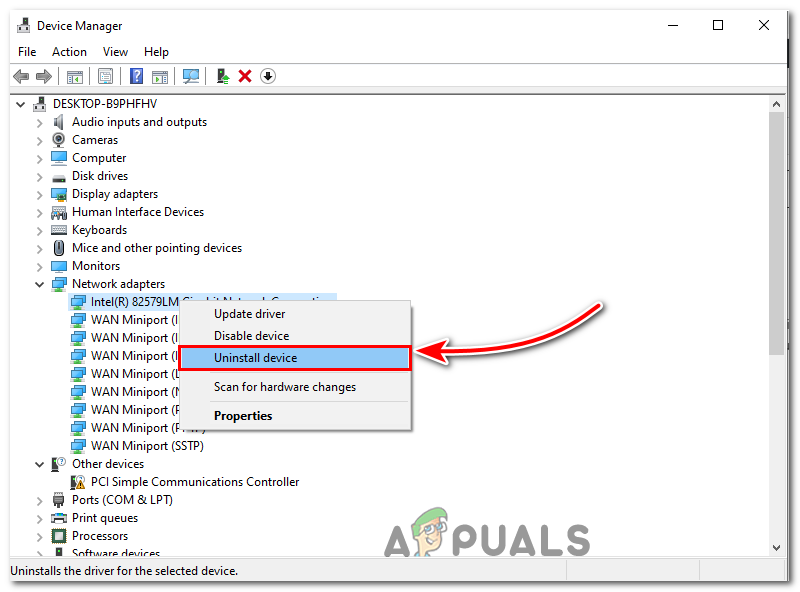
Uninstalling Network Adapter - Once completed, restart your computer to install the network drivers. Note: If you have used a third-party network driver, go ahead and download it.
- Now, check if the Windows 10 slow internet issue persists.
8. Temporarily Disable Antivirus.
Windows Defender often causes slow internet speeds. According to affected users, the slow internet issue can be resolved by disabling Windows Defender. Although we do not recommend disabling Windows Defender, you can temporarily disable it to see if this fixes the problem or not.
- To temporarily disable the antivirus, go to Settings by pressing the Windows + I keys.
- Once the Settings load up, navigate to Update & Security.
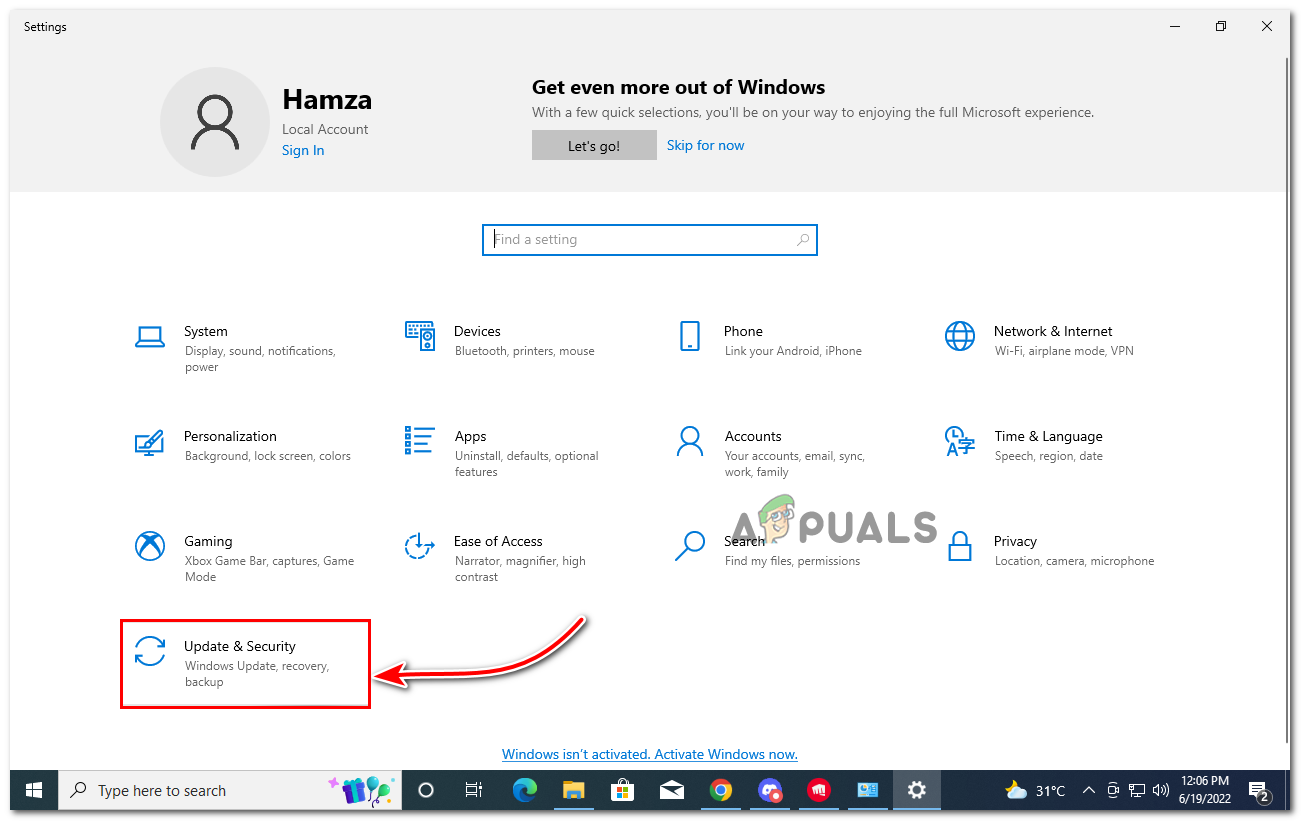
Click on Update and security - Click “Windows Security” from the left pane, and then click “Open Windows Security.
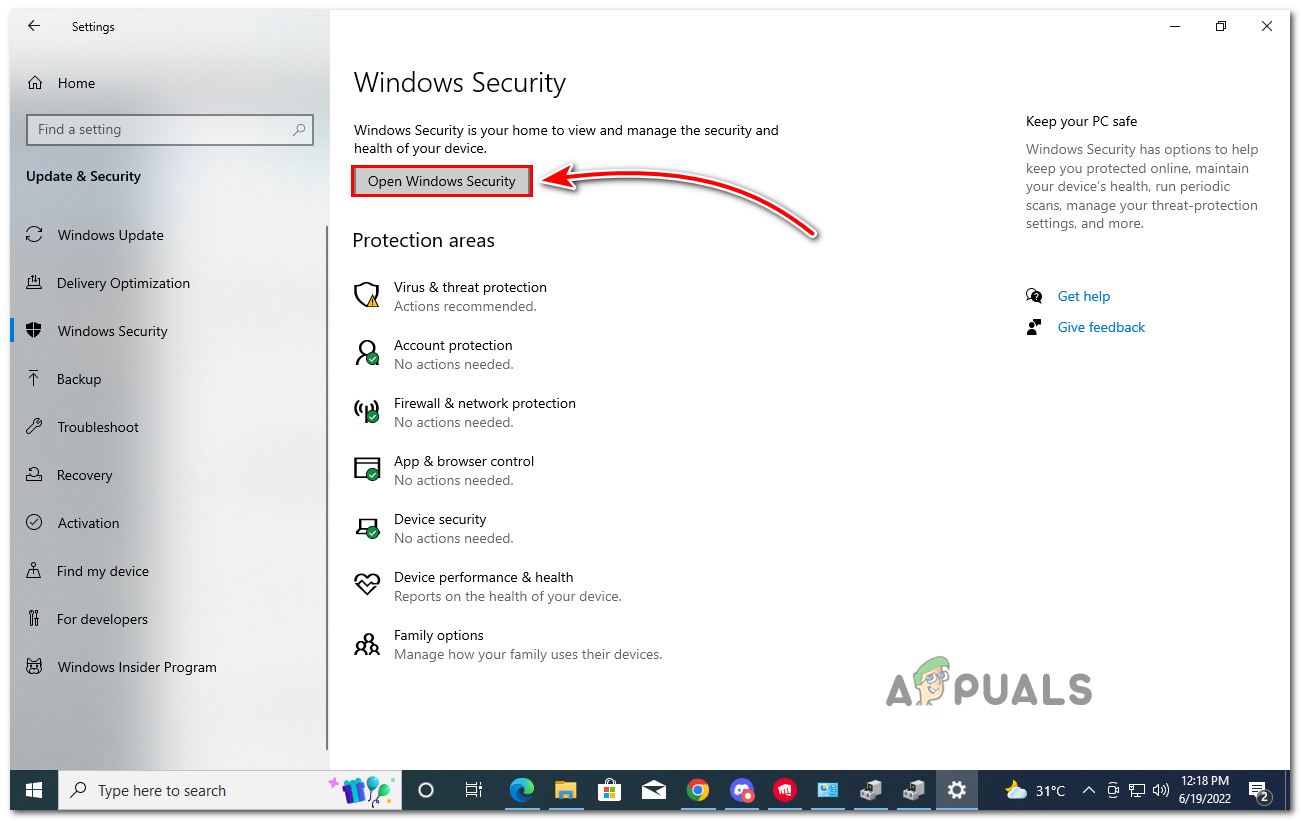
Open Windows Security - Navigate to Virus & Threat Protection and click on Manage Settings.
- Turn off the real-time protection.
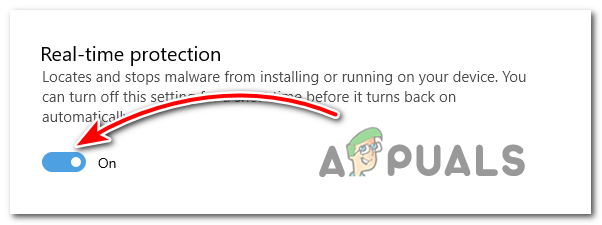
Turn off Real-time protection - Upon completion, check whether this resolves the slow internet issue. If not, try disabling the Firewall.
9. Reset the Network Settings.
If the issue has not been resolved yet, try resetting the network settings. This action will reinstall the network adapters, and all the settings you applied to the network will be set to default. Resetting the network settings will fix the issue if a corrupted network adapter is causing slow internet speed.
- To reset network settings, right-click the Start menu and select ‘Settings‘ from the listed options.
- Once it is opened, navigate to Network & Internet.
- Scroll down to the bottom and click “Network Reset.
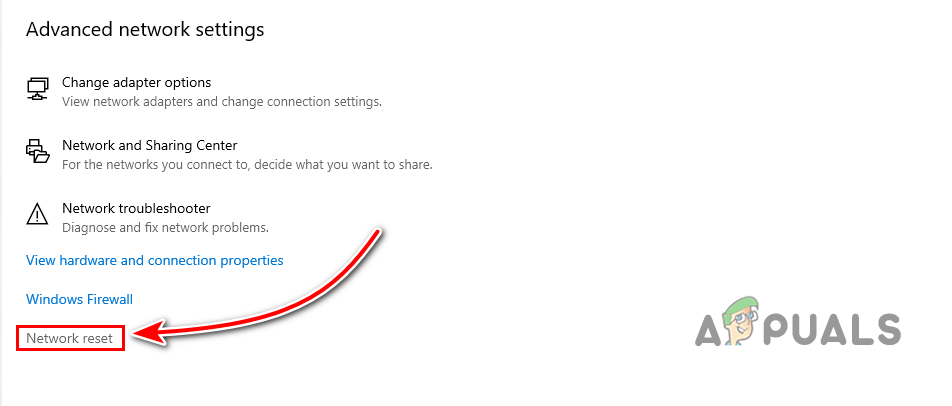
Click Network reset - Then click ‘Reset Now‘, and your PC will restart.
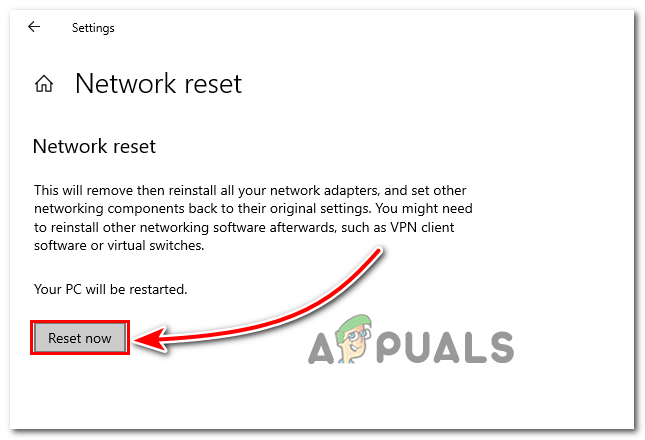
Reset Network Settings - Once completed, check if the slow internet issue on Windows 10 has been resolved.
10. Repair System Files using Commands.
Another way to resolve the slow internet problem is by running commands that will repair any corruption in Windows, which causes slow internet. Below are the commands that will help to repair Windows:
- Click the Start Menu, and type “Command Prompt” in the search bar.
- Right-click on the command prompt and choose “Run as Administrator.
- Once the command prompt has loaded, enter the following command and press Enter.
Sfc /scannow
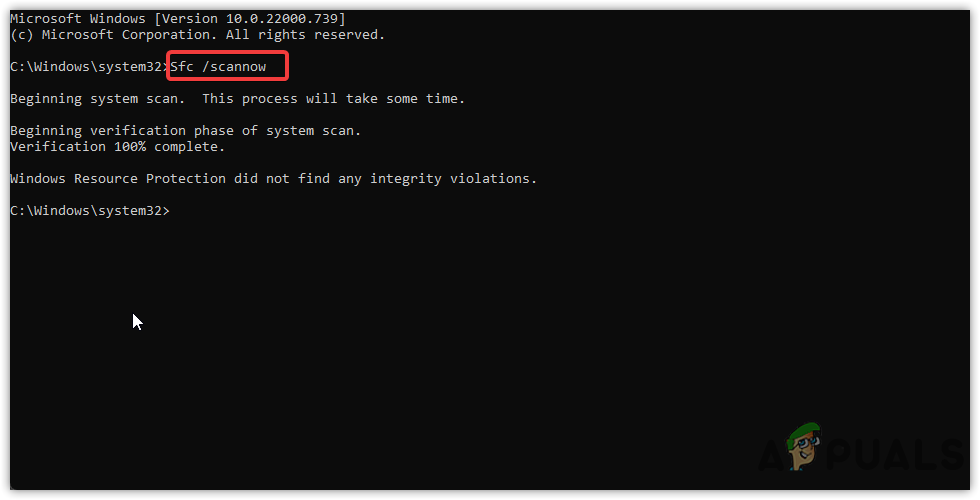
Run Commands to Repair Windows - Once completed, check if the issue is resolved.
11. Uninstall Microsoft OneNote.
Most people use Microsoft Office to do their work but also need Microsoft OneNote. According to users, running Microsoft OneNote for no reason can slow down internet speed. We recommend deleting it from your computer, as it aids in improving network performance.
- To uninstall Microsoft OneNote, go to Settings by pressing the Windows + I keys simultaneously.
- Navigate to Apps > Apps & Features.

Navigating to Apps - Now, find and select Microsoft OneNote, and then click on the three dots that will appear on the right.
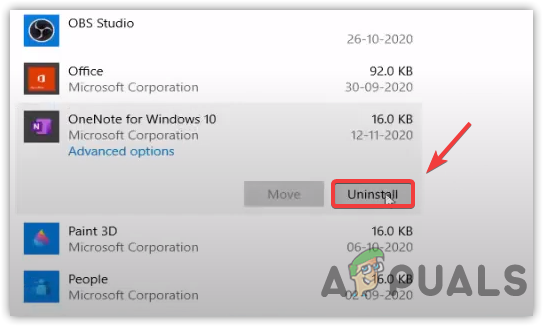
Uninstalling Microsoft OneNote - Click Uninstall, and then click Uninstall again to confirm.