How to Fix High CPU Usage from AVCTP on Windows 11?
High CPU usage caused by AVCTP on Windows 11 can lead to serious lag, apps becoming unresponsive, and your computer overheating. This usually happens after you connect Bluetooth headphones or speakers. AVCTP stands for Audio/Video Control Transport Protocol, and it controls Bluetooth media actions like play, pause, and skip.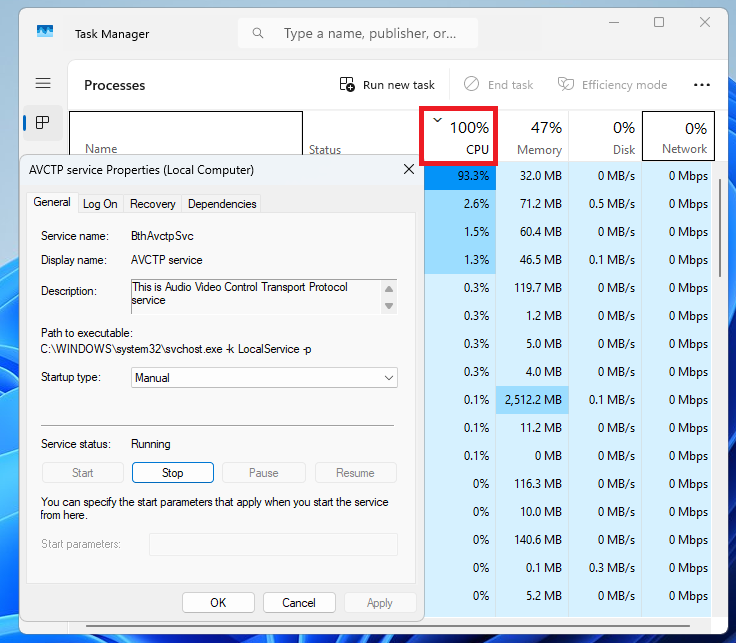
Most of the time, this problem happens because other programs, like Steam, Razer software, or antivirus apps, are interfering with Bluetooth functions. Other possible causes include using old Bluetooth drivers or having a recent Windows update that made AVCTP less stable.
In this article, we will discuss different ways to solve this error.
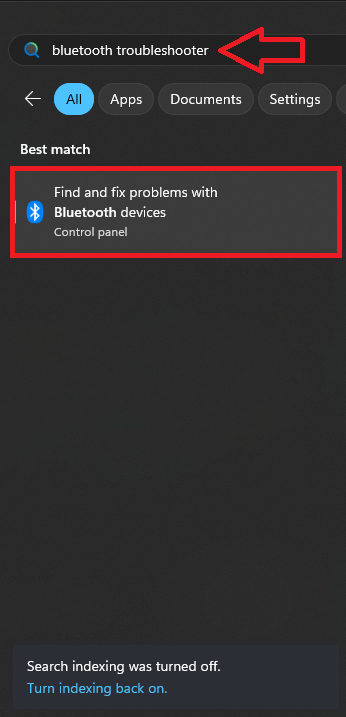
1. Run Bluetooth Troubleshooter
The Bluetooth troubleshooter is a built-in Windows tool that automatically detects and fixes many common Bluetooth issues.
- Open the Start menu, type Bluetooth Troubleshooter, and select it from the list.
- When the Bluetooth troubleshooter window opens, click Advanced, check the option Apply repairs automatically, and click Next.
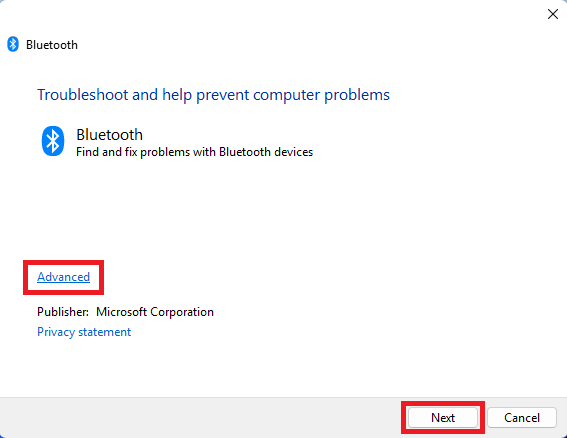
- Follow the on-screen instructions to complete the troubleshooting process.
2. Update Windows
Because AVCTP is a key part of how Bluetooth works on Windows 11, keeping Windows updated is important—it could resolve bugs or issues related to Bluetooth devices.
- Click the Start button, search for Settings, and open it.
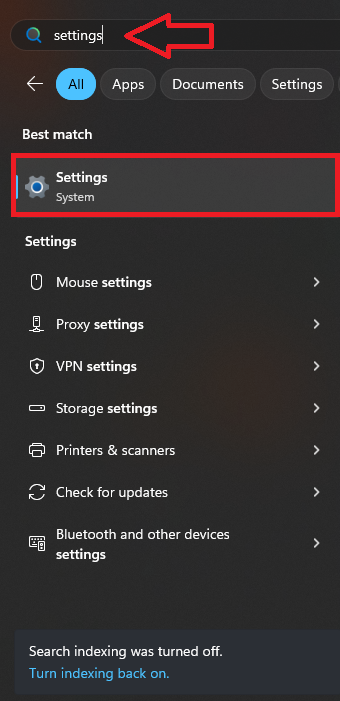
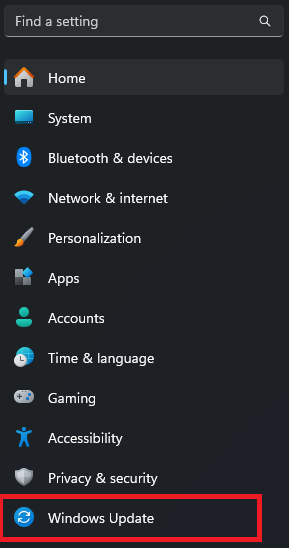
- In Settings, go to the Windows Update section on the left side.
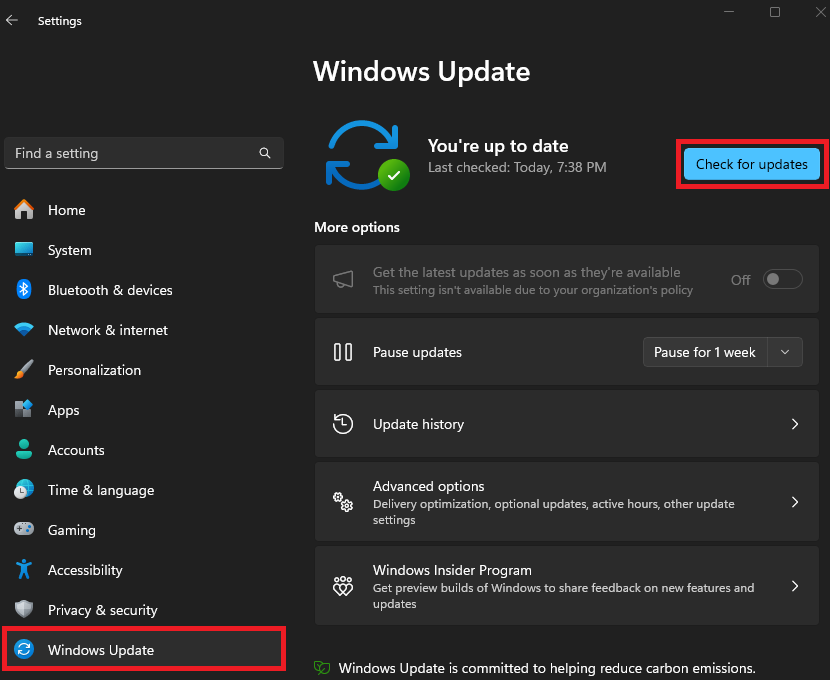
- Click Check for Updates so that Windows can find and install the latest updates automatically.
- Once the updates are installed, restart your PC to see if the problem has been fixed.
3. Update and Re-Install Bluetooth Drivers
Updating your Bluetooth drivers ensures your computer can communicate properly with Bluetooth devices. If updating doesn’t solve the problem, reinstalling the drivers might help.
- Press the Windows + R keys together to open the Run command. Type devmgmt.msc and press Enter to open Device Manager.

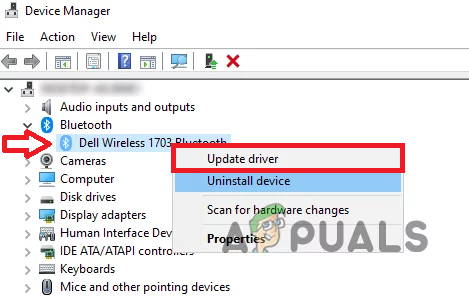
- In Device Manager, find the Bluetooth section, right-click your Bluetooth device, and choose Update Driver.
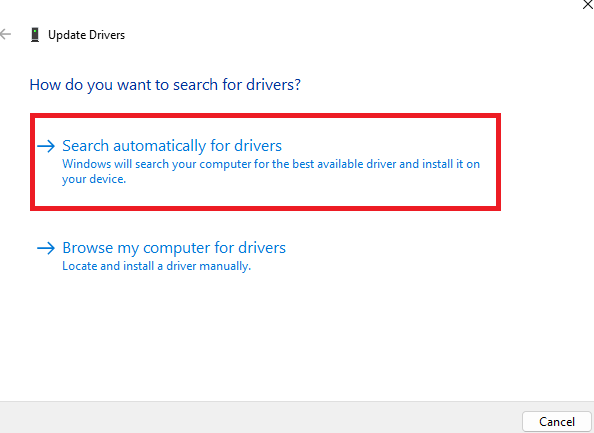
- Select Search automatically for drivers to let Windows find and install the best driver for your device.
- If the problem continues after updating, try reinstalling the Bluetooth drivers.
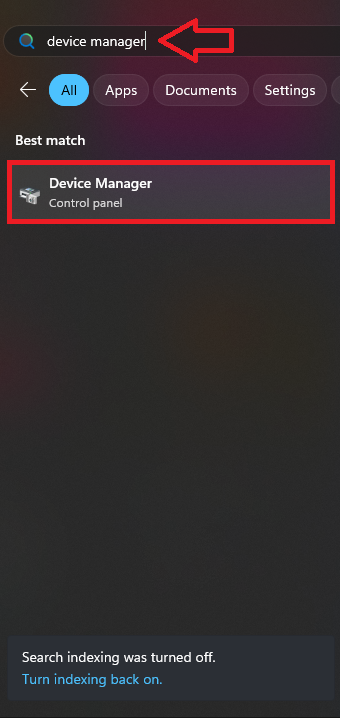
- Open the Start menu, search for Device Manager, and open it.
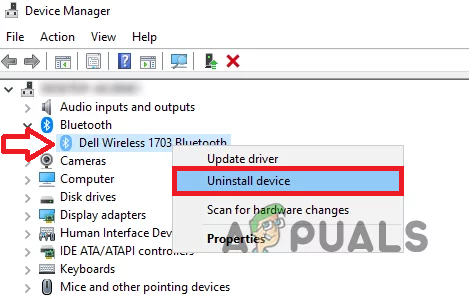
- Find Bluetooth, right-click it, and choose Uninstall Device.
- After uninstalling the driver, restart your computer. Windows will automatically install the Bluetooth driver again.
- Check to see if this fixed the issue.
4. Disable AVCTP Service
Turning off the AVCTP service from the Services Management Console may fix the high CPU issue, but keep in mind this will also disable the ability to control play, pause, and other media commands from your Bluetooth device. We recommend you try restarting the AVCTP service before disabling it, just to see if that’s enough.
- Open the Start menu, search for Services, and click to open it.

- Find the AVCTP service and double-click it.
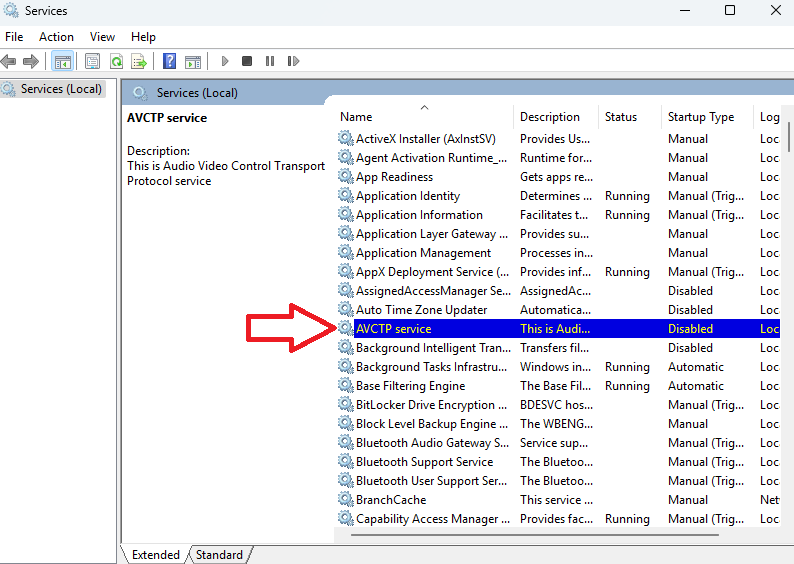
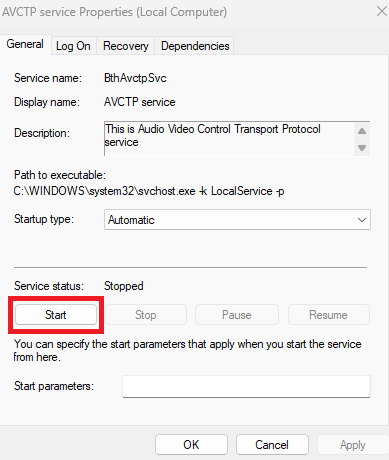
- Click Stop to end the service.
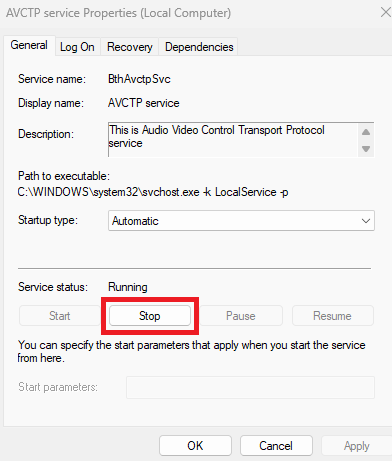
- Then, click Start to restart the service. Check if the high CPU usage problem is gone.
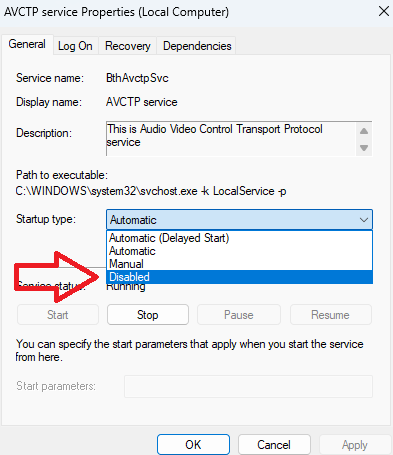
- If you’re still facing the issue, go back to Services Management Console > AVCTP service, then set Startup type to Disabled.
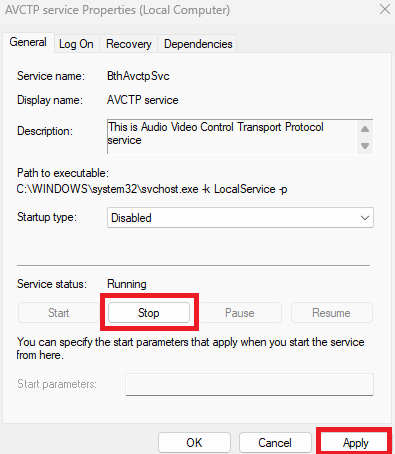
- After setting it to disabled, click Stop, then Apply and OK.
5. Reset Windows
If none of the above solutions work, resetting Windows might be your last option. This will restore Windows to its original state by fixing any missing or corrupt files. However, resetting Windows will remove your apps and may delete your personal files, so make sure to back up anything important before proceeding.
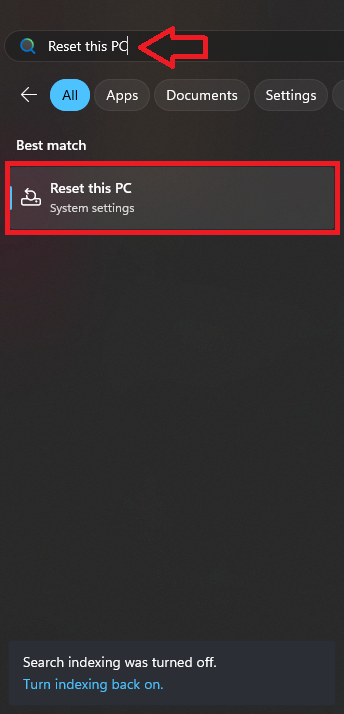
- Open the Start menu, search for Reset this PC, and click on it.
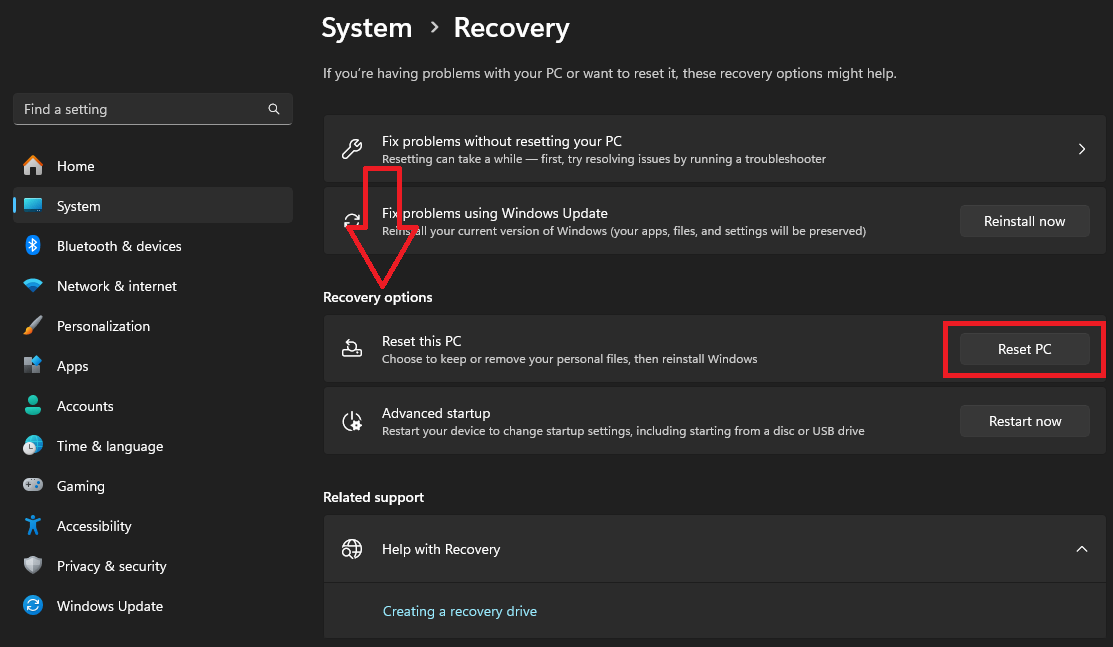
- Click the Reset this PC button under Recovery options.
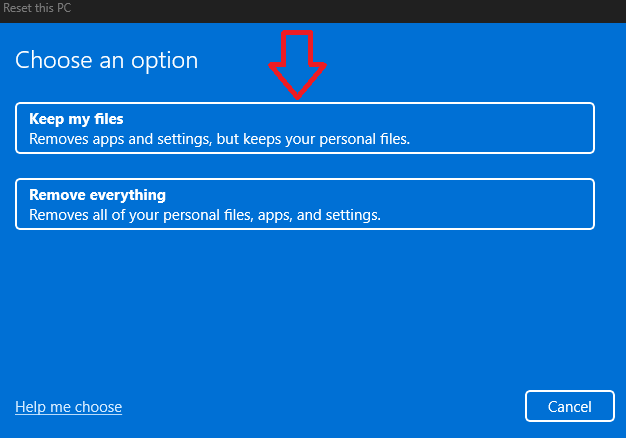
- Choose Keep my files if you want to save your personal files—note that this will still remove your installed apps and settings. Otherwise, pick Remove everything for a totally fresh start.
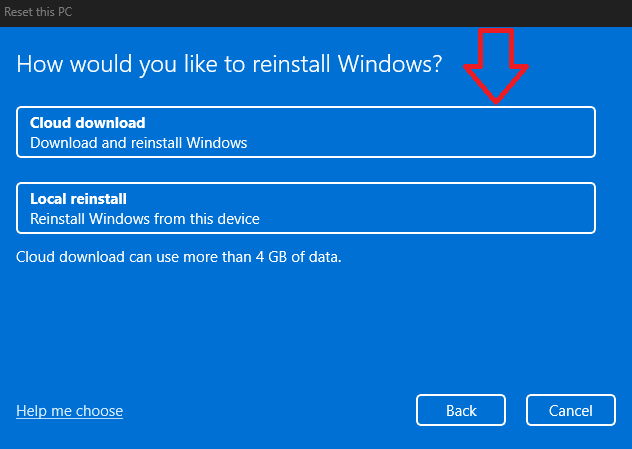
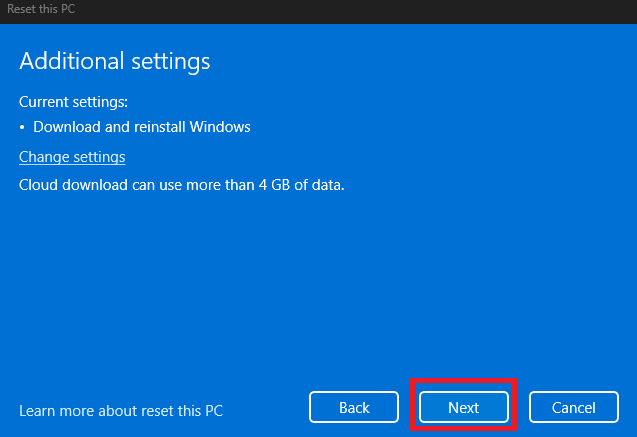
- When prompted, select Cloud Download. This will allow Windows to download and replace any damaged system files.
- Click Next to move on.
- Finally, choose Reset to start the process. Windows will show you one last summary of your choices before beginning.
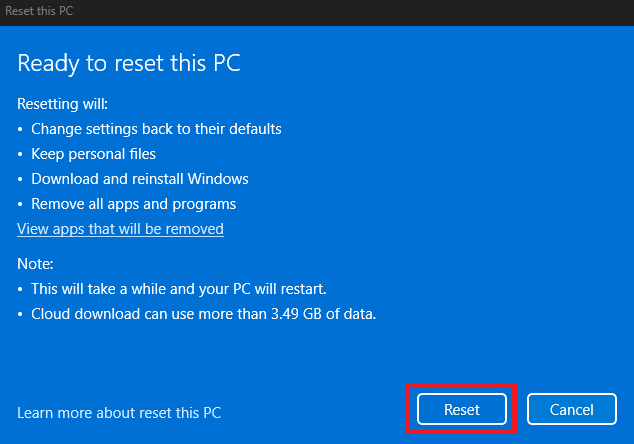
- The reset may take a while to finish, but your issue should be resolved after it completes.