How to Fix Audio Renderer Error on YouTube
The Audio Renderer Error usually appears when your system can’t properly process or play audio. Some common reasons why YouTube might not play audio correctly include problems with your audio drivers, audio settings, browser issues, and more. Let’s take a closer look at how you can quickly troubleshoot these problems and fix the Audio Renderer Error.
1. Restart Your Computer
One of the easiest and fastest ways to solve this issue is by restarting your computer. The error message itself says, “Audio renderer error. Please restart your computer.” This simple restart is the most straightforward solution and should be your first step. Since the error might be a random glitch, rebooting your system often fixes it right away. If it doesn’t, keep reading for more troubleshooting steps.
2. Replug Audio Devices

After restarting, the next simplest solution is to replug your audio devices. Whether you use USB headphones, a headphone jack, or a wireless device, unplug them, wait a few seconds, and plug them back in. After that, try restarting your computer once more and check YouTube again to see if the problem is resolved.
3. Clear Browser Cache and Cookies
Since most people use YouTube in a web browser, it’s possible the browser is causing the issue. To rule this out, we recommend clearing your browser cache and cookies. This can remove any corrupted or outdated data that might be causing problems. While cache and cookies can make browsing faster, they are often the reason behind certain errors.
For this guide, we’ll use Google Chrome as an example. If you use another browser like Microsoft Edge, Opera, or others, the steps are very similar, and you’ll usually find the right settings in the same place.
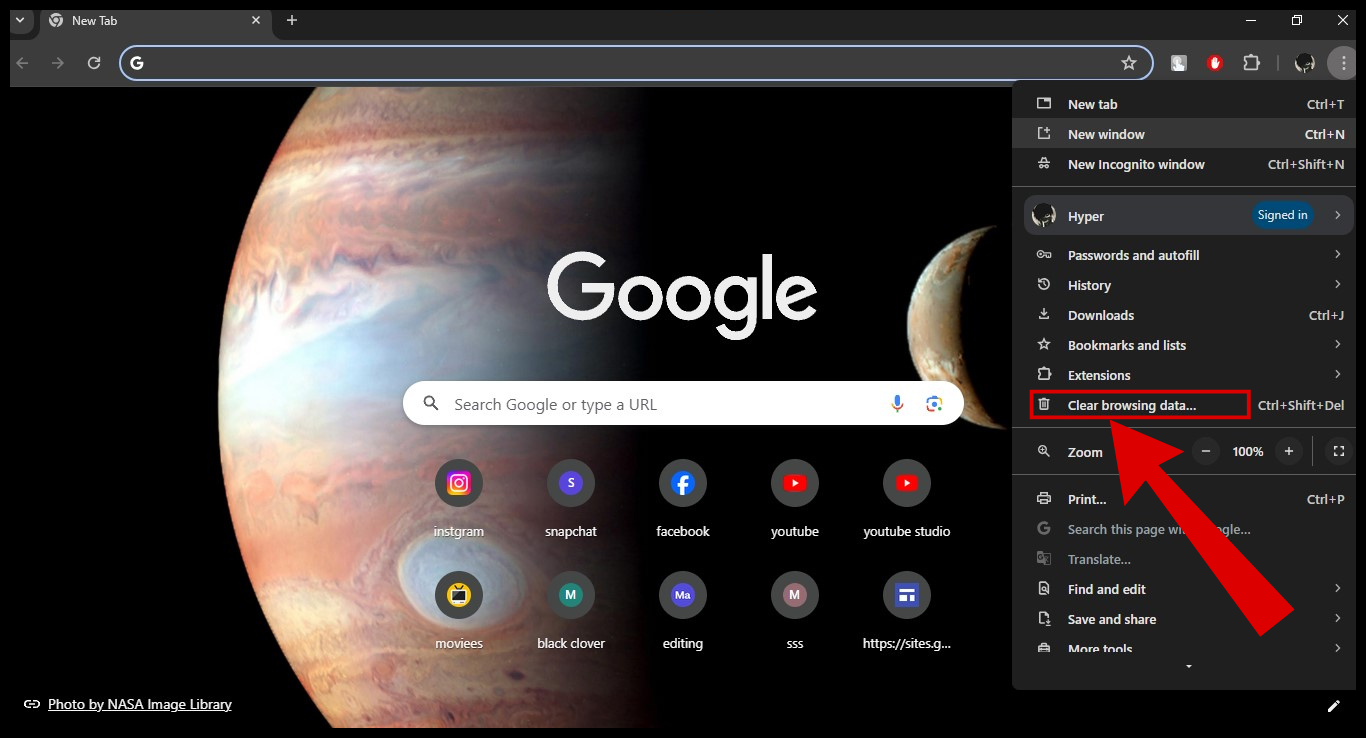
- Open Google Chrome and click the three vertical dots at the top right.
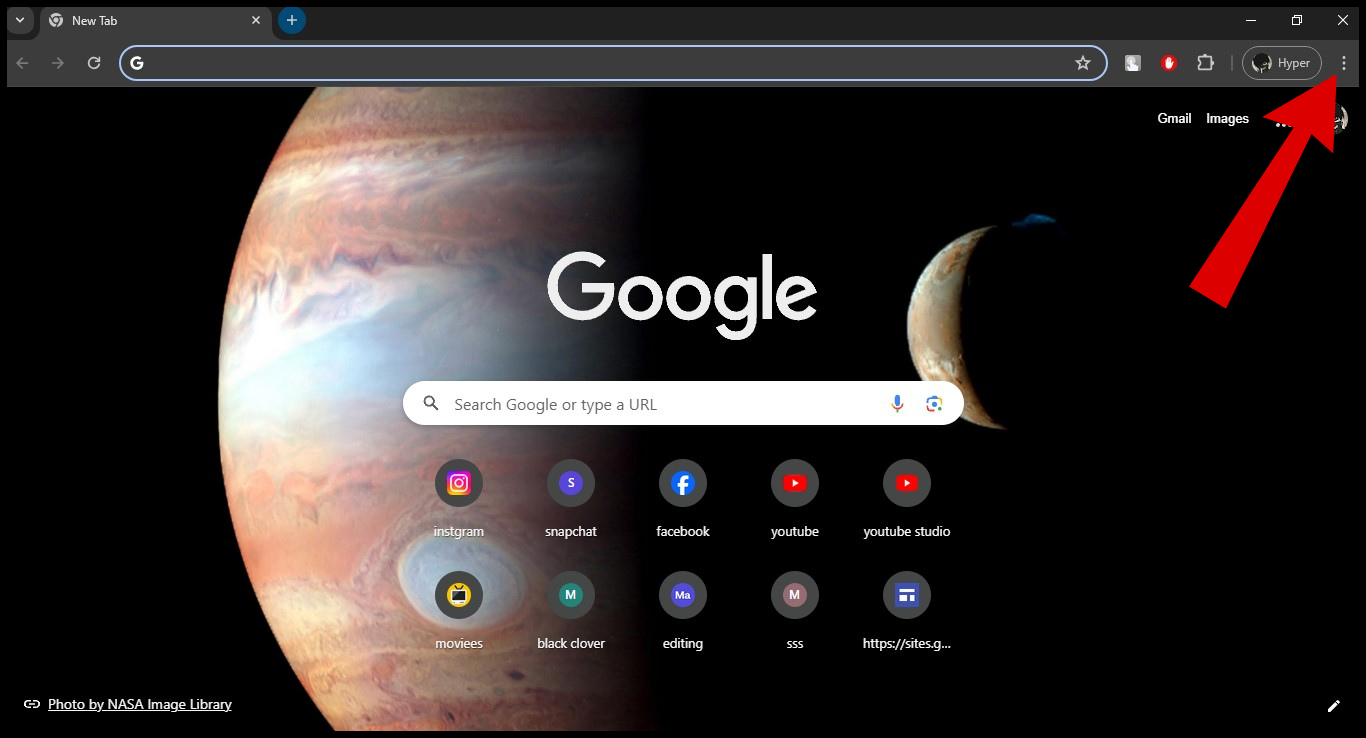 Click on the three dots
 - Choose the Clear Browsing Data option and click it.
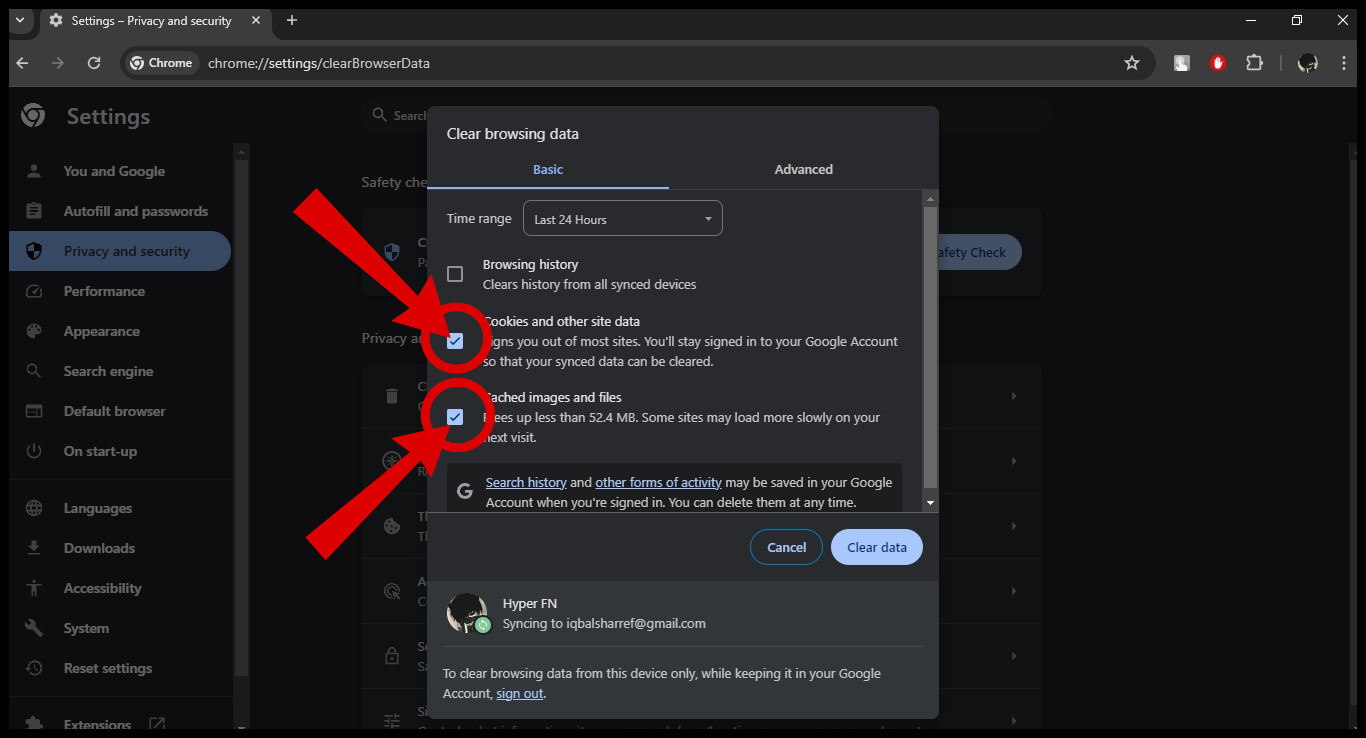
Clear Browsing data - You’ll go directly to the right menu. Here, uncheck the box for Browsing History and check the boxes for Cookies and Cached files.
Check the two boxes - Finally, click Clear data and you’re all set.
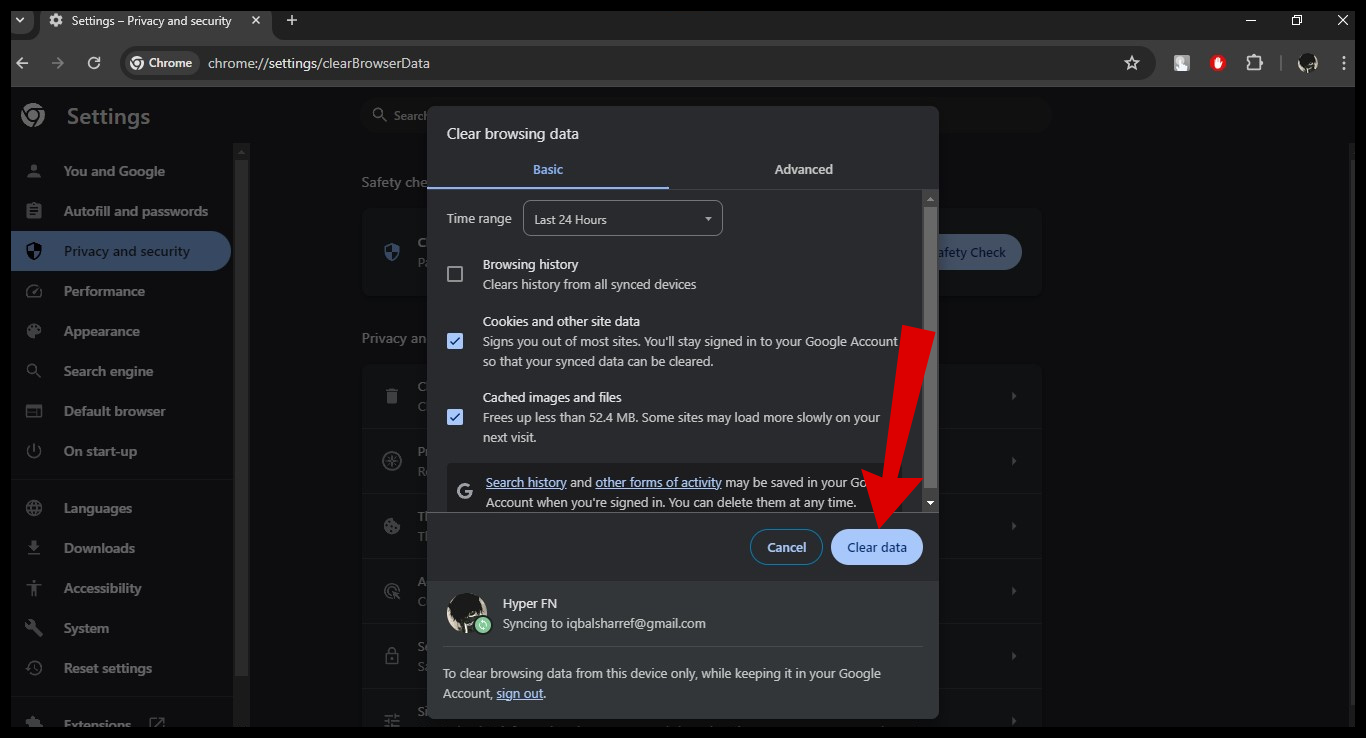
Hit Clear data
4. Restart the Audio Driver
Before you try updating or rolling back your audio drivers, it’s a good idea to simply restart your audio driver. This won’t change anything in your driver settings—it just gives the driver a fresh start and may fix bugs or glitches. Here’s how you can restart your audio driver:
- Click on the Windows Search bar and type Device Manager. Select the best match from the results.

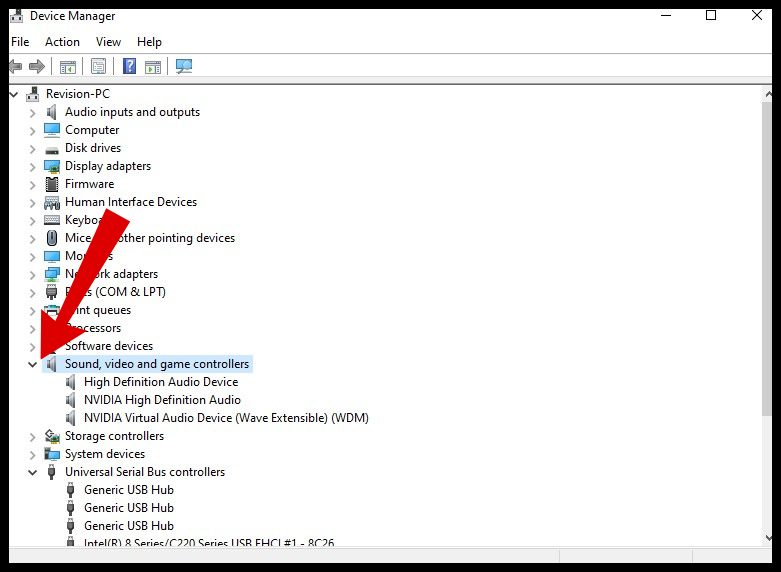
Type Device Manager - Look for “Sound, video, and game controllers” and double-click to expand it.
Double-click to expand - Find your audio driver, right-click on it, and a menu will appear.
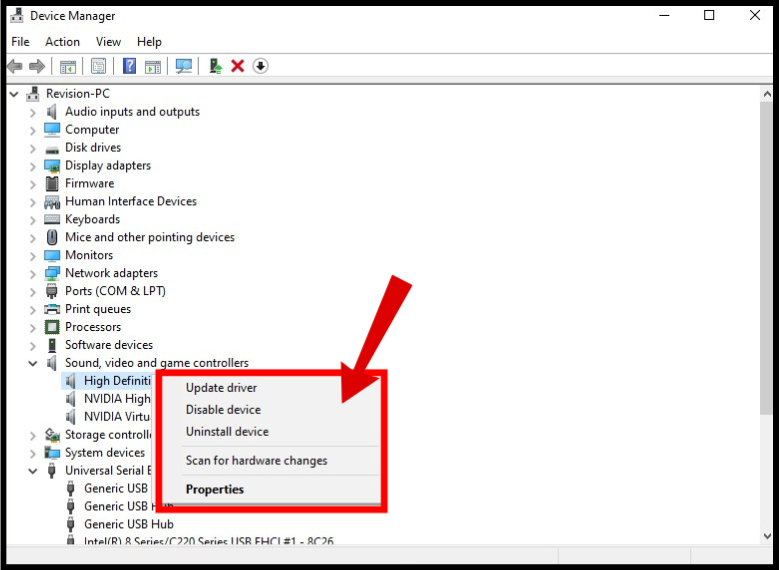
Open this menu - Select Disable Device from the list.
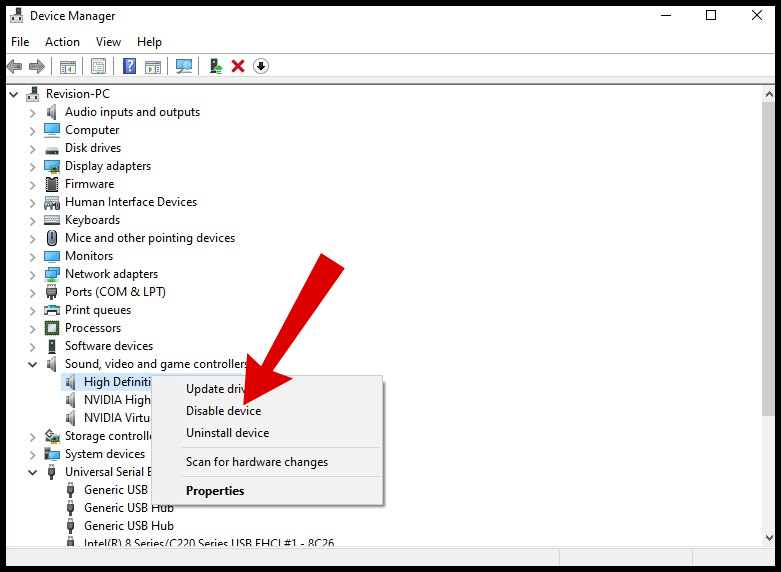 Disable device
 - A confirmation pop-up will appear. Click Yes to continue.
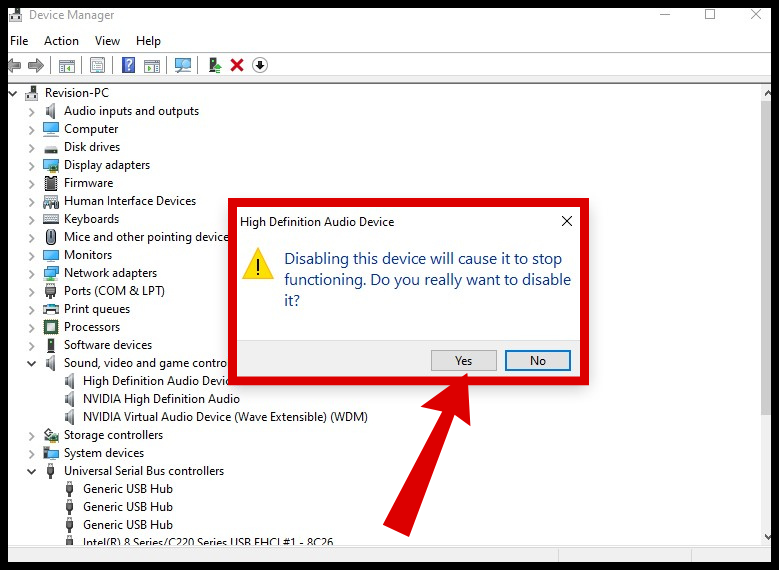
Select yes to confirm - Wait a minute or two, then return to the menu and select Enable Device. Finally, reopen YouTube to check if the problem is gone.
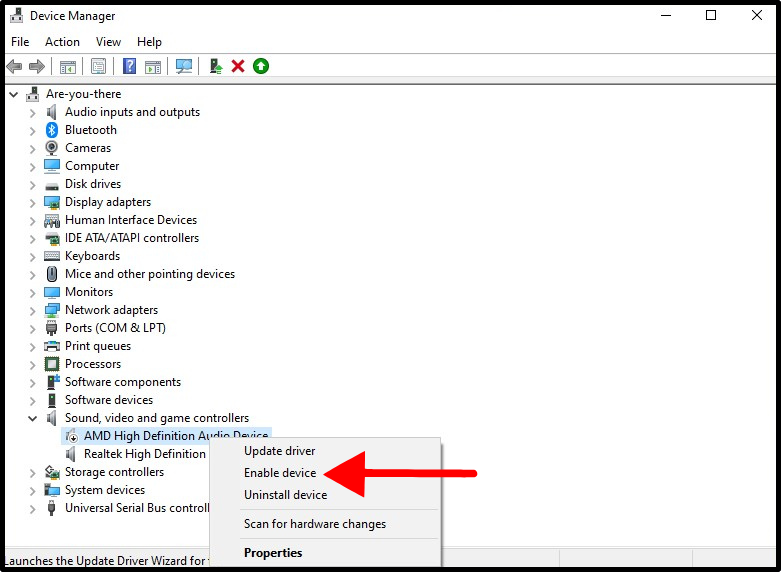
Press Enable device
5. Update the Audio Driver
If restarting your audio driver doesn’t help, your next step should be to update it to the latest version. To update your audio driver, follow the same steps as restarting it, but choose a different option:
- After you right-click your audio driver, choose Update Driver.

Update your driver - A new window will appear. Choose “Search automatically for updated driver software,” and let Windows search for the latest drivers.
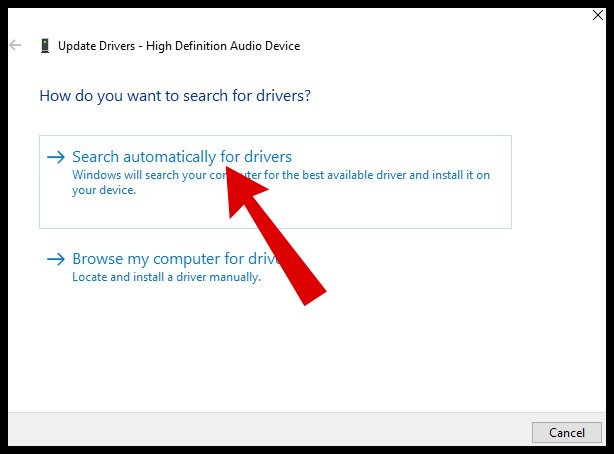 Select the first option
6. Reinstall Your Audio Driver
If Windows can’t find any updates for your driver, or if updating doesn’t help, the last step for driver issues is to reinstall your audio driver. Windows will install the right driver automatically after you uninstall it, so there’s no risk. Usually, reinstalling gives you a more stable and updated version.
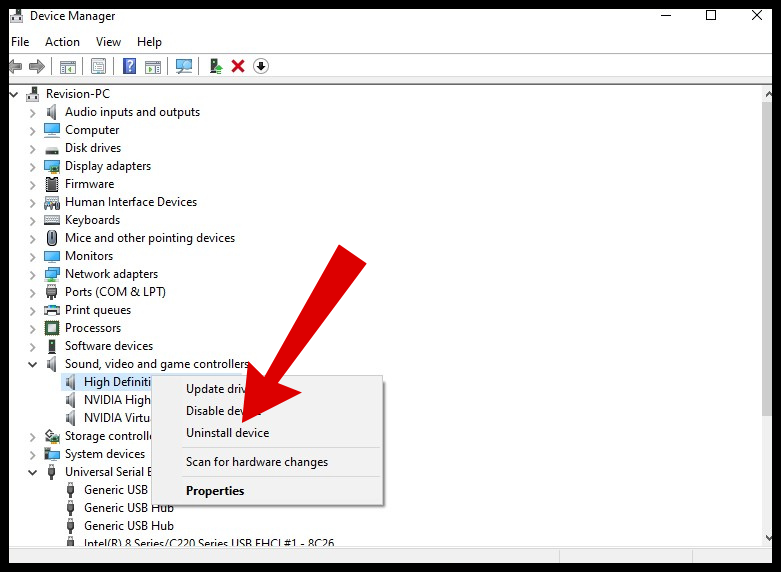
Uninstalling your audio driver is almost the same as the previous steps. Just select Uninstall device, and confirm when asked. The driver will uninstall immediately. To reinstall it, restart your computer, and Windows will do the rest automatically.
7. Run the Audio Troubleshooter
Windows includes built-in troubleshooters to help fix minor problems with your system. Since this is an audio-related error, the audio troubleshooter can help you find the cause and suggest possible fixes.
- Click the Windows Search bar and search for “Troubleshooting settings“.
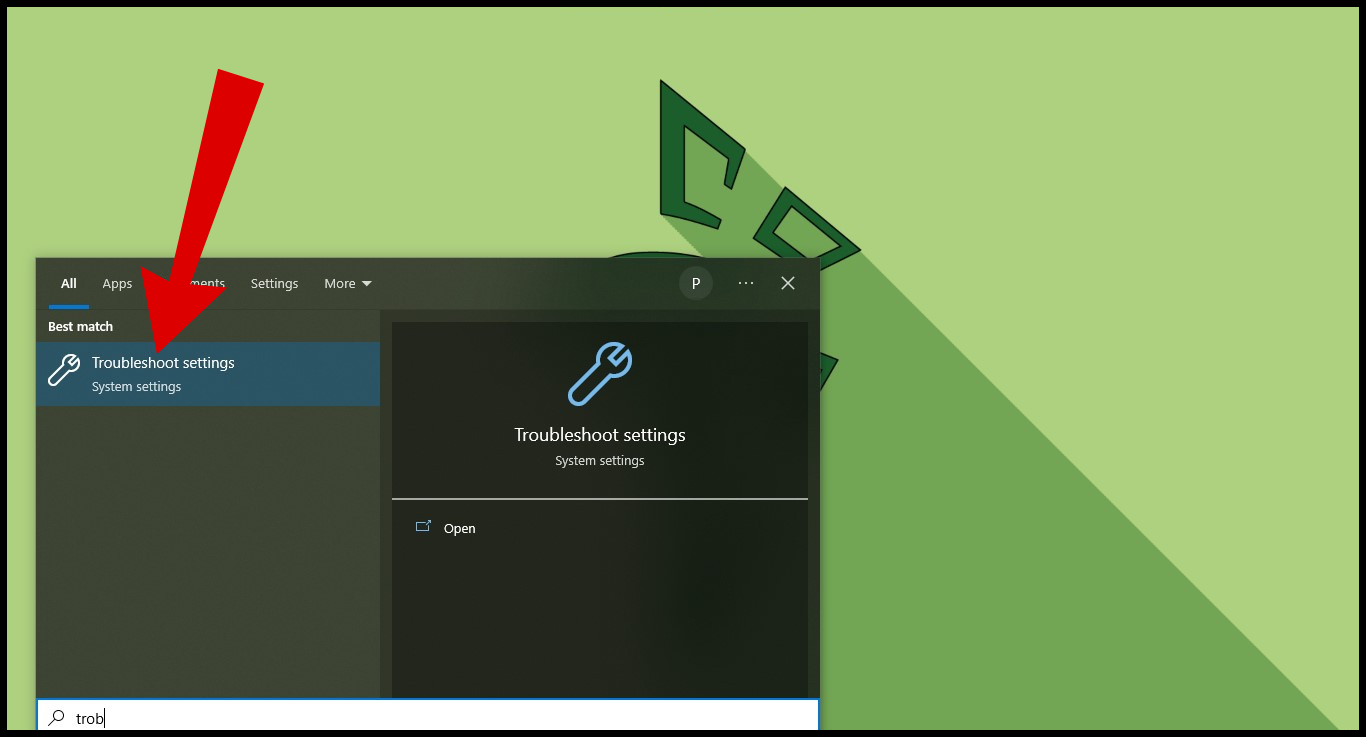
Search Troubleshooting Settings - Click on Additional troubleshooter to see all options.
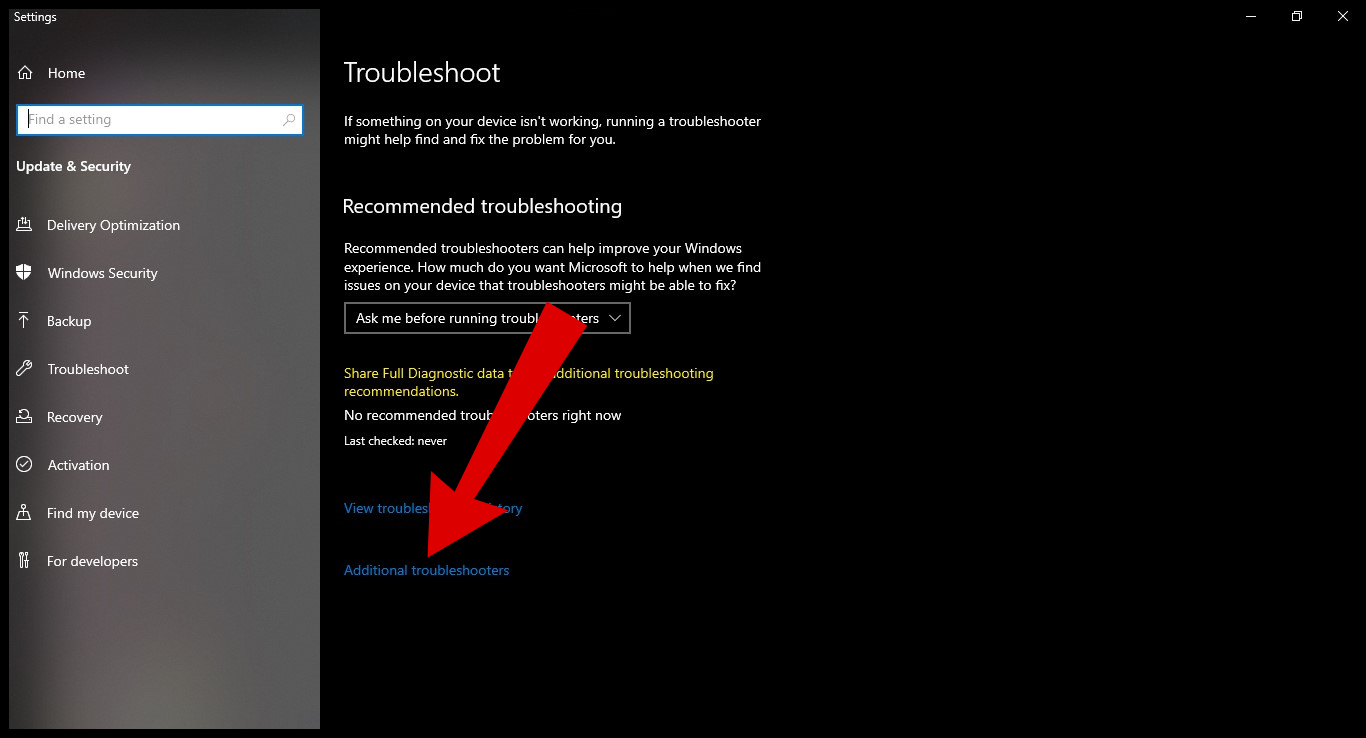
Click on Additional settings - Under the Get up and running section, click Playing Audio and select Run the troubleshooter.
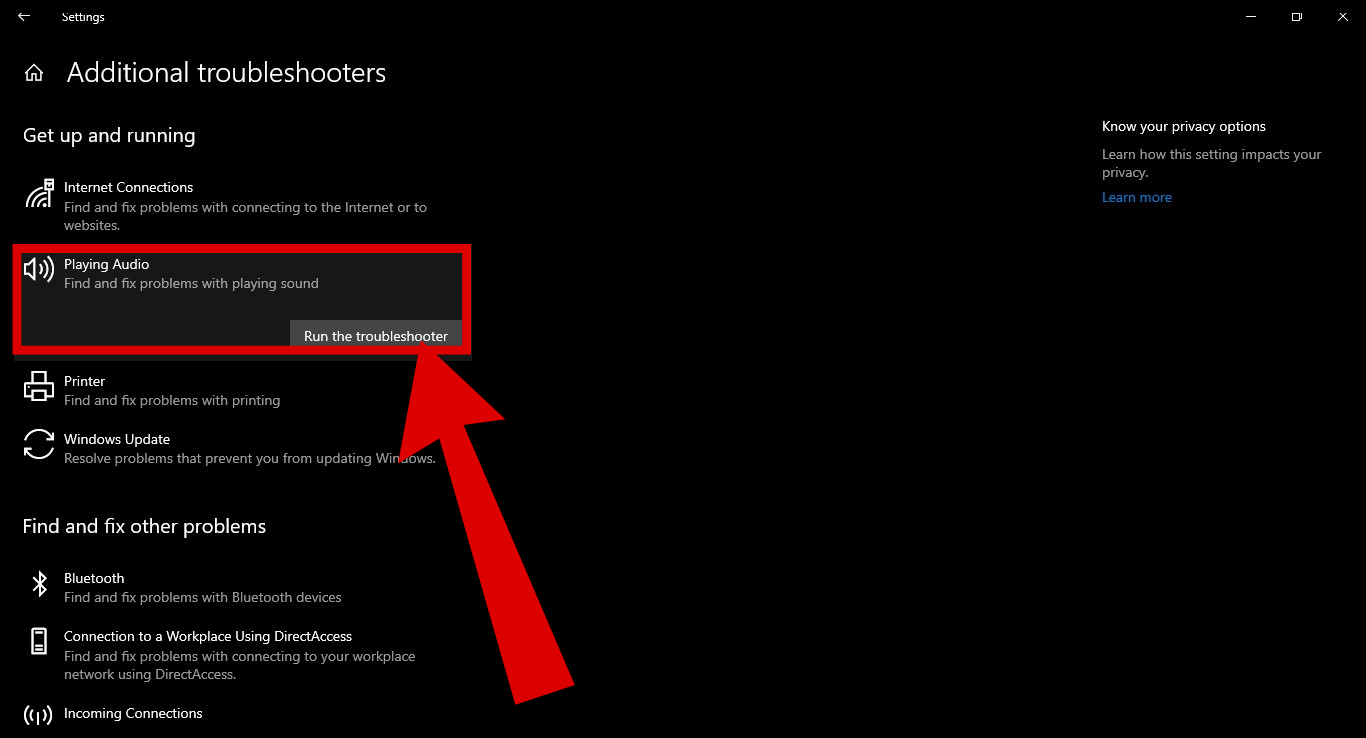
Run the troubleshooter - The audio troubleshooter will start and try to find any issues, then offer steps to fix them.
8. Disable Audio Enhancements
There’s also a setting called Audio Enhancements that can cause problems. While these enhancements are meant to improve sound quality, they sometimes conflict with some devices. To be safe, it’s a good idea to disable audio enhancements.
- Open the Windows Search bar and type Sound Settings.
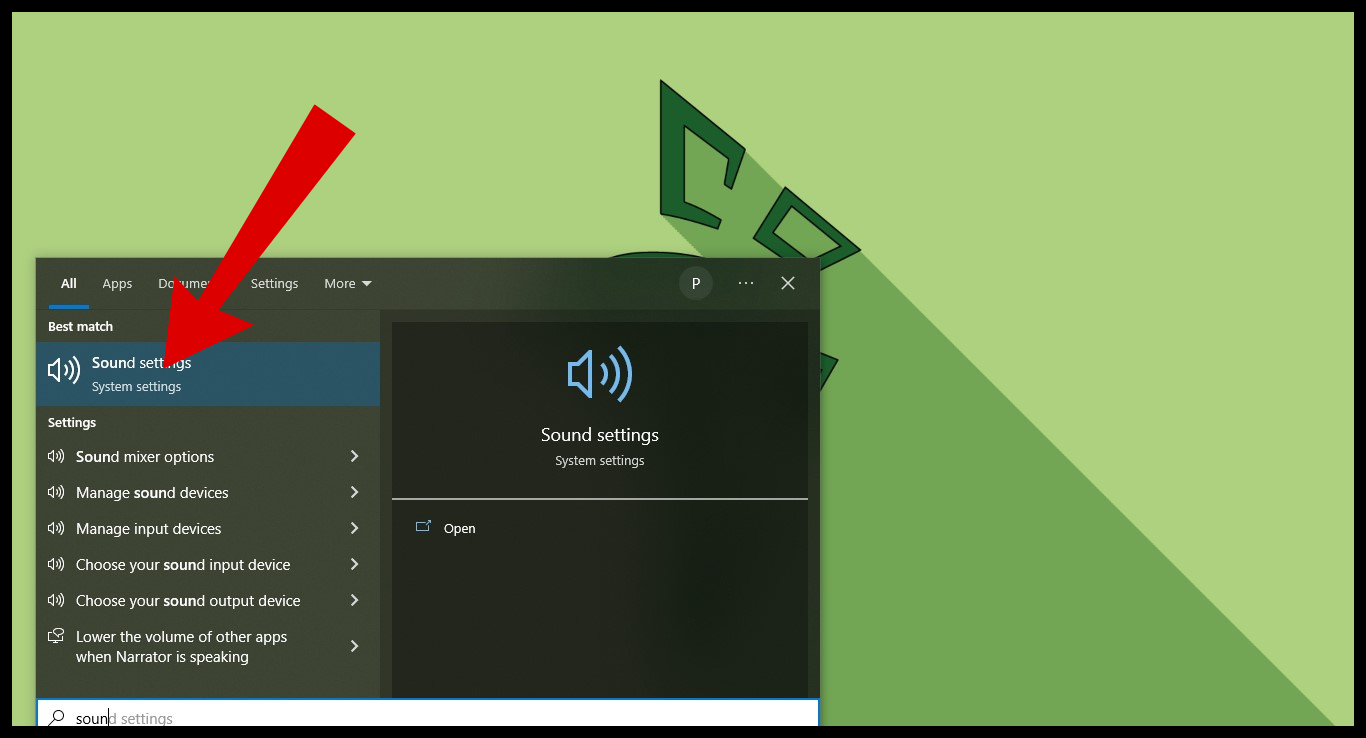
Search for Sound settings - Click on Device properties.
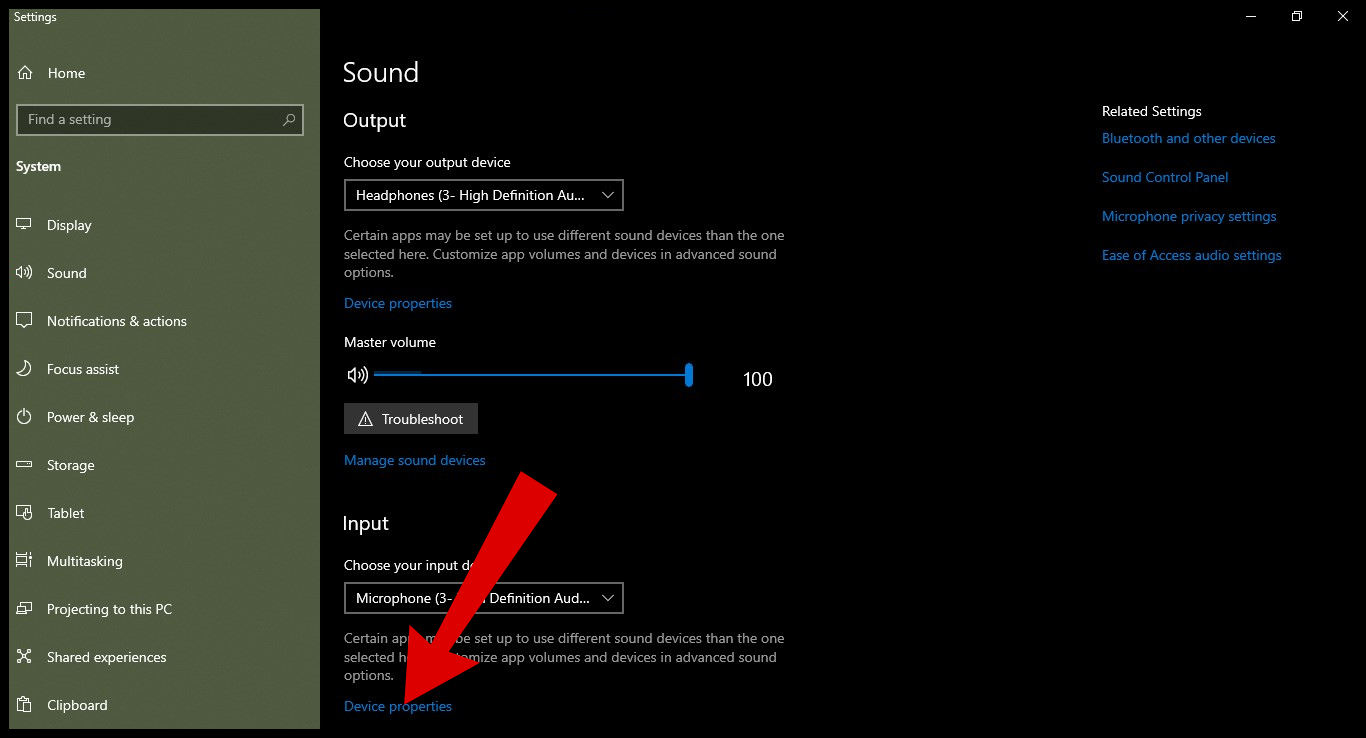
Click on Device properties - On the right, find the Related Settings section and click Additional device properties.
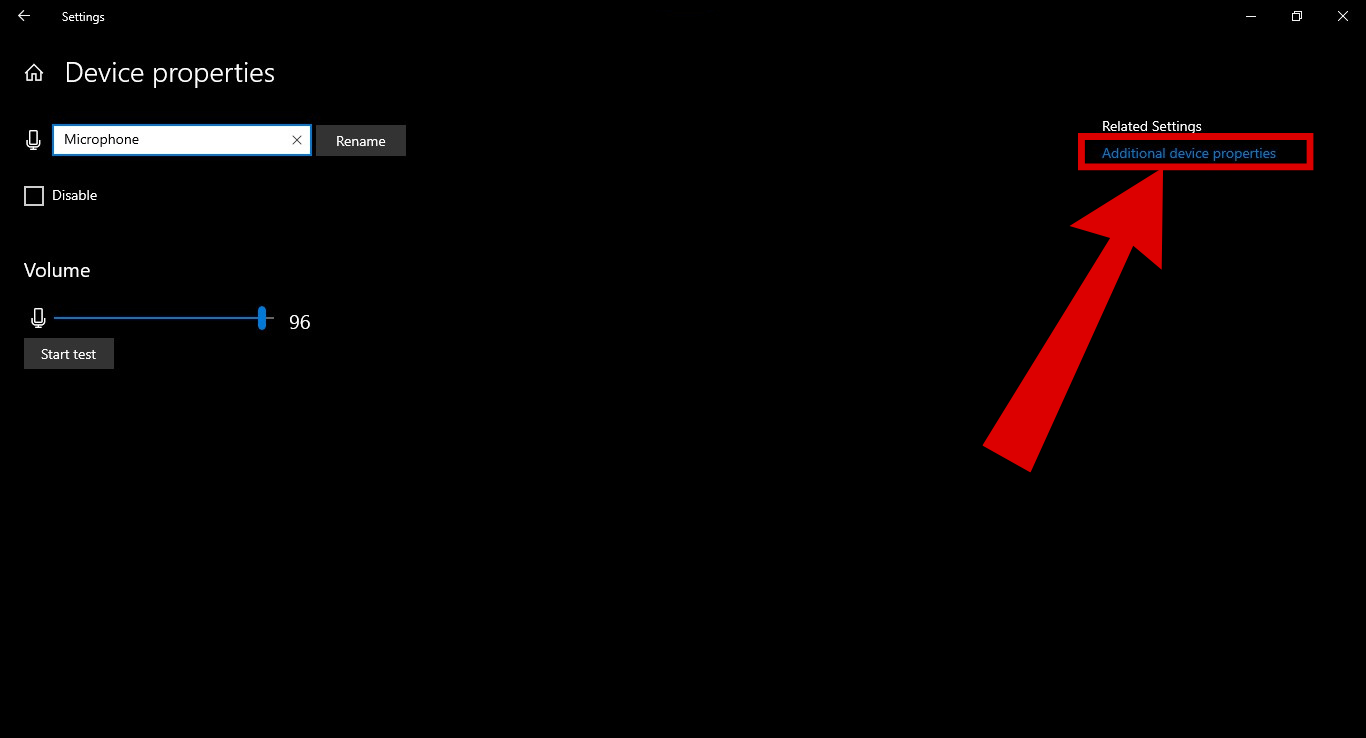
Click on Additional Device properties - When the menu opens, go to the Enhancements tab. Then select Disable all sound effects.
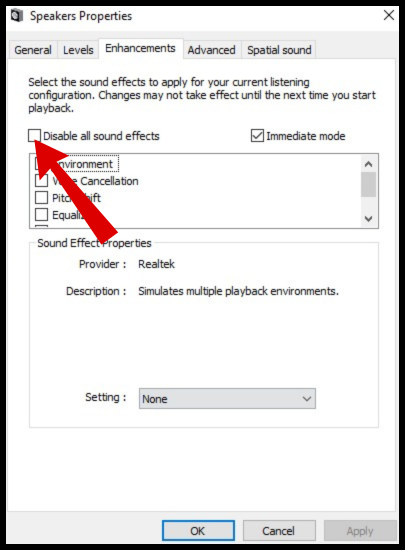
Disable sound effects
It’s never fun to run into errors, especially when you just want to enjoy a video on YouTube. However, with these straightforward solutions, you should be able to fix the Audio Renderer Error in no time. Let us know in the comments which solution worked for you!