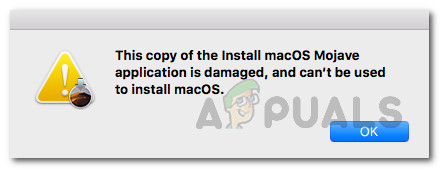
[FIX] Application is Damaged and Can’t be Used to Install macOS
The error usually shows up when you try to install macOS, either by starting the installer from the Applications folder or by using a bootable USB drive. This error means the installer is marked as “damaged” because its certificate has expired or some important files needed for verification are missing.
The most common reason is using an old installer whose certificate is past its expiry date. Other reasons include a corrupted download or missing key files, like InstallInfo.plist.
In this article, we will discuss different ways to solve this error.
1. Change Your Mac’s Date
The error appears because the installer’s certificate has expired. You can often solve this by setting your Mac’s date to a time before the certificate expired. To do this, you need to make sure your Mac is completely disconnected from the internet, otherwise it will automatically update the date and time from Apple’s servers, which would defeat the purpose of this fix. Once you set the correct date, the installer should be recognized as valid.
- First, disconnect your Mac from the internet. Unplug any Ethernet cables, and it’s best to switch off your modem or router.
- Next, plug in your installation media (like your USB drive) and restart your Mac.
- As your Mac boots, hold down the Option key to bring up the disk selection screen.
- Select your USB installer. Your Mac should boot into the macOS Utilities screen.
- On this screen, open the Terminal by clicking Utilities in the menu bar, then selecting Terminal from the dropdown.
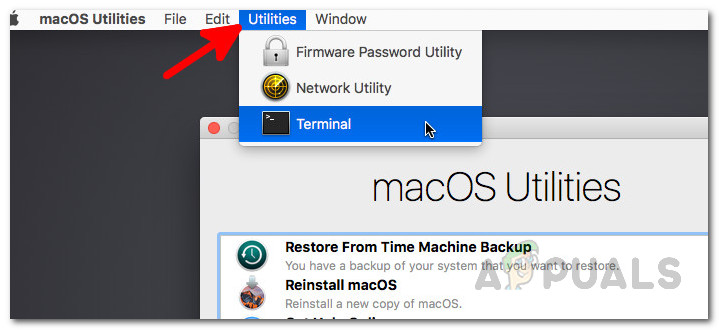
Accessing Terminal - Once Terminal is open, you need to figure out the date your installer was made. First, go to the root directory by typing cd /, then type stat Install\ macOS\ Mojave.app (replace the installer name if you’re using a different version). This will show you when the installer was downloaded. Set your Mac’s date to one day before that.
- Change the date by entering this command (fill in your date and time details):
date [mm][dd][HH][MM][yyyy]
- For example, type date 051817122015 for May 18th, 17:12, 2015. (Do not add spaces.)

Changing Date - Once the date is set, close Terminal and try running the installer again. The error should be resolved.
2. Delete the Property List (.plist) File
Another way to solve this is by deleting the installer’s property list file (.plist). These files store settings and preferences for apps. In this case, the installer’s .plist file might be corrupted or outdated. Deleting it can clear the error, but you’ll need your admin password to do it.
- Open your Applications folder via Finder.
- Find the installer, right-click it, and choose Show Package Contents from the menu.

Accessing Package Contents - In the window that opens, go into the Contents folder, then open SharedSupport.
- Find and delete the file called InstallInfo.plist.

Installer Package Contents - Enter your administrator password when prompted.
- Now, try running the installer again to see if the problem is fixed.
3. Reset Your Mac’s SMC
The SMC (System Management Controller) controls many important functions on your Mac—like power, sleep, and other system management tasks. Sometimes, resetting the SMC can resolve unexpected issues, and it’s helped other users fix this particular problem as well.
3.1. Macs with Non-Removable Battery
- Shut down your Mac.
- Plug in the power cord.
- Hold down the Control + Shift + Option + Power keys for about 5 seconds, then release them all.
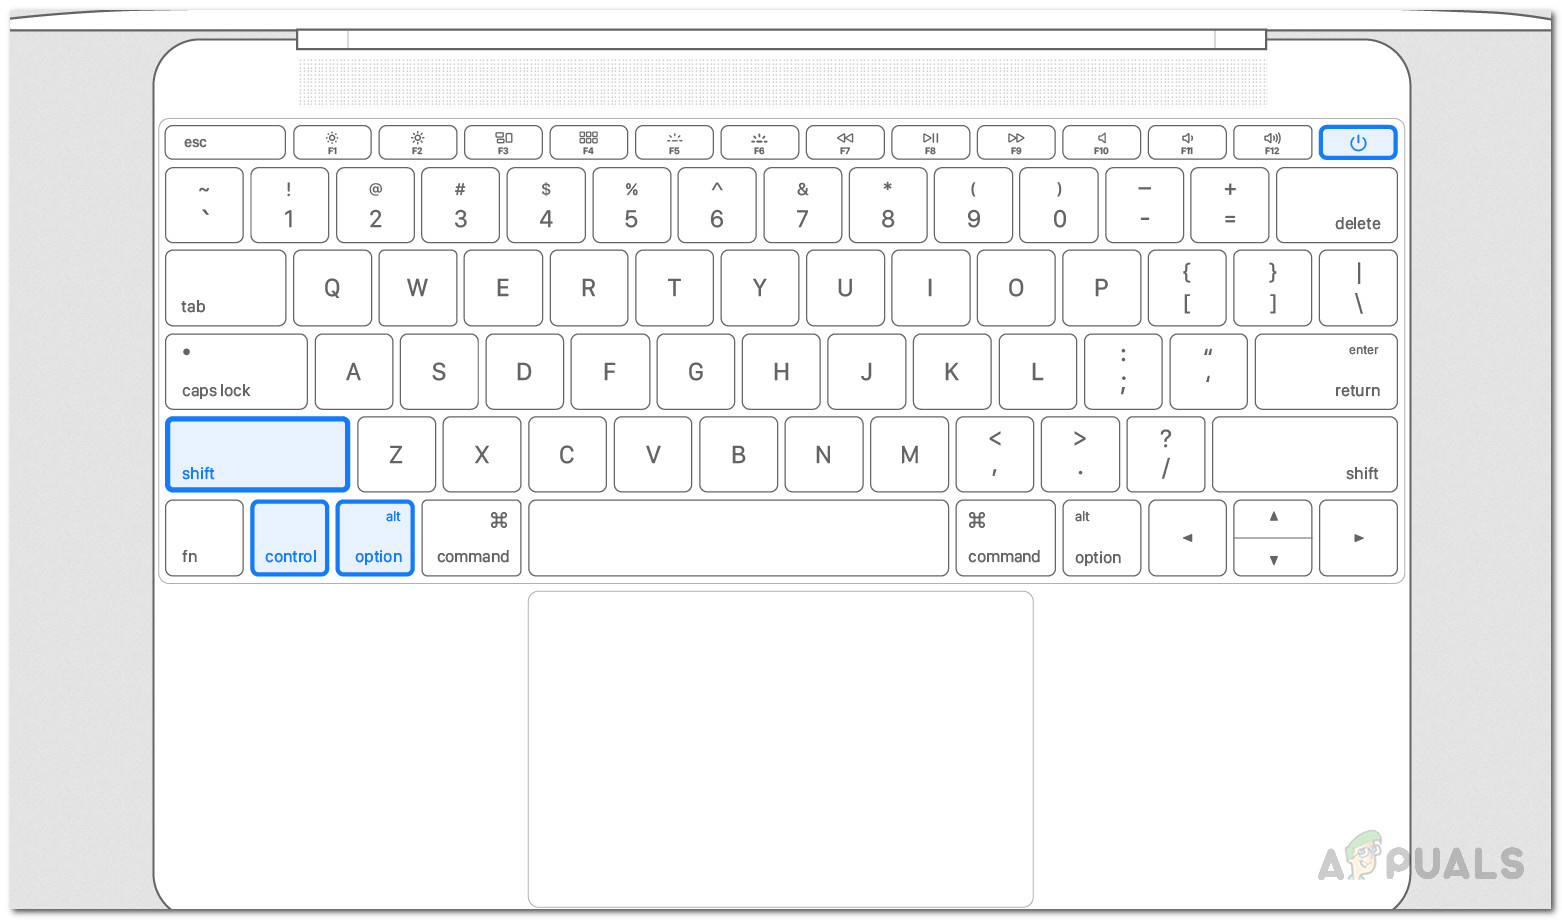
Resetting SMC - Now, turn your Mac on as usual.
3.2. Macs with Removable Battery
- Power off your Mac, then remove the battery.
- Disconnect the power cable. After that, press and hold the Power button for at least 5 seconds.
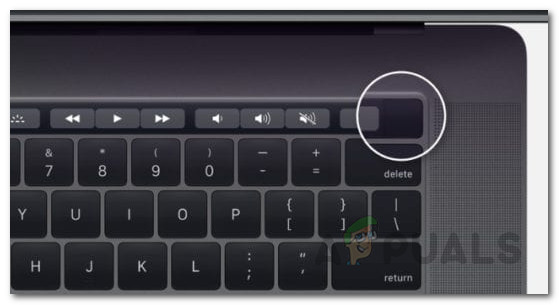
Mac Power Button - Reconnect the battery and turn your Mac back on.
3.3. Mac Mini, iMac, and Mac Pro
- Shut down your Mac and unplug the power cord.
Power Cord - Wait about 15 seconds.
- Plug the power cord back in and wait for 5 more seconds.
- Now, turn on your Mac to check if the error is gone.
4. Delete and Re-Download the Installer
If none of the above fixes work, the best solution is to delete your current installer and download a fresh copy from the App Store or Apple’s website. New installers come with up-to-date certificates, so you shouldn’t run into this issue.
- Open Finder and navigate to where your installer is saved.
- Right-click on the installer and select Move to Trash.
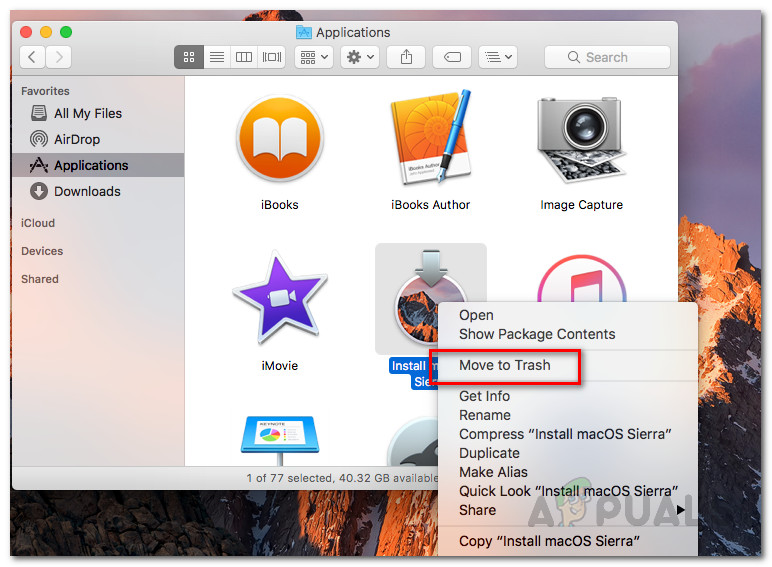
Trashing Installer - Be sure to empty your Trash afterwards to fully remove the old installer.
- Download the latest version of the installer again.
- This should permanently solve the issue.


