How to Fix Apex Legends ‘Error Code 100’
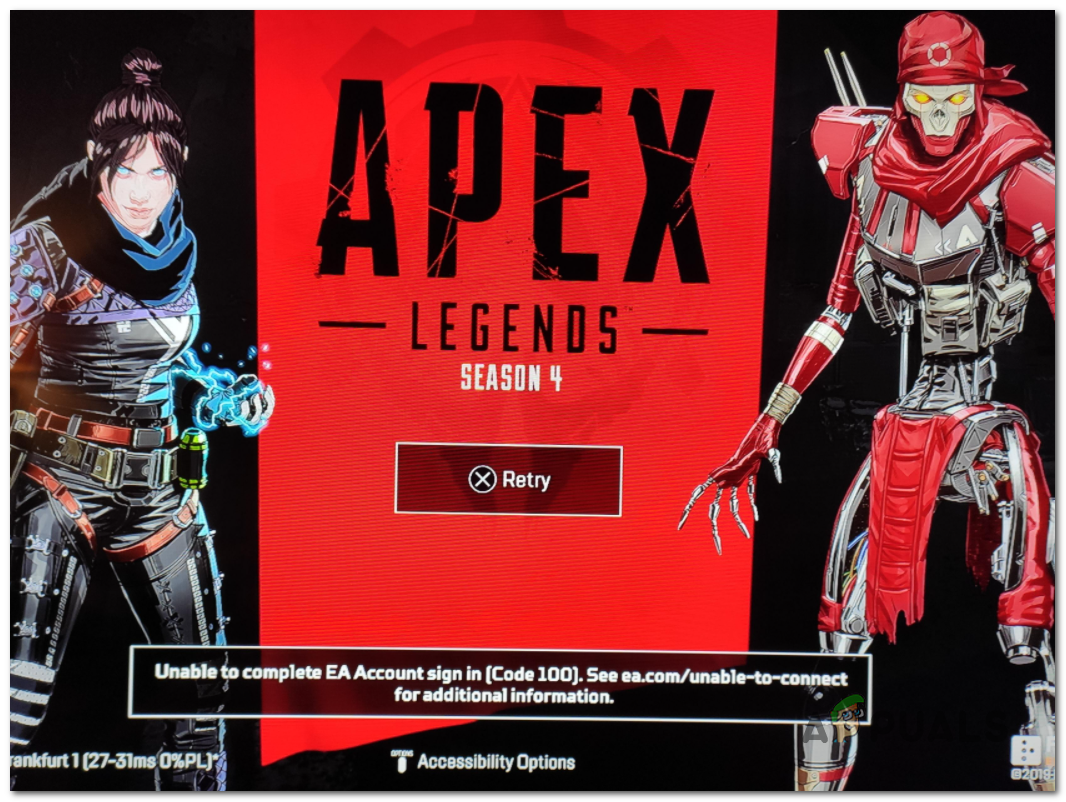
Apex Legends might not connect to EA servers and show ‘Error Code 100‘ on the login screen, stopping you from playing. This error means the game can’t confirm your account with EA’s servers. The most common reasons are incorrect DNS settings or problems with your internet connection.
Sometimes, it can also happen because your Origin or Steam login details are outdated, two-factor authentication is not working properly, or there are server issues in your region.
In this article, we will discuss different ways to solve this error.
1. Check for EA Server Issues
Before trying any of the fixes below, make sure the problem isn’t something global that you can’t control. As other players have reported, this error code can sometimes show up because of server issues affecting all of EA’s servers.
To start troubleshooting, visit websites like DownDetector or IsTheServiceDown. These sites will show you if a lot of other Apex players are currently experiencing the same Error code 100.
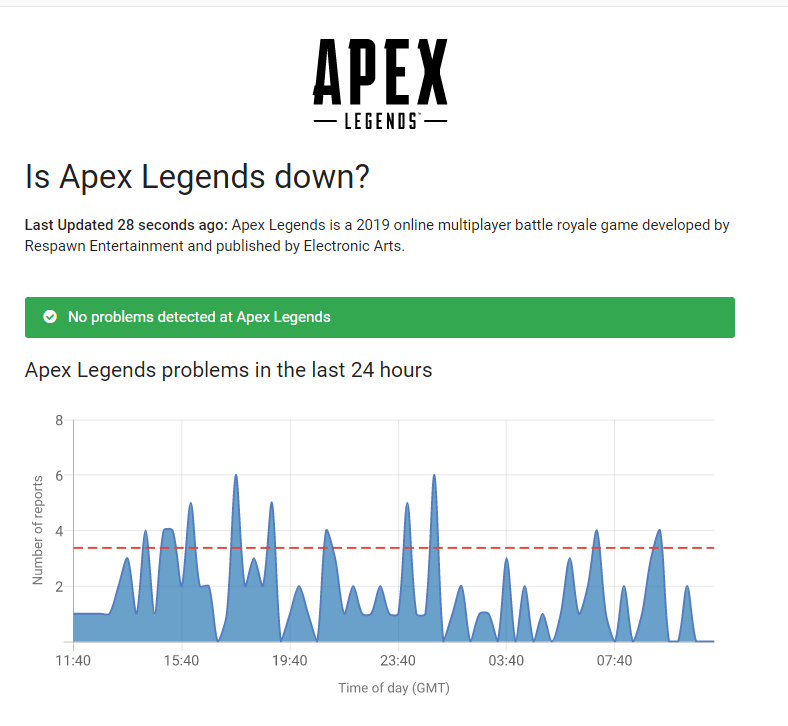
If you see reports of ongoing server problems, then it’s likely not something you can fix on your end. All you can do is wait for Respawn (the developer of Apex Legends) to resolve the server issue.
2. Using Google DNS
According to most users who have managed to fix Error code 100 in Apex Legends, the problem is often related to a DNS (Domain Name System) misconfiguration.
The best solution in this case is to switch to a more reliable DNS service (most people choose Google DNS).
Because this issue can happen on Xbox One, PlayStation 4, and PC, the steps to change your DNS settings will be slightly different depending on your platform. Follow the appropriate guide below for your device:
2.1. Change to Google DNS on PC
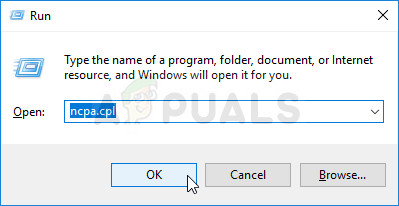
- Press Windows key + R to open the Run dialog box. Type ‘ncpa.cpl’ and press Enter to open the Network Connections window.
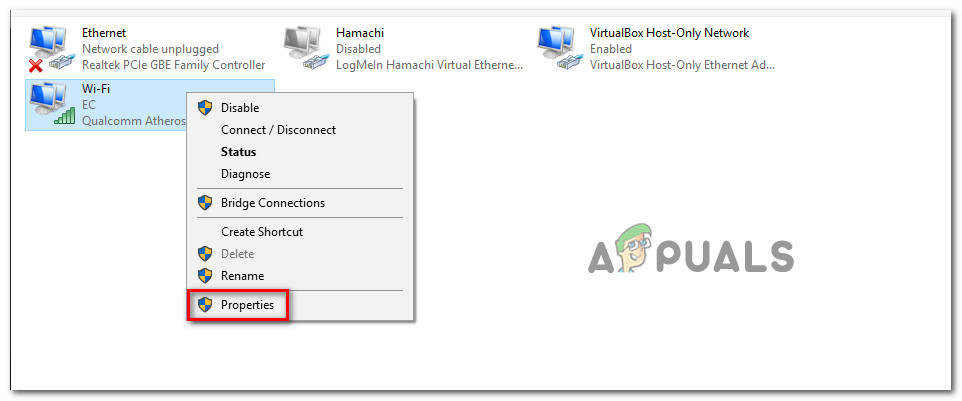
Run this in the Run dialog box - In the Network Connections window, right-click on Wi-Fi (Wireless Network Connection) and choose Properties if you use a wireless connection. If you’re on a wired connection, right-click on Ethernet (Local Area Connection) instead.
Opening the Properties screen of your network Note: When prompted by UAC (User Account Control), click Yes to allow the changes.
- From the Ethernet Properties or Wi-Fi Properties window, stay on the Networking tab. Locate the section titled This connection uses the following items. Tick the box for Internet Protocol Version 4 (TCP/IPv4) and then click the Properties button.
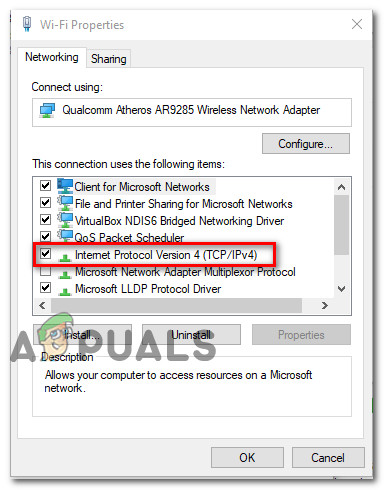
Accessing the Internet Protocol Version 4 settings - Under Internet Protocol Version 4 (TCP/IPv4) Properties, select the General tab, then choose Use the following DNS server addresses.
- Enter the following values:
Preferred DNS server: 8.8.8.8
Alternate DNS server: 8.8.4.4
- If you also use the TCP/IPv6 protocol, repeat the steps above for the Internet Protocol Version 6 menu:
Preferred DNS server: 2001:4860:4860::8888
Alternate DNS server: 2001:4860:4860::8844
- Click OK to save changes, then restart your PC. After startup, launch Apex Legends to check if the error is resolved.
2.2. Change to Google DNS on PlayStation 4
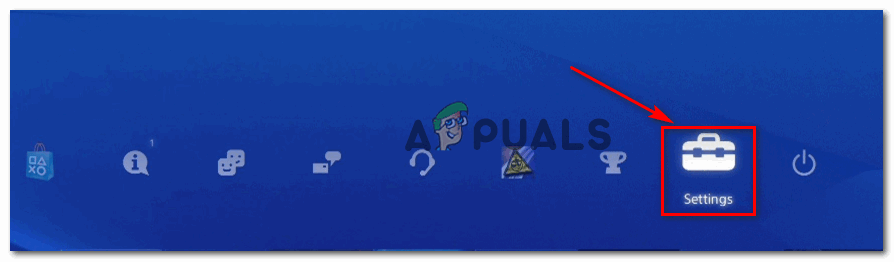
- From your PS4 home screen, swipe upwards, and select the Settings icon. Press X to open the menu.
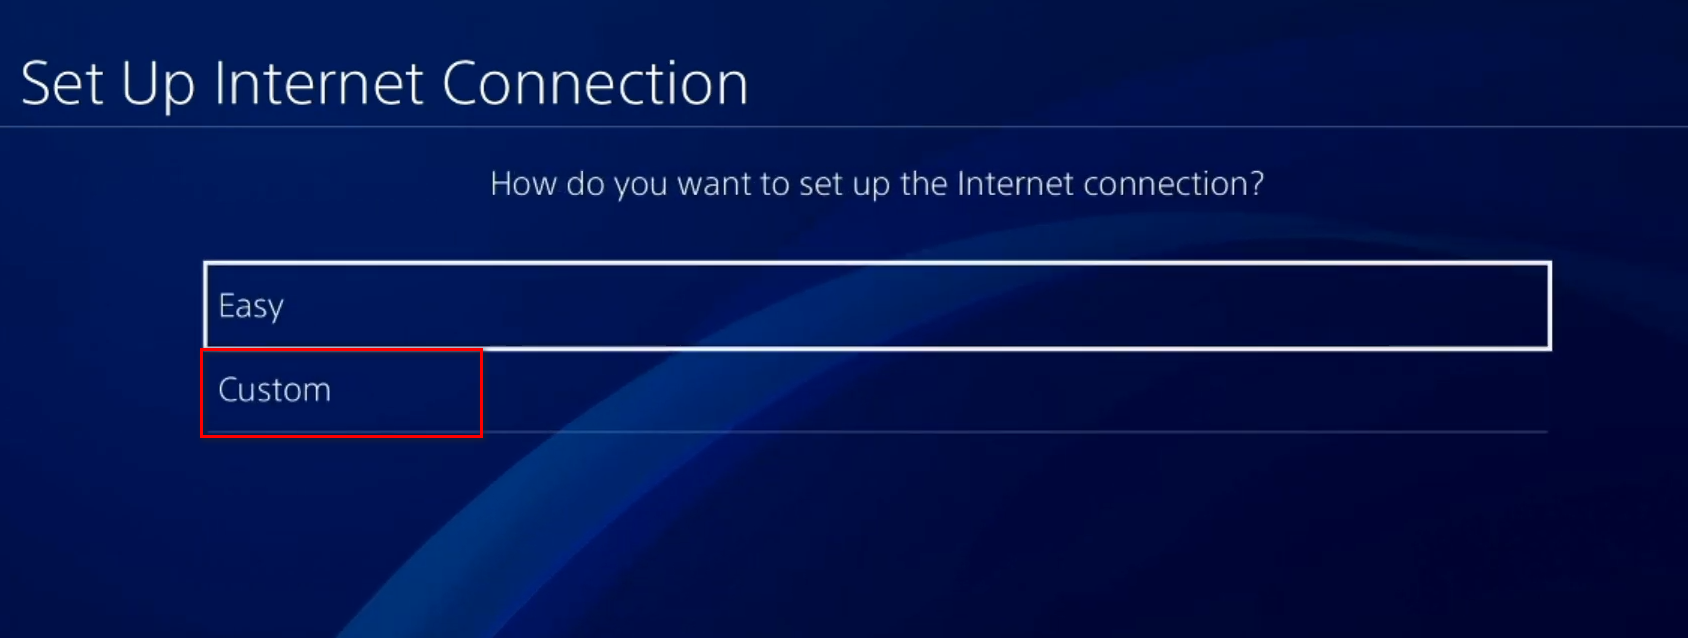
Accessing the Settings menu on PS4 - Inside the Settings menu, go to Network, then select Set Up Internet Connection. Choose Custom when prompted so you can specify your DNS settings.
Going for a Custom Internet Connection on Ps4 - When asked if you want to configure your IP address Automatically or Manually, choose Automatic.
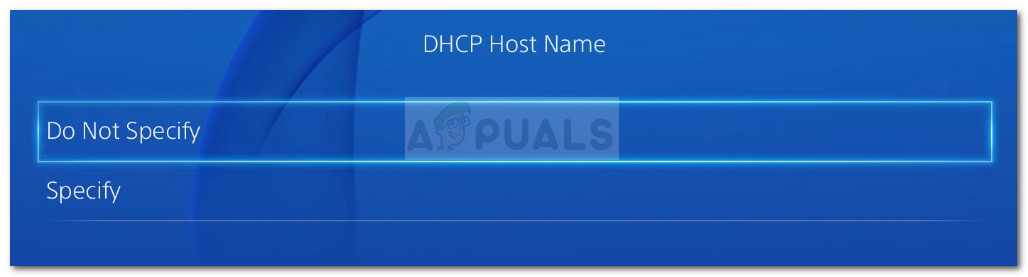
- At the DHCP Host Name screen, select Do Not Specify.
DHCP Host Name - When you get to the DNS Settings stage, choose Manual. Set the Primary DNS to 8.8.8.8 and the Secondary DNS to 8.8.4.4.Note: If you prefer to use IPv6 DNS, use these values instead:
Primary DNS: 208.67.222.222
Secondary DNS: 208.67.220.220
- Save your changes and restart your PS4. Then try launching Apex Legends again to see if the problem is fixed.
2.3. Change to Google DNS on Xbox One
- On your Xbox One home screen, press the Xbox button on your controller to open the guide. Go to the All Settings menu.
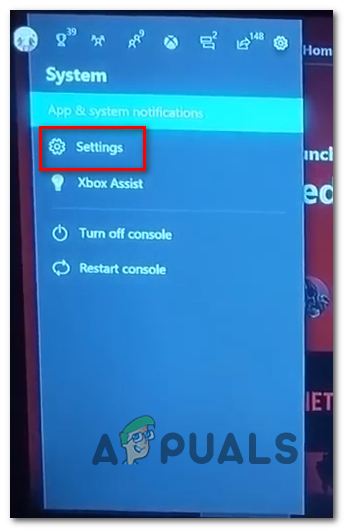
Accessing the Settings menu on Xbox One - In the Settings menu, go to the Network tab, and then select Network Settings.

Accessing the Network settings menu - Inside the Network menu, choose Advanced Settings.

Xbox One Advanced Network Settings - From the Advanced Settings menu, select DNS settings, then choose Manual.
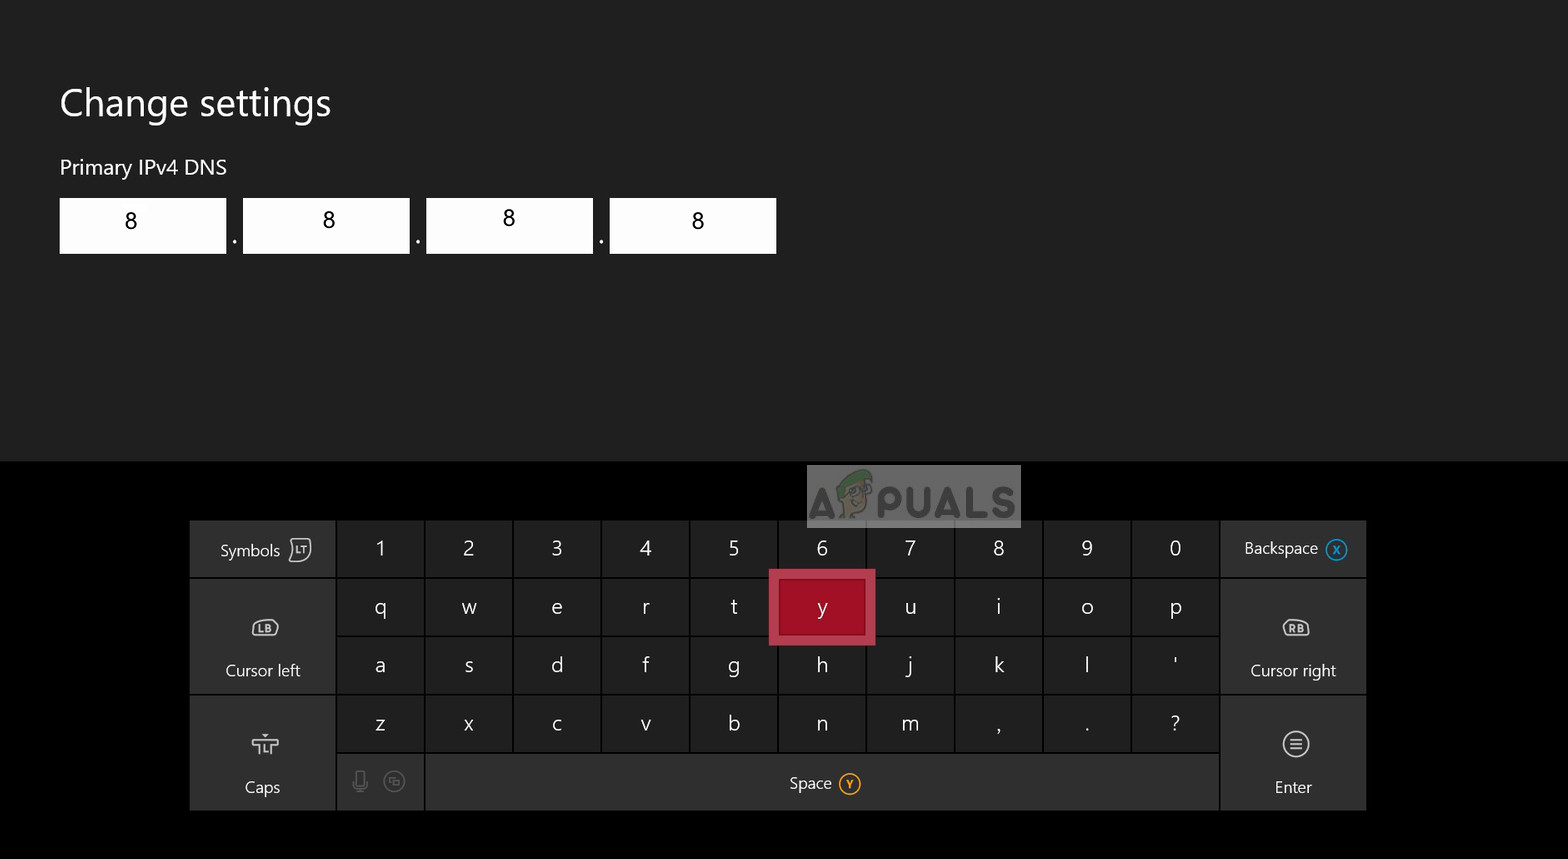
Google DNS Settings – Xbox - Replace the existing DNS values with the following:
Primary DNS: 8.8.8.8
Secondary DNS: 8.8.4.4
Note: For IPv6 DNS, use these values instead:
Primary DNS: 208.67.222.222
Secondary DNS: 208.67.220.220
- Save your changes, then restart your Xbox One. Open Apex Legends and check if the error code has disappeared.


