How to Fix An Error Occurred While Preparing the Installation on Mac
An error that says “An error occurred while preparing the installation. Try running this application again” usually shows up when you’re installing macOS or using recovery mode, especially if the progress bar stops for a while. This message means the installer couldn’t check some important things needed to continue. Most often, the problem is because the system date and time are wrong, or the version of macOS doesn’t match what’s needed.
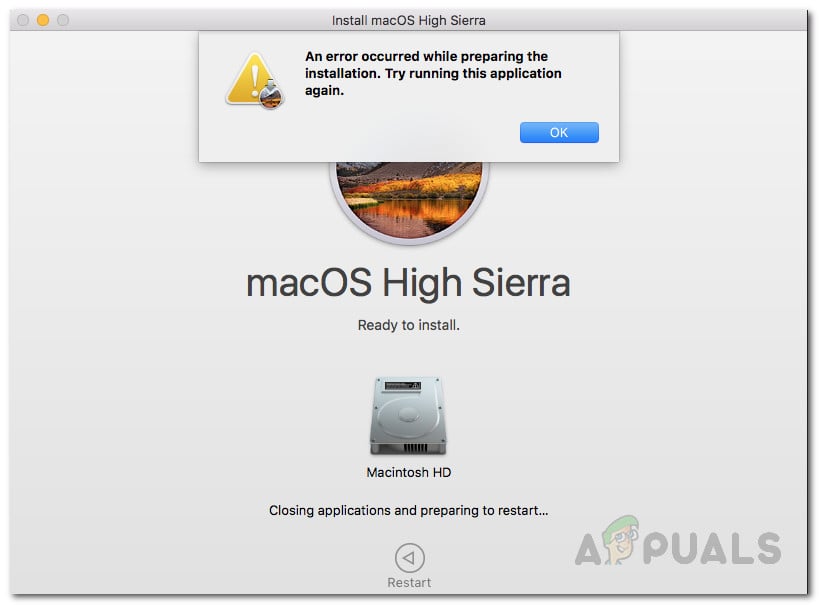
The most common reason is the date on your Mac is incorrect—this often happens when recovery mode sets the date back to something like 2001 or 2017. Other possible causes are expired installer certificates, damaged installation files, or using an old version of the macOS installer.
Now that you know what can cause the error, let’s go through the steps to fix it. Remember, as mentioned earlier, sometimes a simple restart is enough, so try restarting your Mac before moving on to the next steps. If the error keeps showing up even after a reboot, continue with the methods below.
1. Change Date and Time
When you install or upgrade macOS, the installer connects to Apple’s servers. These servers check that your Mac’s date and time are accurate. If the settings are wrong, the connection is blocked, and you get the error message. To fix this, you’ll need to set the correct date and time before trying the installation again.
There are two ways to do this. If you can use your Mac normally, you can update the date and time from System Preferences.
- Open the System Preferences window from the Apple menu.
- Go to the Date & Time option.
- Select “Set date and time automatically” and make sure the correct region is chosen from the drop-down menu.
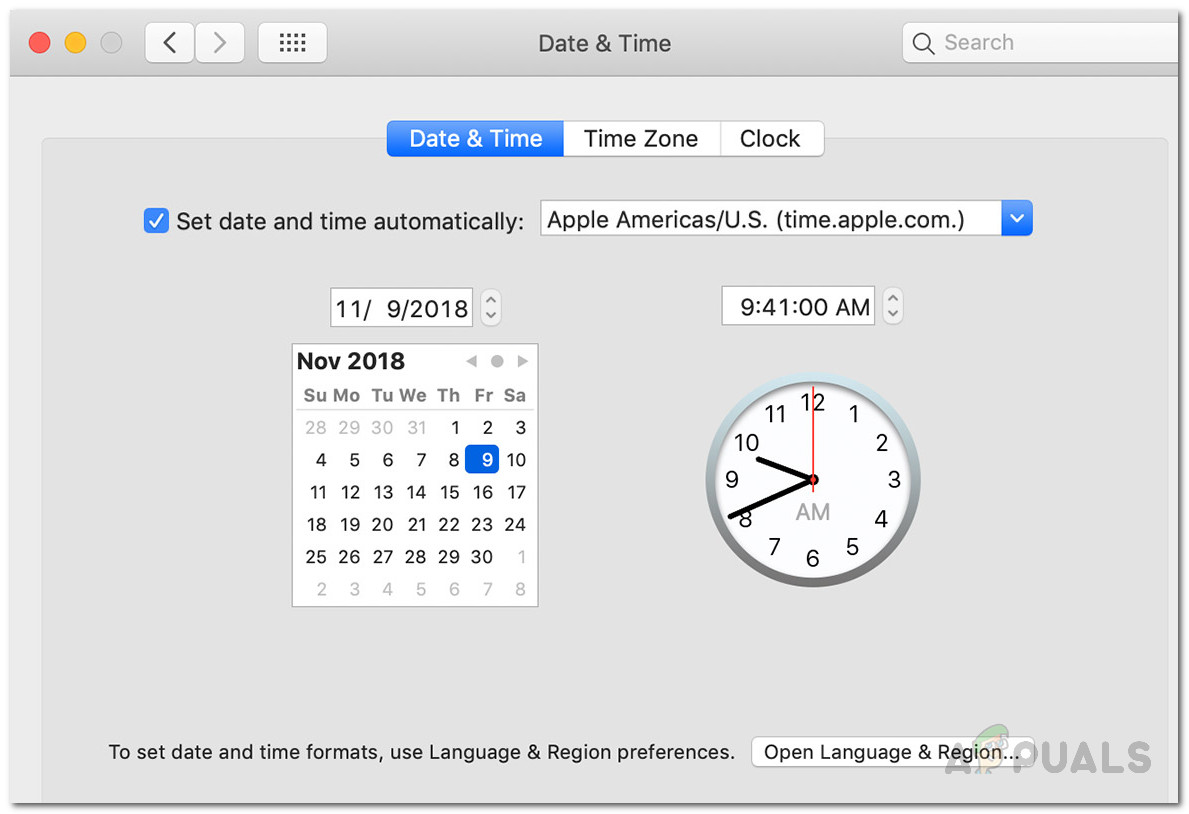
Changing Date and Time - Once you’ve updated the date and time, restart your Mac and try the installer again to see if the problem is fixed.
If you can’t start up your Mac as usual, don’t worry—you can still change the date and time from macOS Recovery. Follow these steps:
- Power off your Mac.
- Turn it on and immediately hold down the Command + R keys.

Accessing macOS Utilities - Keep holding the keys until you see the Apple logo on the screen.
- Let go of the keys. Your Mac will start in macOS Recovery.
- On the macOS Utilities screen, click the Utilities option in the menu bar.
- From the drop-down menu, choose Terminal.

Accessing a Terminal - When the Terminal window opens, you can change the date and time settings here.
- If your Mac is connected to the internet, type the following command to set the date and time automatically:
ntpdate -u time.apple.com
- If you’re not connected to the internet, you’ll need to set the date and time manually. Use this command format:
date [mm][dd][HH][MM][yyyy]
- That means month, day, hour, minute, and year. Enter it without spaces, like this:
date 0518171215
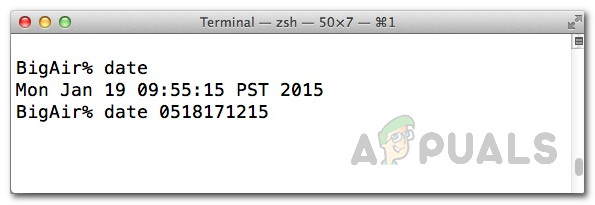
Changing Date and Time From Terminal - To check, just type the date command and see if the date and time are correct. Once done, you can close Terminal.
- Now, try running the installer again to see if the error is gone.
2. Use macOS Recovery
Another way to solve this problem is with macOS Recovery. When you start your Mac in macOS Recovery, you have options to install different versions of macOS, depending on which keys you hold down. Here are the key combinations you can use—pick the one that suits your needs:
- First, turn off your Mac.
- Turn it back on, and as it starts up, use one of these key combinations:
- Command + R: Reinstall the latest version of macOS that was installed on your Mac.
- Option + Command + R: Upgrade your Mac to the latest version of macOS that is compatible with your device.

Mac Keyboard Combination - Shift + Option + Command + R: Use this combination to reinstall the macOS version that originally came with your Mac, or the closest version still available.
- Follow the prompts and click Reinstall macOS to continue the installation.
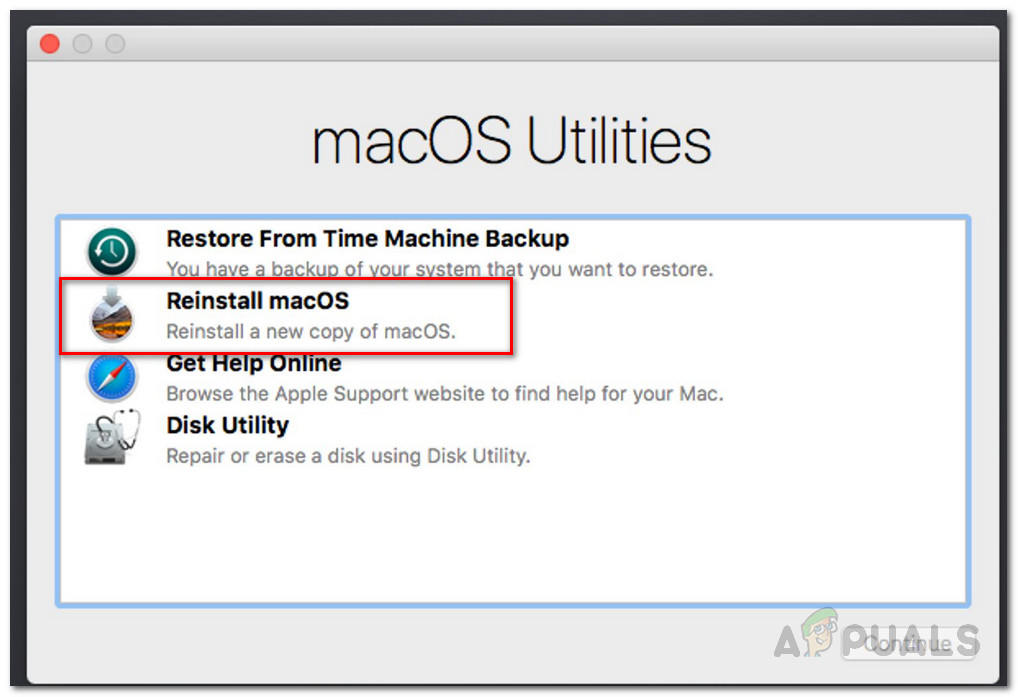
macOS Utilities
3. Download Installer Again
If none of the above methods fix the issue, it’s possible that the installer you’re using is corrupted or incomplete. This happens sometimes if the download is interrupted. The best solution here is to delete the existing installer from your Mac, then download a new installer from the official source. Once you have a fresh installer, try the installation process again—this should solve the problem.


Thanks very much for the very clear instructions. I was getting crazy trying to make a clear install of el capitan with a usb boot key (that I made from another macbook air 11″ of 2010) but was not working on my macbook air 11″ from 2013.
I used the 4th method (update the mac to the latest compatible version) and it downloaded directly catalina from recovery mode and installed it, unbelievable!
I am so happy!
I just wonder how it would be possible to download and make an install of el capitan directly from recovery mode but I am very grateful for the result!