[FIX] Amifldrv64.sys BSOD when Updating BIOS on Windows 10
The Amifldrv64.sys BSOD happens as soon as the BIOS update tool starts running in Windows. This causes the system to crash and restart suddenly. This error is linked to a problem with the AMI firmware flashing driver, which is needed to update the BIOS at a deep system level.

The most common reason for this issue is that Windows blocks the driver because it’s on Microsoft’s list of risky drivers. Other reasons can include interference from your antivirus software or trying to run the updater from an external drive or a drive that isn’t using the NTFS file system.
In this article, we will discuss different ways to solve this error.
1. Disable Driver Verifier
Driver Verifier is a built-in troubleshooting tool for Windows 7, 8.1, and 10. Its primary purpose is to ensure that both Microsoft and third-party drivers are working properly by putting them under extra pressure, exposing any potential errors or incompatibilities.
While Driver Verifier is great for finding driver problems, it can conflict with BIOS update tools, especially since many BIOS flashing utilities are basic scripts that motherboard manufacturers don’t often update.
Because of this, most BSODs that appear during BIOS updates—especially those referencing Amifldrv64.sys—are actually caused by Driver Verifier.
If this scenario applies to you, the solution is simple: disable Driver Verifier while updating your BIOS, and re-enable it once the update is complete.
Since the steps are a little different depending on whether you can boot into Windows, we’ve included two sections—one if you can access your desktop, and another if you can only access the Windows Recovery menu.
Use the first guide if you can get to your Windows desktop, or the second if you need to do this from the Recovery menu.
1.1. How to Disable & Enable Driver Verifier via Driver Verifier Manager
- Press Windows key + R to open a Run dialog box. Type ‘verifier.exe’ and press Enter to open the Driver Verifier utility.

Opening the Driver Verifier utility Note: If the User Account Control (UAC) window appears, click Yes to allow the program to make changes.
- Inside the Driver Verifier Manager window, select Delete existing settings (under ‘Select a task’) and click Finish.
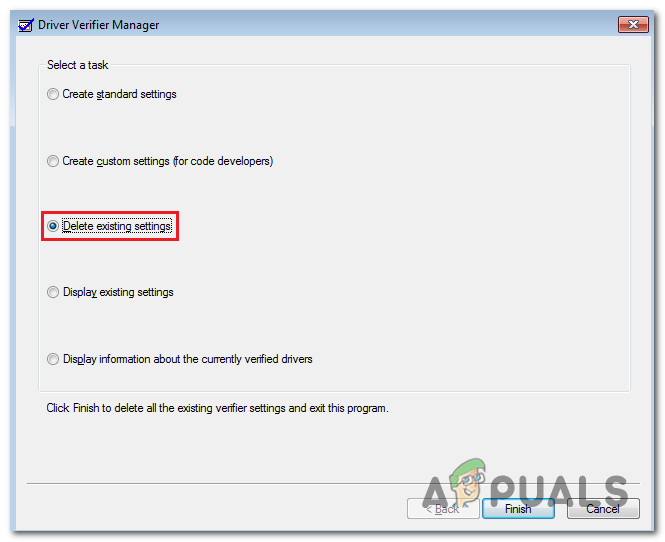
Deleting Existing settings - With Driver Verifier disabled, restart your computer and try updating your BIOS again.
- If you’re able to complete the update without any issues, follow the steps below to re-enable Driver Verifier.
- Press Windows key + R, type ‘verifier.exe’ again, and press Enter to reopen the Driver Verifier utility.
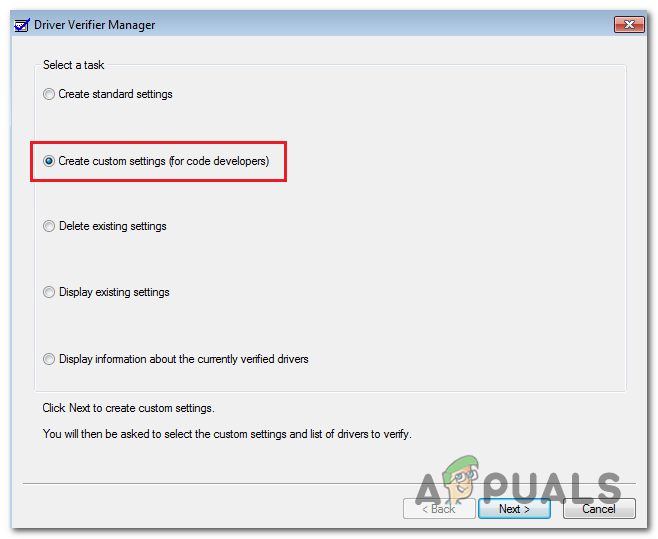
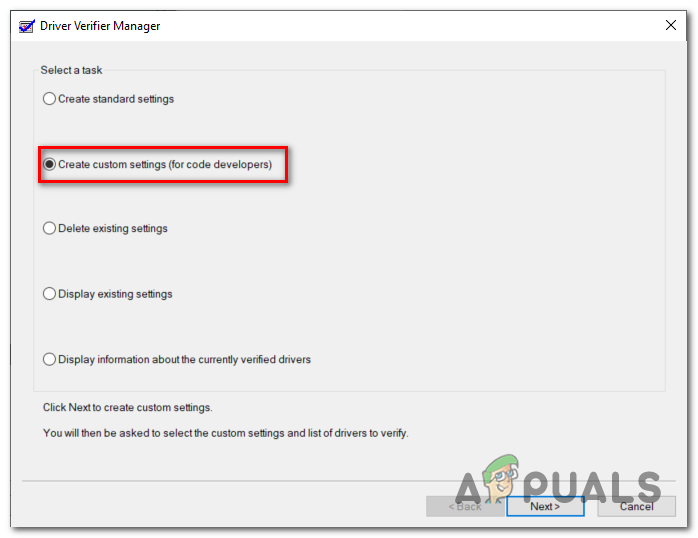
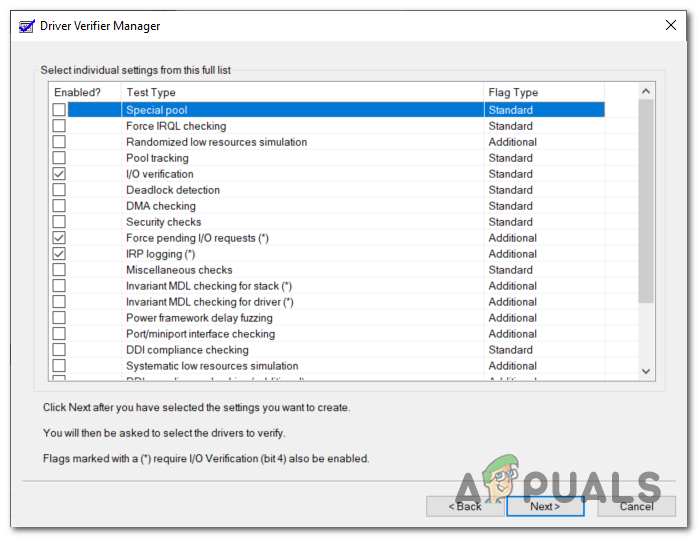
Opening the Driver Verifier utility again - In Driver Verifier Manager, select Create custom settings (for code developers) and click Next.
Create custom settings driver verifier - Make sure Standard settings, IRP Logging, and Force pending I/O requests are checked. Click Next.

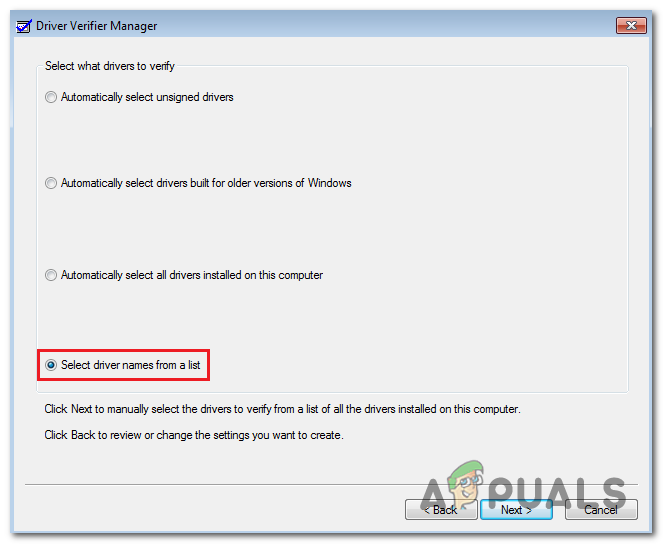
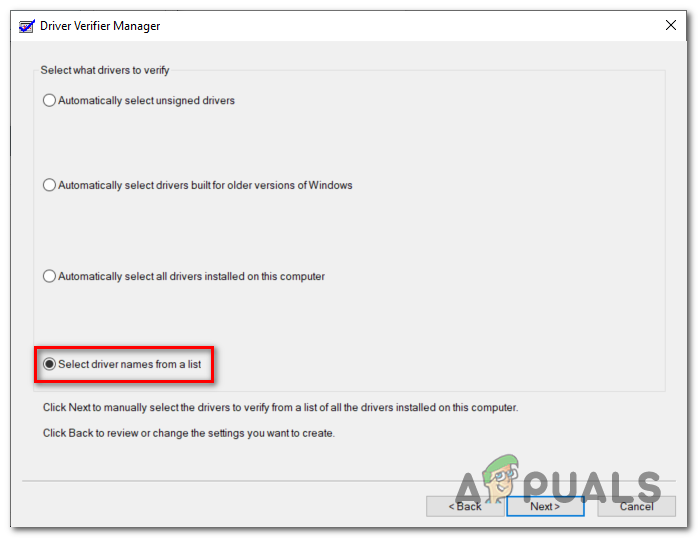
Configuring Driver Verifier - At the next screen, select Select driver names from a list and click Next.
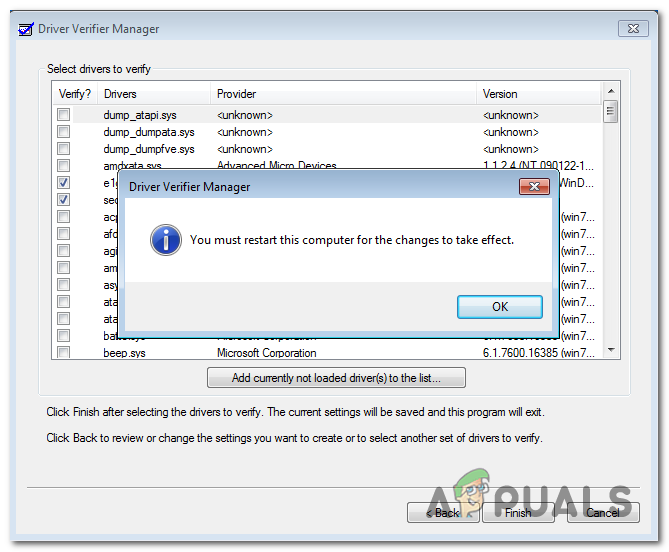
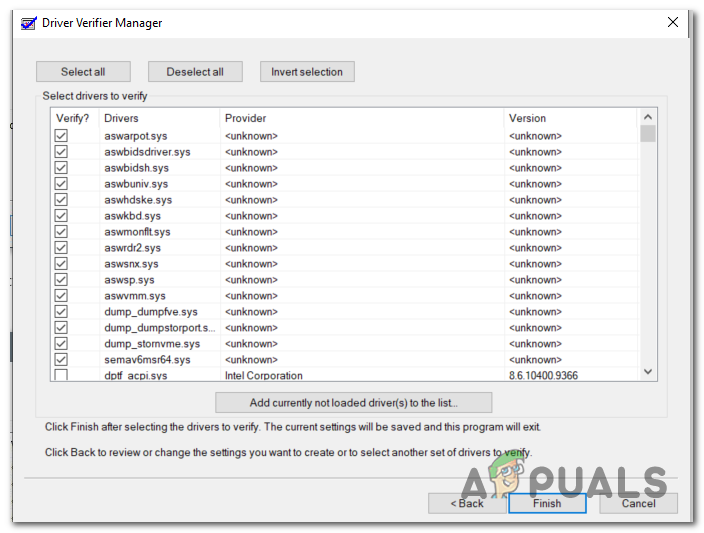
Selecting the drivers names from the list (Driver Verifier) - Sort the list by clicking Provider. Check every driver not provided by Microsoft Corporation. After you’re finished, click Finish and then Ok at the final prompt.
Restarting computer to save the changes - Restart your computer to re-enable Driver Verifier.
1.2. How to Disable & Enable Driver Verifier via Windows Recovery
- Insert Windows installation media, restart your computer, and press a key when prompted to boot from the installation media.

Press any key to boot from installation media - On the first Windows Setup screen, click Repair your computer (bottom left corner). This will open the Recovery Menu.
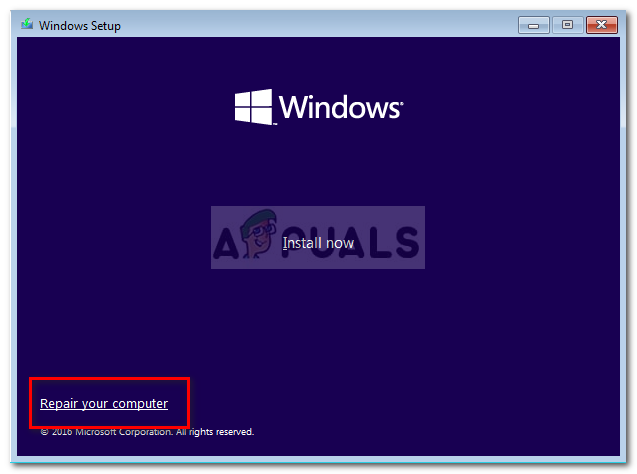
Select ‘Repair my computer’ Note: You can also get to the Advanced Recovery menu by forcing three consecutive interruptions during boot (turning your PC off as it boots up).
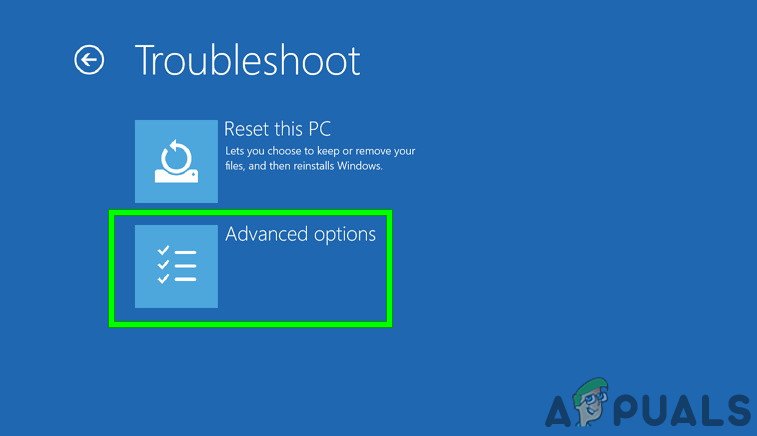
- Inside the Recovery Menu, click Troubleshoot, then Advanced Options.
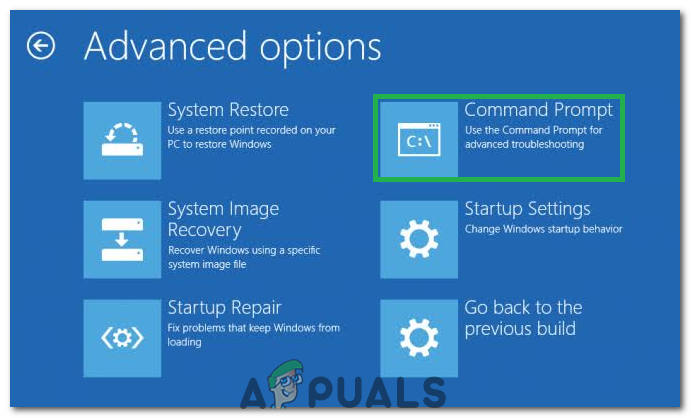
Advanced options in Troubleshoot screen - At the Advanced Options menu, click Command Prompt.
Clicking on the command prompt option - Choose your account and enter your password if prompted.
- Once in the command prompt, type the following and press Enter to turn off Driver Verifier:
verifier /reset
- Close the command prompt and restart your computer. When it starts up, follow your motherboard manufacturer’s steps to update your BIOS. Check to see if it now completes without errors.
- Regardless of the result, you’ll want to re-enable Driver Verifier. Follow steps 1–4 above to access command prompt again. This time, type ‘verifier’ and press Enter.
- Inside the Driver Verifier Manager window, select Create custom settings (for code developers) and click Next.
- On the next screen, make sure that I/O verification, Force pending I/O requests, and IRP logging are checked. Click Next.
Enabling every essential individual service - Select Select driver names from a list, then click Next.
Selecting the driver names from the list - Click Provider to sort alphabetically, then enable every driver box that isn’t signed by Microsoft Corporation. Once finished, click Finish.
Including every relevant driver - Restart your computer to apply the changes.
If you’re still having the same issue after disabling Driver Verifier, try the next method below to fix the amifldrv64.sys BSOD.
2. Use System Restore
amifldrv64.sys is commonly associated with the MSI Live Update tool. If you get a BSOD linked to this file after a failed BIOS update, your computer may not be able to boot properly.
In this case, you can use System Restore to bring your PC back to a point before the BIOS update attempt.
Follow this article to see how to use System Restore, even if you can’t log into Windows normally.
If System Restore doesn’t help or you don’t have a restore point available, move to the next step below.
3. Uninstall the MSI Live Update Program
If the BSOD points to amifldrv64.sys or NTIOLib_X64.sys, but you can still boot into Windows, the problem may lie with the MSI Live Update program.
Many users have stopped the BSOD crashes by simply uninstalling Live Update. Removing it will mean you lose automatic BIOS and chipset detection, but it’s better than dealing with frequent crashes.
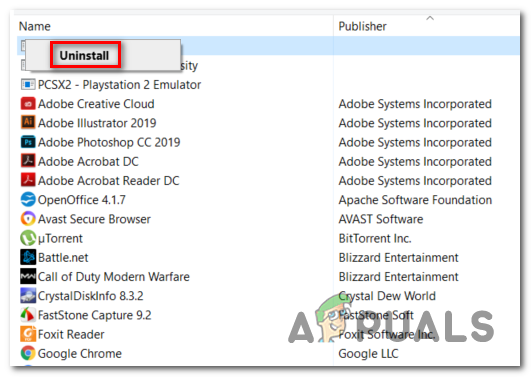
- Press Windows key + R to open a Run box, type ‘appwiz.cpl’, and press Enter to open the Programs and Features window.

Type appwiz.cpl and Press Enter to Open Installed Programs List - In Programs and Features, scroll down and locate MSI Live Update.
- Right-click on it and choose Uninstall.
Uninstalling the MSI Live Update app - Follow the prompts to finish uninstalling, then restart your computer to see if the BSODs have stopped.
4. Create a Bootable BIOS Update USB
If you get a BSOD while updating your BIOS from within Windows, you might have better luck using a bootable USB flash drive. Although flashing the BIOS from the OS seems easier, it’s riskier and can cause major problems—including making your PC unbootable.
You can usually avoid these issues by creating a bootable USB for your BIOS update and installing it from your computer’s initial boot screen.
Each motherboard manufacturer has their own BIOS update method and specific tools, but here are some general steps:
Important: Always check your motherboard’s official documentation for exact instructions for BIOS updates via USB.
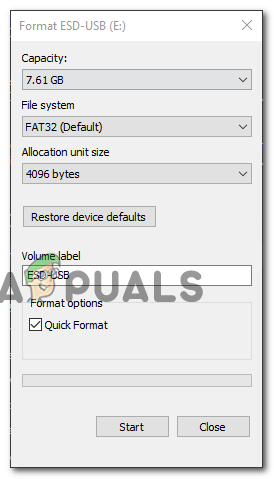
- Get a blank USB flash drive. If there’s anything on it, back it up, right-click the flash drive in File Explorer, and select Format.
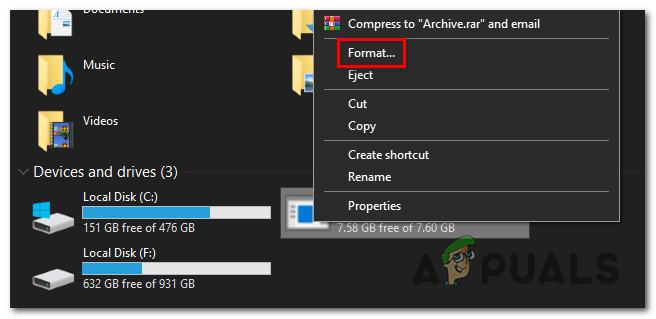
Formatting the USB drive - Set the File System to FAT32 and check Quick Format. Click Start to format.
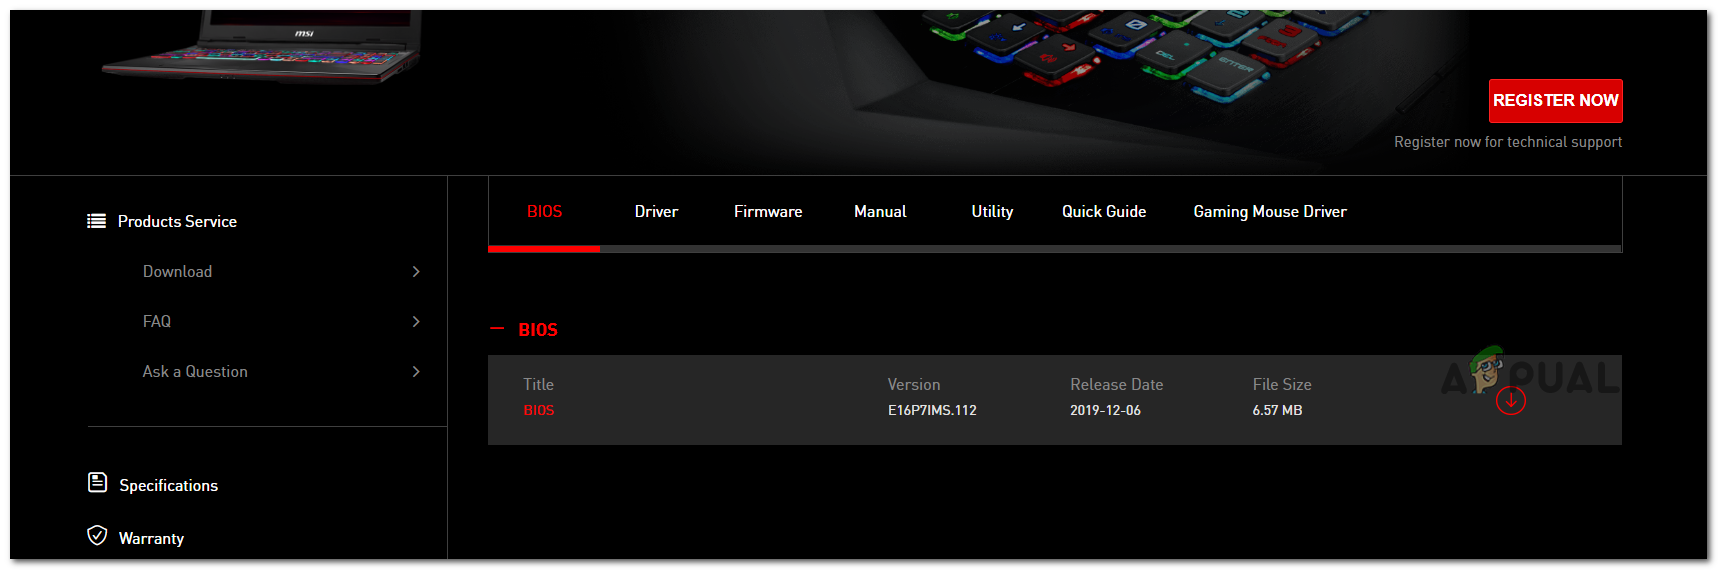
Formatting the drive - Download the latest BIOS update for your motherboard from the manufacturer’s website and copy it onto the USB drive.
Downloading the latest BIOS version Note: Some manufacturers might require you to rename or extract files before installing via USB. Check your motherboard’s instructions.
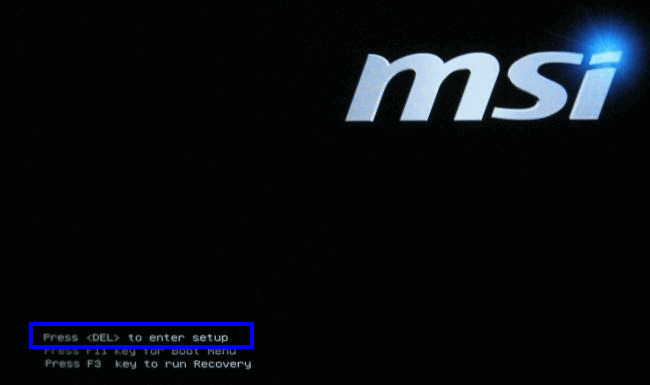
- Restart your PC and press the required key (usually Esc, Del, F2, F4, F8, F12, etc.) to enter BIOS setup. If you’re not sure about the key, look it up for your motherboard model.
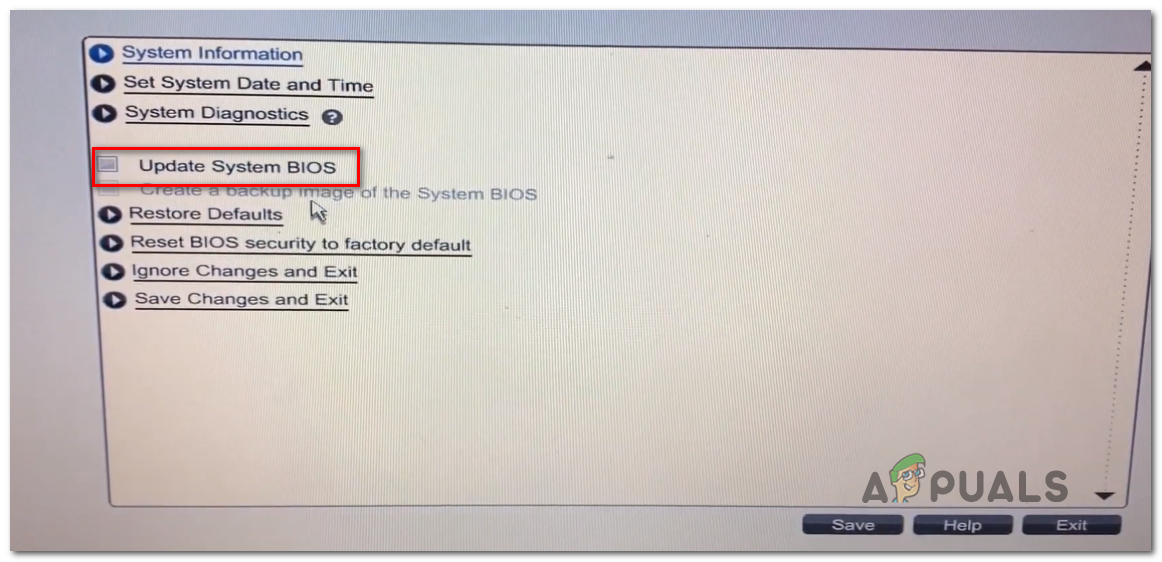
Press [key] to enter setup - Once in BIOS, locate the Update System BIOS or similar option.
Updating the System BIOS via USB flash - Follow the prompts to select your USB drive and confirm. The update should start automatically.
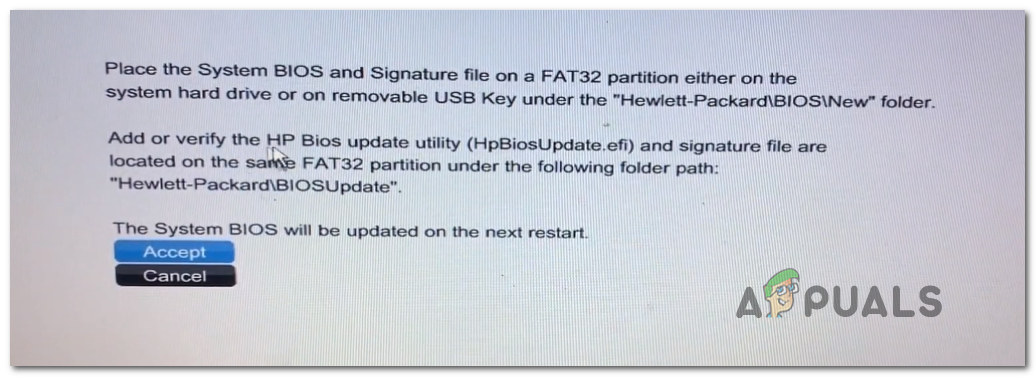
Updating BIOS via USB flash - Once the update finishes, restart your computer. You can remove the USB flash drive after the reboot.
5. Reinstalling the WiFi Adapter Driver
If the problem started right after a BIOS update (or a failed attempt), you should also check your WiFi adapter driver. Sometimes, a BIOS update can cause the WLAN driver to act up.
Many users have solved this issue by reinstalling their WiFi adapter driver through Device Manager.
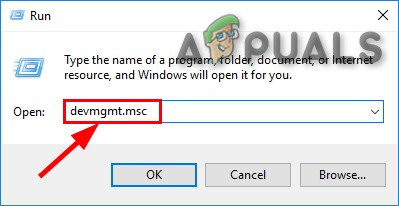
- Press Windows key + R, type ‘devmgmt.msc’, and press Enter to open Device Manager. If prompted by User Account Control (UAC), click Yes.
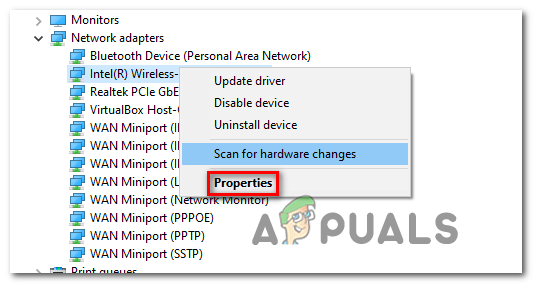
Run devmgmt.msc - In Device Manager, expand Network Adapters.
- Right-click your WiFi adapter, and choose Properties.
Accessing the Properties screen of your network driver - Go to the Driver tab and click Uninstall Device.
- Confirm if prompted, and wait for the process to finish.
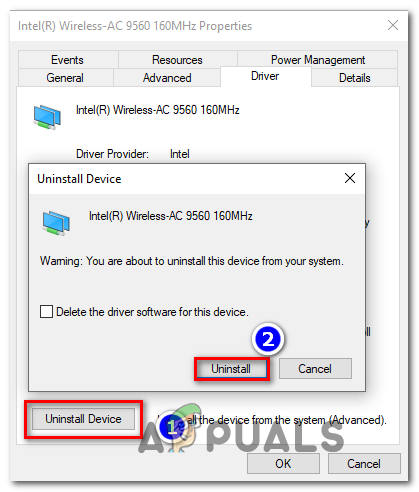
Uninstalling the wireless driver - Restart your computer. Windows should use a generic driver at first, then update to the latest version once you’re online again.
- Once your WiFi is working again, check if the BSOD issue is resolved.
6. Perform a Repair Install
If none of the above solutions have worked, you may need to restore your Windows system files to rule out any OS corruption.
The best way to do this is a repair install (also known as an in-place upgrade). You’ll need compatible installation media to start.
Here’s how to create installation media for Windows 7 or Windows 10.


