How to Allow Users to Run Specified Windows Programs Only?
Most companies require only a few applications on the computer to be used. An admin can restrict the access of a Windows application from employees. They can set a policy to allow only specific applications and restrict everything else on a computer. It is also a good idea when you are letting someone else use your personal computer for work. This limits the computer to only those few applications and nothing else. You can also limit a user account for only specific programs. In this article, you will learn how to allow users to run only specific Windows applications.

Note: Make sure you are making the below changes in the User Standard account and not in an administrator account. If you are making changes in the administrator account, then make sure to allow the administrator tools like Group Policy Editor, Registry Editor, and so on. This will help you in reversing any of the changes that will be made through this article.
Run Only Specified Windows Applications
The methods in this article will require the executable names of the applications. It will only allow those applications that you list in the below methods. Executable files will have an extension of .exe and you can find them easily in the folders of those applications. However, if you want to add .msc extensions in the list of allowed applications, then you need to add “mmc.exe” (Microsoft Management Console). That is because .msc files are just text files containing XML. Whenever a user opens an MSC file, Windows will execute mmc.exe, passing in the .msc file as an argument.
Method 1: Using the Local Group Policy Editor
The Local Group Policy Editor is a tool that is used to configure settings for the operating system. There are different policy settings in the Group Policy Editor. The one we will be using in this method can be found under the User Configuration category. There is also one other setting that only restricts applications that you will add to the list in the setting rather than only allowing the few that you list.
Skip this method if you are using the Windows Home operating system. That is because the Group Policy Editor isn’t available in the Windows Home Editions.
- Open Run dialog by pressing Windows + R key combination on the keyboard. Then, type “gpedit.msc” in it and press the Enter key to open the Local Group Policy Editor.
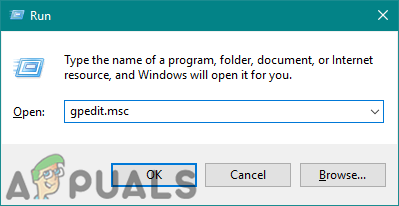
Opening Local Group Policy Editor - In the User Configuration category of Group Policy, navigate to the following path:
User Configuration\Administrative Templates\System\
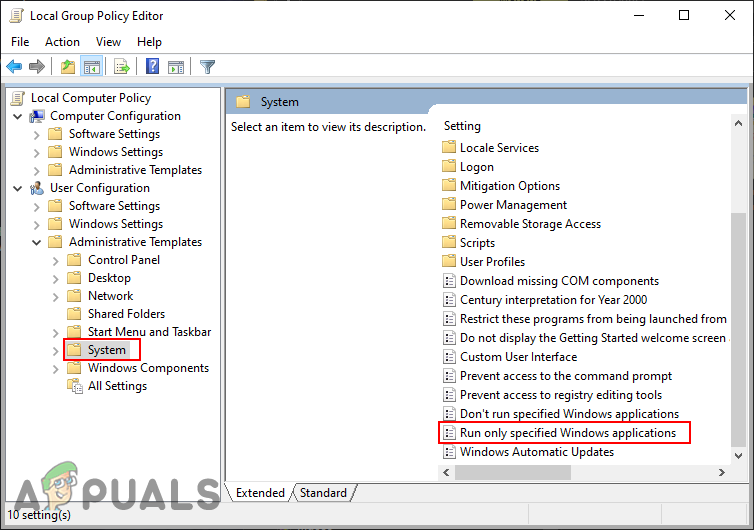
Navigating to the setting - Double-click on the setting named “Run only specified Windows applications” and it will open up in another window. Now change the toggle option to Enabled and click on the Show button.
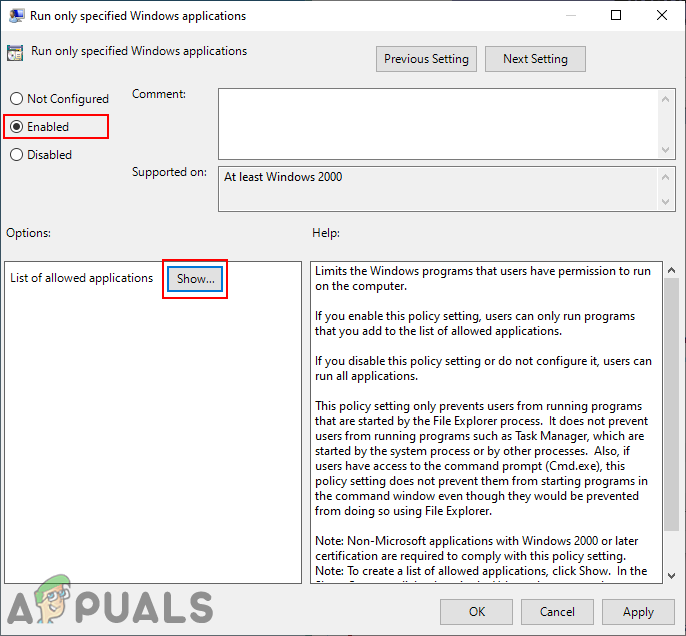
Enabling the setting - Now add the executable names of the applications to be allowed. The names can be written as shown in the screenshot.
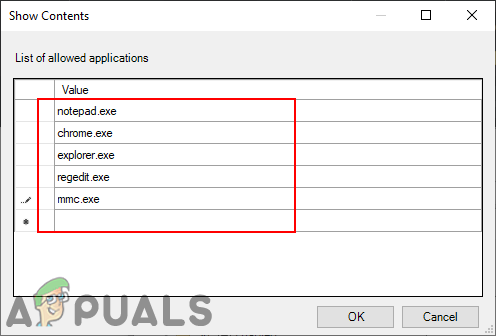
Adding program names to allow for the user Note: Make sure you add the applications like Explorer, Group Policy Editor, Registry Editor, and so on. Adding administrator tools (like GPO) will allow you to reverse this setting.
- Click on the Apply/Ok button for this setting to save the change. This will disable all the Windows applications on your system and only allow the ones you added to the list.
- To enable all Windows applications back again, change the toggle option in step 3 to Not Configured or Disabled.
Method 2: Using the Registry Editor
The Registry Editor is a tool that allows users to view and manage low-level settings of the Windows operating system. However, unlike the Group Policy Editor method, this will require some technical steps from users. You will need to create the missing keys and values for the setting to work. Also, just to be safe, you can always create a backup of the registry. Follow the below steps to allow only specific applications for the standard user.
- Press the Windows + R key combination to open a Run dialog and type “regedit” in it. Press the Enter key to open the Registry Editor and if prompted by UAC (User Account Control), then select the Yes option.
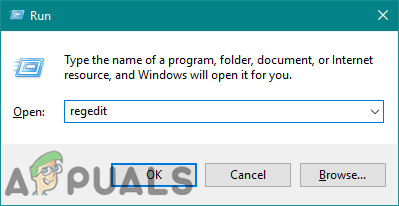
Opening the Registry Editor - In the Current User Hive, navigate to the following key:
HKEY_CURRENT_USER\Software\Microsoft\Windows\CurrentVersion\Policies\Explorer
- Create a new value in the Explorer key by right-clicking and choosing New > DWORD (32-bit) Value. Name this newly created value as “RestrictRun“.
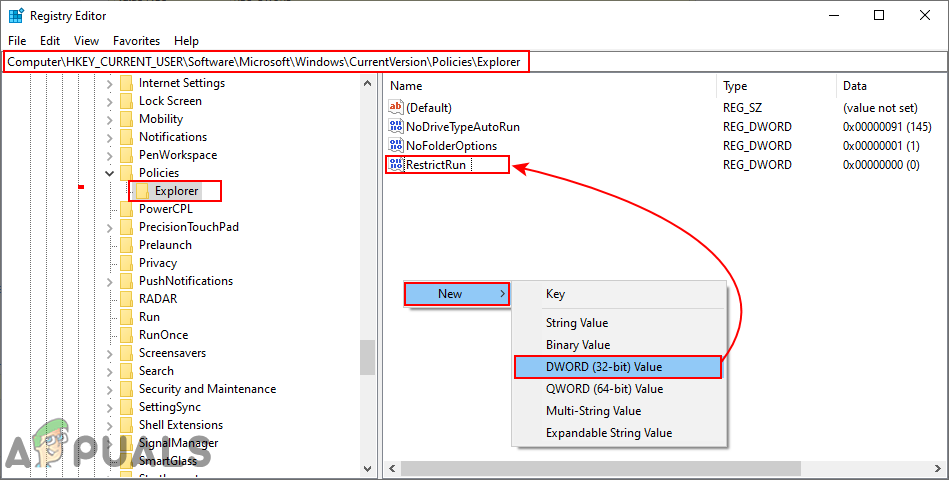
Creating a new value - Double-click on the RestrictRun value and set the value data to 1.
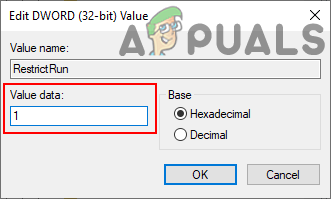
Enabling the value - Next is to create another key under the Explorer key by right-clicking on the key and choosing the New > Key option. This value should be named “RestrictRun“.
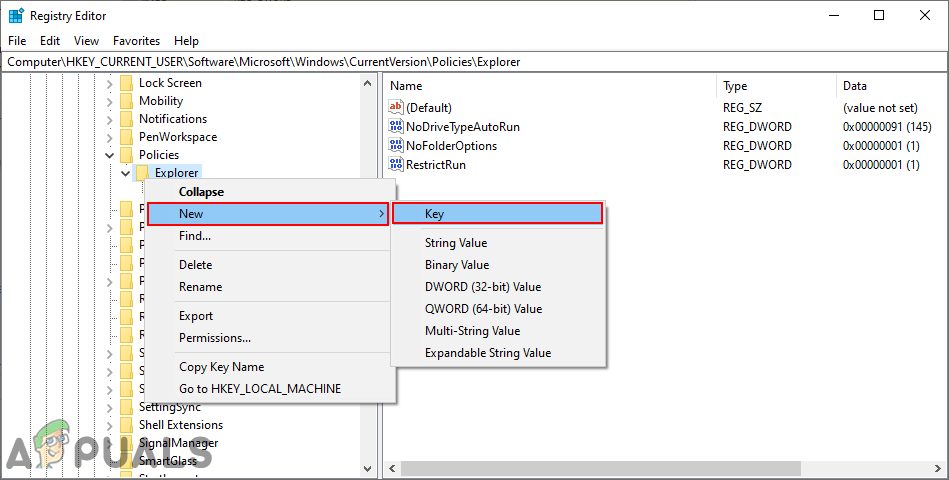
Creating the new key - In this key, create a new value by right-clicking on the right pane and choosing the New > String Value option. The name of the value can exactly be the executable as shown in the screenshot:
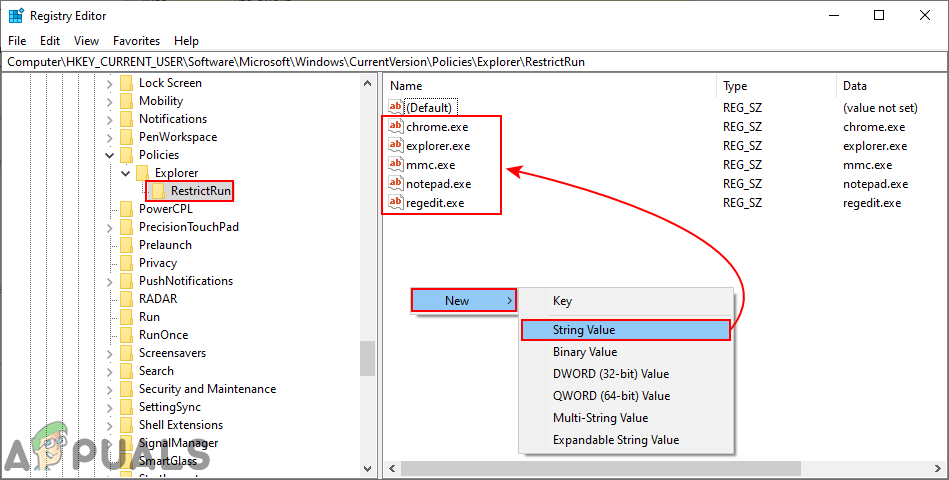
Creating string value for each program name - Open the value and add the string value as the executable name of the application.
Note: Some tools will have an extension of ‘.msc‘, so add the “mmc.exe” executable for all those tools.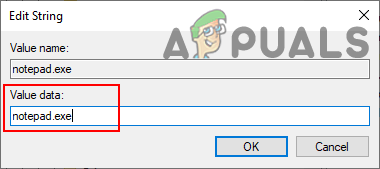
Adding the executable name of programs as value data - After all the configurations, you will need to restart your computer to apply the changes made.
- To enable all the programs again on your system, you need to remove the executable names in value data or delete the values from the Registry.


