How to Add a Second Network Card to Amazon EC2 instance?
Once you create your EC2 instance, Amazon will automatically assign a single network interface with a static private IP address and an internal DNS name. Both of these addresses are provided by Amazon’s DHCP server. It’s important to remember that your Amazon EC2 instance cannot directly communicate with the internet using a private IP address. Private IP addresses are only used to connect with other EC2 instances inside the same VPC (Virtual Private Cloud).

Adding an additional network interface to your instance is a simple process. However, keep in mind that you cannot assign an additional network interface to a t2.small instance, which is often used in the AWS Free Tier.
- Log in to the AWS Management Console.
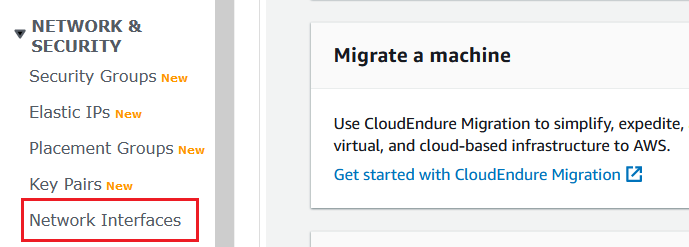
- Click on Network Interfaces under the Network & Security section.
- Click on Create Network Interface.

- Fill out the form with the following details:
- Description – This is an optional field where you can describe the network interface. For example, you can write “Connection to FTP” if you plan to use it for FTP access.
- Subnet – Select the subnet to associate with this network interface. You can find your subnet by going to your EC2 instance, then checking the Description tab.
- IPv4 Private IP – Choose whether you want the DHCP server to assign an IP, or if you want to specify a static IP address.
- IPv4 address – If you chose to use a static IP, enter a valid private IP address that fits within your chosen subnet.
- Elastic Fabric Adapter – An Elastic Fabric Adapter can boost performance for high-performance computing and machine learning workloads. For most cases, including ours, you can leave this option disabled.
- Security groups – Select the security group to manage what kind of network traffic is allowed. The default security group usually allows remote desktop (RDP) access to your EC2 instance and all outgoing traffic.
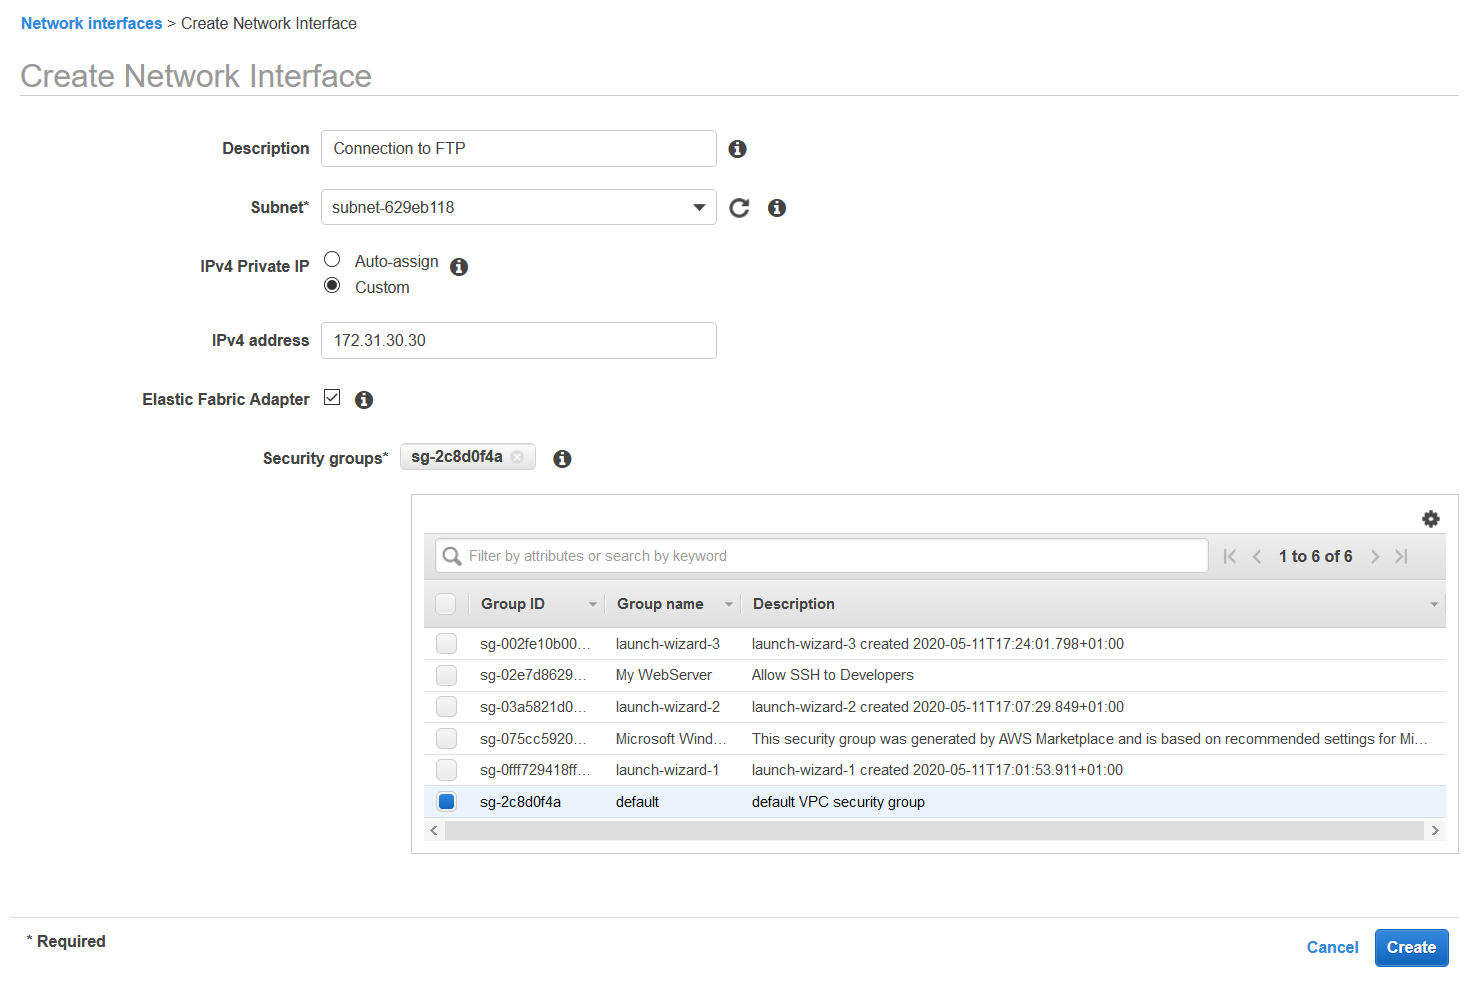
- Click on Create. Your new network interface is now created and listed in the Network Interfaces section.
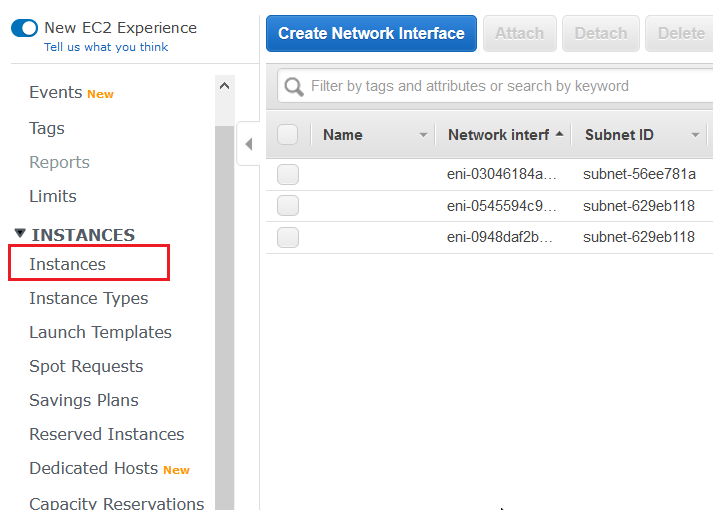
- Click on Instances under the INSTANCES heading on the left side of the window.
- Right-click your Amazon EC2 instance, then click on Instance State > Stop to stop the instance. You need to stop your instance before you can attach a new network interface.
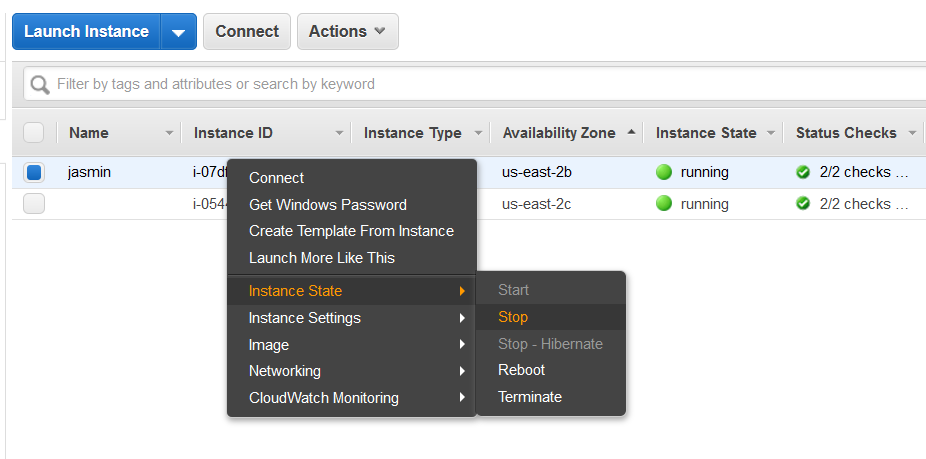
- When prompted, click Yes, Stop to confirm.
- Go back to Network Interfaces under the Network & Security section.
- Select your newly created network interface, right-click it, and choose Attach to assign this network interface to your Amazon EC2 instance.
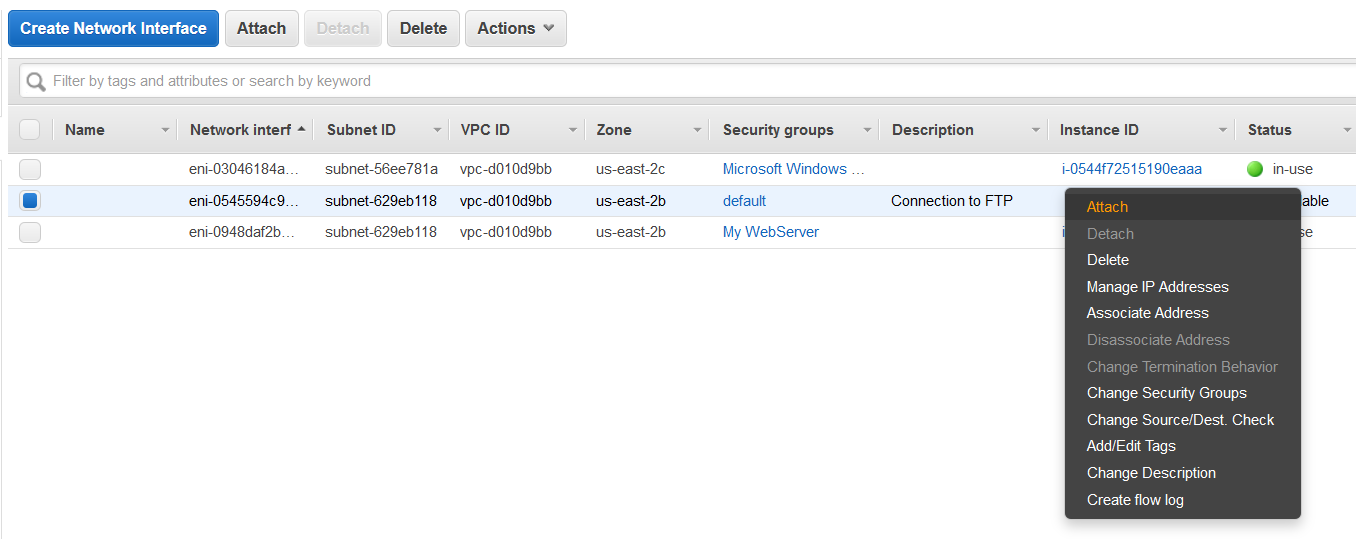
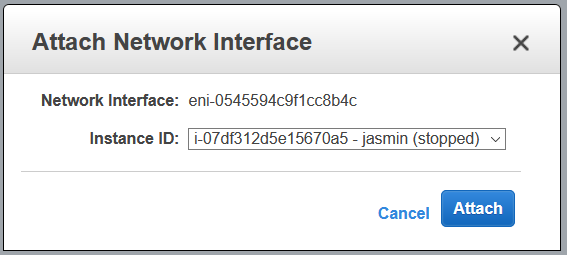
- On the Attach Network Interface window, select your instance ID from the dropdown, and then click Attach.
- Return to Instances under the INSTANCES section on the left.
- Right-click on your Amazon EC2 instance and select Instance State > Start to restart your instance.
- When prompted, click Yes, Start to confirm.
- Connect to your Amazon EC2 instance and finish any additional configuration that may be required for your network interface card.