Fix: ‘Actions Recommended’ Warning in Windows Defender
The yellow exclamation mark on the Windows Defender icon can show up even when the Windows Security app says everything is working fine. This can be confusing because it makes you think there are problems that need fixing. The “Actions Recommended” warning usually means that some security settings are not set up properly or need your attention to keep your computer safe.
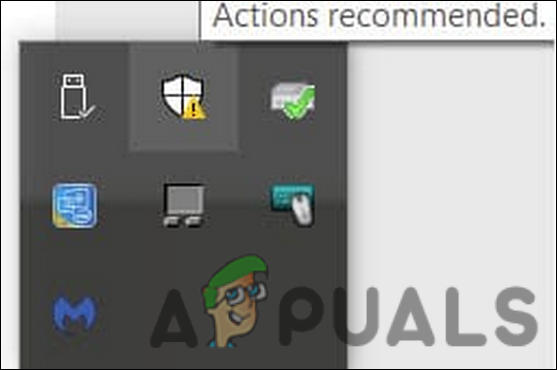
The most common reason for this warning is having some options turned off in the “App & Browser Control” section, especially under Reputation-based protection. Other possible reasons include not finishing a security scan, having updates that need to be installed, or turning off Core Isolation settings.
In this article, we will discuss how to solve this problem.
1. Install Pending Updates
Before trying more advanced troubleshooting steps, we recommend installing any pending system updates. Sometimes, the “Action recommended” warning appears simply because recent system or threat protection updates have not been installed.
- Press Win + I together to open Windows Settings.
- Select Windows Update from the menu.
- On the right side, click the Check for updates button and wait for Windows to search for available updates.
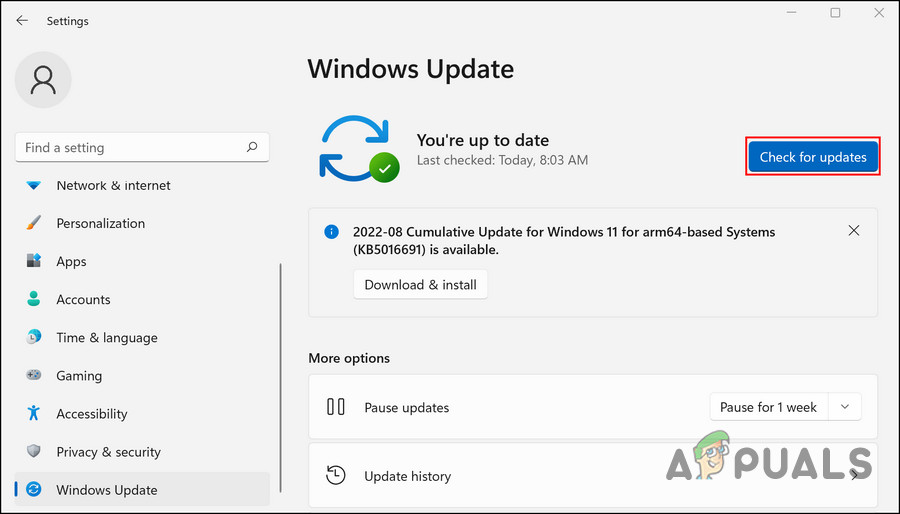
Click on the Check for updates button - Install any pending updates one at a time.
Once you have installed all available Windows updates, you should also check for any pending security updates.
- Click the Windows Defender icon in your system tray to open the Windows Security app. If it doesn’t open, type “Windows Security” in the search bar and click Open.
- Select Virus & threat protection from the left panel.
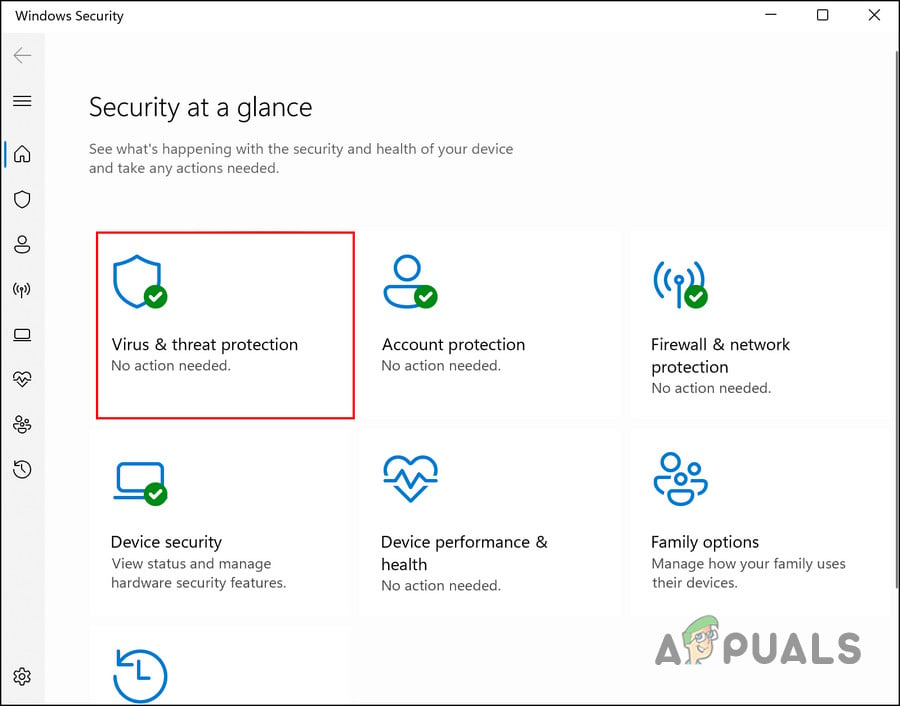
Click on the Virus & threat protection settings - Scroll down and find the Virus & threat protection updates section on the right side.
- Click the Protection updates link.
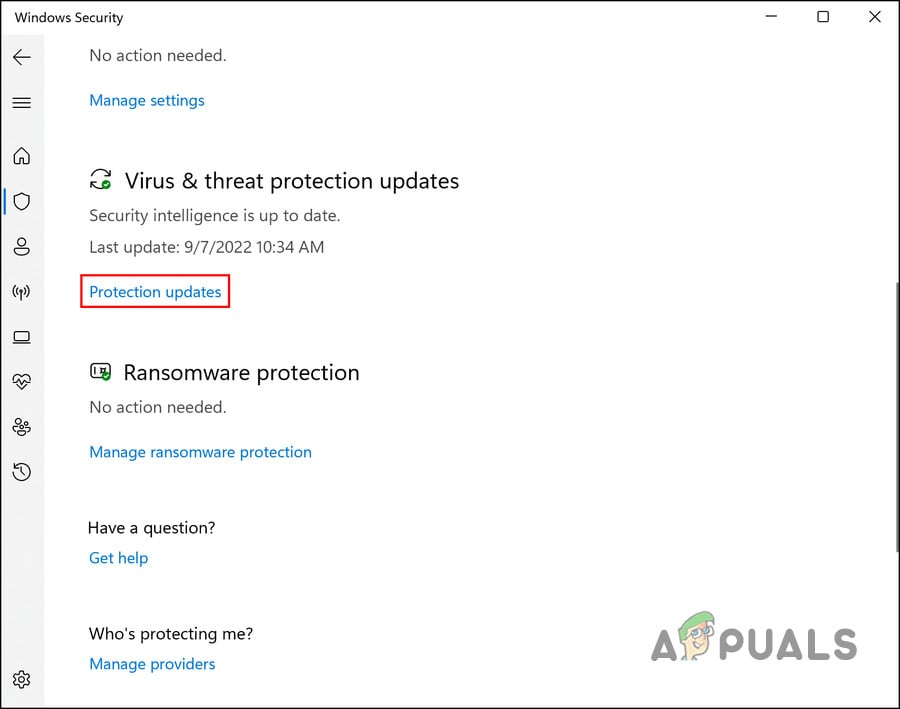
Click on the Protection updates hyperlink - In the next window, click the Check for updates button.
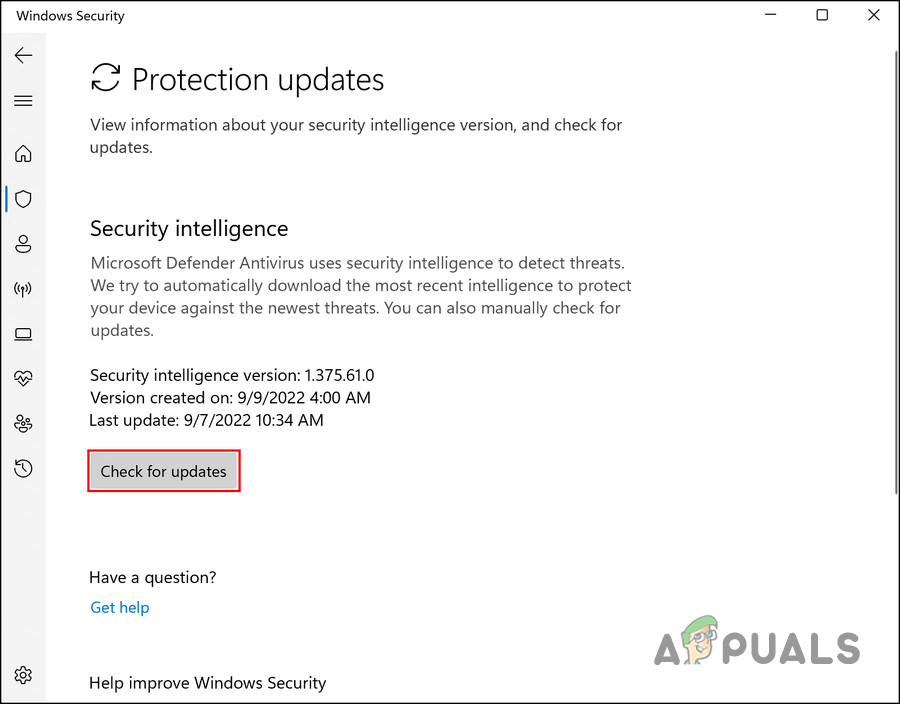
Check for available security updates - If any security updates are found, install them.
- Restart your computer and check if the “Action recommended” warning is gone.
You can also manually force security definition updates and clear the current cache.
- Type cmd in the search area of the taskbar, right-click Command Prompt, and select Run as administrator.
- Click Yes if prompted by User Account Control.
- In Command Prompt, type these commands one by one, pressing Enter after each:
cd %ProgramFiles%\Windows Defender

MpCmdRun.exe -removedefinitions -dynamicsignatures

MpCmdRun.exe -SignatureUpdate
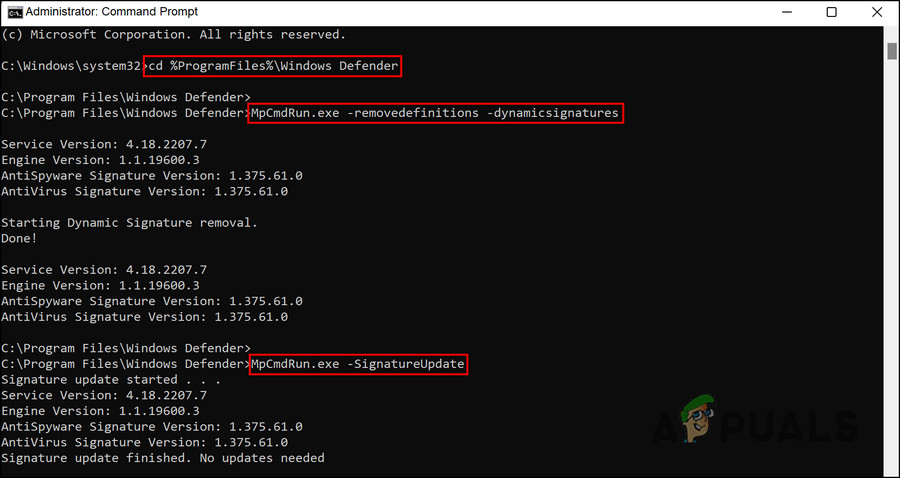
Execute the entered commands - After completing the steps, close Command Prompt and restart your PC. Check to see if the issue is fixed.
2. Refresh Windows Defender Firewall Actions
If the problem is caused by a minor glitch within the Windows Defender Firewall, refreshing the firewall actions may resolve it.
- Type Windows Security in the Windows search bar and click Open.
- Click on Firewall & network protection in the left panel.
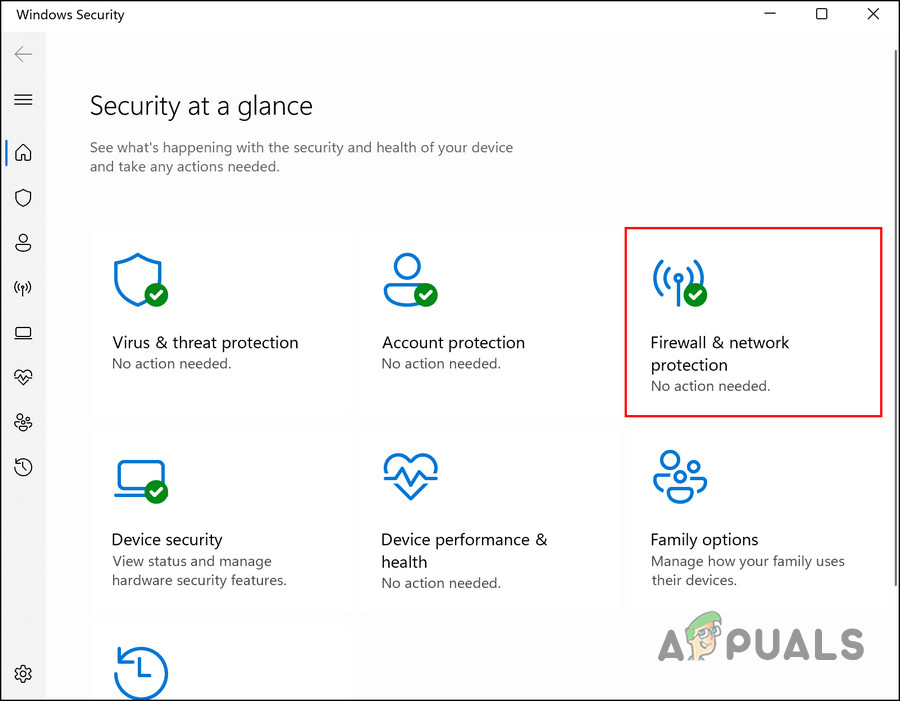
Click on the Firewall & network protection option - On the next screen, click Advanced settings.
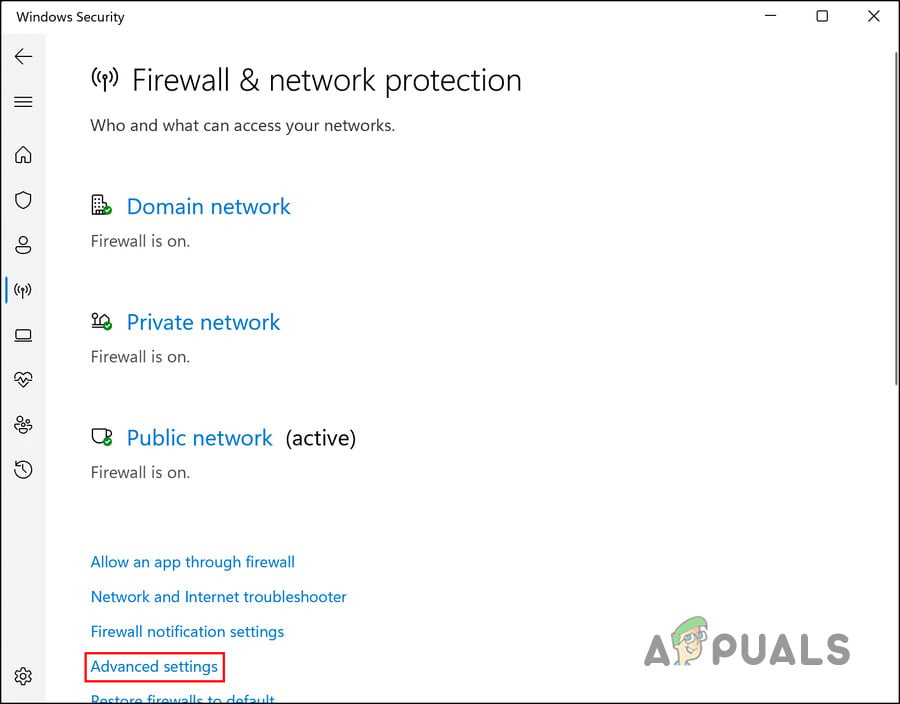
Launch the Advanced settings option - If prompted by User Account Control, click Yes to continue.
- In the Windows Defender Firewall with Advanced Security window, find the Actions pane on the right side and click the Refresh button.
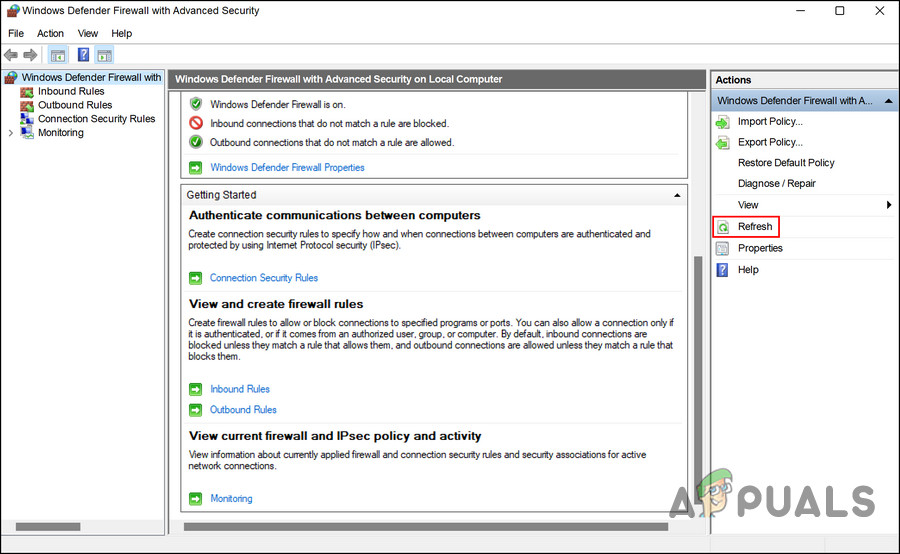
Refresh the Defender Firewall
That’s it! The yellow exclamation mark and Action recommended warning should disappear.
3. Use a Third-Party Security Program
Sometimes, the yellow exclamation mark on the Windows Defender icon means there’s a security issue on your computer that Windows Defender alone can’t resolve.
If this is the case, running a scan with a third-party antivirus utility is a good idea.
We have already created a guide on the best antivirus programs you can use for extra help.
4. Reset the Security Application
If nothing else works, resetting the Windows Security application could fix any corruption or errors causing the Action recommended warning. We’ll use Windows PowerShell for this process.
Resetting the security app will return it to its original default state. This process won’t affect your personal files or most settings.
- Right-click on the Windows icon in the taskbar and choose PowerShell (Admin). For Windows 11, select Windows Terminal (Admin).
- Or, type PowerShell in the search bar, then right-click and select Run as administrator.
- Click Yes in the User Account Control prompt.
- Type the following command and press Enter:
Get-AppxPackage Microsoft.SecHealthUI -AllUsers | Reset-AppxPackage
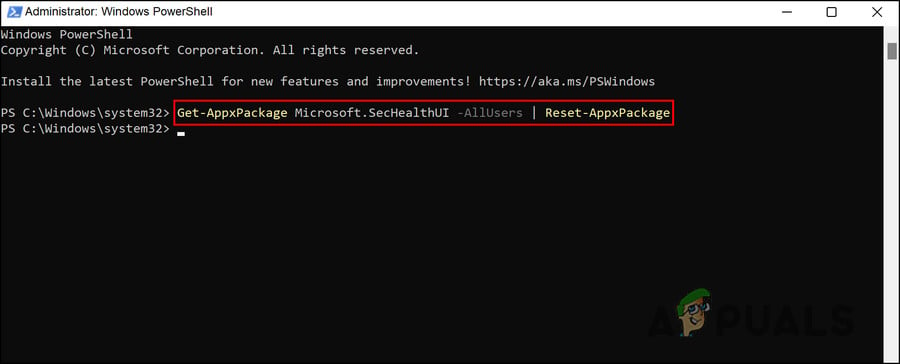
Reset the application - When the command is finished, restart your computer and check if the warning is gone.


