How to Fix an ACER Monitor Showing ‘No Signal’ Issue?
 Reviewed by Huzaifa Haroon
An Acer monitor showing a “No Signal” message is turned on but can’t show anything because it’s not getting input from your PC or game console. This message means the monitor can’t find any video signal coming from the device it’s connected to.

The most common reason for this is the display cable being plugged into the wrong port—usually into the motherboard instead of the graphics card—especially on computers that have both. Other possible reasons include a damaged cable, the monitor set to the wrong input source, or a problem with the graphics card or power supply.
Basic Troubleshooting
- Check if your monitor works when connected to another device, such as a Chromebook.
- Try connecting your Acer monitor to your PC using a different cable and port.
- Use a different port type (for example, if you’re having trouble with HDMI, try using the DP port and a DP cable instead).
- Make sure you have selected the correct input source on your monitor.
- If you’re using the DP port, check the DP version on your monitor and make sure your system supports it.
- If your computer has two graphics cards (one discrete and one integrated), try switching to the other graphics card. You may also need to change ports or adjust some settings on your PC to do this.
1. Restart the Monitor and System
Your Acer monitor may not display anything if either the monitor or your computer is stuck in an error state. In many cases, simply restarting both the monitor and your system can resolve this.
Let’s first try reseating the cable. If that doesn’t help, we’ll try a more thorough reset of all devices.
- Unplug the monitor’s cable from your computer and wait for about a minute.
- Plug the cable back in and see if the display comes back.
If that doesn’t fix the issue, let’s refresh your entire system.
- Turn off all monitors and your computer.
- Unplug the power cables. Also, unplug the monitor’s cable from the computer.
If you’re using a laptop, remove its battery (if possible) and press and hold the power button for 20 seconds.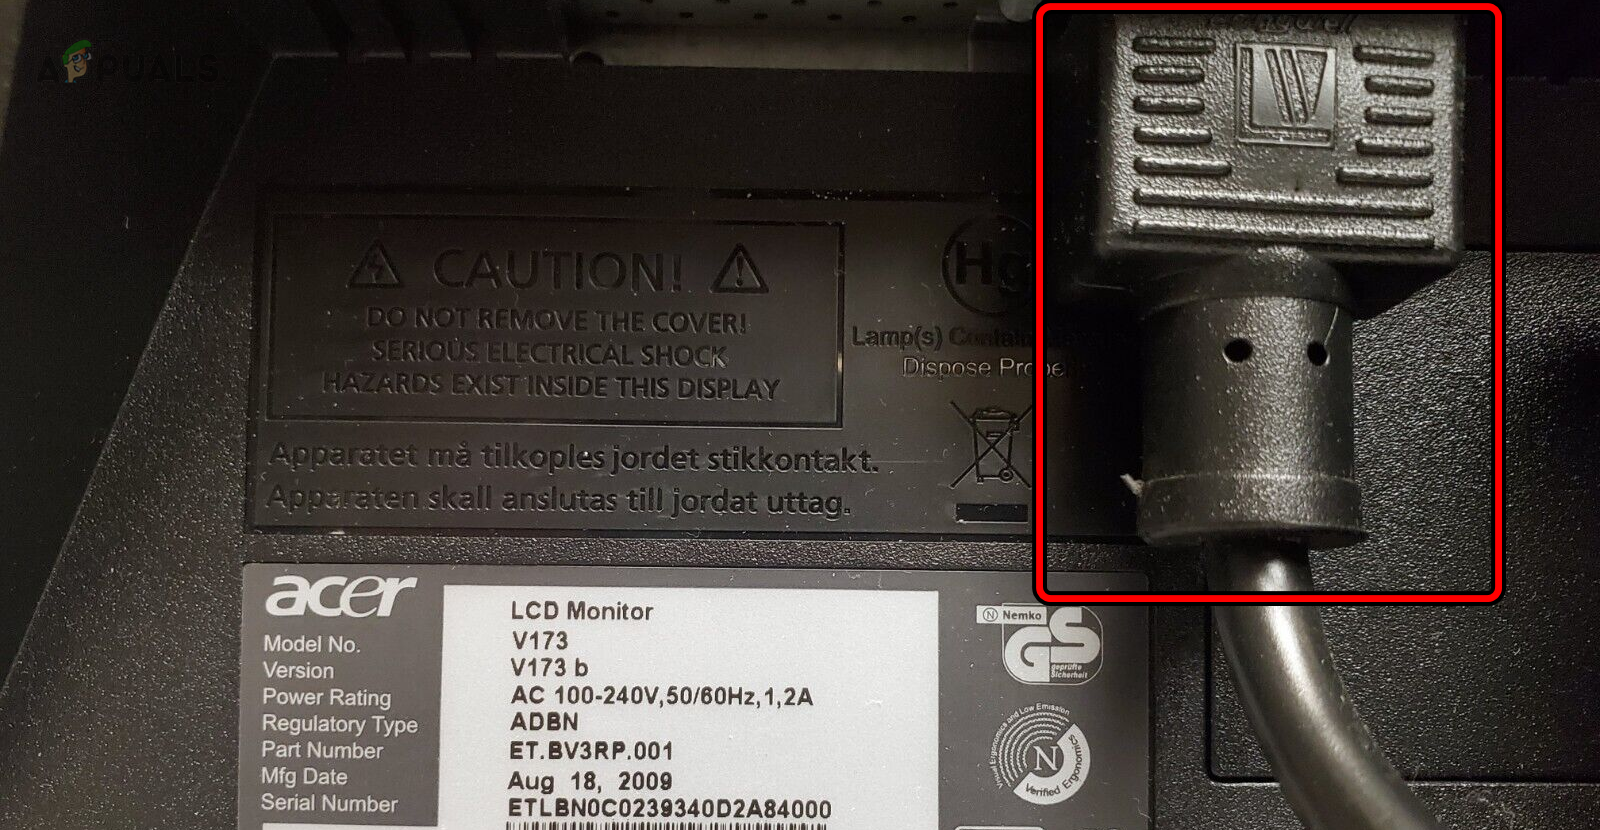
Unplug the Power Cable of the Acer Monitor - Wait for a minute, then plug everything back in except the monitor cable.
- Power on your monitor first. Once the monitor is fully on, turn on your computer and then connect the monitor cable.
- Check if the monitor now shows your display.
- If that doesn’t work, turn off your computer and reseat all internal components, especially your RAM (memory) sticks.
2. Update the System’s OS to the Latest Build
If your computer’s operating system is out of date, it may not communicate properly with your Acer monitor. Updating your operating system to the latest version can often solve this kind of issue.
- Right-click the Start button (Windows icon) and go to Settings > Windows Update.
- Click Check for Updates and install any available updates.
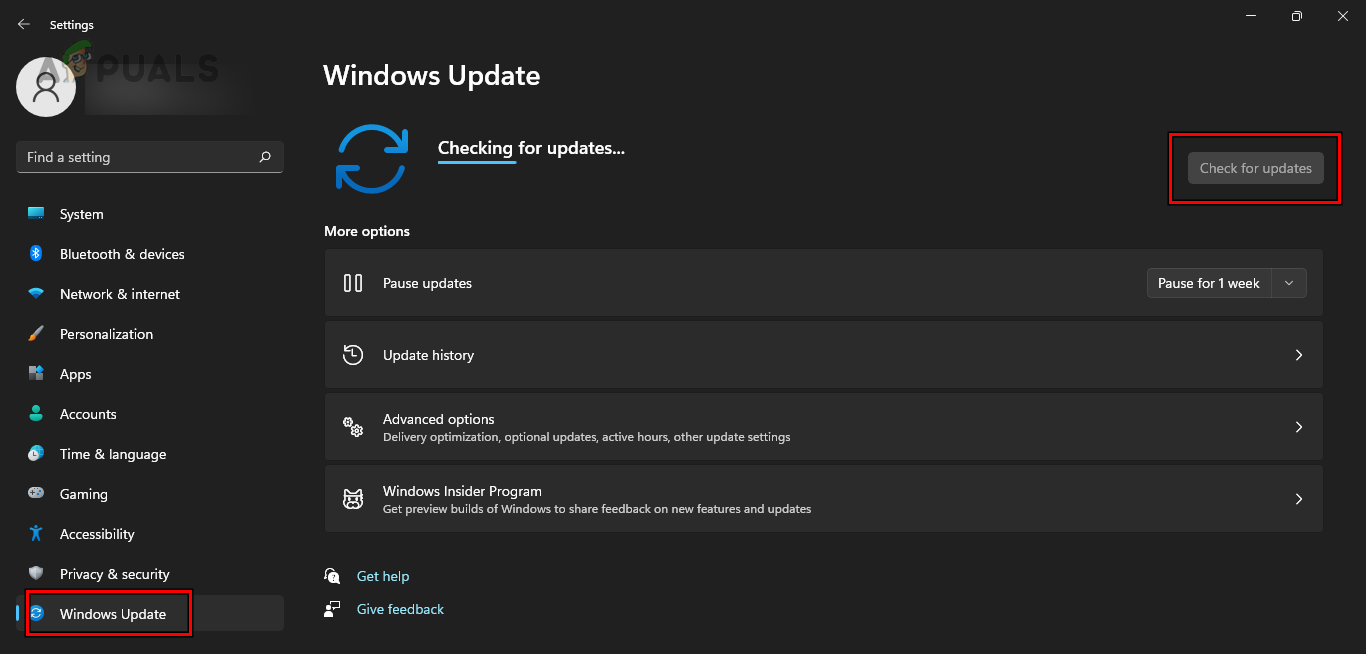
Check for Windows Updates - Restart your computer and see if your Acer monitor now shows your desktop.
If the issue continues, try updating the firmware for your Acer monitor if available.
3. Change the System’s Resolution and Refresh Rate
If your system’s display resolution or refresh rate does not match what your monitor supports, the display might not work and you may see the “No Signal” message. You can fix this by lowering the resolution and refresh rate.
3.1. For Windows
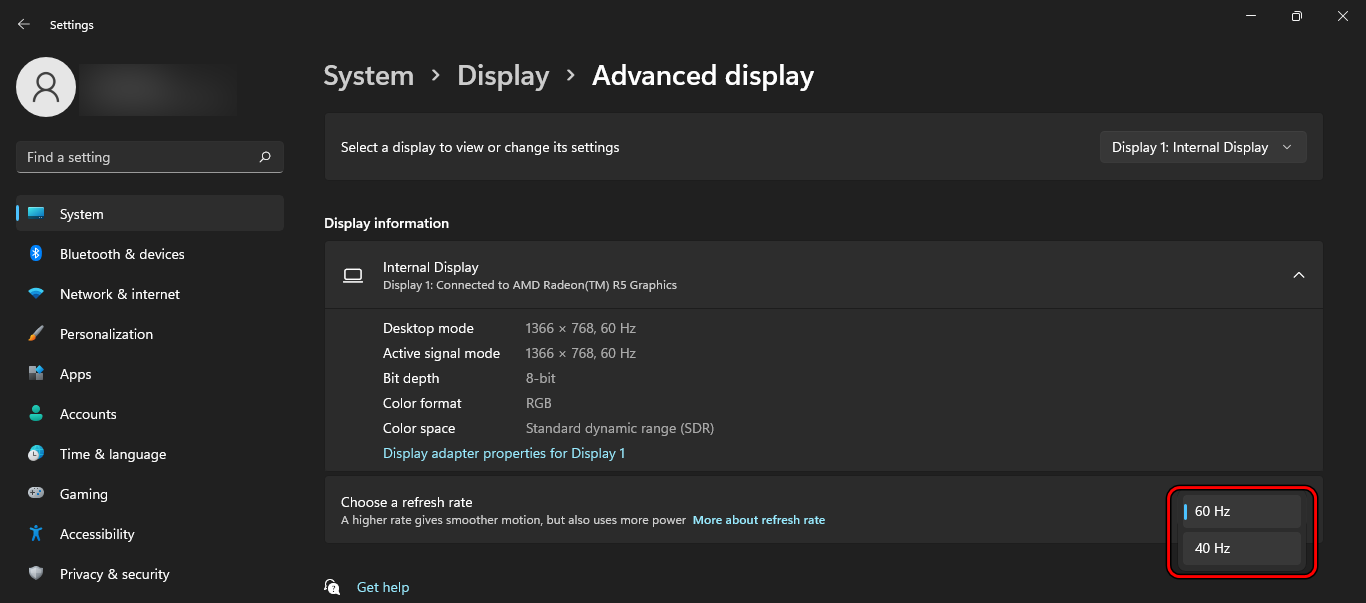
- Right-click on the Start menu and go to Settings > System > Display.
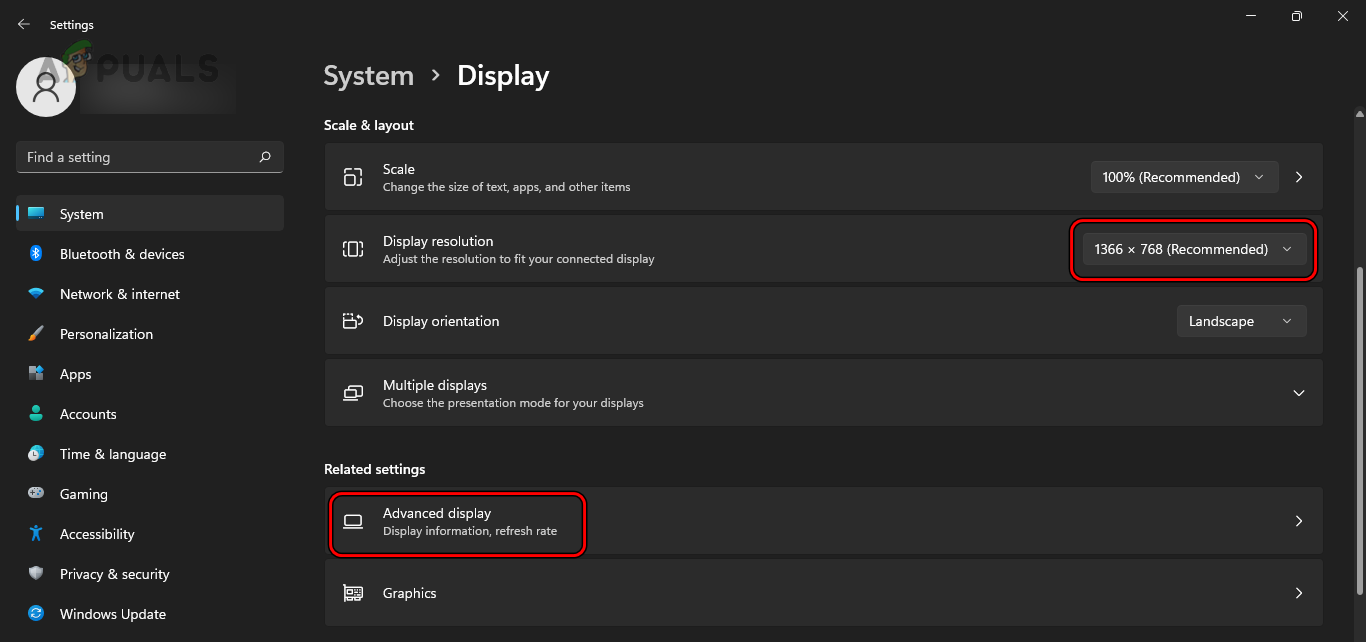
Lower the Display Resolution and Open Advanced Display - Lower the Display Resolution and go to Advanced Display settings.
- Select a lower Refresh Rate and check if your Acer monitor is working.
Lower the Refresh Rate of Your Display
In some cases, your graphics card control panel (like Intel HD Control Panel) can also be used to adjust resolution and refresh rate.
3.2. For macOS
- Open your Mac’s System Preferences > Displays.
- Select a lower Resolution and then open the Refresh Rate dropdown.
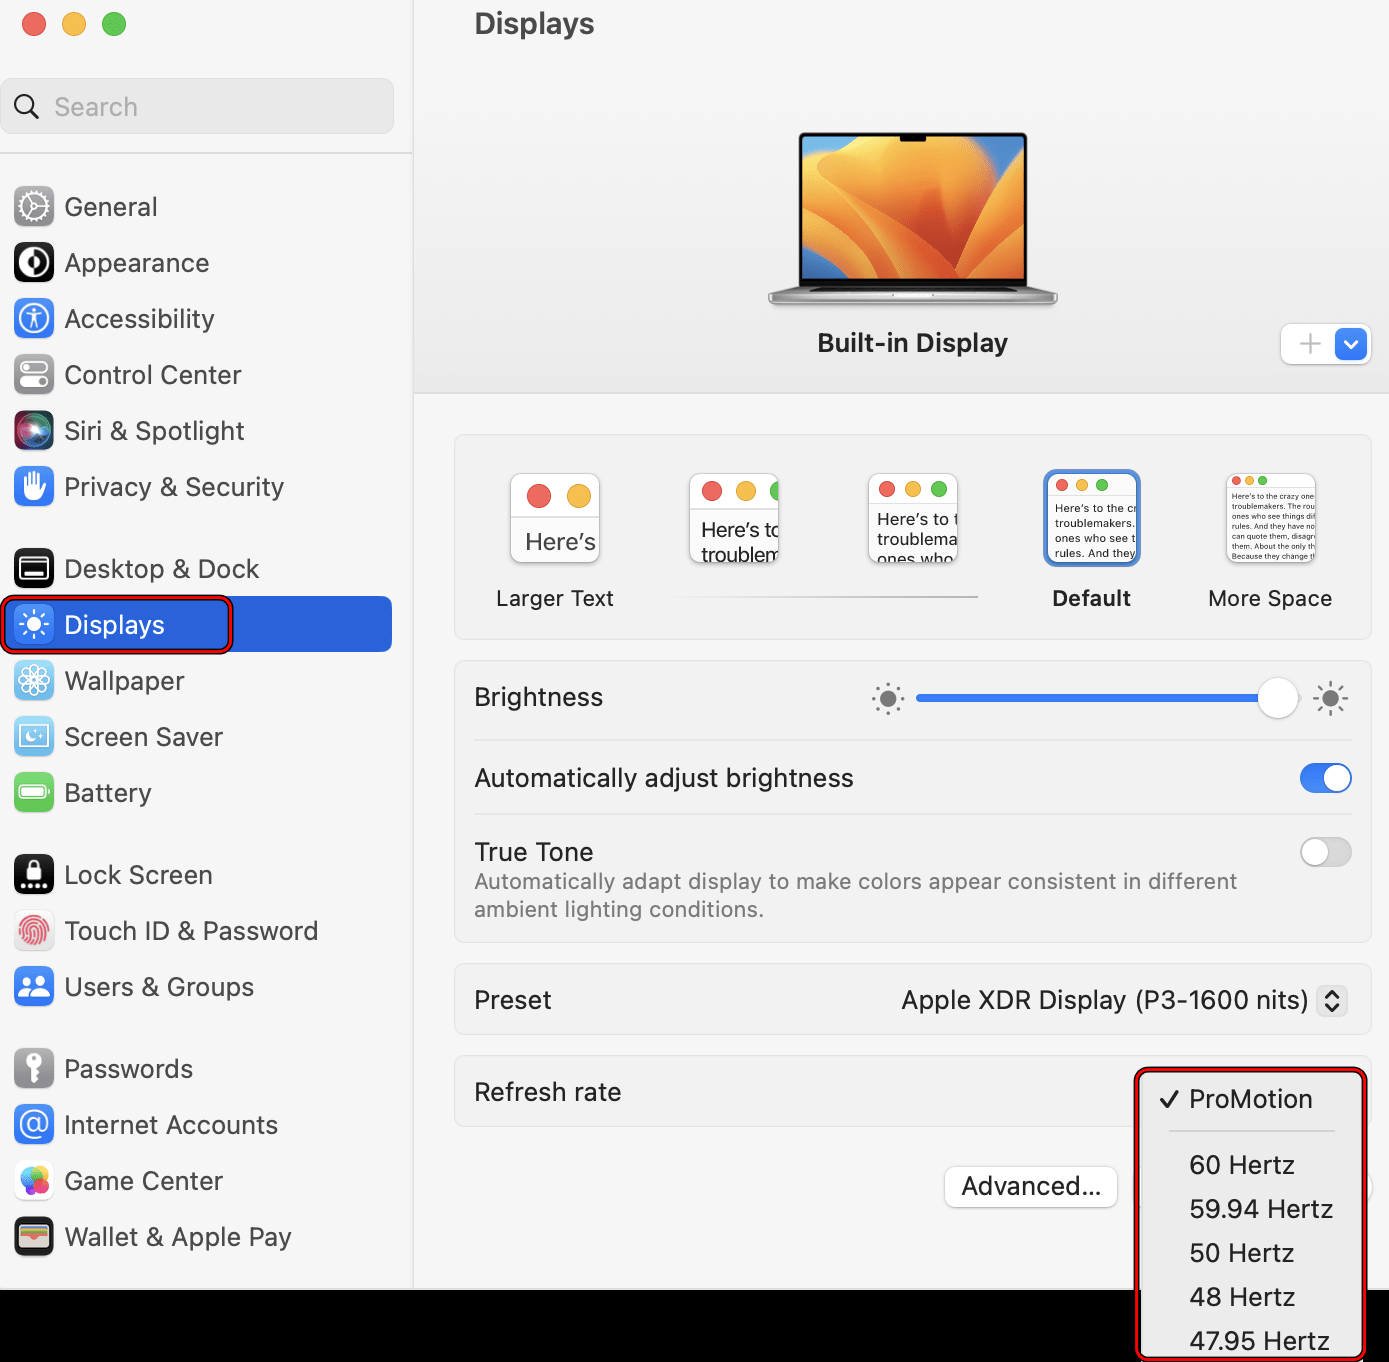
Lower the Refresh Rate on a Mac - Choose a lower refresh rate (try 60 Hz or 50 Hz) and check if the monitor now works.
4. Disable HDCP in the Graphics Control Panel
HDCP is a feature used to protect high-definition video and audio from being copied. However, sometimes this feature can interfere with the display on your Acer monitor, causing a “No Signal” message.
To fix this, try disabling HDCP in your graphics control panel. For AMD users:
- Open the AMD graphics control panel and go to Display > Specs.
- Select Override and find the HDCP Support option.
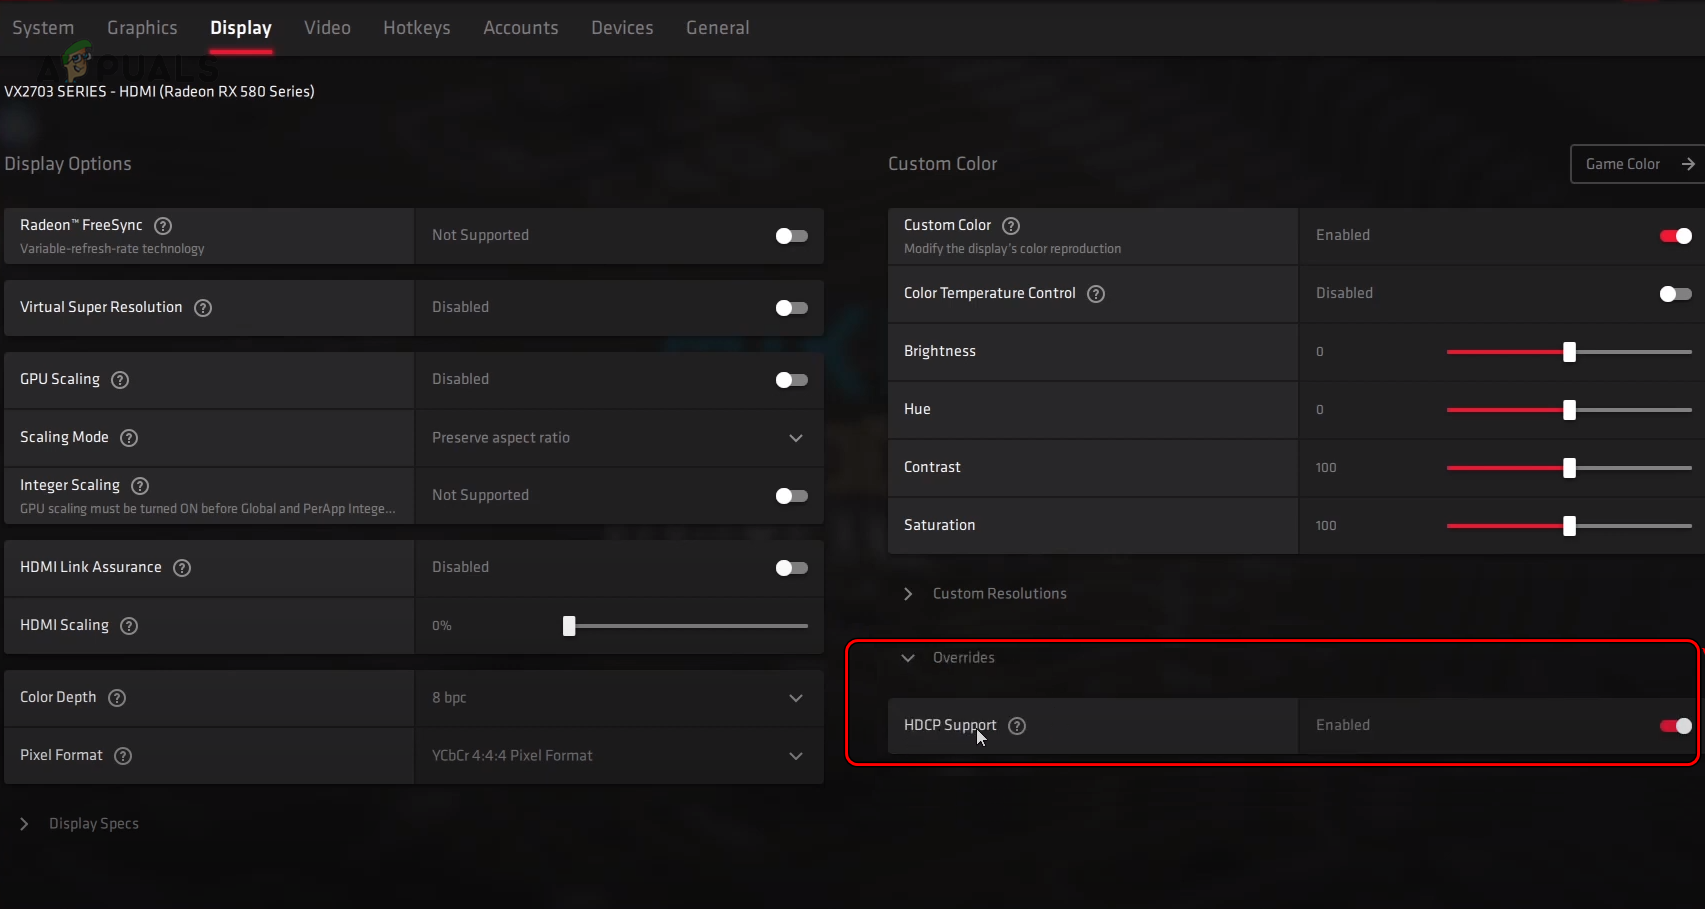
Disable HDCP Support in the AMD Settings - Disable HDCP support, then restart your computer and check if your Acer monitor is now working.
5. Update Your Drivers
If your system’s display drivers are out of date, your computer may not be able to send a signal your monitor can use.
5.1. Using Device Manager (Windows)
- Right-click the Start button and go to Device Manager. Then expand Display Adapters.
- Right-click on your graphics device and choose Update Driver.
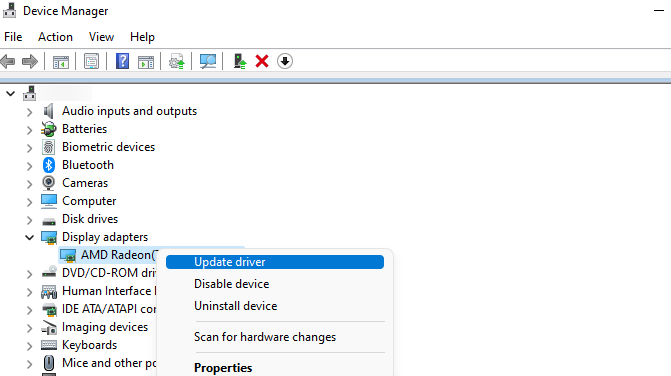
Update the Display Driver Through the Device Manager - Select Search automatically for drivers and install any updates found.
- Restart your system and check if the monitor display issue is fixed.
5.2. Manually Update the Driver
- Download the latest driver for your system from the manufacturer’s website and install it as an administrator.
- Restart your system and check if your Acer monitor is now working.
5.3. Update Using the OEM App
- Open your OEM app (for example, HP Support Assistant) and check if any driver updates are available.
- If you see updates, install them and restart your computer. See if the “No Signal” problem disappears.
6. Reset SMC and PRAM/NVRAM (Mac Only)
The SMC (System Management Controller) manages power, battery, and other essential functions. The PRAM/NVRAM stores things like display resolution and startup disk info.
If either of these becomes corrupted, your Mac may not output a display to your Acer monitor. Resetting them can help.
6.1. Reset SMC
To reset SMC on a MacBook:
- Turn off your MacBook. On the built-in keyboard, press and hold these keys together:
Shift

Control

Option

Power
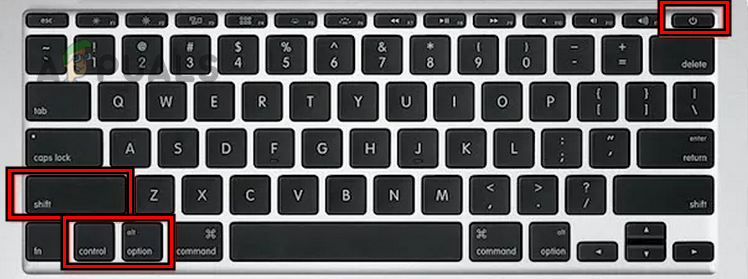
Perform an SMC Reset on the MacBook Air - Hold for 10 seconds, then release all keys.
- Press the power button to turn your MacBook back on. Check if the Acer monitor works.
6.2. Reset PRAM/NVRAM
- Restart your Mac and immediately hold these keys:
Option

Command

P

R
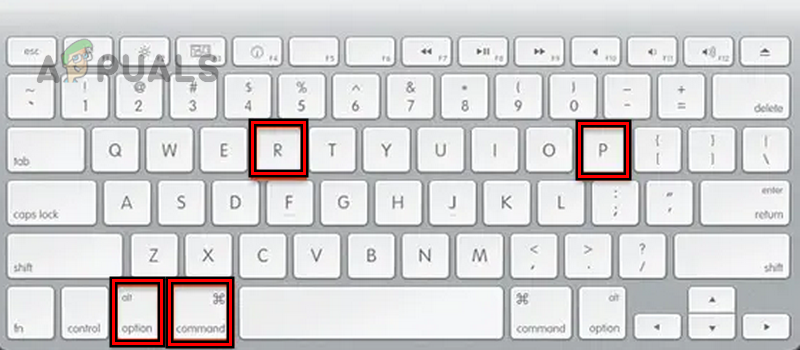
Perform a PRAM Reset on the MacBook Air - Wait for the second startup chime, then release the keys.
- Allow your Mac to boot up and check if your monitor is now working.
7. Change the BIOS Settings or Reset BIOS
If your computer’s graphics settings in the BIOS are incorrect, you may not see any output on your Acer monitor. Adjusting or resetting the BIOS settings can help.
7.1. Change Boot Mode
- If the problem continues, boot into your computer’s BIOS and look for Boot Type or Boot Mode settings.
- Enable CSM (Compatibility Support Module) and save your changes.
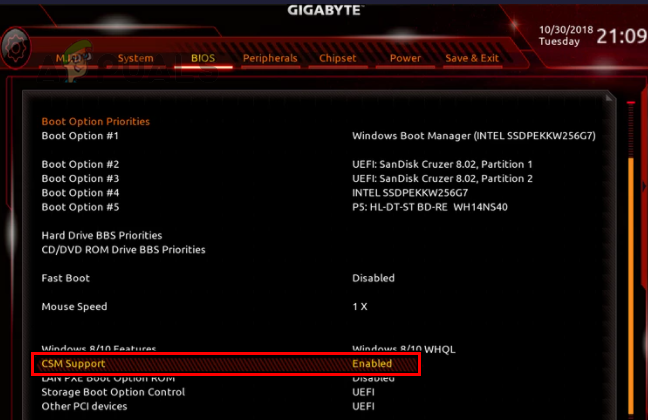
Enable CSM in the System’s BIOS - Boot back into your operating system and see if the monitor works.
7.2. Reset BIOS
- Boot into the BIOS and open the BIOS Recovery Options.
- Select Reset BIOS Settings to Default and confirm.
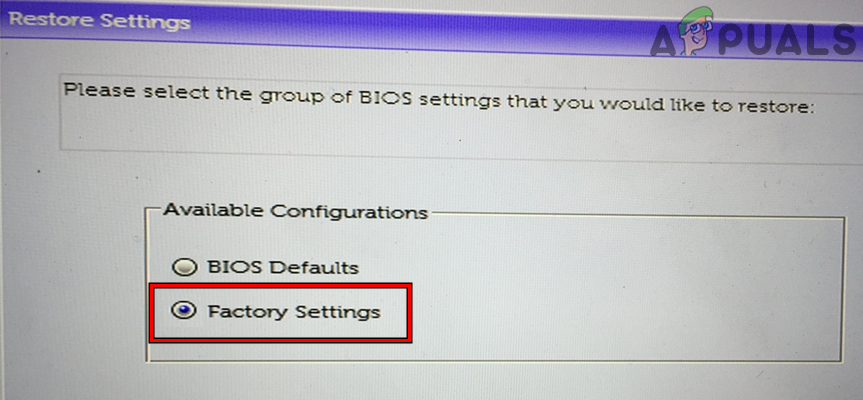
Reset BIOS to Factory Settings - Once done, restart the system and check if your monitor is working.
- If it isn’t, you might need to replace the CMOS battery in your computer and test again.
- If you’re still having trouble, try reinstalling or updating your BIOS (if your motherboard supports it) and check again.
8. Use System Restore
Your monitor may show “No Signal” if a recent change on your computer (like a new app or setting) created a conflict. If you’re not sure what changed, using System Restore can help get things working again.
- Right-click the Start button and go to Settings > System > Recovery.
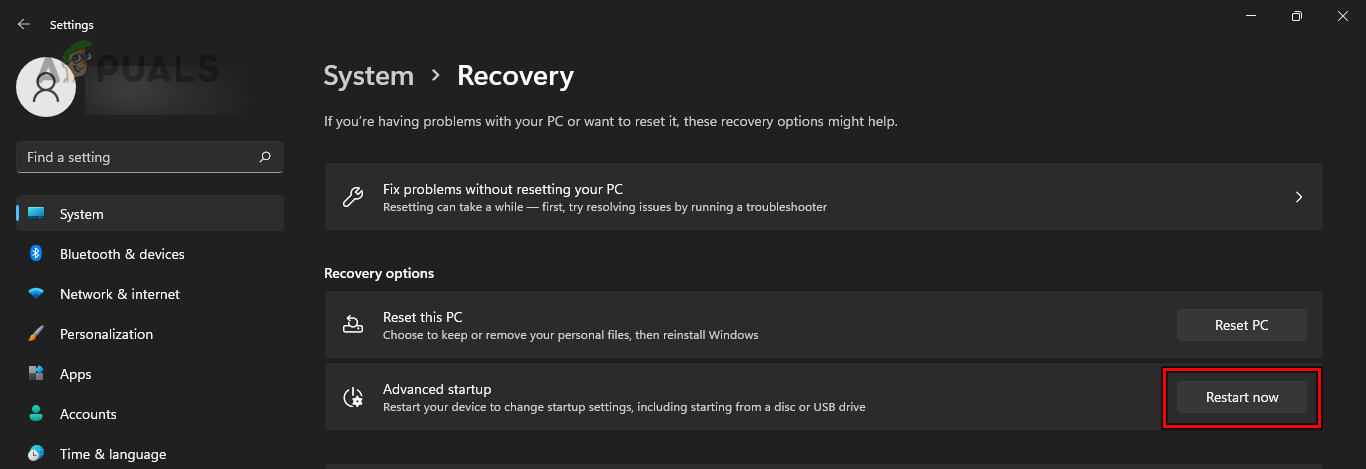
Click on Restart Now in the Advanced Recovery Startup - Under Advanced Startup, click Restart Now. Once in the Windows Recovery Environment, go to Troubleshoot > Advanced Options.
- Choose System Restore and select the most recent restore point.
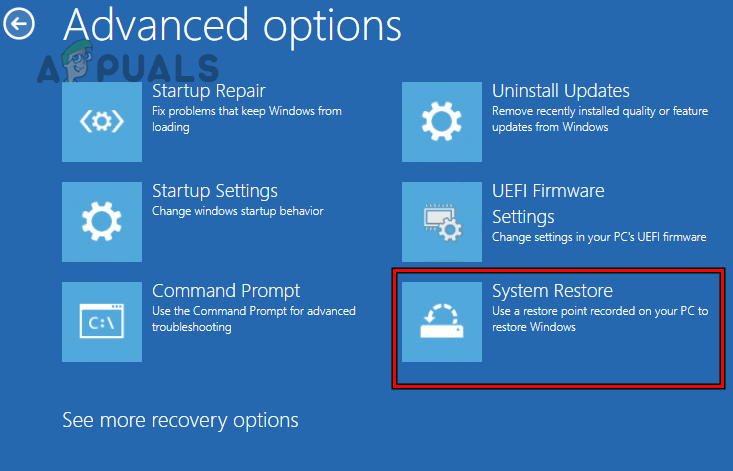
Use System Restore in the Advanced Recovery Options - Follow the on-screen instructions to finish the process. When done, your Acer monitor should hopefully start working again.
If none of the above solutions work and your monitor won’t work with any other device, please contact Acer Support for further assistance.
Reviewed by Huzaifa Haroon