How to Fix ‘Access Denied’ Error When Visiting GameStop Website?
The “Access Denied” error on the GameStop website usually appears after you open the homepage but cannot visit other pages. This error means the website’s server has blocked your request because it thinks you may have broken a security rule.
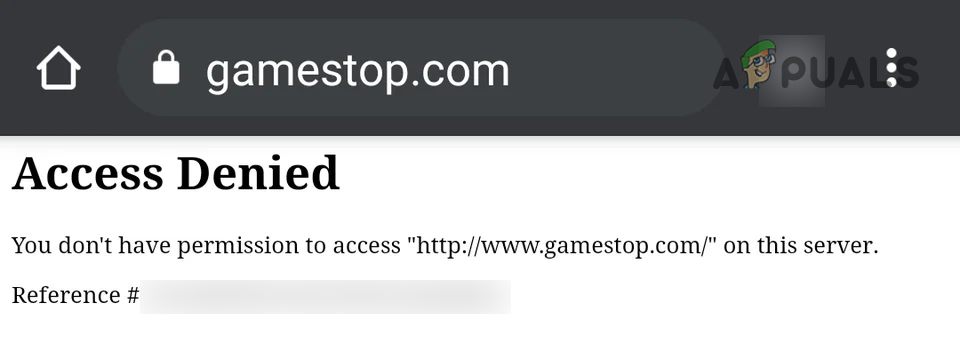
A common reason for this is browser extensions like Dark Reader, which can confuse the website. Other causes include using a VPN, incorrect browser settings, or too many requests coming from your internet address.
In this article, we will discuss different ways to solve this error.
1. Try Incognito or InPrivate Mode of Your Browser
Corrupted browser extensions, cookies, or cached data can prevent access to the GameStop website. Using your browser’s incognito or InPrivate mode is a quick way to determine if these factors are responsible. Before starting, verify that the GameStop website is not down by checking resources such as Down Detector.
- Open the Chrome browser. Click the three vertical dots at the upper right corner to open the menu.
- Select New Incognito Window. In the new private browsing window, go to the GameStop website and see if it loads correctly.
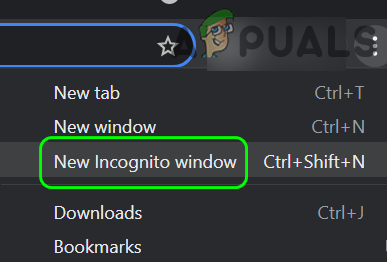
Open New Incognito Mode in Chrome
If you are able to access GameStop in Incognito or InPrivate mode, it is likely that a browser extension or corrupted cookies/cache is causing the problem. In this case, ensure that none of your extensions or add-ins—especially ad blockers—are responsible.
2. Clear Your Browser’s Cookies and Cache
The access denied error may occur if your browser’s cookies or cache are corrupted. Clearing them can often resolve these problems.
2.1. Delete GameStop-Specific Cookies
- Open Chrome and navigate to the GameStop website.
- Click the padlock icon in the address bar, then select Cookies in the drop-down menu.
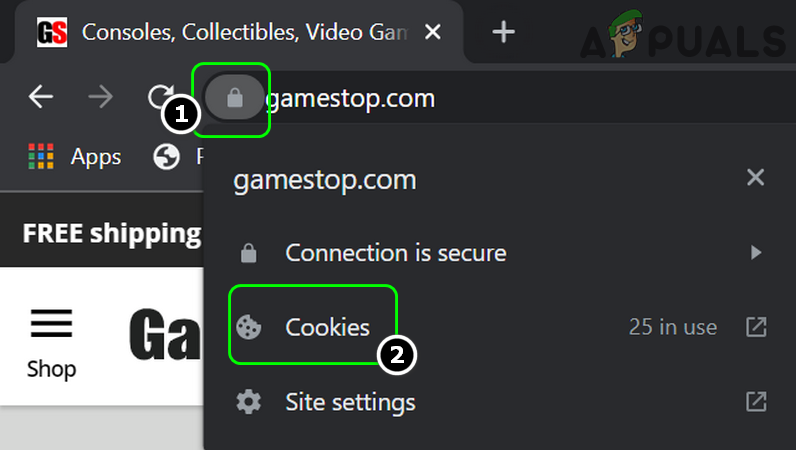
Open the GameStop Cookies - Select each cookie listed at the top and click Remove at the bottom.
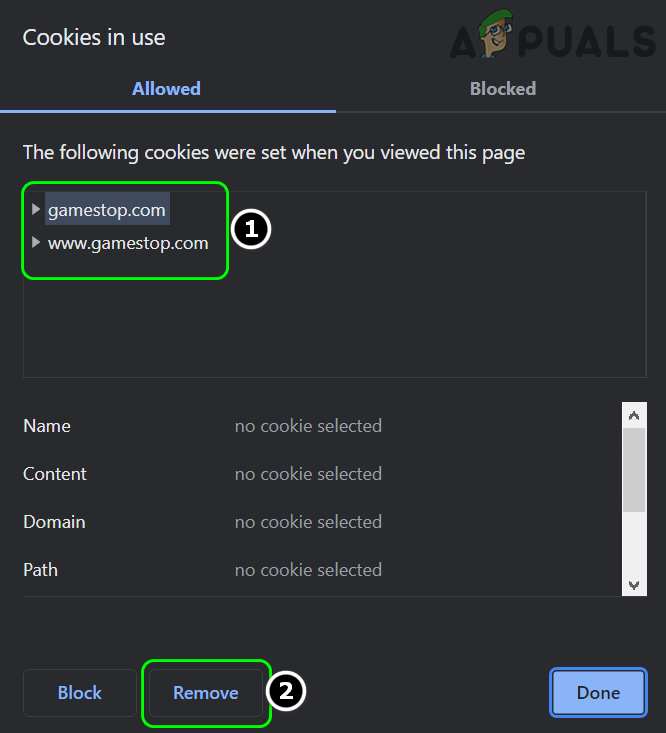
Remove the GameStop Cookies - Repeat this process to remove all GameStop cookies. Relaunch Chrome and check if you can now access the GameStop website.
2.2. Delete All Browser Cookies and Cache
- If deleting GameStop-specific cookies does not resolve the issue, open the Chrome menu again by clicking the three dots.
- Hover over More Tools and select Clear Browsing Data.
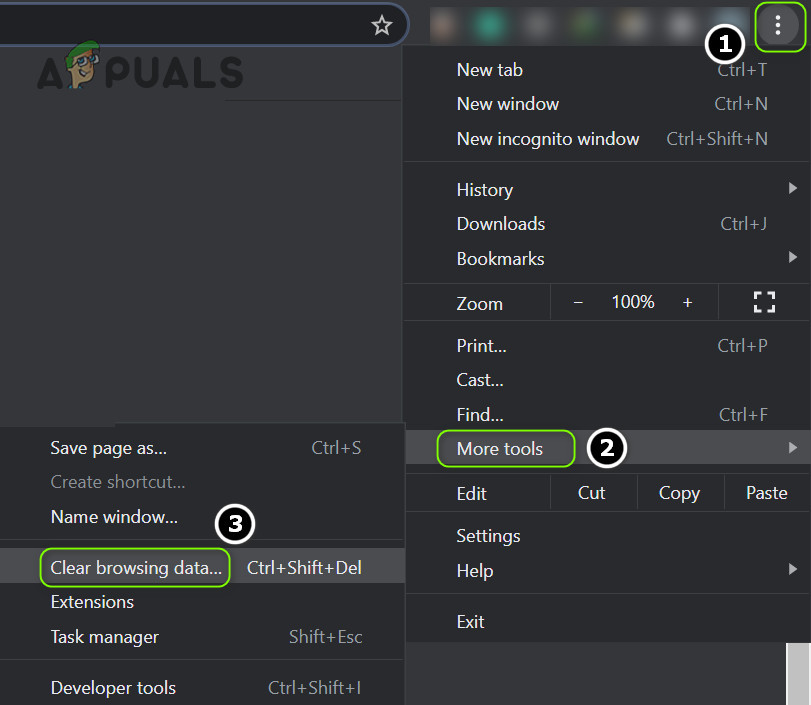
Open Clear Browsing Data in the Chrome Menu - At the bottom of the new window, click Sign Out (to keep your history with your Google account) and select All Time in the time range drop-down menu.
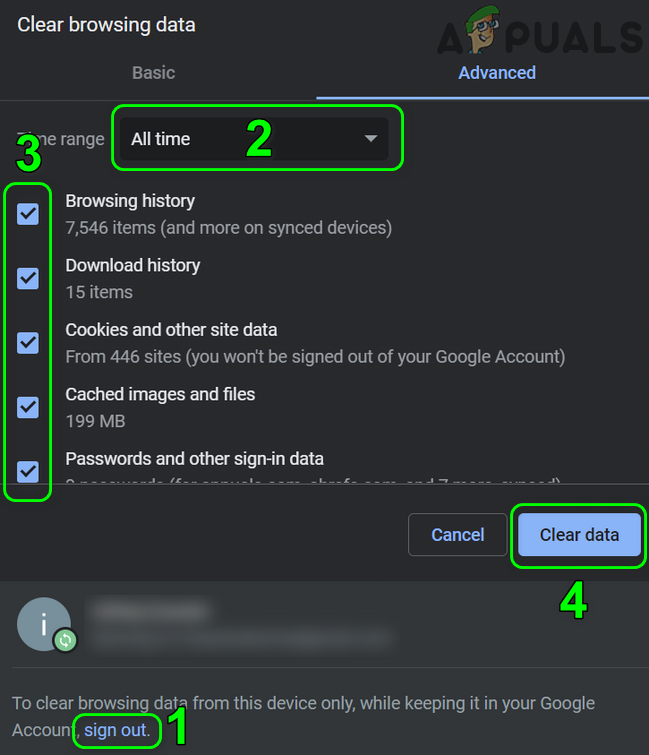
Clear the Browsing Data of Chrome - Check all data categories, then click Clear Data.
- Relaunch Chrome to see if the access denied error on GameStop is resolved.
3. Restore Browser Settings to Defaults
Corrupted or misconfigured browser settings can also lead to access denied errors. Resetting your browser to its default settings can resolve these issues. Make sure to back up any important browser data before proceeding.
- Open Chrome and click the three vertical dots at the upper right corner.
- Go to Settings and expand Advanced in the left panel.
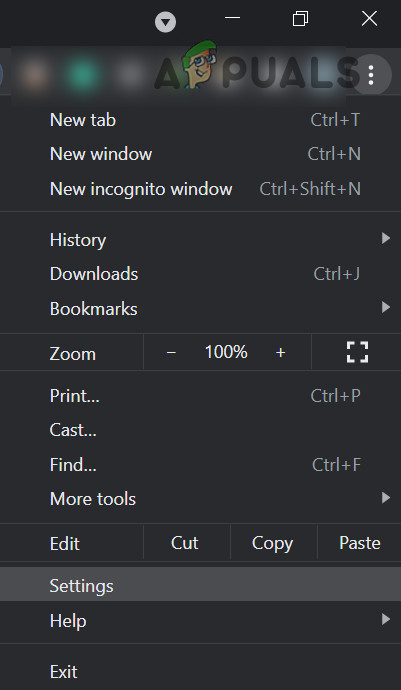
Open the Chrome Settings - Navigate to Reset and Clean Up, and in the right panel, click Restore Settings to Their Original Defaults.
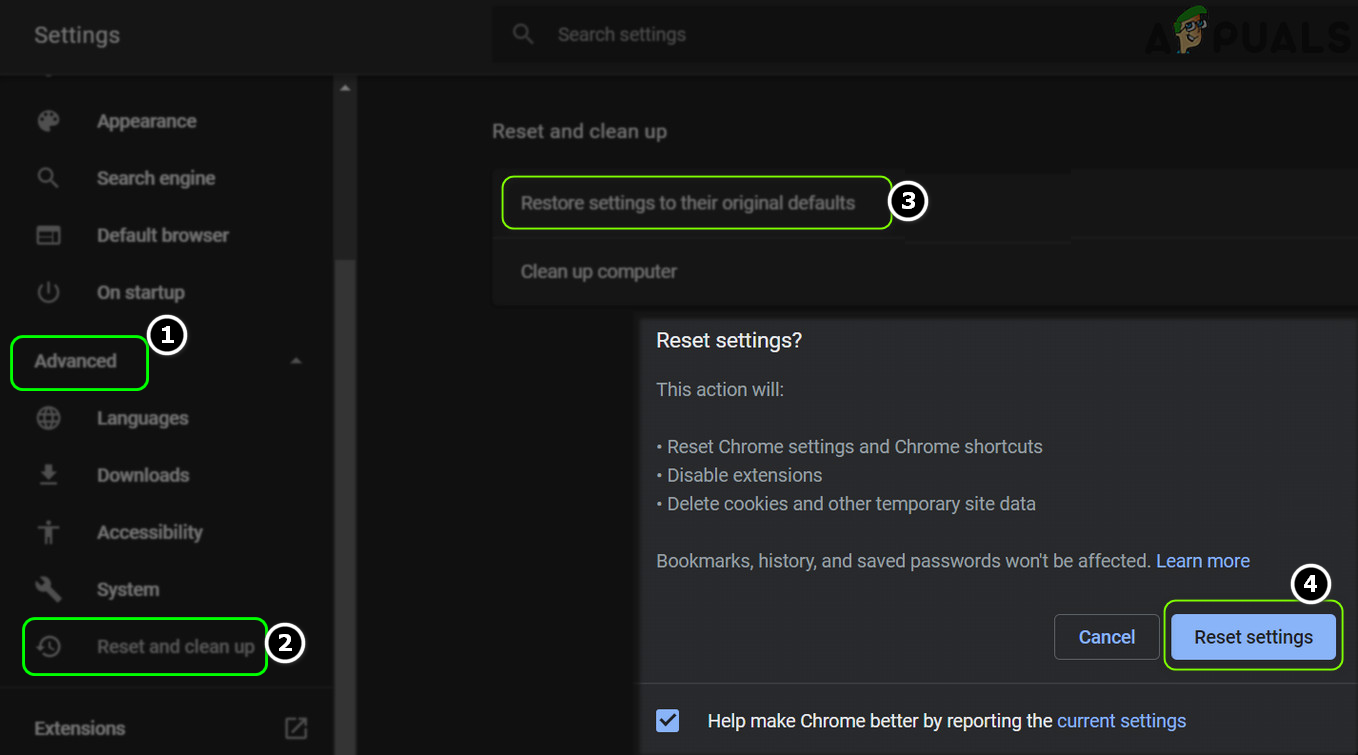
Reset Chrome Settings to Defaults.png - Click Reset Settings and relaunch Chrome. Revisit the GameStop website to check if the issue is resolved.
4. Try Another Browser
A temporary communication issue between your browser and the GameStop website can cause the error. Testing access in another browser can help determine if your main browser is the cause.
- Download and install another browser (such as Firefox, especially if you’re currently using a Chromium-based browser).
- Ensure your main browser is closed, then open the new browser and visit the GameStop website to see if you can access it.
5. Change the DNS Settings of Your System or Device
If your device’s DNS servers are unable to resolve addresses related to GameStop, you may receive an access denied error. Changing your DNS settings can often fix this.
- Right-click the Windows button and select Network Connections.
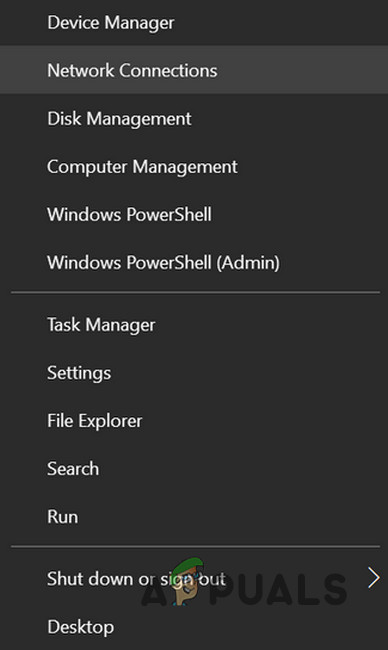
Open Network Connections - Select Change Adapter Options and right-click your active network connection.
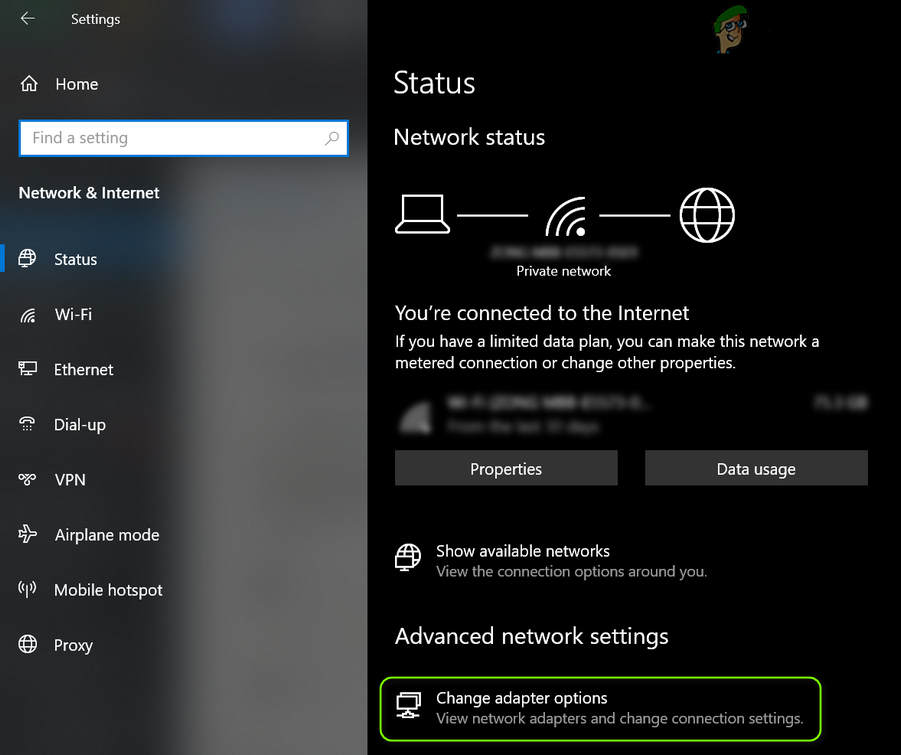
Open Change Adapter Options - Choose Properties and double-click Internet Protocol Version 4 (TCP/IPv4).
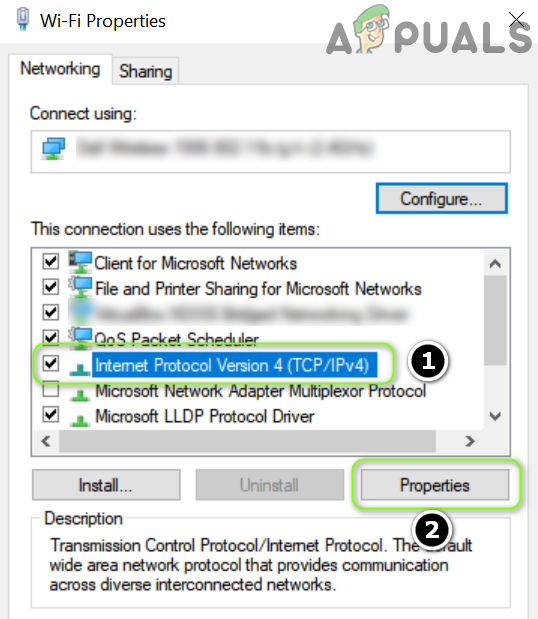
Open Properties of Internet Protocol Version 4 (TCP IPv4) - Select Use the Following DNS Server Addresses.
- Enter the following Cloudflare DNS addresses:
Preferred DNS Server: 1.1.1.1

Alternate DNS Server: 1.0.0.1
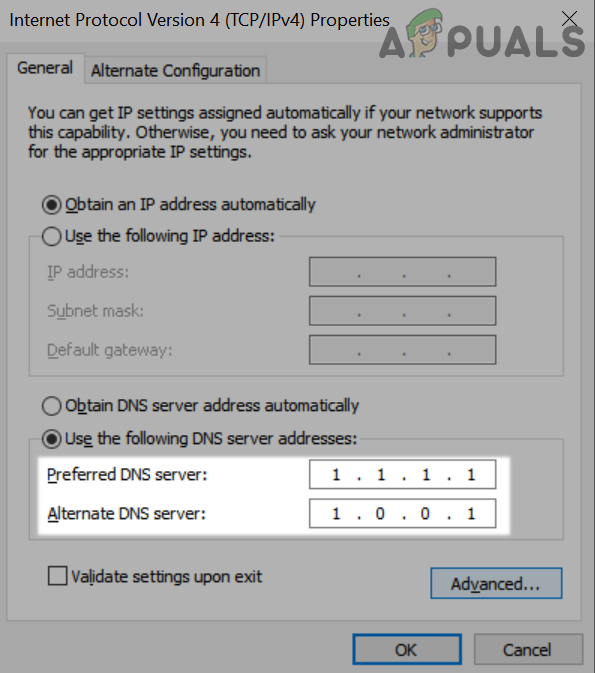
Use the Cloudflare DNS for Preferred and Alternate DNS - Apply your changes and restart your system.
- After restarting, try accessing the GameStop website again.
6. Try Another Network or Use a VPN
ISP restrictions or a blacklisted IP address may also prevent access to GameStop. Trying a different network or using a VPN can help bypass these blocks. Please note that some VPN IPs may already be blocked by GameStop. Before attempting these steps, disable any active proxy servers on your device.
6.1. Try a VPN
- If you do not have a VPN, install and launch a VPN application.
- Connect to a server, ideally located in the USA. Test the GameStop website to see if it loads.
- If you are already using a VPN and still receive the error, try disabling your VPN to see if this resolves the issue.
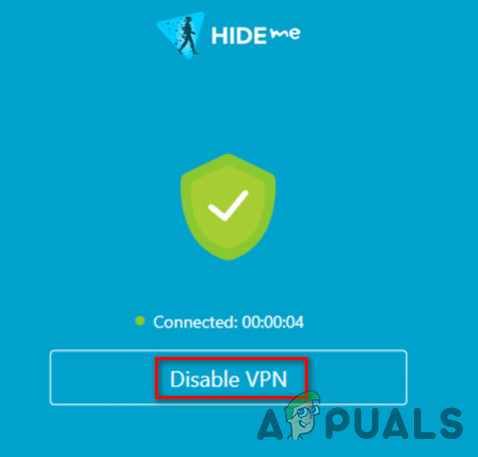
Disable the VPN Client
6.2. Try Another Network
- If the VPN does not help, disconnect from your current network and connect to a different network, such as a mobile hotspot or, for mobile devices, cellular data.
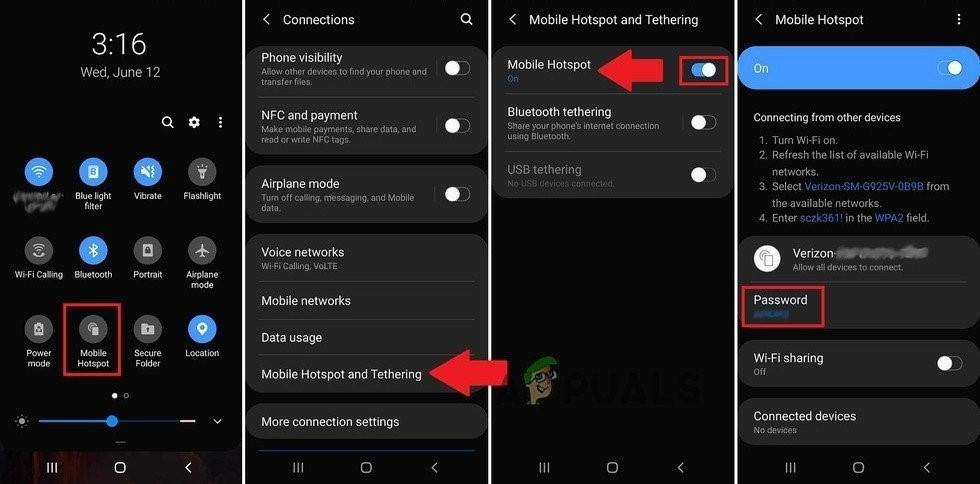
Enable Hotspot of Your Phone - Check if you can access the GameStop website using the new connection. If successful, contact your ISP to confirm whether they are blocking GameStop or request that they renew your router’s IP address. If your ISP is not the cause, consider contacting GameStop support (for example, via Twitter) to request removal of an IP block.
7. Whitelist GameStop in Antivirus or Firewall Settings
If your antivirus, firewall, or privacy application (such as SurfShark) blocks access to GameStop, adding the site to the whitelist can resolve the issue. Here is an example of whitelisting GameStop using ESET Internet Security.
Warning: Proceed cautiously, as changing antivirus or firewall settings can expose your system to potential risks.
- Open ESET Internet Security and go to the Setup tab in the left-hand menu. Then select Internet Protection.
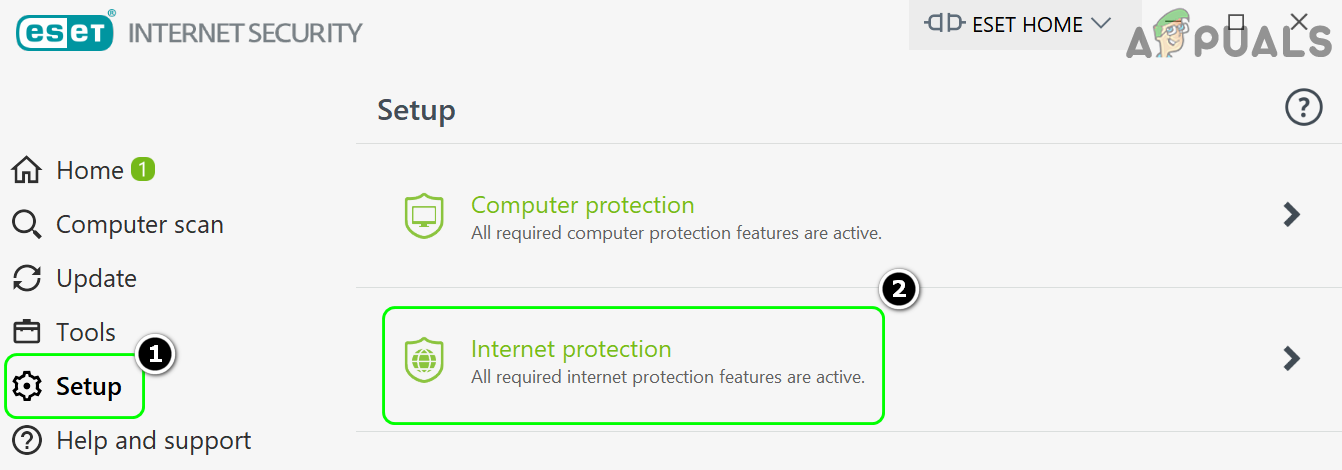
Open Internet Protection in ESET - Click the Settings icon next to Web Access Protection and select URL Address Management.
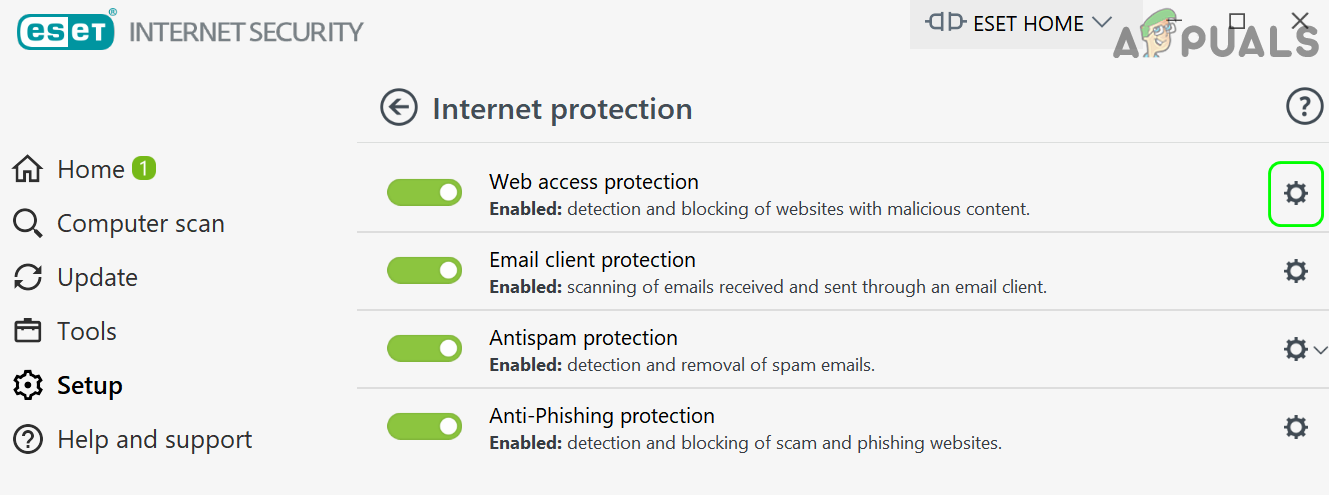
Open Settings of ESET Web Access Protection - Click Edit next to Address List and select List of Allowed Addresses.
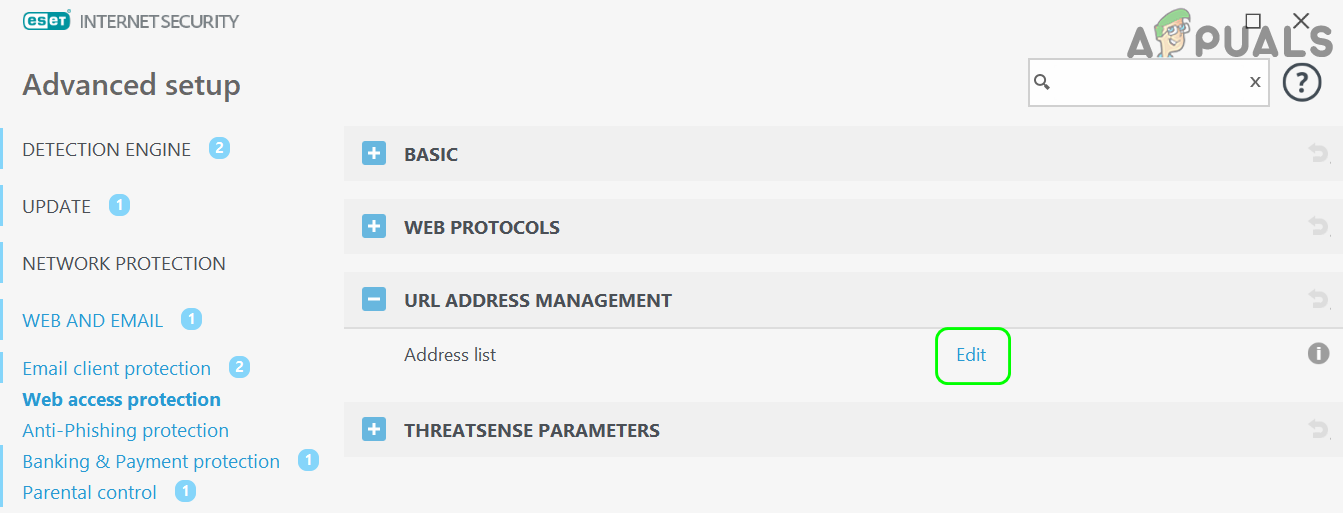
Open Edit Address List in URL Address Management of ESET - Click Edit again, then Add.
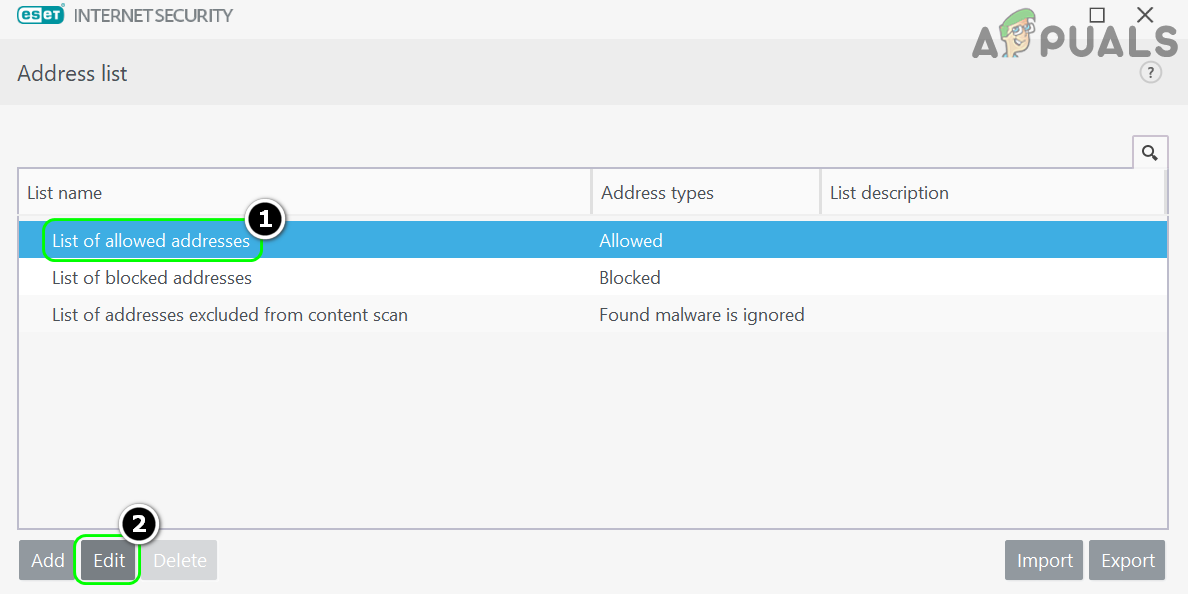
Edit List of Allowed Address in ESET - Enter the following URL and click Add:
https://www.gamestop.com/
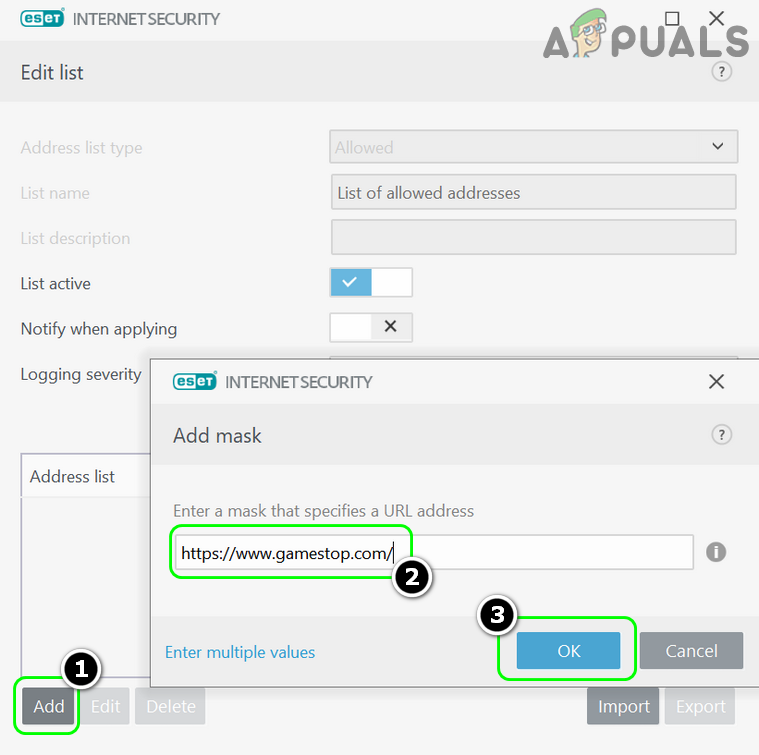
Add GameStop in the Allowed Addresses of ESET - Click OK or Apply on all open ESET windows to save your changes.
- Open your browser and check if you can now access the GameStop website.
8. Reset Your Router to Default Settings
Corrupted router settings or configurations can sometimes cause the access denied error. Resetting your router to its factory defaults can help in fixing such issues.
8.1. Restart the Router and Try a Direct Connection
Before resetting, try restarting your router to refresh your connection’s IP assignment.
- Restart your network router and check if the access denied error is resolved.
- If not, try connecting your device directly to the Internet (bypassing the router). If you are able to access GameStop with a direct connection, inspect your router settings for conflicts.
8.2. Reset the Router to Factory Defaults
If a direct connection works but you cannot identify the problematic router setting, resetting the router to factory defaults may resolve the issue. Ensure you back up your router configuration before proceeding.
- Locate the Reset button on the router (typically at the back; some models use the power button for reset).
- Press and hold the Reset button for approximately 30 seconds. A pointed object such as a paperclip may be required.
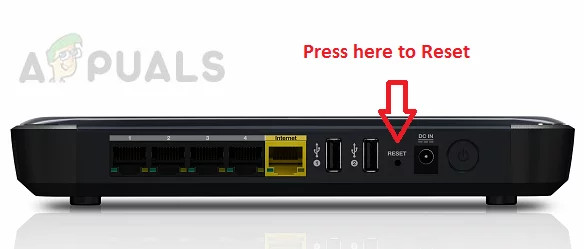
Reset Your Router - Release the button and wait until the router’s lights stabilize. Then, follow your ISP’s instructions to set up your router.
- Once your router is configured, check if the GameStop access denied issue is resolved.
If none of the above solutions work, try using a regional GameStop website, such as gamestop.ca for Canadian users, to determine if you can access GameStop services from an alternate domain.


