Fix: “A Connection Error Occurred – Returning to Your World” in Elden Ring
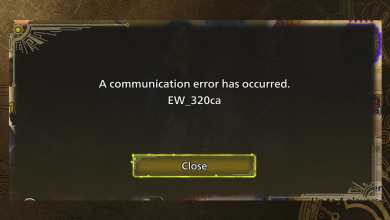
The message “A Connection Error Occurred – Returning to Your World” often appears in Elden Ring when trying to join or host co-op sessions or invasions, causing multiplayer games to suddenly disconnect. This error means the game could not connect properly with another player, so the session has to end.

The main reason for this problem is interference from Easy Anti-Cheat (EAC), especially if you don’t run Elden Ring or Steam as an administrator. Other common causes include having a strict NAT type, an unstable internet connection, or losing data packets when the game tries to match players together.
Knowing these reasons can help you quickly identify and fix the issue so you can return to playing with others smoothly.
1. Check Your Internet Connection
The first and most critical step when addressing connectivity issues in Elden Ring is to verify your internet connection’s quality. Ensuring a stable and fast connection significantly reduces the likelihood of connection errors.
Begin by checking if any large downloads or streaming activities are running in the background, as these can consume bandwidth and cause instability. Pause or stop these processes to free up network resources for Elden Ring.
If you continue to experience issues, try switching from Wi-Fi to a wired Ethernet connection by connecting your device directly to your router. Wired connections are more stable and significantly reduce packet loss.
Additionally, restarting your router can refresh your internet connection. Power off the router, wait for about a minute, and then turn it back on.
If these steps do not resolve the issue, try connecting to a different network if one is available. Alternatively, you can use your mobile device’s hotspot feature to test whether your primary connection is at fault.
2. Check for Server Problems
Elden Ring’s servers can sometimes become overloaded, especially during peak hours or game updates, preventing new connections from being established.
Before attempting in-depth troubleshooting, check the game’s official social media, server status pages, or community forums to see if there are widespread reports of server downtime. If servers are down, you will need to wait for official maintenance or fixes to be completed.
3. Turn Off In-Game Voice Chat
Some players have identified Elden Ring’s in-game voice chat as a possible cause of the “connection error occurred” issue. Disabling this feature can stabilize your connection.
- Open the Settings menu in Elden Ring.
- Navigate to the Network category.
- Set the Voice Chat option to Restricted.
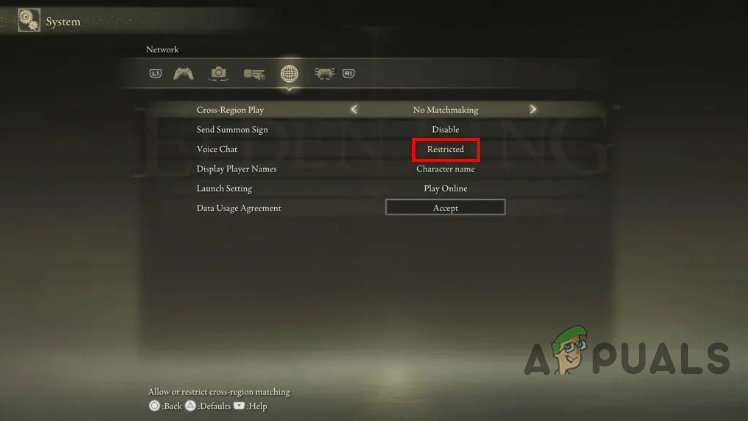
If this step does not resolve your issue, proceed to the additional solutions provided below.
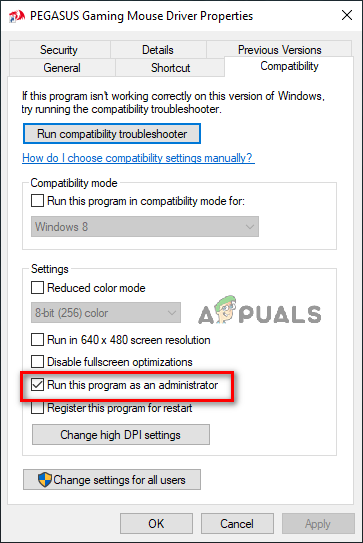
4. Run Elden Ring and Steam as Administrator
Running Steam and Elden Ring with administrative privileges can prevent permission-related errors that interfere with connectivity. Granting these privileges allows the applications to function optimally and access the necessary resources.
- Press the Windows key and type Steam.
- Right-click Steam and select Open File Location.
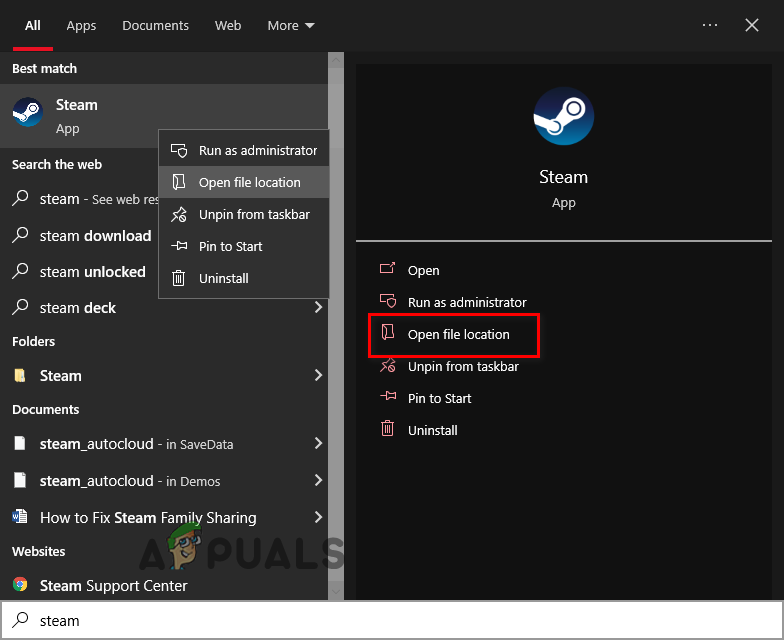
- In the new window, right-click Steam.exe and select Properties.
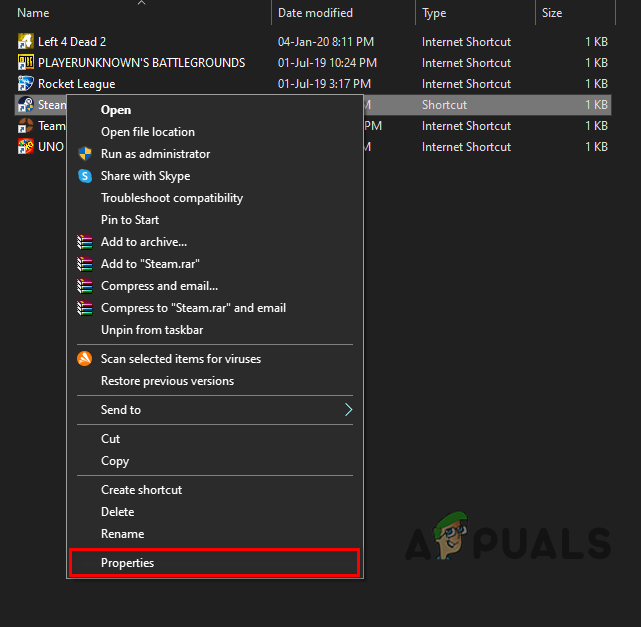
- On the Compatibility tab, check Run as administrator and click Apply.
Next, you should also grant administrator rights to Elden Ring’s anti-cheat component:
- Navigate to the following directory:
C:\Program Files (x86)\EasyAntiCheat_EOS
- If you do not find the file here, use File Explorer to locate it.
- Right-click the file, select Properties, and on the Compatibility tab, check Run as administrator and click Apply.
After applying these changes, relaunch Elden Ring and check if the connection error persists.
5. Enable a VPN
Network routing and regional restrictions can sometimes cause connectivity problems in online games. Using a VPN can help determine if your location is affecting your connection to Elden Ring servers.
A VPN changes your apparent geographic location, potentially bypassing problematic regional routes and accessing more reliable servers. When selecting a VPN, ensure it allows connections to regions such as Germany, Switzerland, or Canada, as these often have robust gaming infrastructures.
After installing your chosen VPN, connect to one of the recommended countries, then launch Elden Ring to test for improvements.
Explore our guide on the best VPNs for gaming for suitable options.
6. Switch to the Google DNS Setting
Default DNS settings may not always provide the fastest or most reliable route to gaming servers. Switching to Google’s DNS (8.8.8.8 and 8.8.4.4) often ensures better stability and reduced latency for online games.
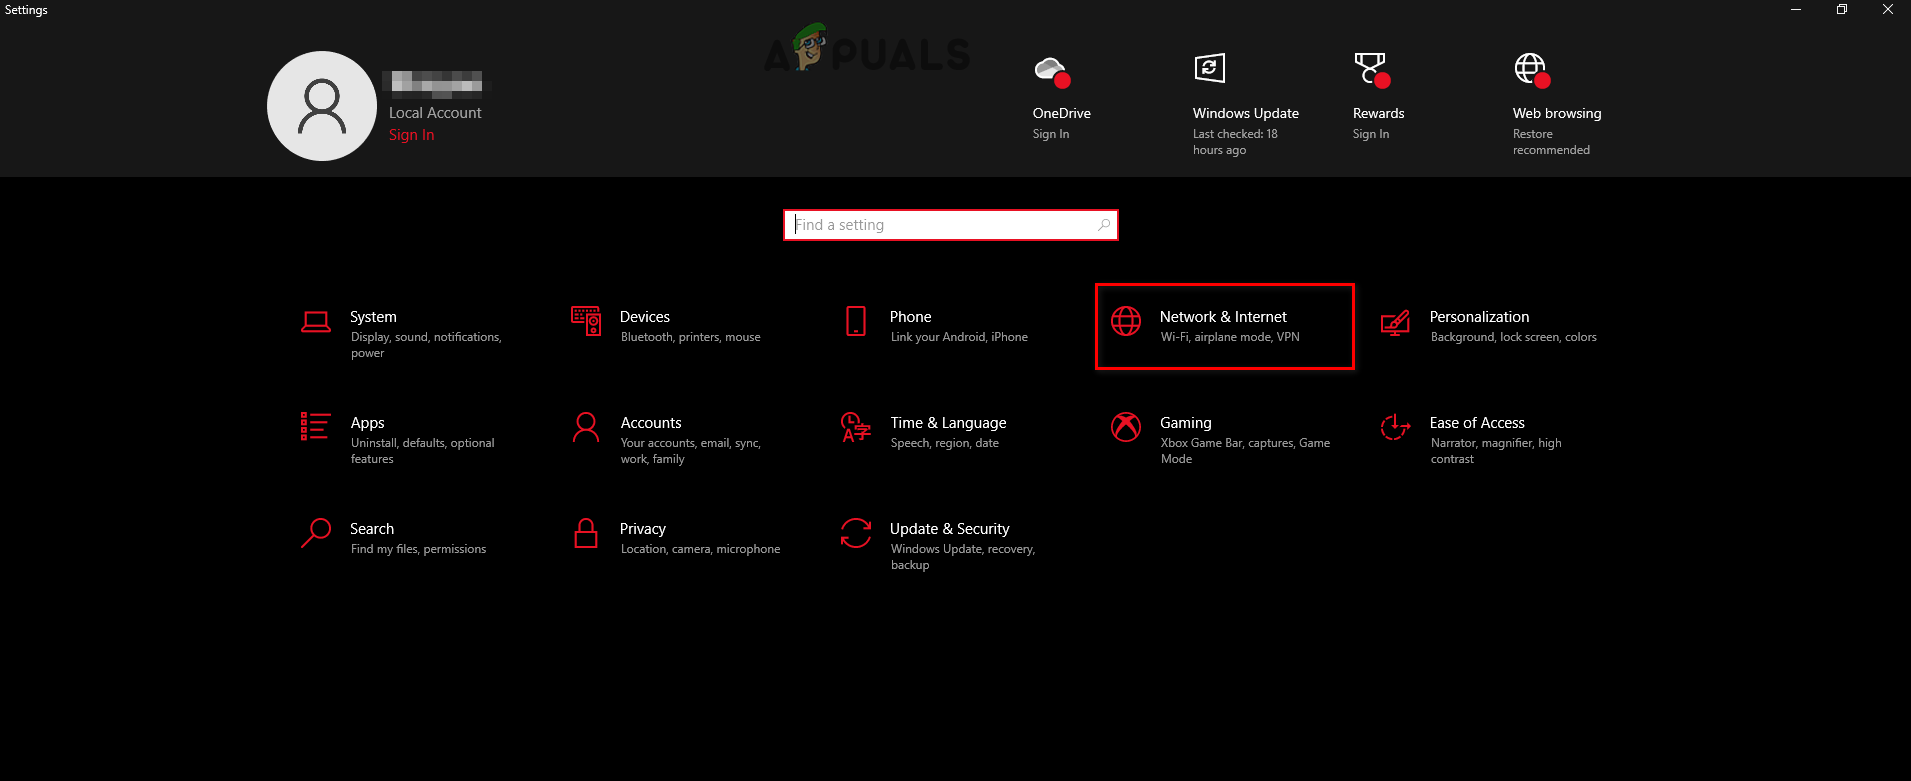
6.1. For PC
- Press Windows Key + I to open Settings.
- Select Network & Internet.
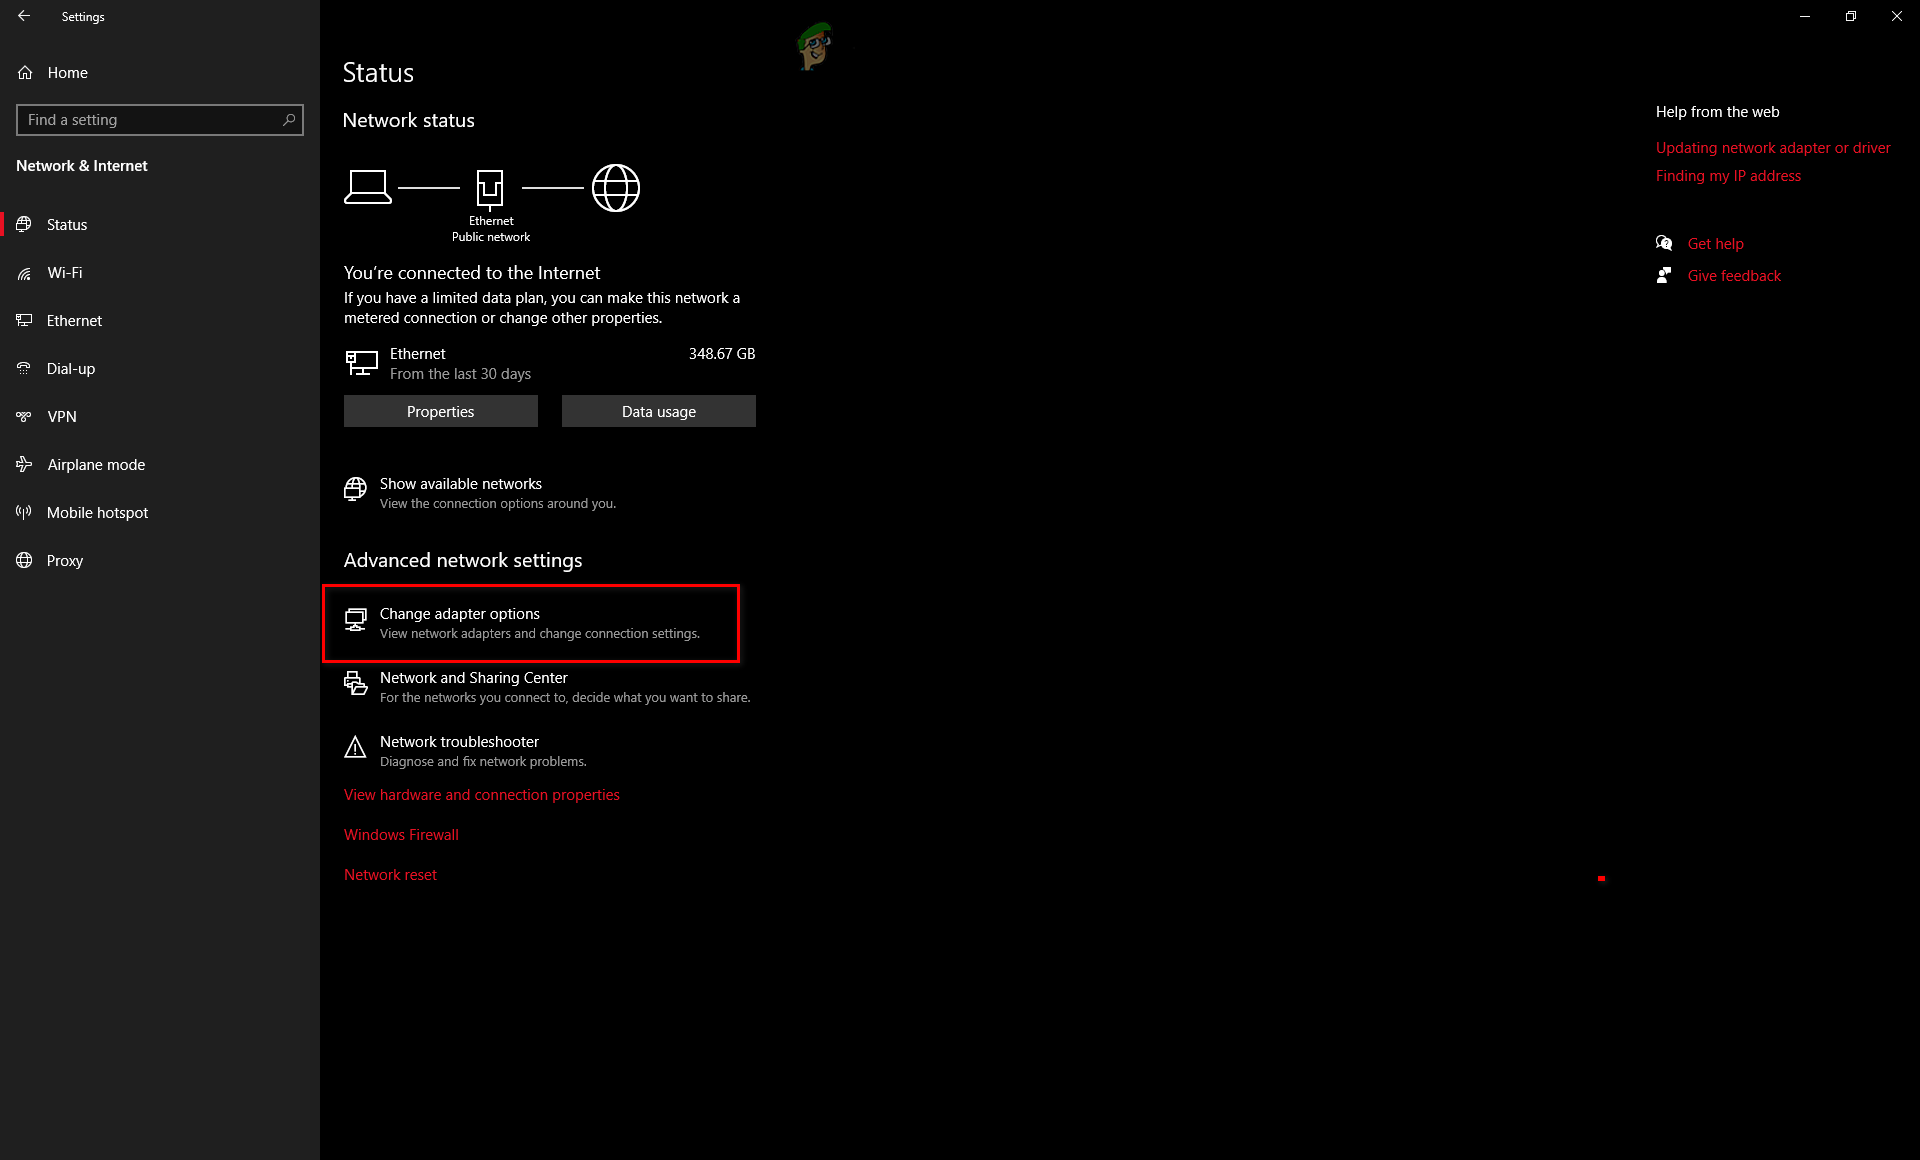
Opening Network and Internet Settings - Click Change Adapter Settings.
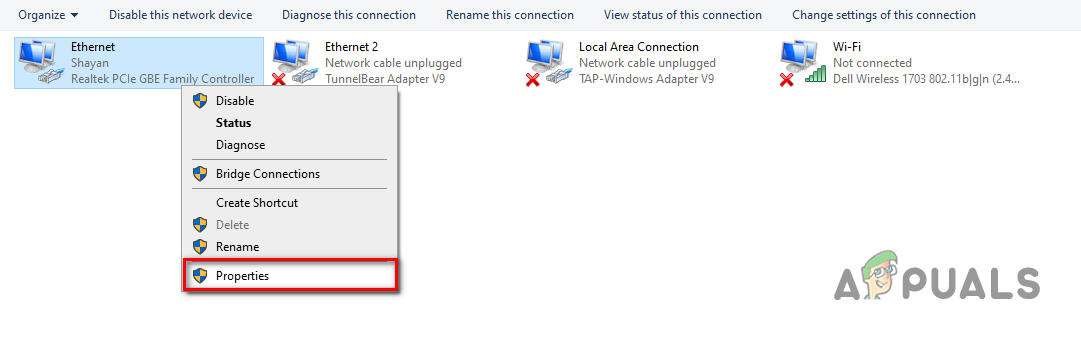
Opening Adapter options - Right-click your active network and select Properties.
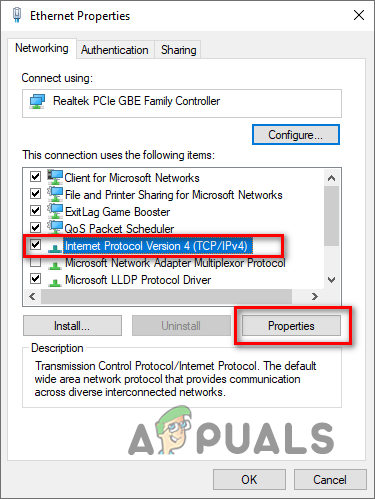
Opening Network properties - Select Internet Protocol Version 4 (TCP/IPv4) and click Properties.
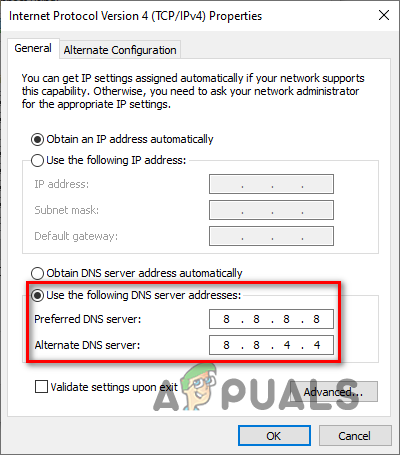
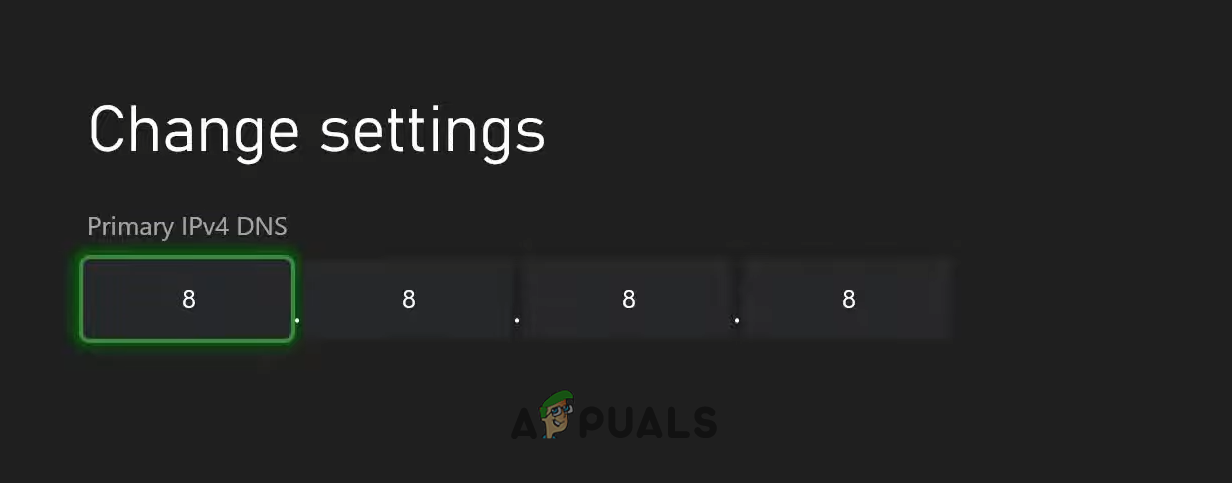
Opening Internet Protocol options - Select “Use the following DNS server addresses.”
- Set Preferred DNS server to 8.8.8.8 and Alternate DNS server to 8.8.4.4.
- Click OK and restart your PC.
Changing DNS Server
6.2. For PlayStation 4
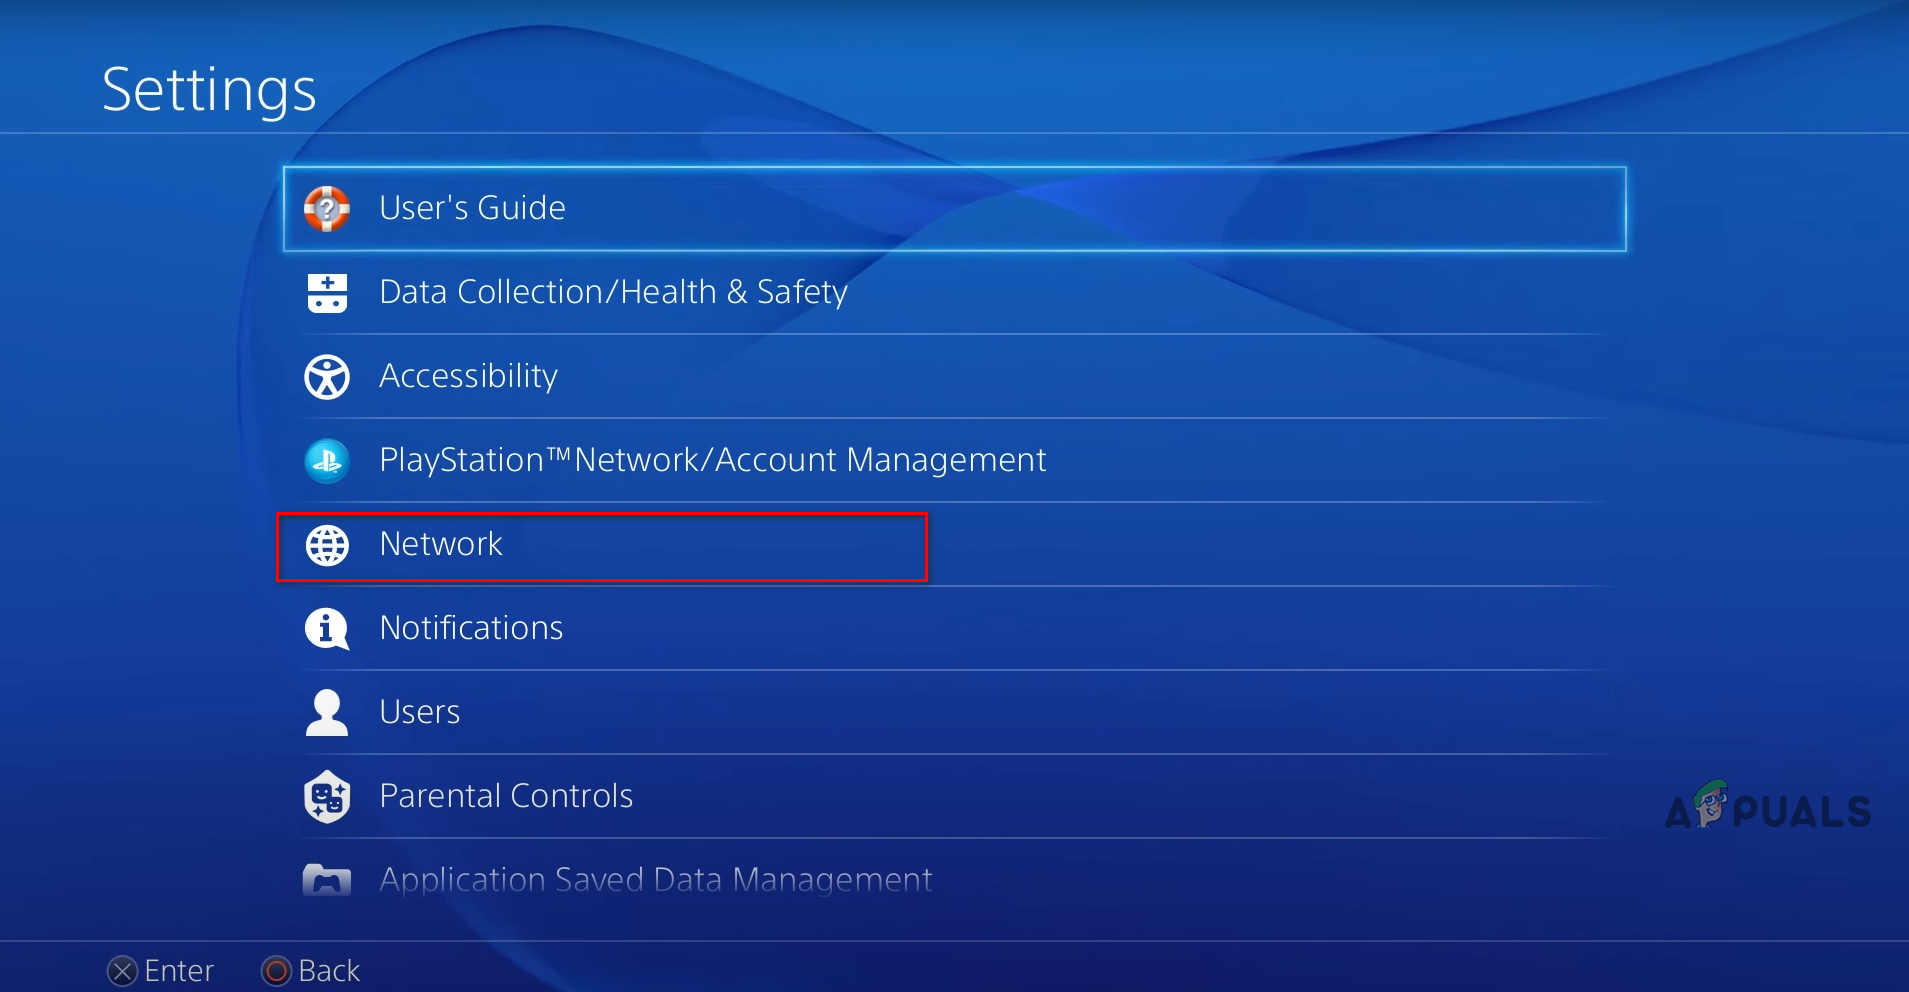
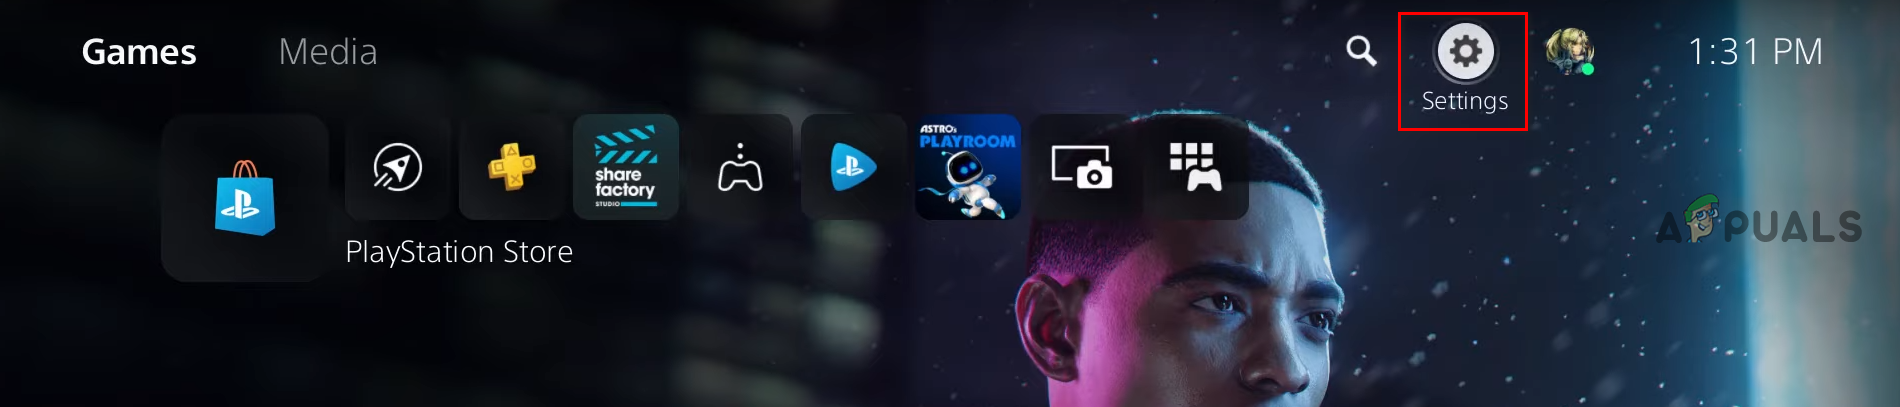
- Open Settings.

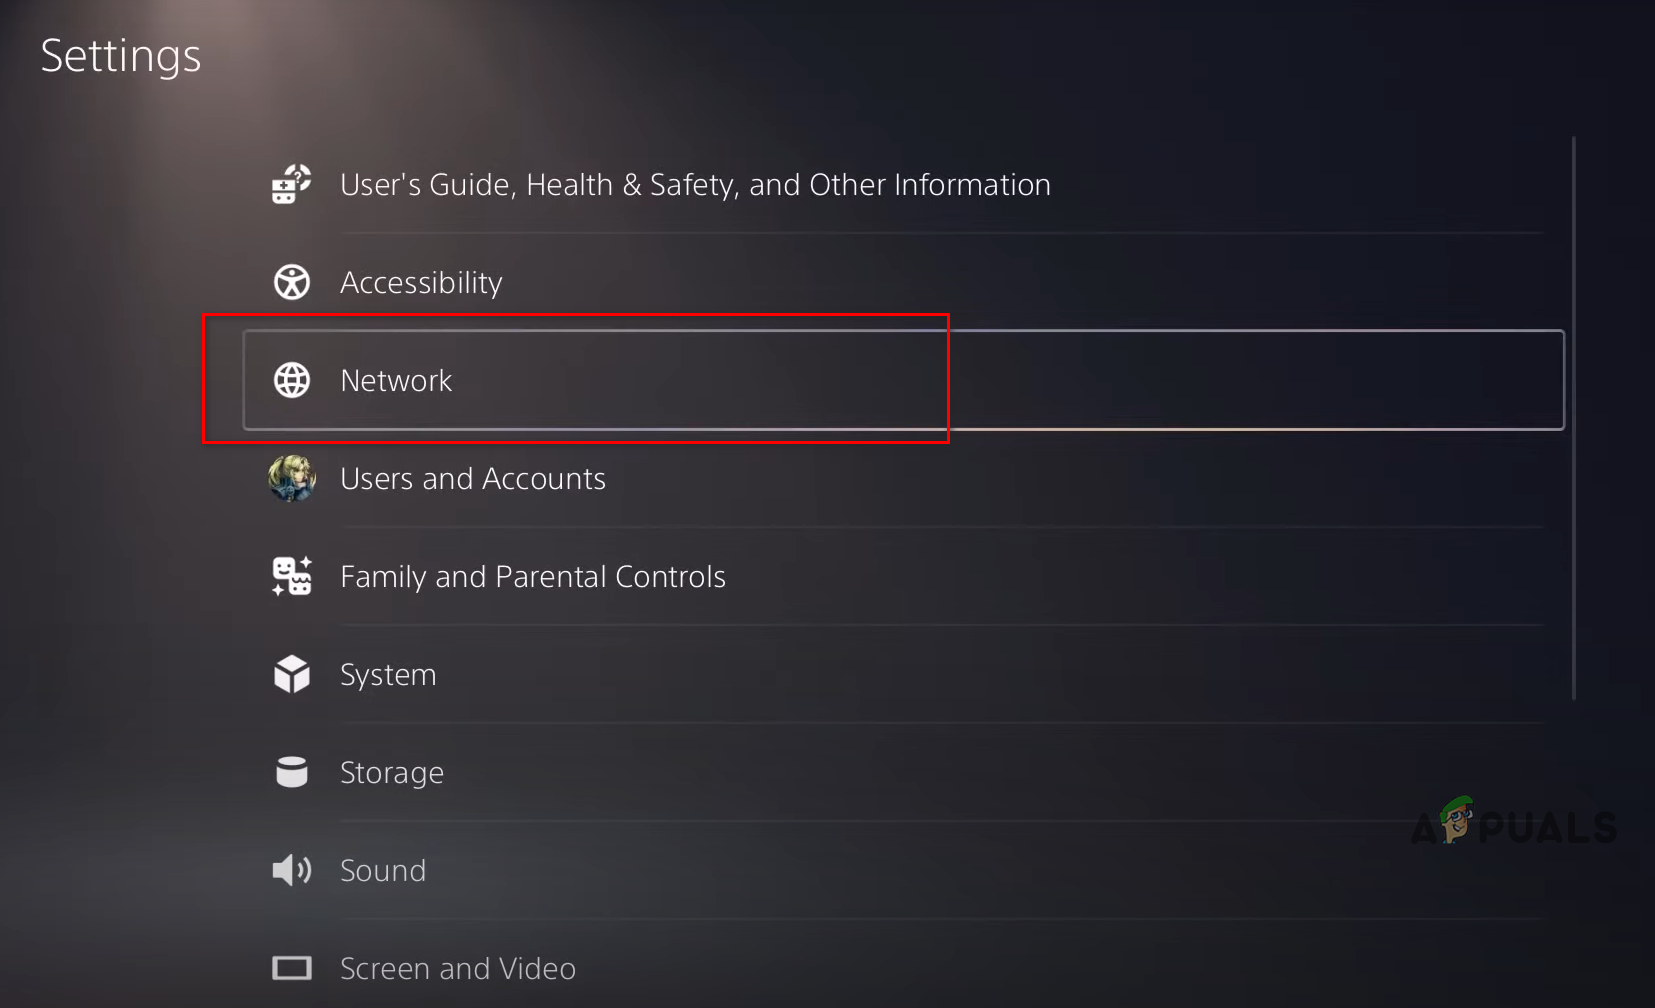
Opening PS4 Settings - Select Network and then Set up Internet Connection.
Opening PS4 Network Settings 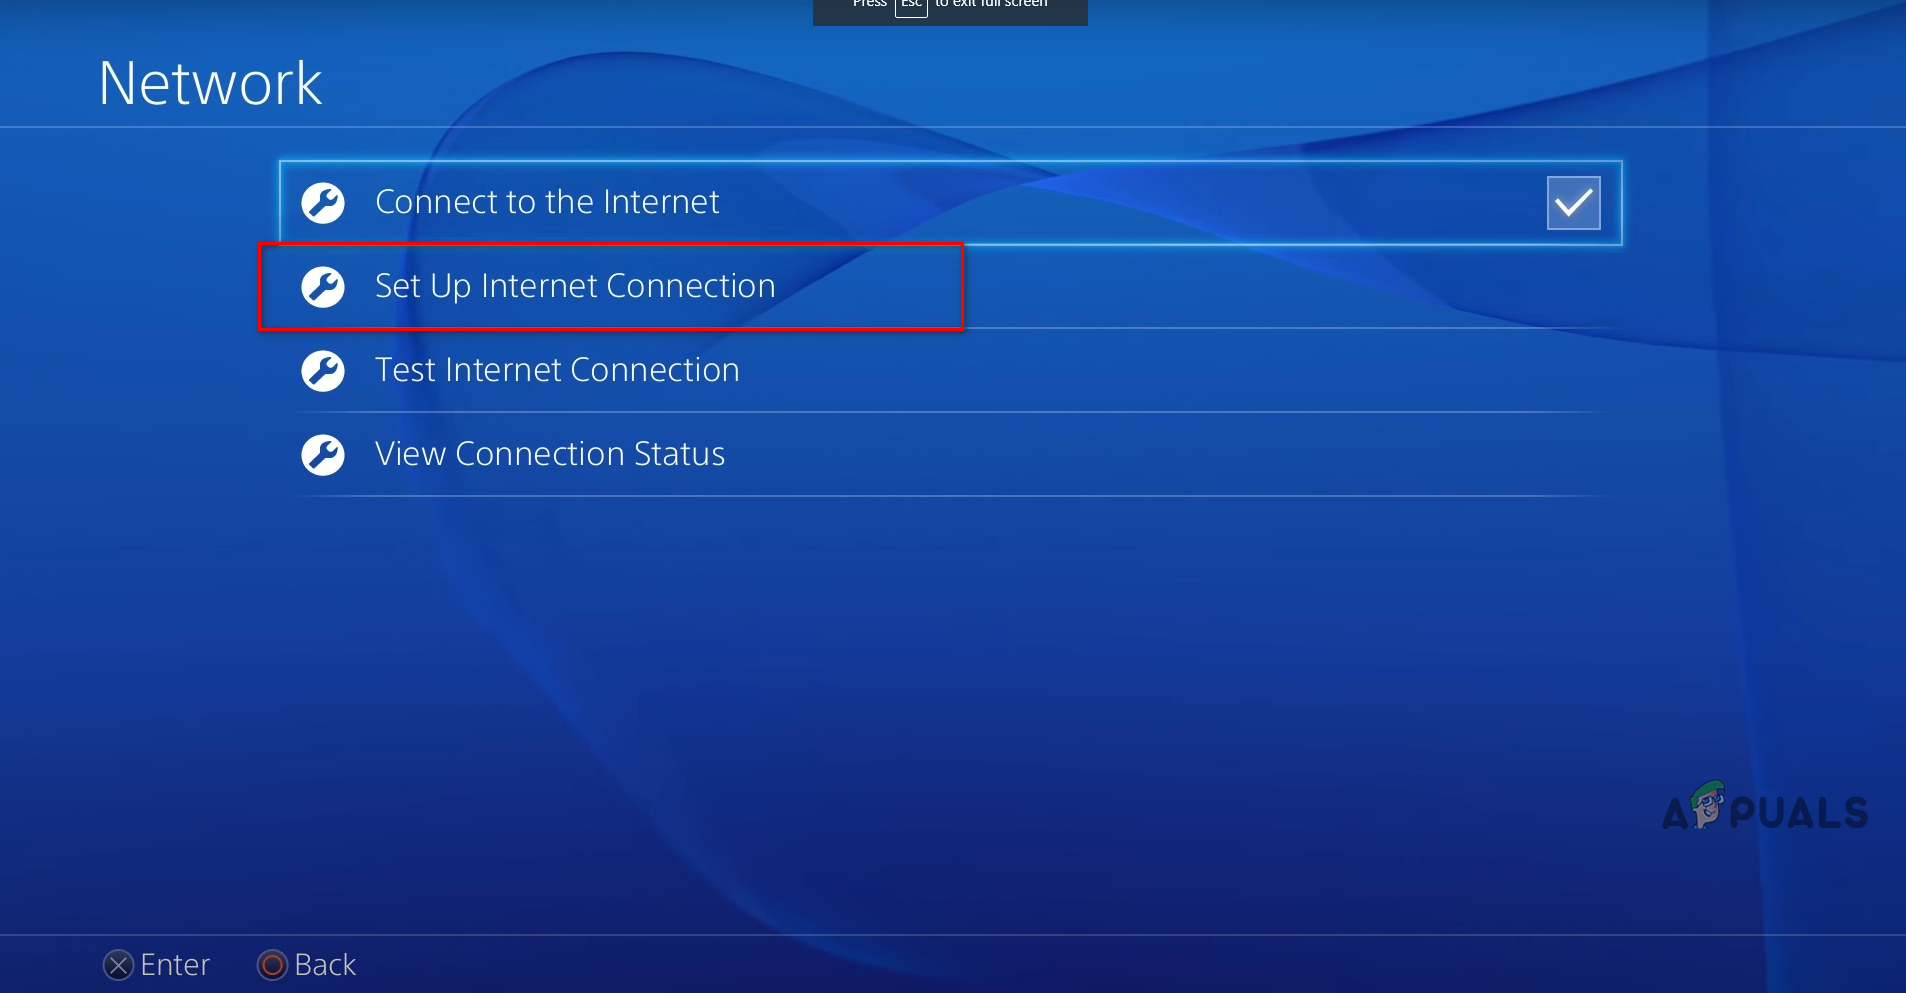
Select Set Up Internet Connection - Choose Wi-Fi or LAN, depending on your connection.
- Select Custom.
- Select Automatic for IP Address Settings.
- Select Do Not Specify for DHCP Host Name.
- Choose Manual for DNS Settings.
- Enter 8.8.8.8 as Primary DNS and 8.8.4.4 as Secondary DNS.
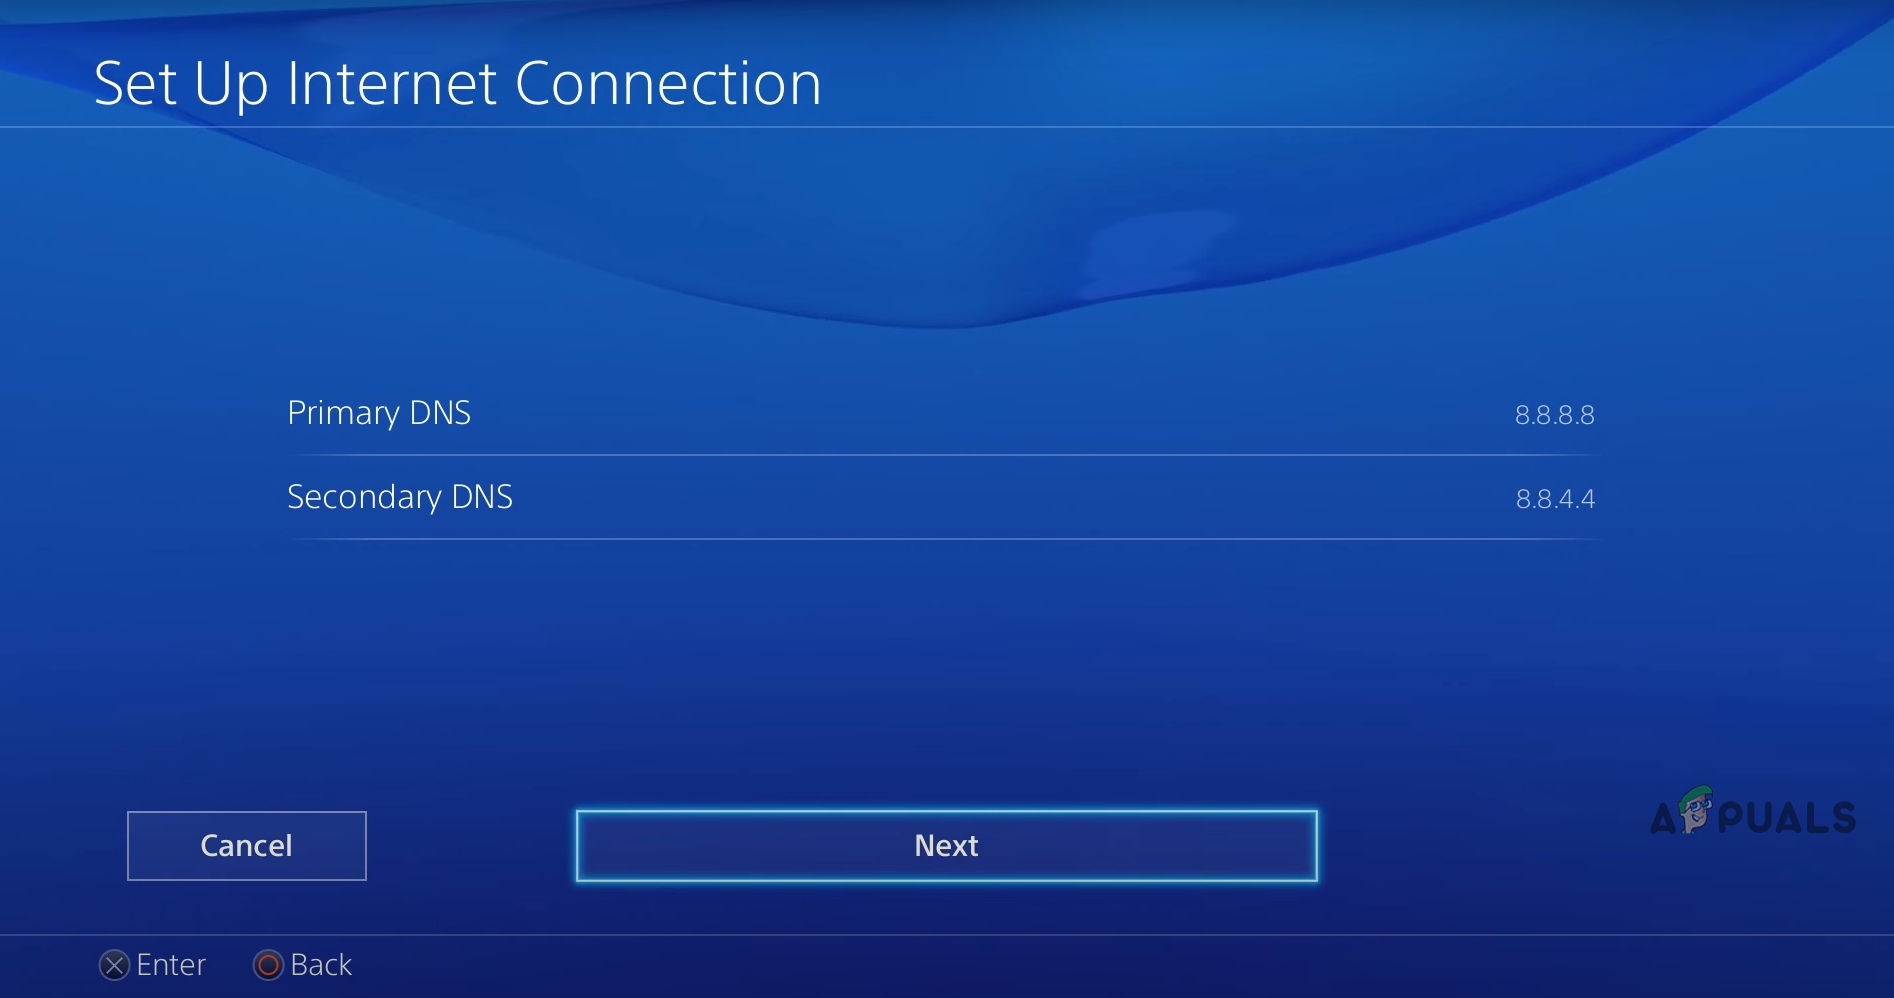
Changing DNS Server on PS4 - Continue with Automatic for MTU Settings.
- Select Do Not Use for Proxy Server.
Restart your PlayStation 4 to apply the changes.
6.3. For PlayStation 5
- Open Settings from the home screen.
Opening PS5 Settings - Go to Network > Settings > Set up Internet Connection.
Opening PS5 Network Settings 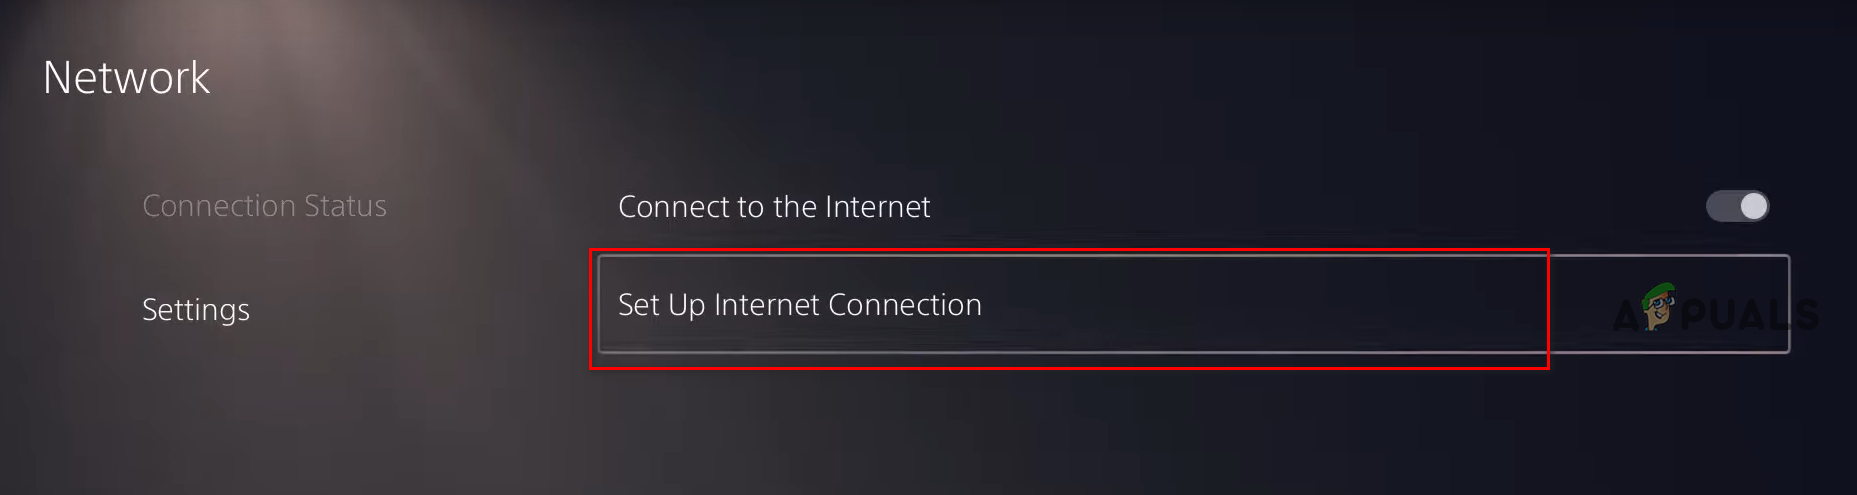
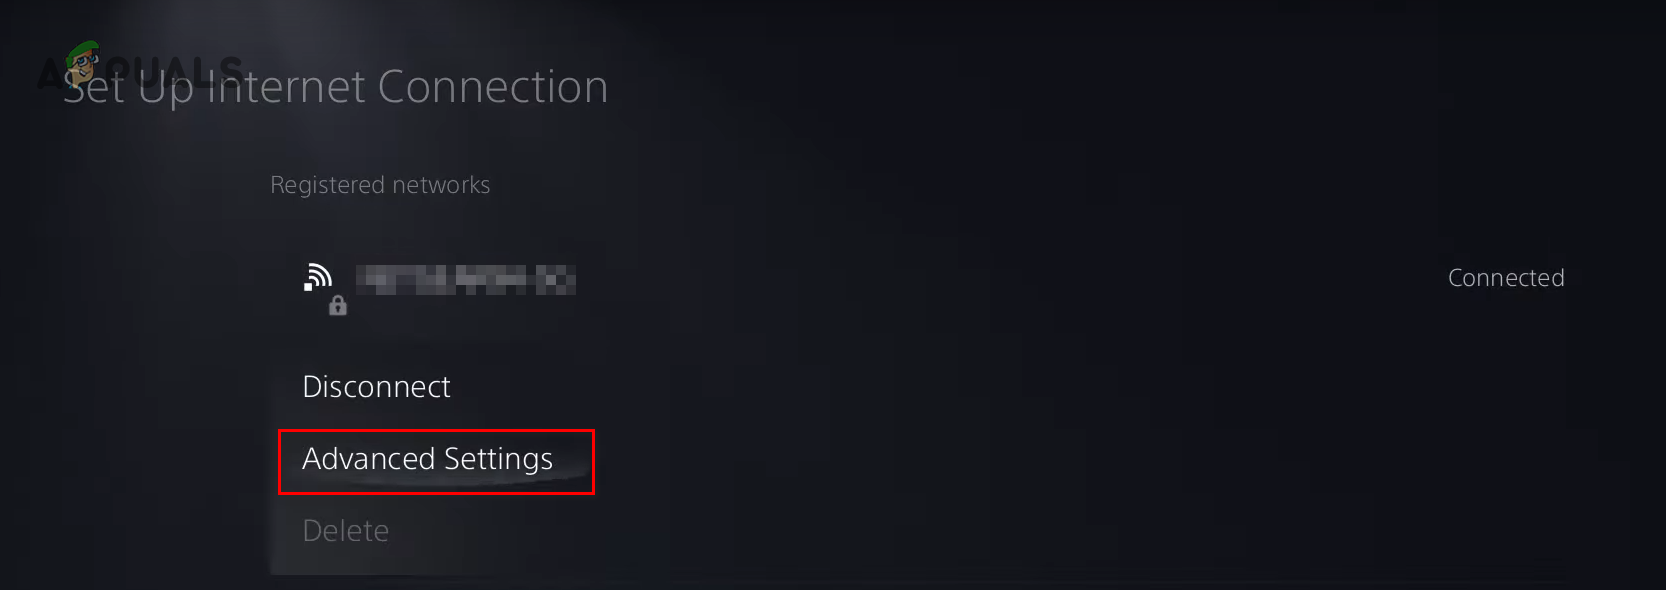
Selecting Set Up Internet Connection - Select your active network and click Advanced Settings.
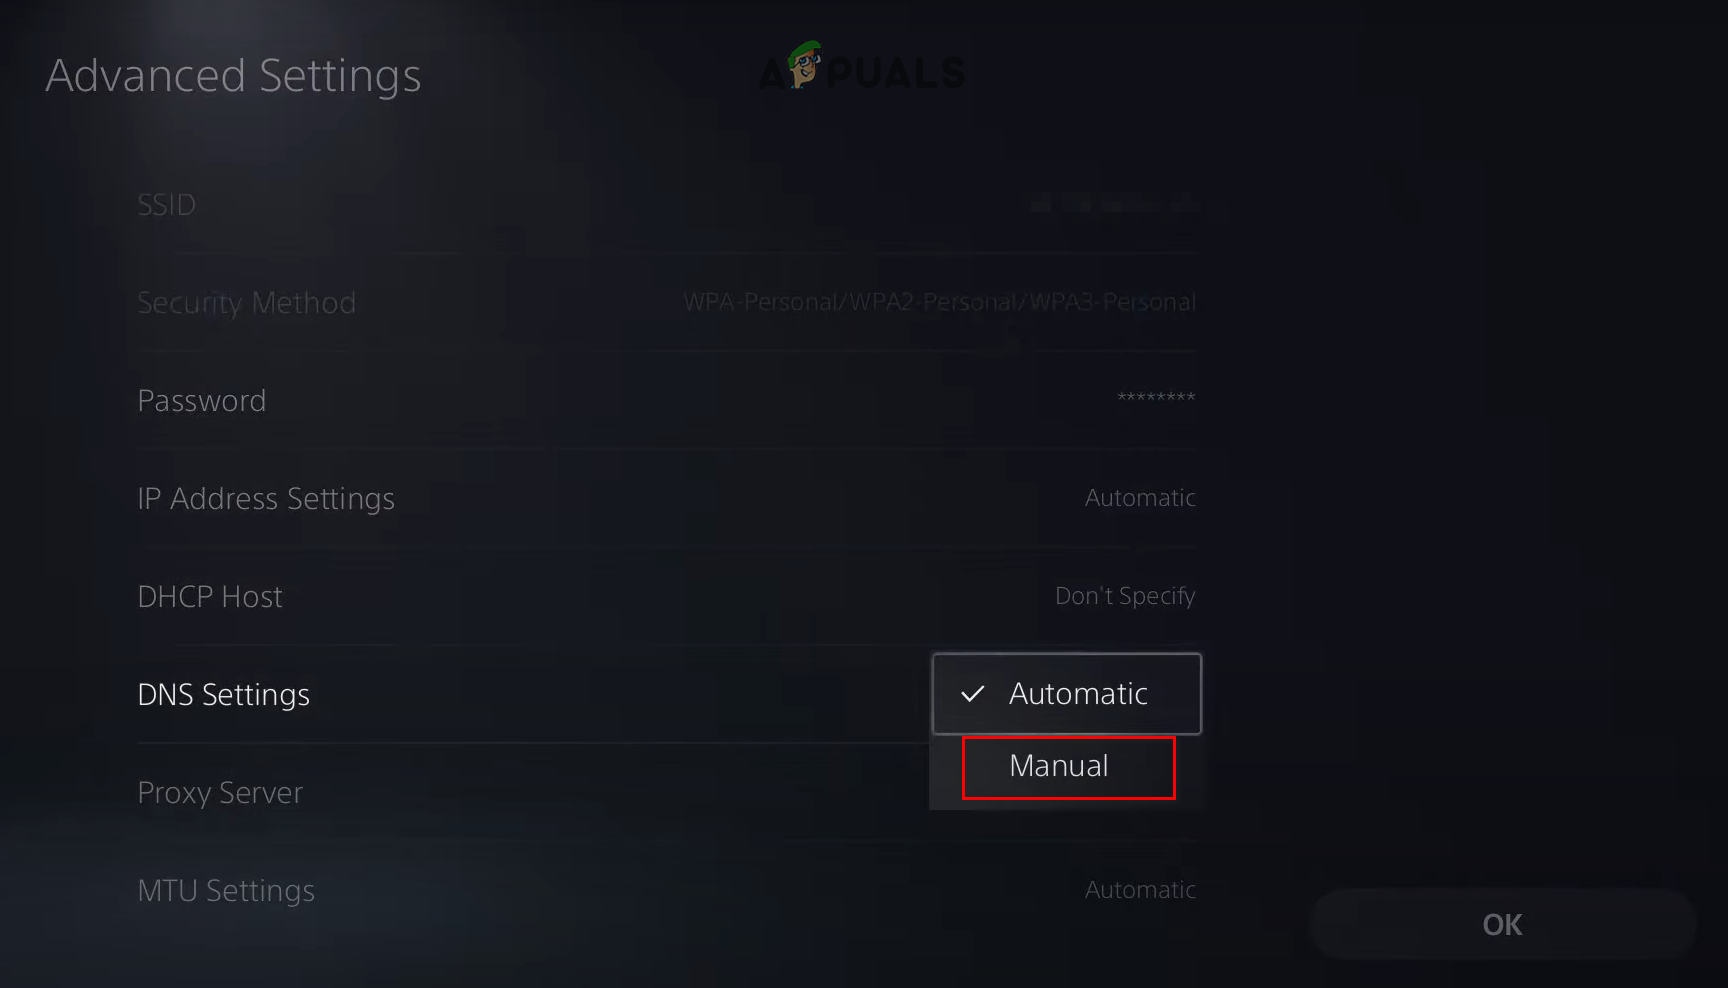
Selecting Advanced Network Settings - Change DNS Settings to Manual, then set Primary DNS to 8.8.8.8 and Secondary DNS to 8.8.4.4.
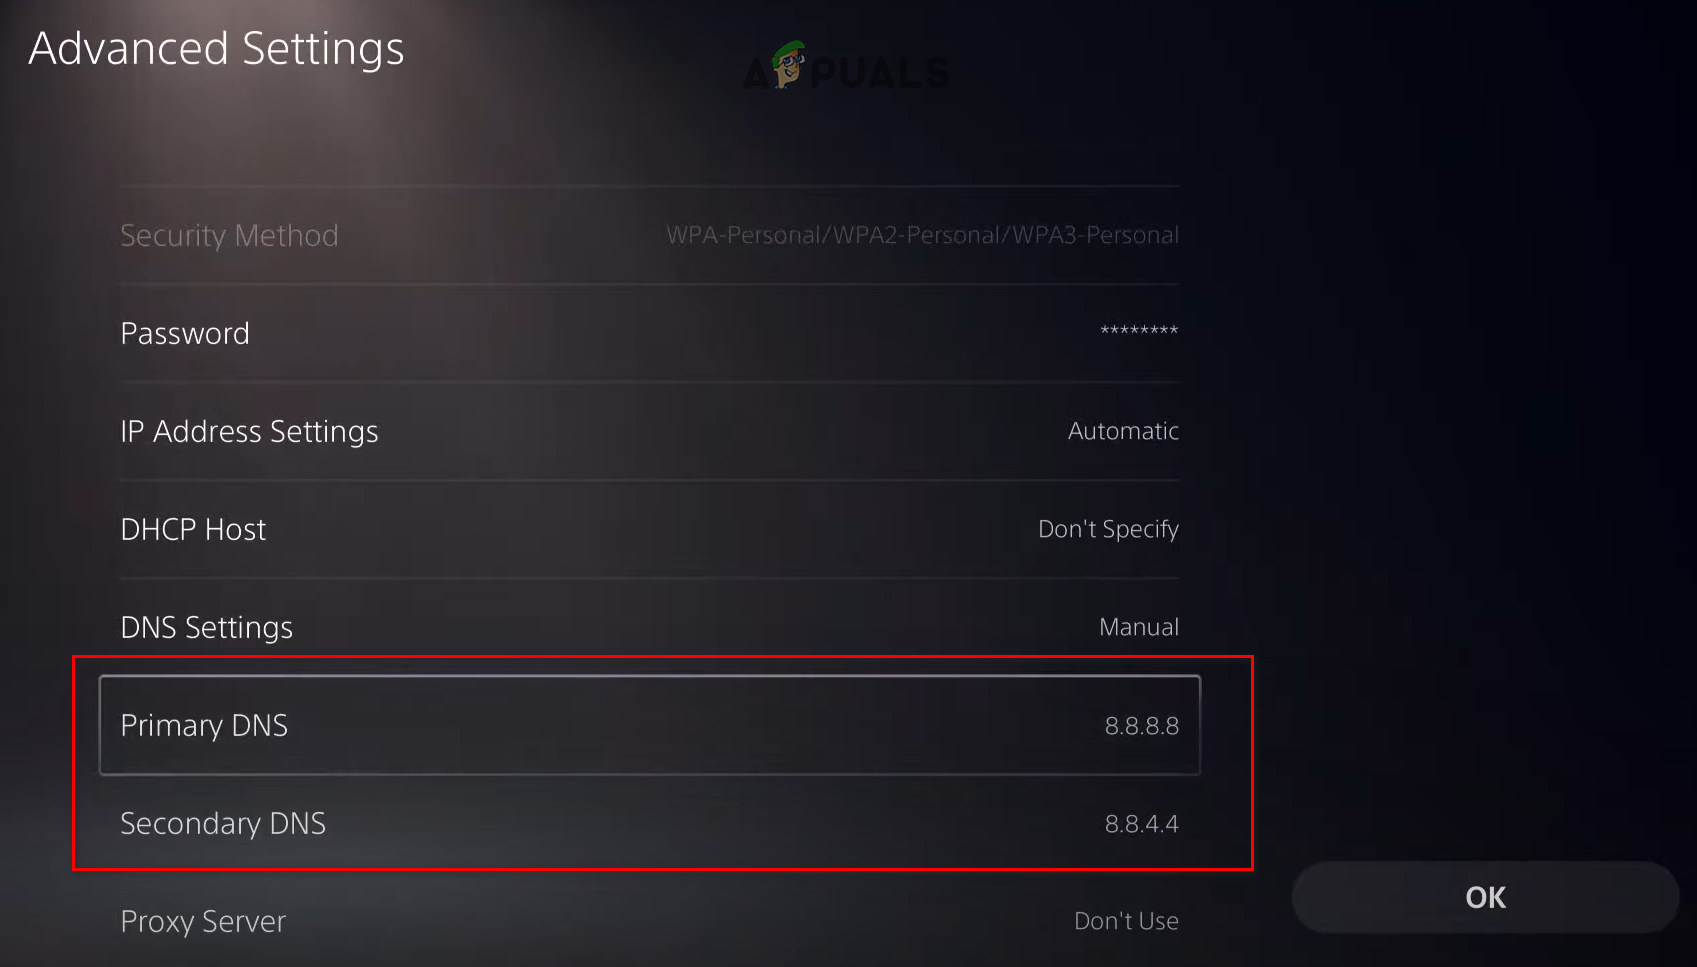
Changing Primary and Secondary DNS Settings - Save your changes by clicking OK.
6.4. For Xbox One
- Press the Xbox button to open the Guide menu.
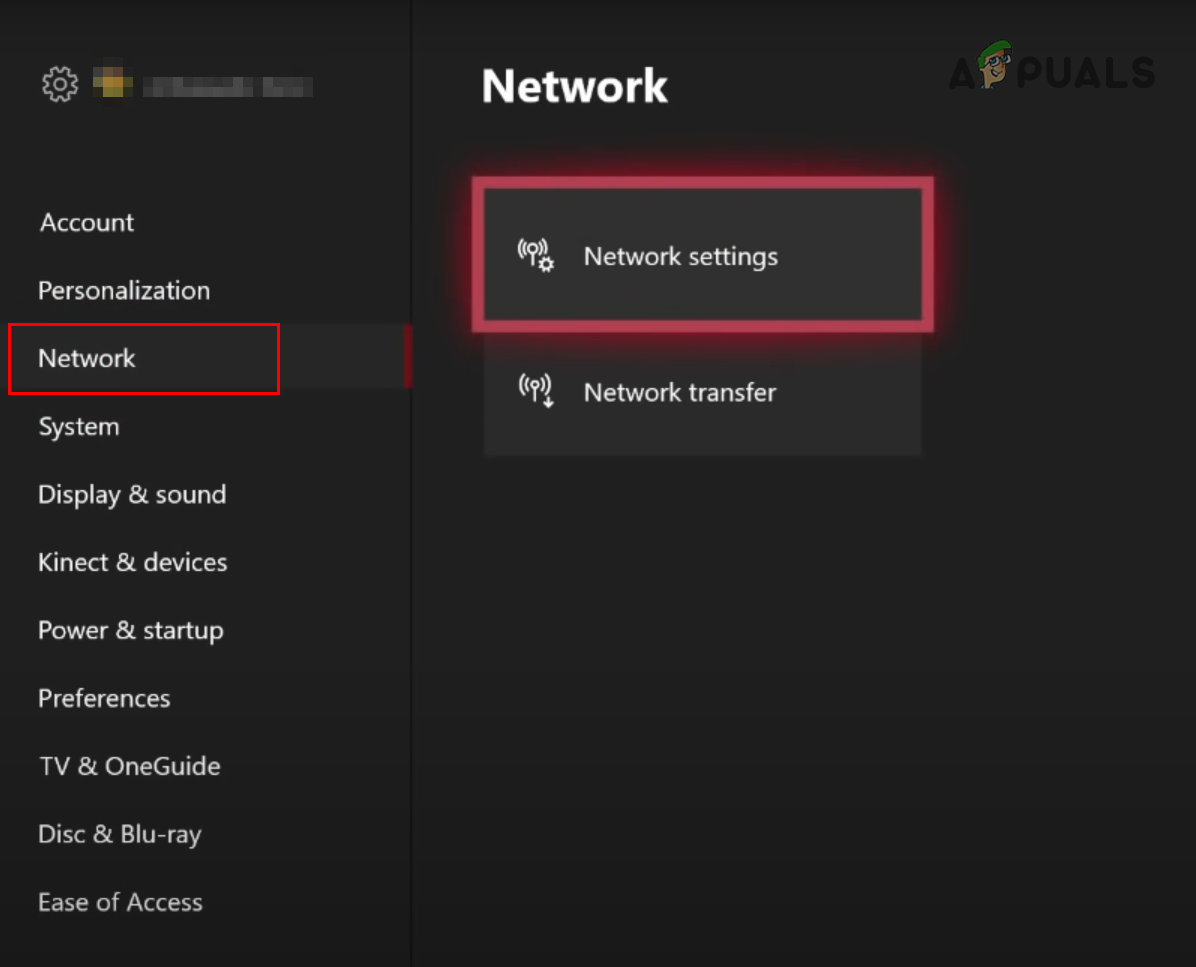
- Navigate to System > Settings > Network.
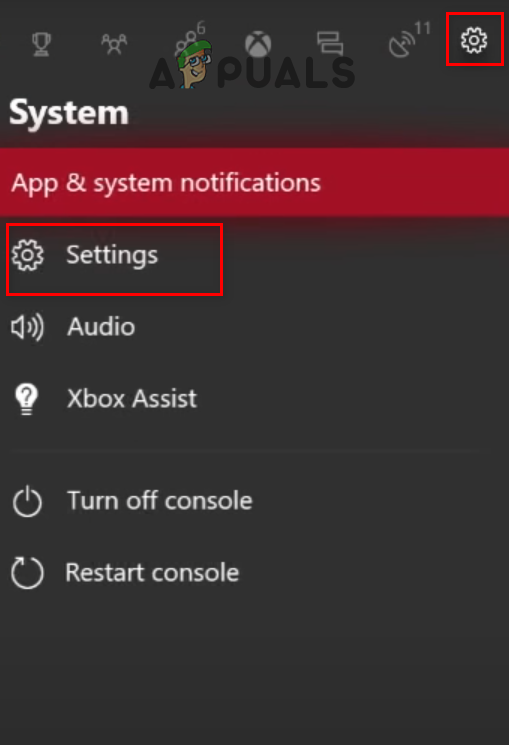
Opening Xbox Settings - Select Network Settings.
Opening Xbox Network Settings - Go to Advanced Settings > DNS Settings > Manual.

Selecting Advanced Settings 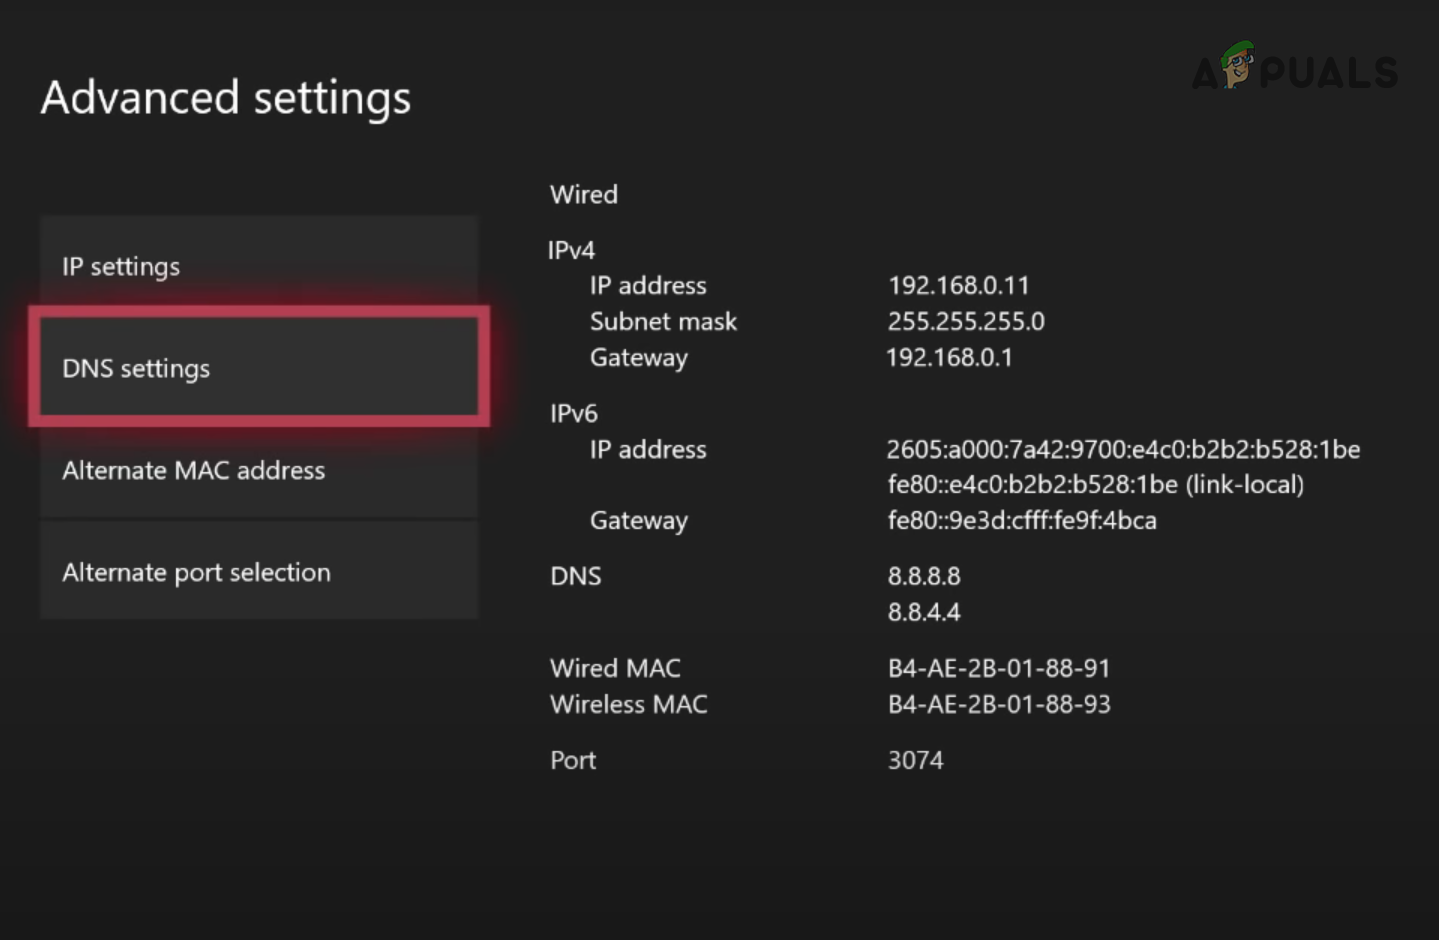
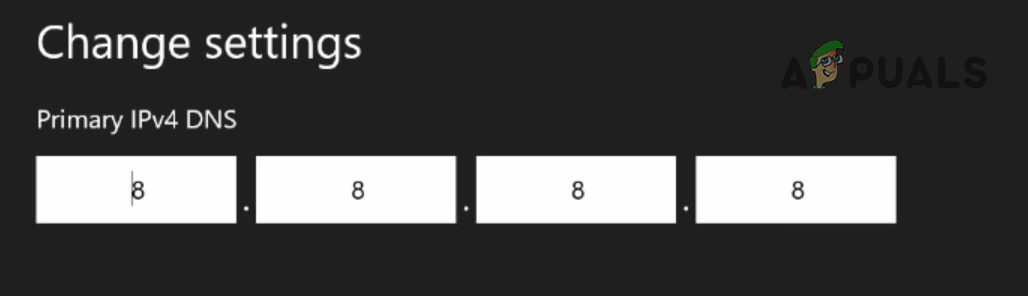
Selecting DNS Settings - Enter 8.8.8.8 as Primary DNS, and 8.8.4.4 as Secondary DNS.
Changing Primary DNS 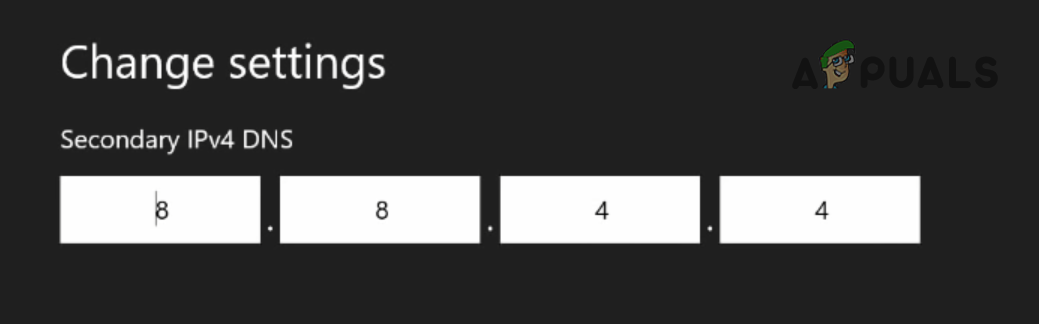
Changing Secondary DNS
6.5. For Xbox Series S or Series X:
- Open Settings.
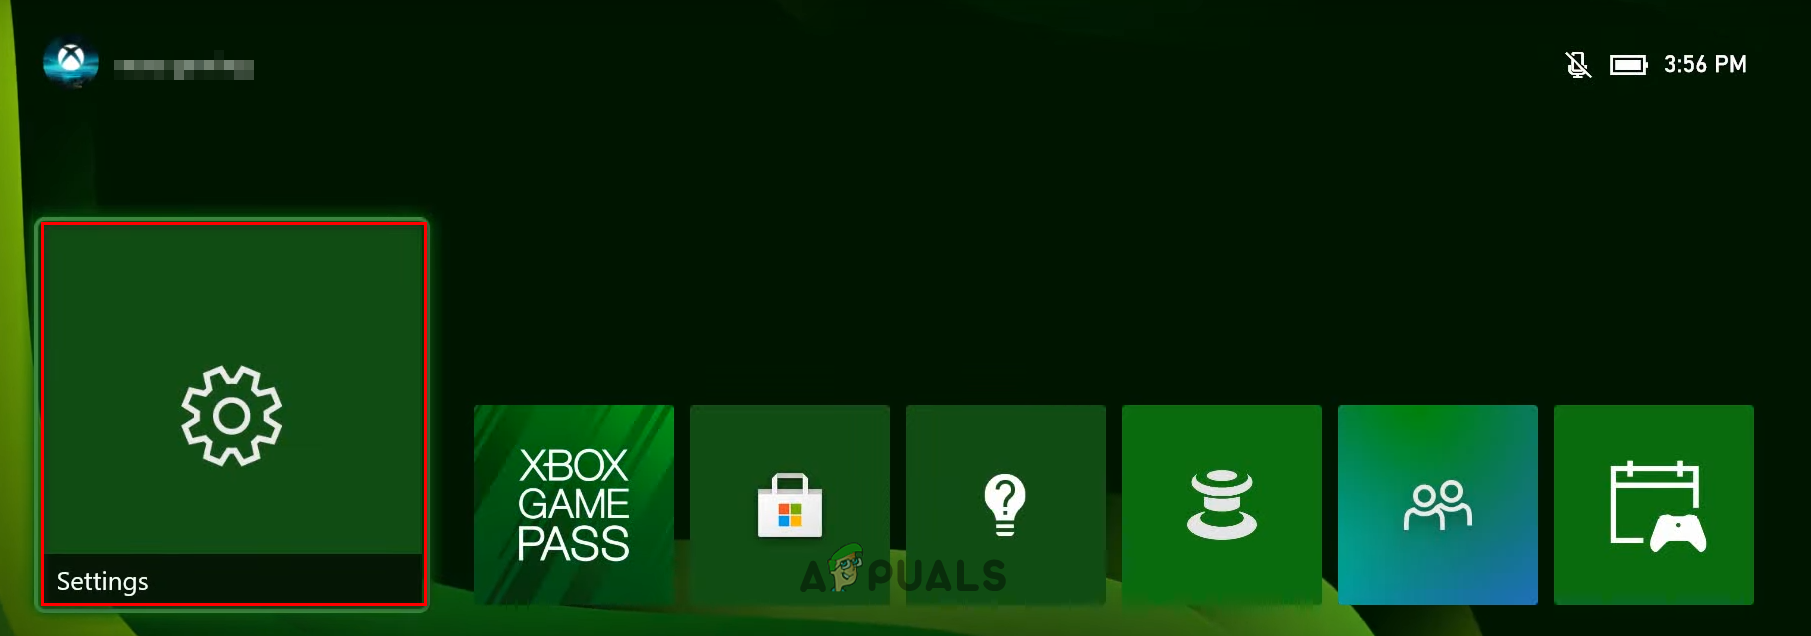
Opening Xbox Series X/S Settings - Go to General > Network Settings.
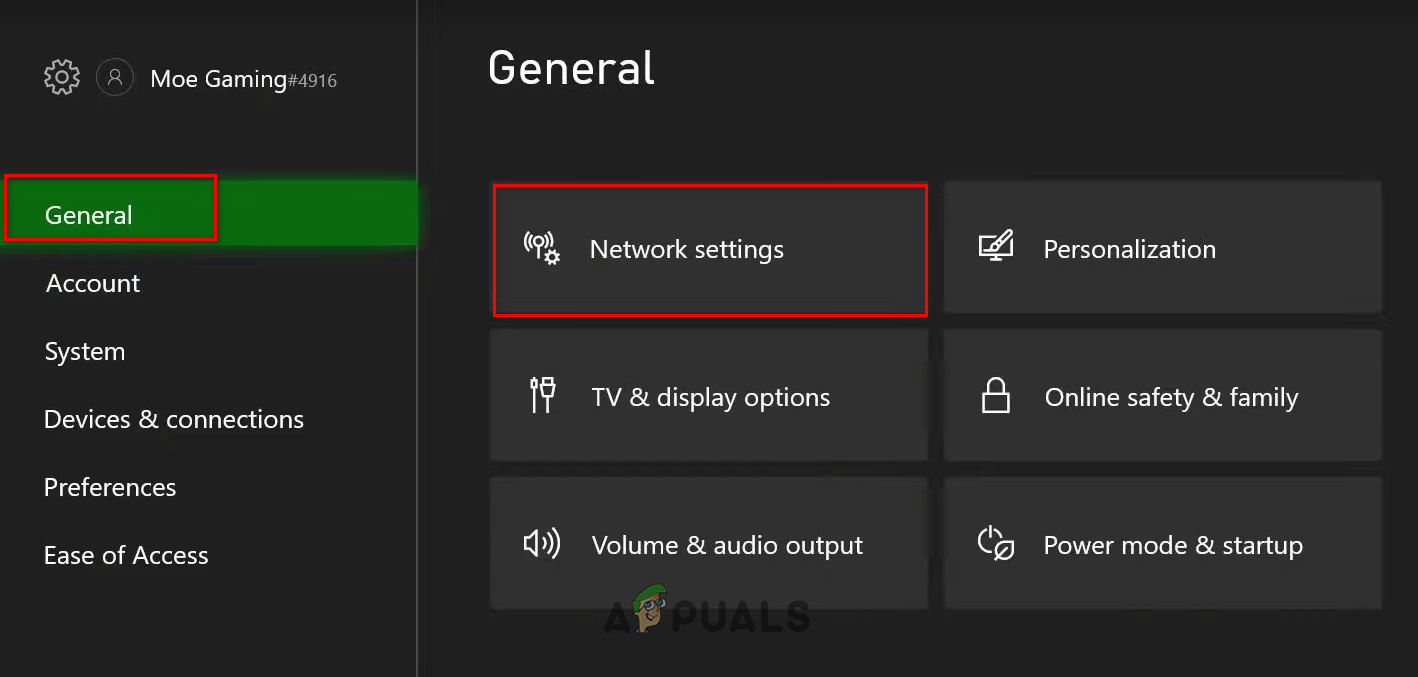
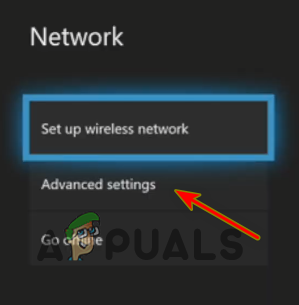
Opening Xbox Series X/S Network Settings - Select Advanced Settings > DNS Settings > Manual.
Opening Advanced Settings 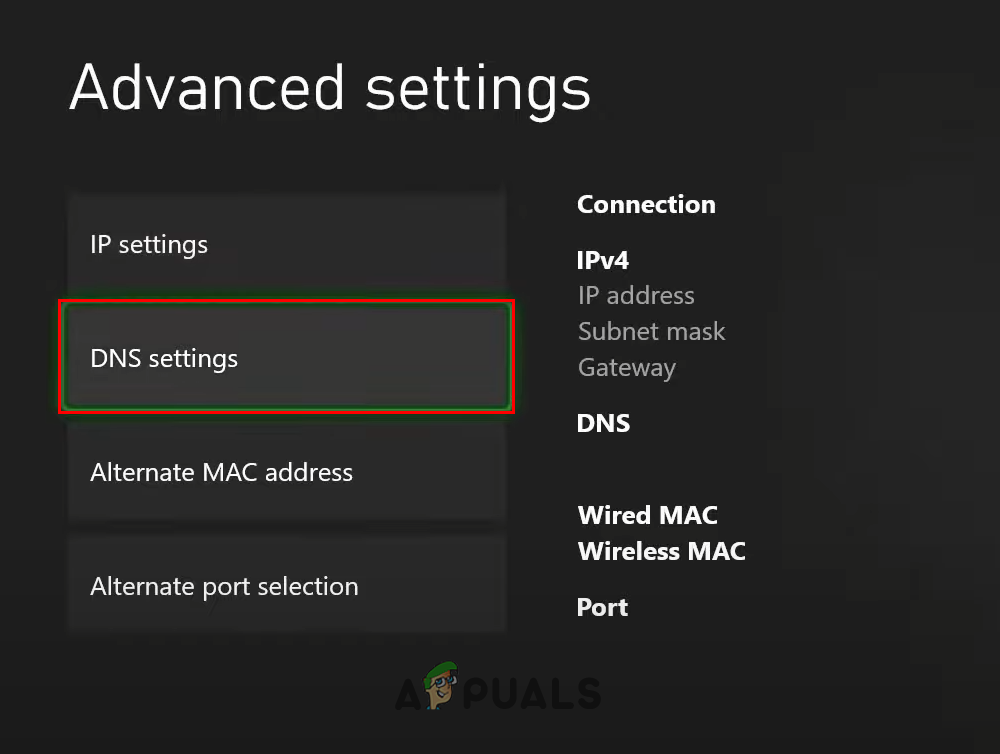
Opening DNS Settings - Enter 8.8.8.8 as Primary DNS, and 8.8.4.4 as Secondary DNS.
Changing Xbox Primary DNS Server 
Changing Xbox Secondary DNS Server
After changing the DNS settings, it is recommended to flush your PC’s DNS cache to remove any previously stored information:
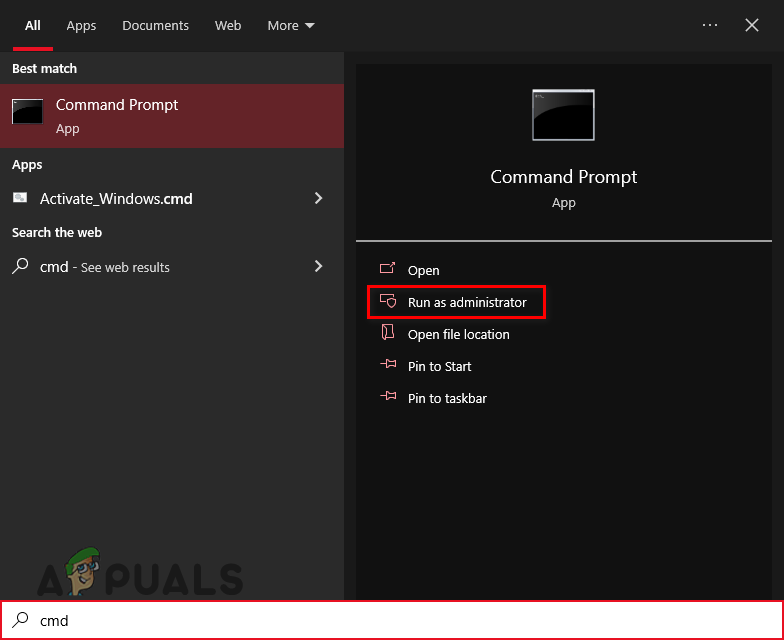
- Press the Windows key and type cmd.
- Right-click Command Prompt and select Run as administrator.
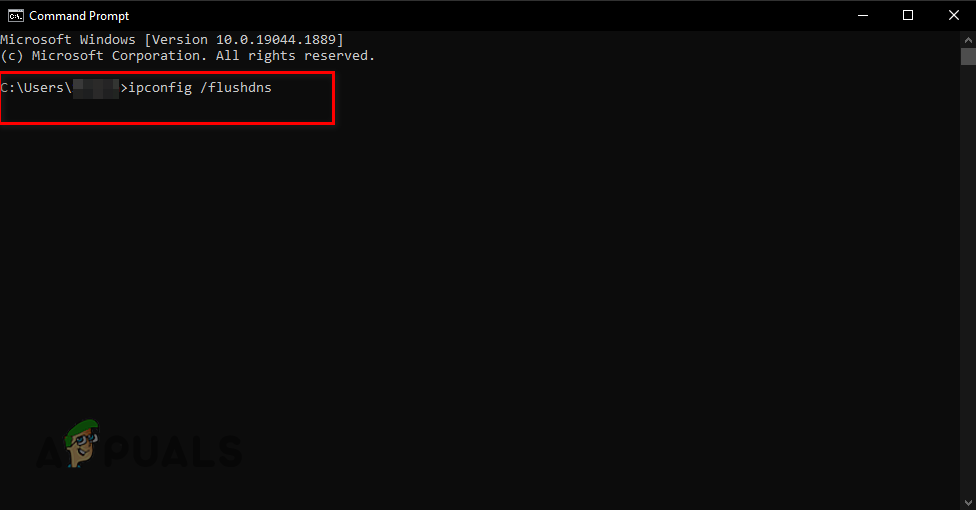
Opening Command Prompt - In Command Prompt, type:
ipconfig /flushdns
- Press Enter and wait for the confirmation message.
Flushing DNS - Close Command Prompt and restart your PC.
Now, launch Elden Ring and test if the “Connection Error Occurred – Returning to Your World” issue is resolved.
7. Change Your NAT Type
On gaming consoles, the Network Address Translation (NAT) setting directly impacts your system’s connectivity to online servers. Three NAT types are available: Strict, Moderate, and Open.
For optimal multiplayer connectivity, you want the NAT type set to Open. If your NAT is Strict or Moderate, your system’s ability to join or host multiplayer sessions will be limited.
To check your NAT type, navigate to your console’s Network settings and select “Test Internet Connection.” This will display your current NAT type.
- Press the Windows key and type cmd.
- Open Command Prompt as administrator.
Opening Command Prompt - Type the command:
ipconfig
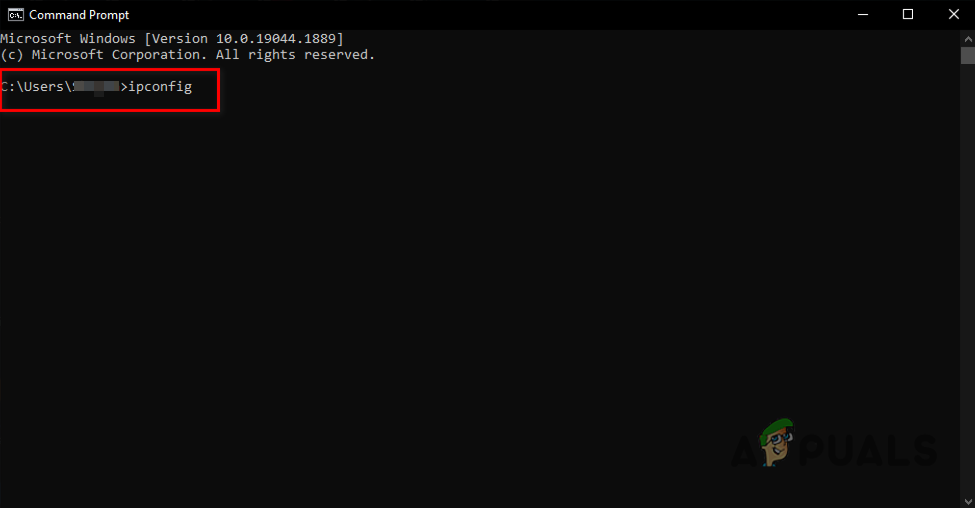
Entering ipconfig command in Command Prompt - Scroll to the Ethernet Adapter section and note your Default Gateway.
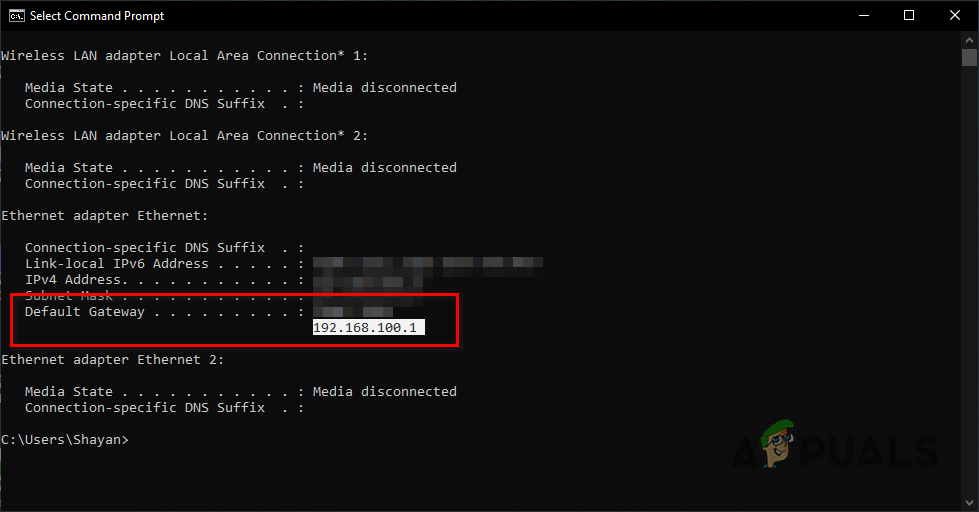
Finding your router’s IP Address
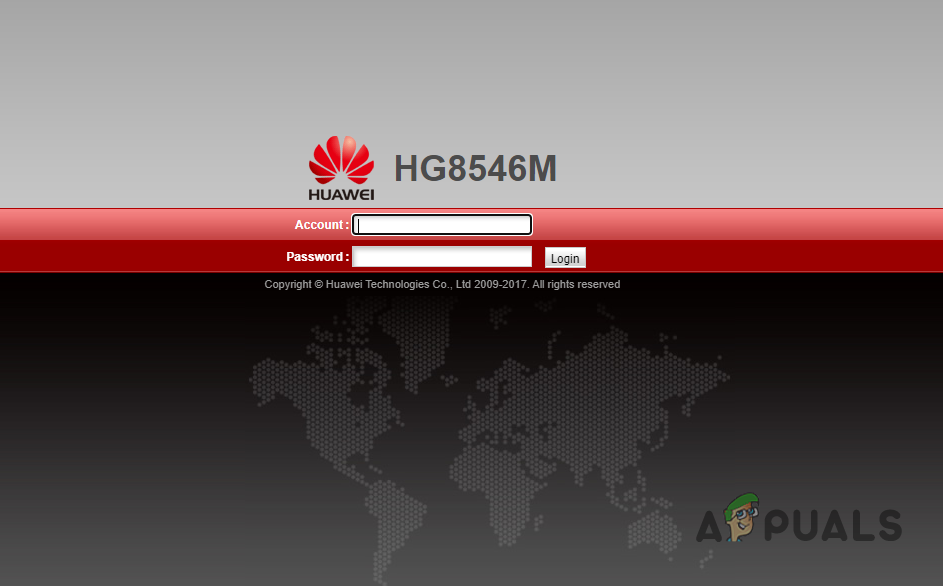
Enter the default gateway (IP address) in your browser’s address bar and press Enter, bringing you to the router’s login page. Enter your login credentials (if unsure, search for your router model’s default username and password online).
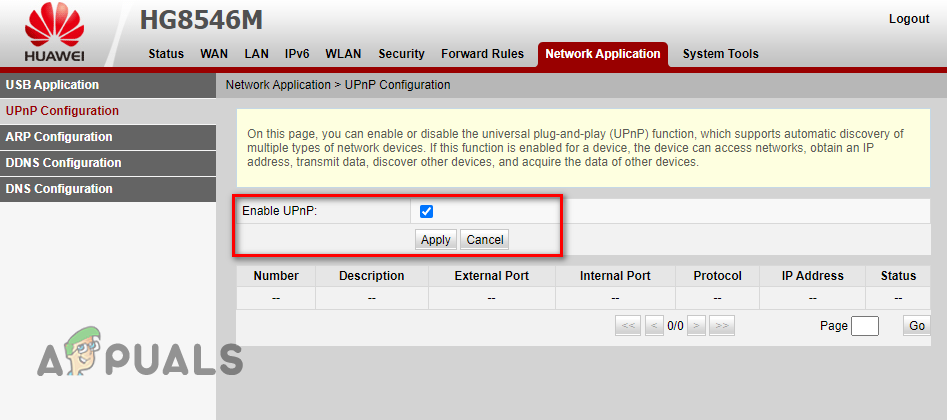
Within your router’s settings, locate and enable the UPnP (Universal Plug and Play) configuration.
Return to your console’s Network settings and repeat the “Test Internet Connection” process. Your NAT type should now reflect as Open, allowing seamless connectivity in Elden Ring.