Nintendo 3DS or 2DS will not Connect to Wifi Error ‘003-1099’
The Nintendo 3DS or 2DS shows error code 003-1099 when it cannot connect to a Wi-Fi network while trying to access the internet or perform a system update. This error means the console cannot find or communicate with a wireless access point.
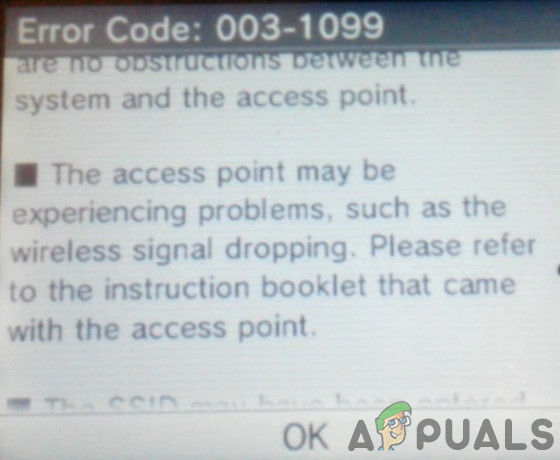
The most common reason is that the system is trying to connect to a 5GHz network, which it does not support—it only works with 2.4GHz (802.11b/g) networks. Other possible causes include incorrect security settings—such as unsupported WPA2 modes—or signal interference.
In this article, we will discuss different ways to solve this error.
1. Change Network Configuration
If the network settings on your 3DS are not configured correctly, this error may occur. Correct network configuration is essential for successful internet connectivity.
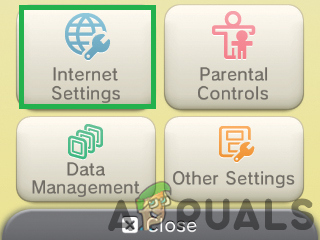
- From the Home Menu, select “System Settings”, then tap “Internet Settings.”
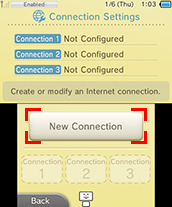
Clicking on “Internet Settings” - Tap on “Connection Settings” and select “New Connection.”
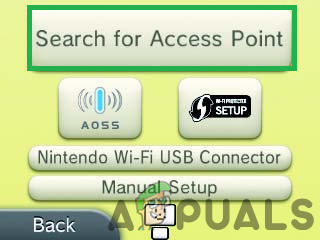
Selecting “New Connection” option - Select “Manual Setup”, then tap “Search for Access Point.”
Clicking on the “Search for Access Point” option - Select the name of your wireless network and tap “OK.”
- Carefully enter your network’s configuration details, such as the correct password, and tap “OK” to connect.
- Once connected, verify if the issue is resolved.
Why this step helps: Ensuring your network details are accurate is vital because even a small error can prevent your console from accessing the internet. This step resolves issues related to misconfigured Wi-Fi settings or incorrect login credentials.
2. Forward the Network Ports
Some internet functions of the Nintendo 3DS require specific network ports to be open. If these ports are blocked, your device cannot communicate efficiently with Nintendo’s servers, causing connectivity errors.
You will need to open the necessary ports on your router. Since accessing router settings may be complex or restricted for some users, it is often best to contact your Internet Service Provider (ISP) and request that they open these ports for you:
UDP Ports: 442 - 445 and 28000 - 29500
Additionally, ask your ISP to enable UDP connections and ensure that UPnP (Universal Plug and Play) is active. Enabling UPnP allows your console to automatically establish fast, reliable connections with game servers, which reduces latency and improves your online experience.
Why this step helps: Proper port forwarding removes communication barriers between your router and Nintendo services. This step is crucial for online play, downloading, and other network features to function smoothly and without errors.
3. Change the Wireless Mode on Your Router
There are several wireless standards—802.11b, 802.11g, and 802.11n. The Nintendo 3DS supports only the 802.11b/g modes, while some routers are configured by default to use 802.11n or g-only modes. If your router uses an incompatible mode, the 3DS cannot detect or connect to the wireless network.
- Type your router’s IP address into your web browser and press “Enter.”
Note: Common IP addresses include “192.168.1.1,” “192.168.10.1,” or “192.168.1.2.” - Log in using your username and password (these credentials are often printed on the router’s label).
Entering the Login information - Look through the interface for the “802.11” Wireless Mode settings, which may be listed under Wireless or Advanced Settings. Locate the option to change the wireless standard.
- Set the wireless mode to “802.11b/g/n” or “802.11b/g.”
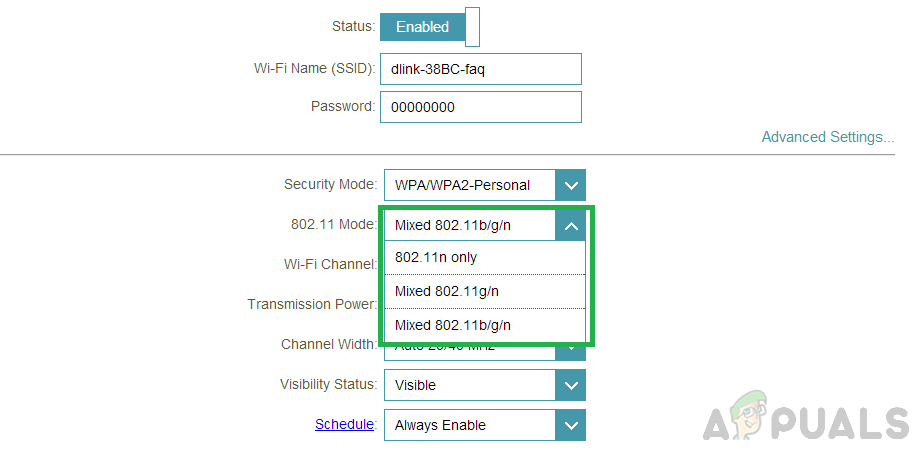
Selecting the “802.11b/g/n” mode - Save the new settings and reboot your router.
- Restart your 3DS console and try connecting to the network again.
- Check if the issue is resolved.
Why this step helps: Ensuring your router broadcasts using a mode compatible with the 3DS is essential. This step directly addresses issues caused by frequency or mode incompatibility, enabling your console to detect and connect to your network effectively.