3 Methods to Get Xiaomi Yeelight Music Mode on PC
As we’ve talked about in previous Yeelight guides, Xiaomi’s Yeelight series is a great and affordable alternative to other smart lighting options available – Yeelights are much cheaper than Philips Hue and LIFX, but perform just as good (Xiaomi has that habit of releasing premium products for much cheaper than their competitors, afterall).
One drawback of Xiaomi’s Yeelight app is the Music Mode – basically, it turns your lights into a disco party with a kind of very fast strobe effect, and it only works on the Android app. And currently, there is no official or unofficial Music Mode for PC, but we’re going to hack one together in this guide.
Playing music exclusively on your Android phone, even if you connect your phone to your speaker system via adapters, isn’t really ideal, especially for audiophiles who prefer playing music natively on their PC.
So in this guide, we will be using a combination of Foobar player, the Milkdrop visualizer plug-in, and two different Yeelight controllers for PC to achieve a sort of “Music Mode” – the lights may not match exactly the beats of what you’re playing, but it really depends on the visualizer you’re using. Of course, you can use any music player of your choice as long as you have a way of enabling some kind of music visualizer. Windows Media Player has one built-in, but its not as fancy or feature-rich as Milkdrop.
If you use a Milkdrop visualizer that doesn’t react much to the song frequencies, then the lights will not react much to the song frequencies either and only change colors along with the visualizer – but if you use a visualizer with a lot of frequency feedback and exploding color patterns, your Yeelights will do the same.
Method 1 – Yeelight Toolbox
Yeelight Toolbox can only control 1 light in Movie Mode, so this is a good app for someone who only wants to control, for example, one lightbulb or Yeelight Strip around their desk.
- Follow this Appual’s guide to installing and configuring the Yeelight Toolbox: How to Control Yeelight from a Windows PC
- Then follow this guide for installing the Milkdrop visualizer plug-in for Foobar: How to Get Milkdrop 2 Visualisations in Foobar
- Now launch the Yeelight Toolbox, and choose “Average Color” or “Predominant Color” in the bottom right, and finally click the Start button.
- Now launch Foobar and the Milkdrop plug-in, and put it into Desktop or Full-Screen Mode.
Your light will now react to the visualizer on your screen – its not a perfect “Music Mode”, but there’s a huge list of visualizers to choose from within the Milkdrop configuration menu, so find one that satisfies you as far as color patterns and how it reacts to the music.
Method 2 – Jeelight
Jeelight is a beta program very similar to Yeelight Toolbox, but it can control up to 8 lights simultaneously, and you can configure the zones on your screen where each light should react. For example, you can have Light 1 react to the left side of your screen, Light 2 react to the right side, Light 3 react to the middle, etc.
Jeelight also has a “flash detection” option which will detect changes in brightness on your screen, and change your lights to full white for a fraction of a second. This gives your lights a really cool flash effect that respond really nicely to constantly changing and exploding visualizer patterns.
The only current drawback of Jeelight is that it’s a beta-mode demo and has a 20 minute time limit, until the developer releases the full, paid version.
- In any case, to set up Jeelight, follow the guide we mentioned in the Yeelight Toolbox section for setting up Foobar and the Milkdrop 2 visualizer plug-in.
- Next, download and install Jeelight.
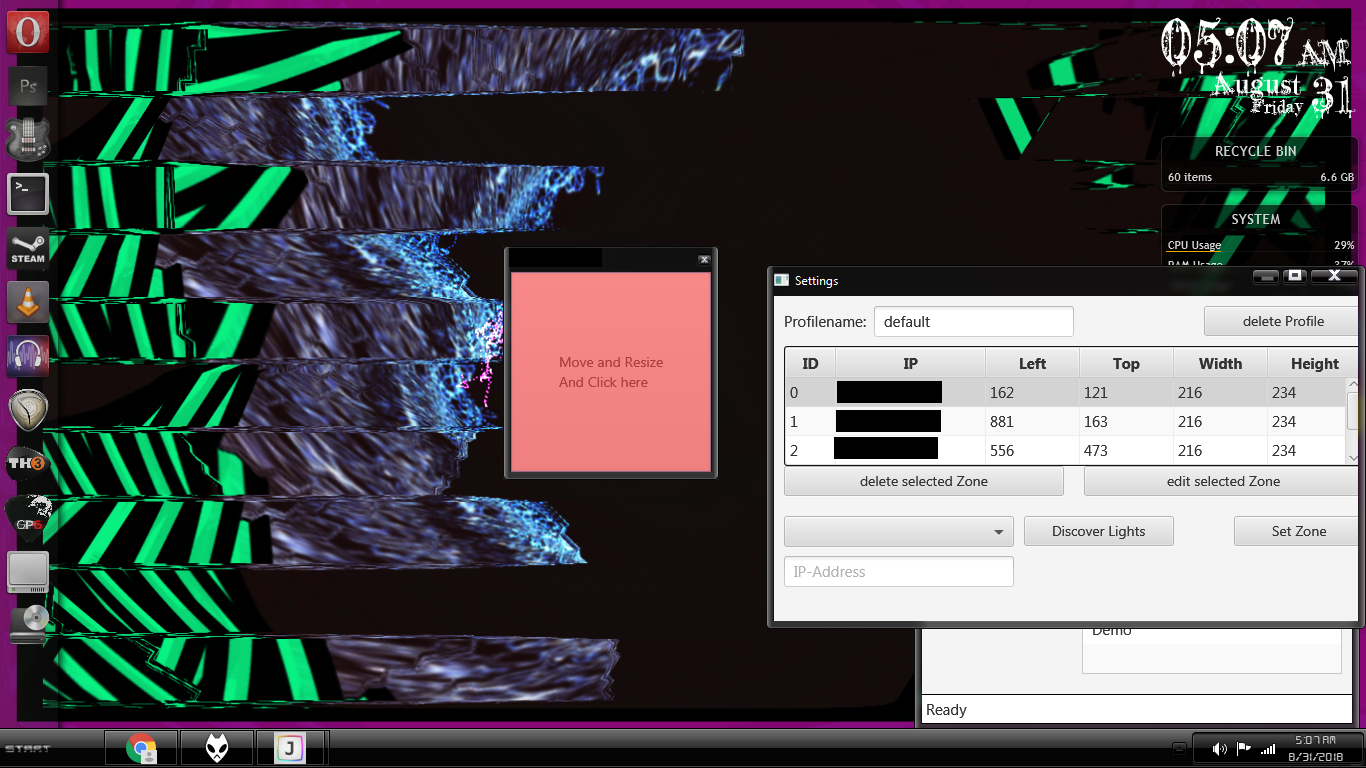
- Launch Jeelight and click the Gear icon in the top right corner, and allow it to find your lights (or manually add their IP addresses).
- When your lights are discovered, click the “Set Zone” for each individual light. A square box will open on your screen, which you can resize and position. Basically, wherever you position the box is where that individual light will get its color from.
- Note: Smaller zone boxes = less CPU usage, you really don’t need to make the zone boxes cover your screen as that will take a huge amount of CPU and its pretty needless. Just shrink the boxes a little and position them where you think they will gather the most color data to send back to your lights.
- After you have configured the light zones, you can enable Flash Detection and CPU Hyperthreading if you want, then click “Save” and finally click “Start”.
Method 3 – Yeelight Music in Android Emulator
This is basically just a way to get the Yeelight Music mode for Android phones onto your PC, so you can play music files on your PC (through the Android emulator) while enjoying the native Yeelight Music effect.
You have two choices here, you can either use the official Yeelight app’s music mode, or the Yeelight Music app from the same developer as Yeelight Toolbox.
In any case, you’ll want an Android emulator that can “connect” to the same WiFi network as your PC and Yeelights, so everything is on the same network and can communicate with each other. Nox Player set to DHCP Bridge Connection in the app settings works perfectly fine.
Once you have your Android emulator configured, install either the official Yeelight app or the Yeelight Music app by Jordi Gordillo into the emulator, then move your music files into the emulator as well. Also install an Android music player into the emulator.
Now launch the Yeelight app of your choice in the Android emulator, and enable the Music Mode. Then start playing music through a music player in the emulator as well.


