Fix GTA IV Fatal Error WTV270
Some Windows users are encountering the ‘GTA IV Fatal Error WTV270‘ whenever they try to launch GTA (Grand Theft Auto 4). This happens with both game clients (like Steam, Origin, etc.) and while double-clicking the game’s executable. The issue is most commonly reported on Windows 10.
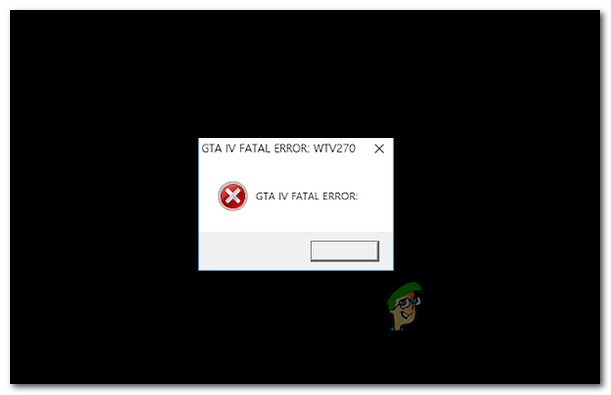
One of the most common causes that will trigger the GTA IV Fatal Error WTV270 is an instance in which the GFWL client is outdated or partially installed. To fix the issue in this case, simply update the Games for Windows Live utility to the latest version.
However, another possibility is that the error is being thrown due to the fact that one key Windows Live service (wllogin_64 or wllogin-32) is not running. This issue can be resolved swiftly either by starting the service manually via the game folder or by installing the whole windows live sign-in assistant utility.
But if you’re looking for a quick workaround, you can force the main executable to launch in windowed mode (either via Steam settings or via Properties screen). A lot of affected users have confirmed that this operation was successful.
If you’re encountering the issue on Windows 10, you might need to use a modded file from a patch called XLiveLess in order to get the game to run (especially on newer configurations). But keep in mind that this will make you lose access to every online component. An additional fix in this case (with limited success) is to run the game in compatibility mode with Windows 7.
If all else fails, you should be able to fix the issue by downgrading to version 1.0.7.0 -but this operation will also make you lose access to multiplayer features.
Method 1: Updating the GFWL utility
As it turns out, one of the most common causes that will trigger the Fatal Error WTV270 is an instance in which the end-user didn’t update the Games for Windows Live (GFWL client). This is automatically resolved on Windows 10 but needs to be done manually on Windows 8.1, Windows 7 or older.
Keep in mind that this client (GFWL) is now obsolete and was replaced by the newer infrastructure powered by Xbox Live. If you don’t take measures to accommodate this change, parts of SecuROM will fail and you will be unable to run the game regardless of your system configuration.
In order to resolve this issue, you will need to install a patch that will replace the traditional GFWL login so that it connects to the Xbox server instead.
If this scenario is applicable, you can resolve the issue swiftly simply by installing the Games for Windows Live patch. Here’s a step by step guide on doing this:
- Visit this link (here) from your default browser and wait until the download is initiated and completed.
- Once the download is complete, double-click on it and click Yes at the UAC (User Account Control) in order to grant administrative privileges.
- Next, follow the on-screen prompts in order to complete the installation.
- When you get to the Install Success screen, there is no need to launch the application.
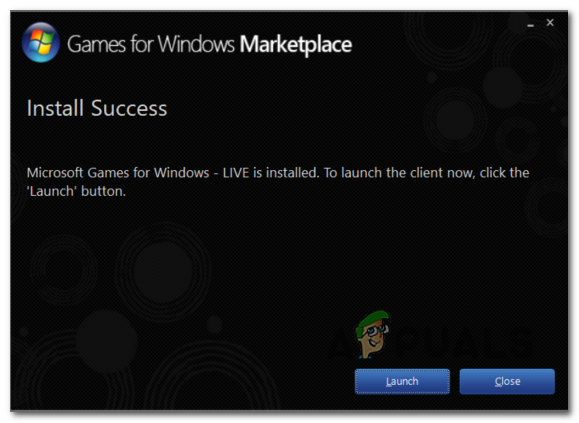
Installing the GFWL client - Instead, simply restart your computer and launch the game once the next startup is complete. The game should now launch normally without the same Fatal Error WTV270.
In case the same issue is persisting, move down to the next potential fix below.
Method 2: Ensuring that the Windows Live Sign-in Assistant is running
The Fatal Error WTV270 error is also known to appear if the service associated with the Live ID Sign-in Assistant is not running.
This service is obsolete on newer games, but if you installed Grand Theft Auto IV from a traditional media, you will need to ensure that the background service (wllogin_64 or wllogin_32) associated with the Windows Live ID Sign-in Assistant 6.5 is running.
Fortunately, the game files of GTA files already contain the services that you need, so you don’t need to install the dedicated client. All you need to do is open the service associated with your OS architecture from the game folder.
Here’s a quick guide on how to do this:
- Open up File Explorer conventionally, right-click on This PC (My Computer on older Windows iterations) and choose Properties from the newly appeared context menu.
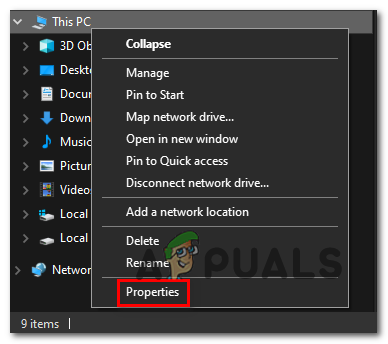
Opening the System Properties screen - Once you’re inside the System Properties screen, look under System category and check your System type. If it shows 64-bit Operation System, you will need to run the wllogin_64 executable. In case it shows 32-bit Operating System, you will need to run the wllogin_32 executable.
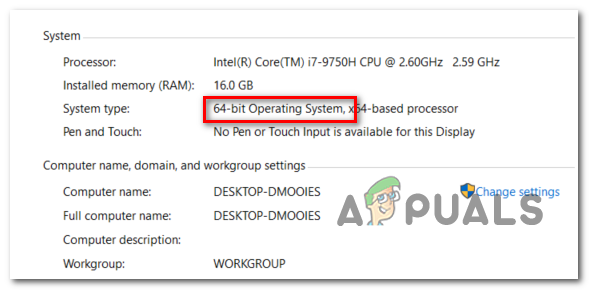
Verifying your OS architecture - Now that you know you’re system architecture, open File Explorer and navigate to the following location:
'Drive letter':\'Game Folder'\Installers\
Note: Keep in mind that both ‘Drive letter‘ and ‘Game Folder‘ are placeholders. Replace them with the actual drive letter where you installed the game and the game folder respectively.
- Next, access the System64 (if you’re on a 64-bit Windows version) or System32 (if you’re using a 32-bit version).
- Once you’re inside the System64 or System32 folder, double-click on wllogin_32 or wllogin_64 executable.
- Wait a full minute to make sure that the service is working, then launch the game and see if it runs without triggering the Fatal Error WTV270.
In case you’re still encountering the same issue, move down to the next method below.
Method 3: Installing the Windows Live Sign-in Assistant
If the method above didn’t allow you to resolve the issue, it’s possible that launching the Windows Live Sign-in Assistant process included in the game executable is not enough to resolve the issue. In this case, you will need to install the full version of the Windows Live-Sign in Assistant from the official Microsoft download link.
If this scenario is applicable, here’s a quick guide on downloading and installing the full version of Windows Live-Sign in Assistant in order to resolve the issue:
- Visit this link (here), select your default language and click on the Download button to initiate the download.
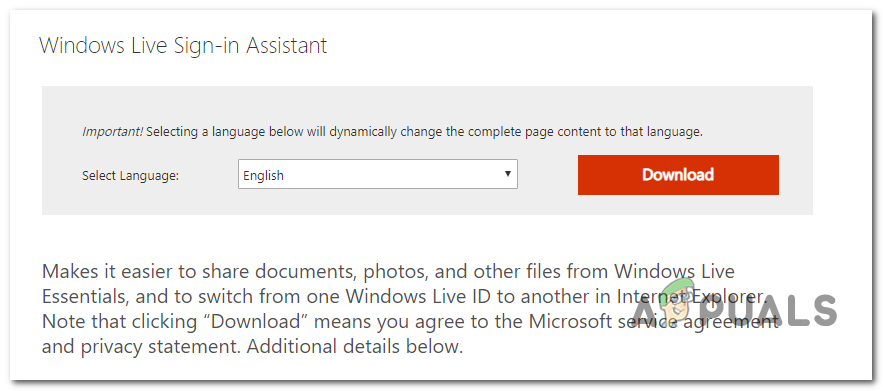
Downloading the live-sing in assistant - Once the download is complete, double-click on the installation executable and follow the on-screen prompts to complete the installation.
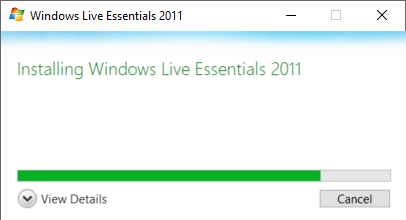
Installing Windows Live Sign-in assistant - After the operation is complete, restart your computer and see if the issue is resolved at the next startup when you try to launch the game.
In case you’re still encountering the same Fatal Error WTV270, move down to the next potential fix below.
Method 4: Running GTA IV in windowed mode
If you’re encountering the issue on a newer configuration, chances are GTA IV is not optimized to run on your native resolution. This problem should have been resolved with the update pushed for Windows 10, but some users are reporting that they can only run the game if they force the executable to run in ‘windowed’ mode.
Sure, the immersion will be less than ideal since you will see borders, but it’s still better than being unable to play the game at all.
Keep in mind that when it comes to doing this, you can either do it directly from your Steam client or by modifying the shortcut that you use to launch the game.
If you’re encountering the issue while trying to start GTA IV from your Steam’s library, follow the instructions below to force the game to run in windowed mode:
Forcing GTA IV to run in Windowed mode from Steam settings
In case GTA IV is part of your Steam’s library, here’s a step by step guide that will allow you to force the game to run in windowed mode:
- Open your Steam application and make sure you are signed up with your account.
- Next, access your library to view all your games, then right-click on Grand Theft Auto IV and click on Properties from the newly appeared context menu.
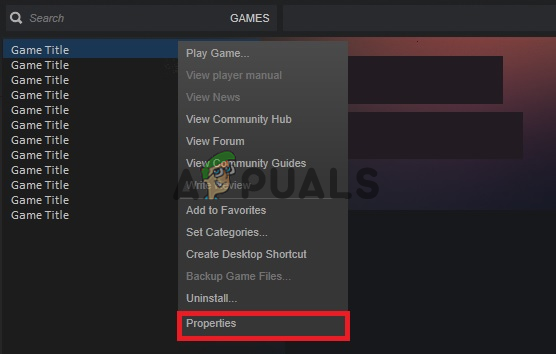
Opening Properties. - Once you’re inside the Properties screen of GTA IV, select the General tab from the horizontal menu at the top, then click on Set Launch Options.
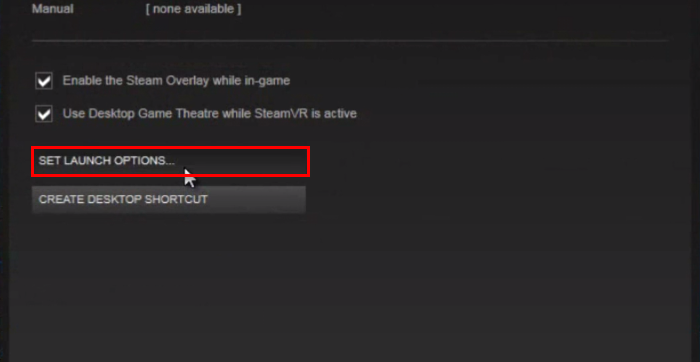
Accessing the Launch Options menu - Inside the Launch Options screen, simply type ‘-windowed’ (without quotes) and click Ok to save the changes.
- Launch the game normally and see if the issue is now resolved and you’re able to run GTA IV without encountering the Fatal Error WTV270 error.
Forcing GTA IV to run in Windowed mode by modifying the shortcut
If you are not using Steam to launch GTA 4, here’s a step by step guide on forcing the shortcut of the main GTA IV executable to run in windowed mode:
- Open up File Explorer and navigate to shortcut that you use to launch the game (not the location where GTA IV files are installed).
- Once you get to the correct location, right-click on the main GTA IV executable (the one you use to launch the game) and choose Properties from the newly appeared context menu.
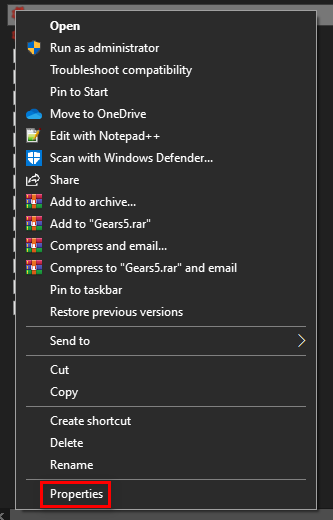
Accessing the Properties screen of the game executable - Inside the Properties screen of the window, select the Shortcut tab and look for the Target location. Once you get to the correct location, simply add ‘-window’ after the target location.
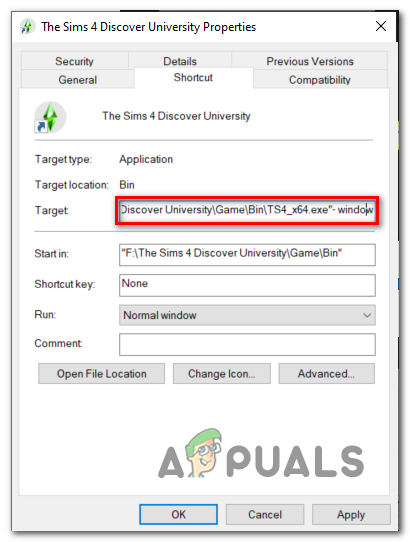
Forcing the shortcut to work in -window mode - Click Apply to save the changes, then double-click on the executable shortcut once again and see if you are able to launch the game without encountering the same Fatal Error WTV270.
In case the same issue is still occurring, move down to the next potential fix below.
Method 5: Using XLiveLess.DLL
If you’re on Windows 10, you might need to go the extra mile in order to ensure that your GTA IV is allowed to run normally. Fortunately, the modding community behind Grand Theft Auto IV has released a patch called XLiveLess which serves as a small replacement of the xlive.dll (the main culprit for this issue) minus the online support.
Among other things, this XLiveLess.DLL will fix a common glitch causing the Fatal Error WTV270.
Important: If you want to play GTA IV for its online components, keep in mind that this operation will disable all online functions.
If you want to follow this method, here’s a quick step-by-step guide on using the xliveless.dll patched DLL file in order to replace the problematic xlive.dll file:
- Visit this link (here) and hit the Download button from the left-hand side menu in order to download the XLiveLess tool.
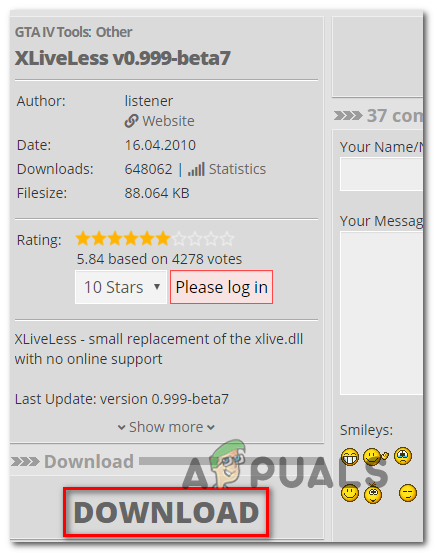
Downloading the xLiveLess utility - Once the download is completed successfully, open the archive and extract the content in a separate folder with a utility like 7zip, WinZip or WinRar.
- After the extraction is complete, open the folder that you just extracted, right-click on xlive.dll and choose Cut from the newly appeared context menu.

Using the patched xlive.dll file - Navigate to the location of your game installation and paste the xlive.dll l file inside the GTA IV folder. By default, the location is:
C:\Steam\SteamApps\common\Grand Theft Auto IV\GTAIV
- Launch the game and see if the issue is now resolved.
In case the same Fatal Error WTV270 problem is still persisting, move down to the next method below.
Method 6: Running the executable in compatibility mode
Keep in mind that at the time of the GTA IV release, Windows 10 was not out yet. This means that the game was not designed to run with the newer OS architecture (that’s precisely why there are this many issues with GTA IV on Windows 10).
Fortunately, most of these incompatibilities can be resolved by forcing the main executable in Compatibility mode with Windows 7 with admin rights. This modification only needs to be done one from the Properties menu.
Here’s a quick guide on forcing the GTA IV executable to run in compatibility mode with Windows 7:
- Right-click on the executable (or shortcut) that you always use when you launch the game and click on Properties from the newly appeared context menu.
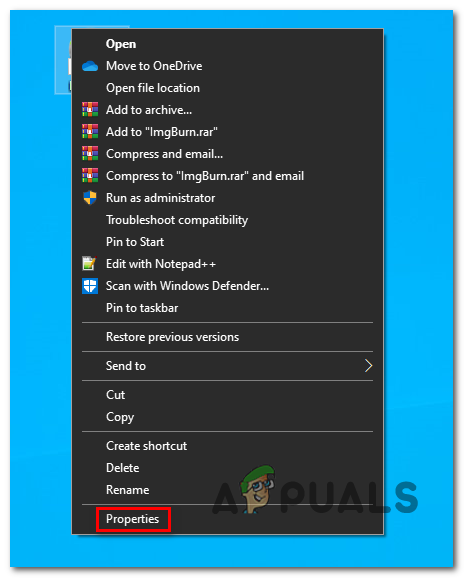
Accessing the Properties screen - Once you’re inside the Properties screen, select the Compatibility tab from the menu at the top, then click enable the box associated with ‘Run this program in compatibility mode for’, next select Windows 7 from the drop-down menu below.
- Next, check the box associated with Run this program as an administrator, then click on Apply to save the changes.
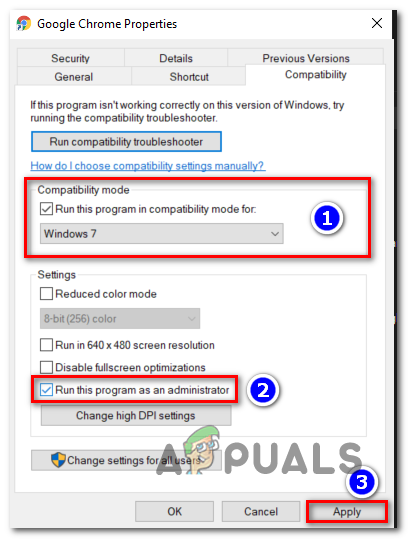
Running the GTA executable in Compatibility Mode - Launch the game and see if the issue is now resolved.
In case the same problem is still occurring, move down to the next potential fix below.
Method 7: Downgrading to version
As it turns out, for a lot of users, the Fatal Error WTV270 problem will only occur with version 1.0.8.0 and older. We’ve been unable to find an official explanation detailing why this happens, but a lot of affected players have confirmed that they were able to fix the issue by downgrading to version 1.0.7.0 version by installing the dedicated patch.
But keep in mind that going this route means that you will also prevent the game from accessing any type of multiplayer components.
If you decide to go through with this method, here’s a step by step guide on downgrading to GTA IV version 1.0.7.0:
- First things first, make sure that GTA IV and any associated instance is completely closed.
- Visit this link (here) to automatically download the 1.0.7.0 patch for English, or download the patch for a different language using this link (here).
- After the patch is completely downloaded, open the archive with a utility like 7zip, WinZip or WinRar and extract it directly into your game installation folder. By default, the game folder is created in:
C:\Steam\SteamApps\common\Grand Theft Auto IV\GTAIV
- Once the extraction is complete, navigate to the GTA IV game folder and double-click on UpdateTitle.exe to apply the patch.
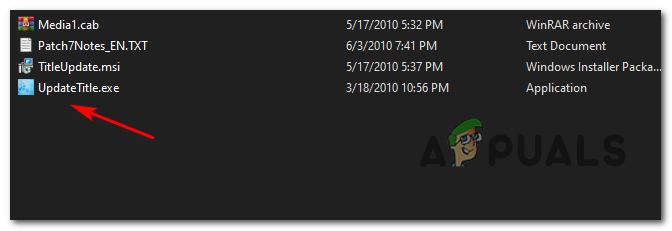
Opening the update title executable - Next, follow the on-screen prompts to complete the installation, then restart your computer and launch the game again to see if the issue has been resolved.


