World War 3 Stuck at Initializing Screen? Here’s how to fix
While trying to play World War 3, users experience an issue as they are not able to get into the game. As it turns out, the “Initializing Interface” message is shown but the game does not go any further and it stays stuck there. This can occur sometimes when the servers are down for maintenance due to which you are not able to connect. However, that may not always be the case as this can also happen due to a bug with OpenSSL which can crash on the processor. In this article, we are going to show you how to resolve the issue in question so just follow through.
As it turns out, World War 3 has been out in closed beta for a while now and more users are allowed to test out the game. These beta phases are really helpful for the developers as it helps them remove any bugs that are still in game before the official release of the game. While some users may face issues with the game such as World War 3 not launching, there are often easy fixes that can help in getting you in the game. The problem in question is related to a bug with OpenSSL and is only limited to Intel processors. Before we get started with the solution, let us first go through the reason in more detail to understand why the issue is occurring.
Why is World War 3 Stuck on Initializing Interface?
To give you a better overview of why this is occurring, let us first explain what OpenSSL is. As it turns out, OpenSSL is essentially used by applications in order to secure communication over computer networks so that no outsider can get their hands on the data that is being sent and received.
The reason that you are facing this issue is due to some bugs with some older OpenSSL versions that either caused a crash or bad Secure Hash Algorithm (SHA) values on Intel processors. Like we have mentioned earlier, this is limited to some Intel generation processors. Now, the issue has been resolved but in case games are built on Unreal Engine versions that contain this bug, the game will certainly be affected, which is the case with World War 3 as well.
With that said, you do not have to worry as there is an easy fix available that you can implement to get around the problem. So, without further ado, let us get started and show you how to fix the issue in question.
Create OpenSSL Environment Variable
To get rid of the problem, you will have to create a new environment variable in the Windows machine. Environment variables are basically paths that are predefined on the system that essentially represent certain locations. This can include a particular file, a drive or even a folder. When you create an environment variable, you will be able to access that file, for example, from anywhere on your computer via the shell.
The environment variable that we will be creating is essentially used to control enabling of features for OpenSSL. After you have created the environment variable, what will happen is that OpenSSL code checks for SHA files will be disabled and a different code path is instead executed. This new code path does not contain the bug that would cause it to crash and thus everything should work normally. With that said, follow the instructions given down below to create an environment variable:
- First of all, bring up the Windows Settings window by pressing the Windows key + I buttons on your keyboard.
- After you have the Settings window open, go to System and then scroll down to the bottom. There, click on the About option that is provided.
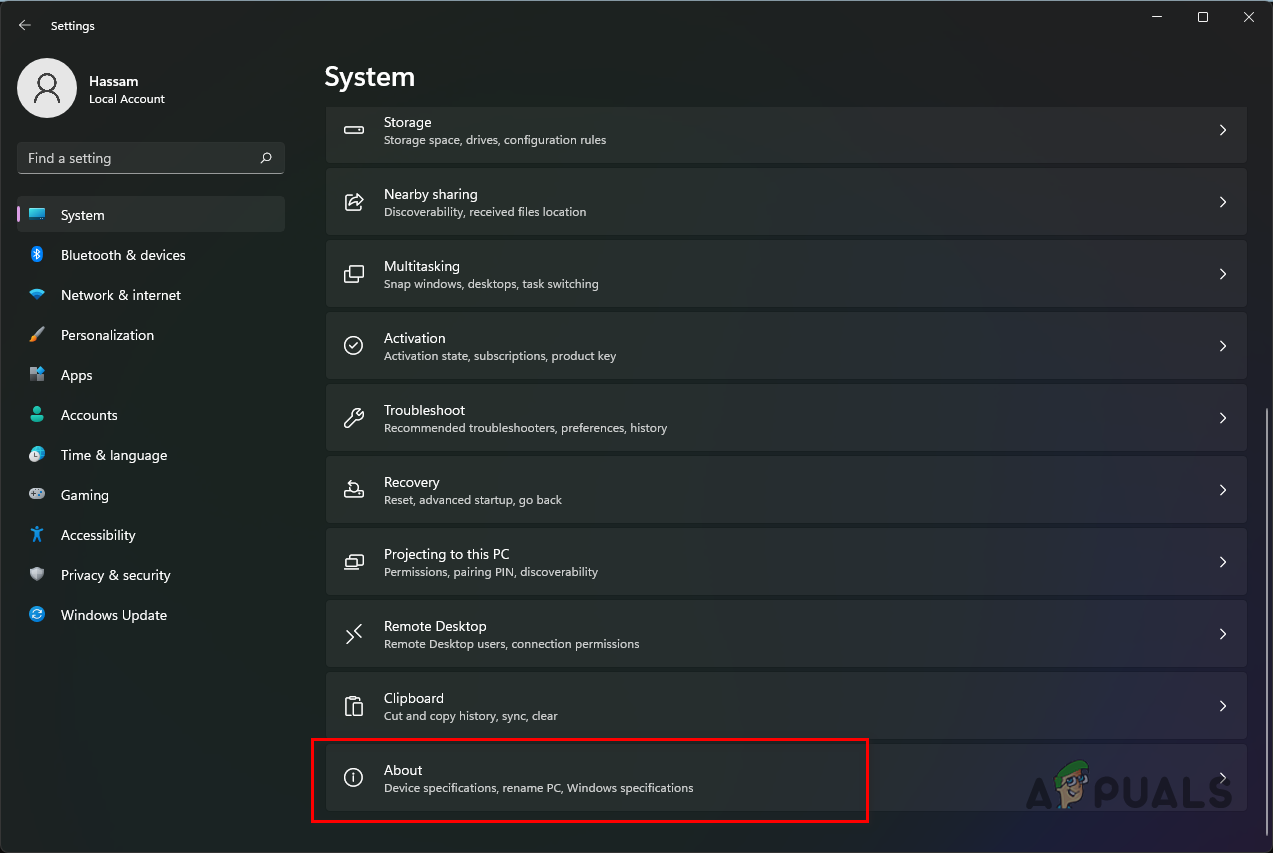
System Settings - Once you have done that, click on the Advanced system settings option on the About screen.
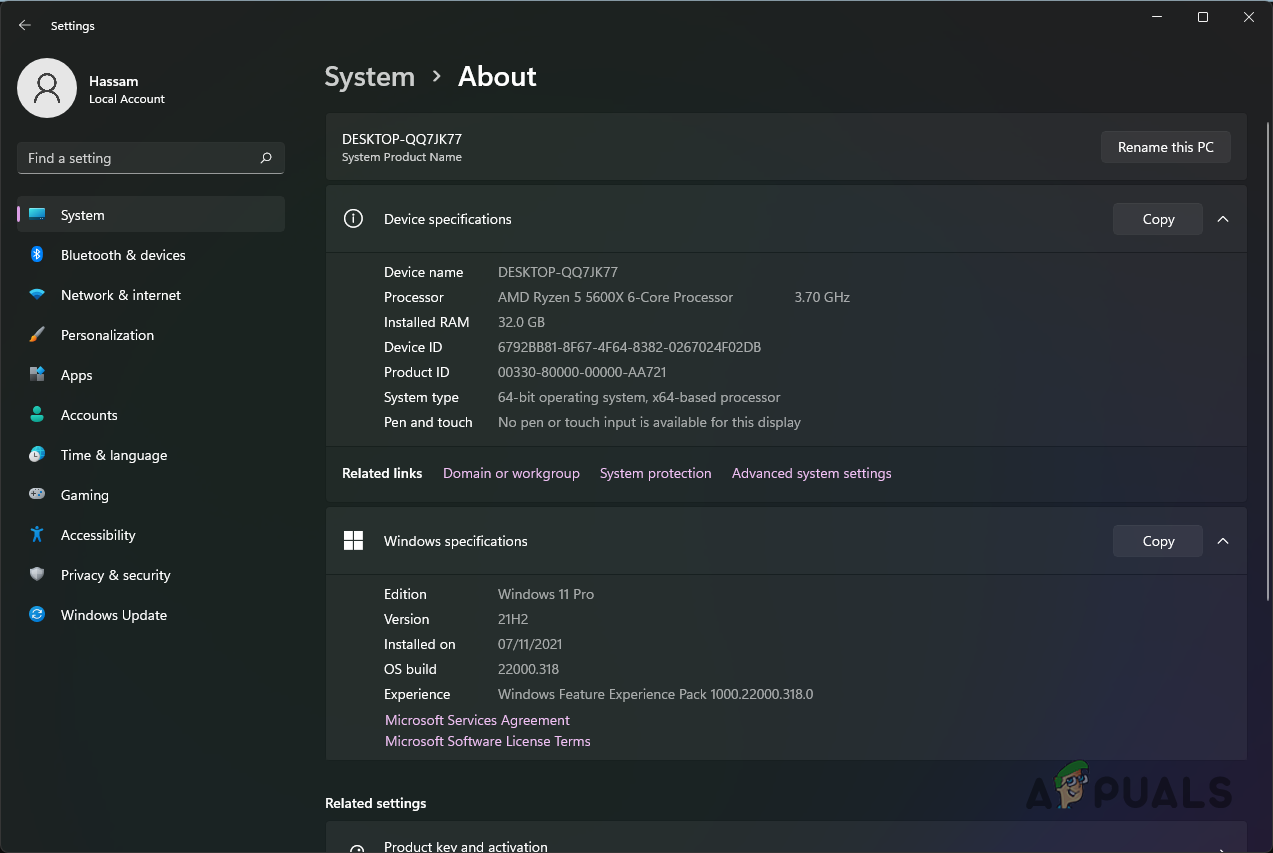
Opening up Advanced System Settings - A new window will open up called System Properties. Here, click the Environment variables button at the bottom right corner.
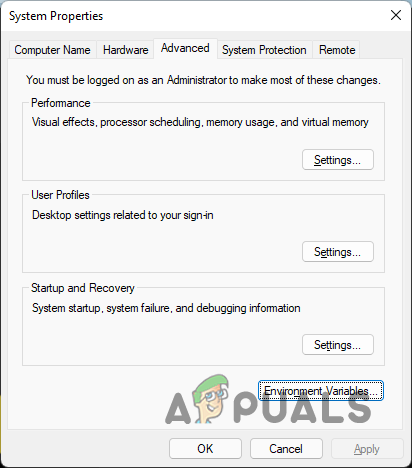
Advanced System Settings - Now, under System variables, click the New button provided.
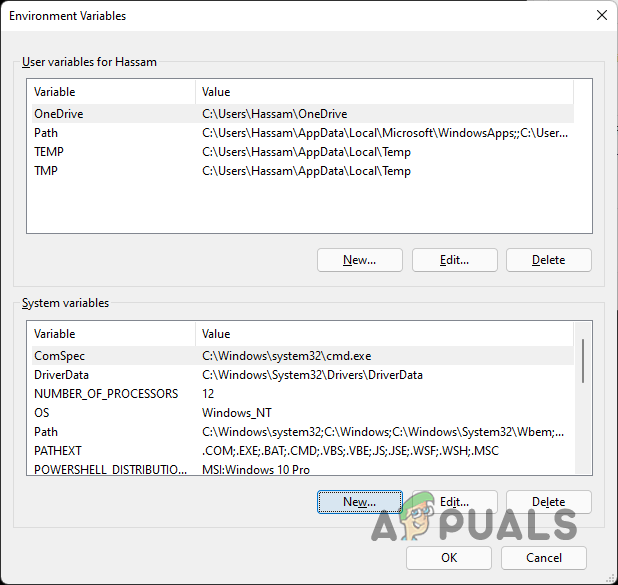
Environment Variables - At this point, you will have to provide the details of the new environment variable.
- For the Variable Name, copy and paste OPENSSL_ia32cap. After that, follow this up by copy pasting the “~0x200000200000000” value in the Variable Value box. Make sure you do not include the quotation marks.

Creating OpenSSL Environment Variable - Once you have done that, click the OK button provided.
- Follow it up by clicking OK again on the remaining windows. Once you do that, the environment variable should now be created.
- Finally, go ahead and restart your computer.
- As your computer powers up, go ahead and open up the game again to see if the problem still occurs or not.


