How to Fix Windows Update Download Error 0xc1900201
The Windows update error 0xc1900201 pops up when the users try to install the latest upgrade, especially the Windows 11 22H2 upgrade. The error is accompanied by the statement, ‘We couldn’t update the system reserved partition.’
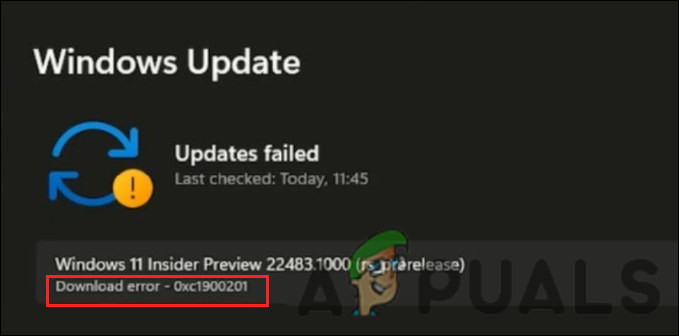
In most cases, the error is caused when the System Reserved Partition (SRP) becomes full. System Reserve Partitions (SRPs) are hard drive partitions that store boot information for Windows. This guide will walk you through the troubleshooting methods that fixed the issue for other users.
1. Resize the Partition
This error is caused when the System Reserve Partition (SRP) becomes full and does not have space for the update. This is why the most appropriate troubleshooting method to start is by resizing the partition.
We will remove the folders not often used to create the required space.
Here is all that you need to do:
- Open the Run program, and Press the Win + R keys together.
- Type diskmgmt.msc in Run and click Enter.
- In the following window, right-click on the disk that contains SRP and choose Properties from the context menu.
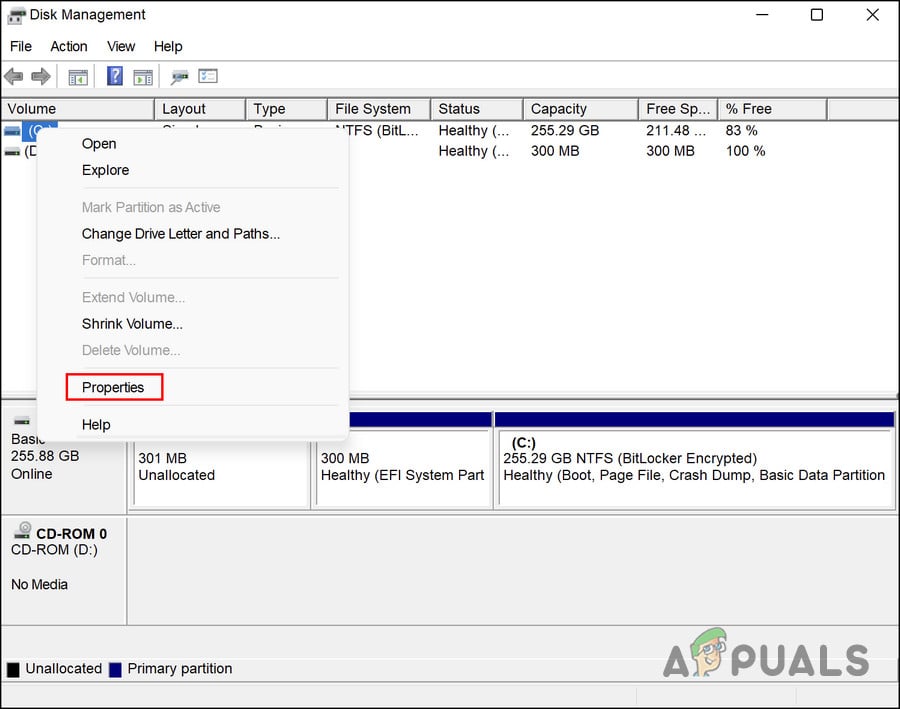
Access the properties of the drive - Head over to the Volume tab and check your partition style. It will either be GUID Partition Table (GPT) or Master Boot Record (MBR).
1st Scenario: GPT Partition
If you have a GPT partition, proceed with the following methods:
- Press Win + R to open Run.
- Type cmd in Run and press Ctrl + Shift + Enter to open Command Prompt as an administrator.
- Alternatively, you can type cmd in the search area of the taskbar and choose Run as administrator.
- Click Yes in the User Account Control prompt.
- Now, type the following command in Command Prompt and hit Enter to execute it. By doing so, you will add the Y: driver letter to access the System Partition.
mountvol y: /s
- Now, type Y: and hit Enter.
- Once done, type the following to open the Fonts folder. This is the folder that we will be removing.
cd EFI\Microsoft\Boot\Fonts
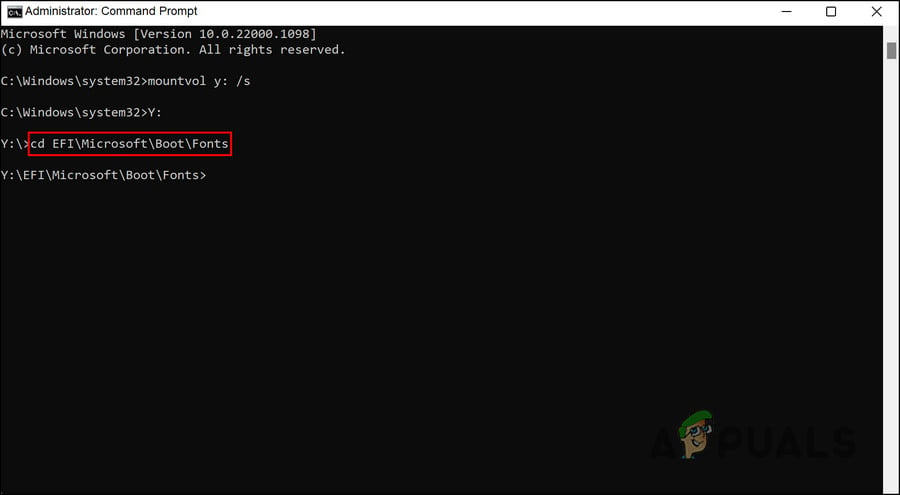
Execute the entered command - Now, type del *.* to delete font files.
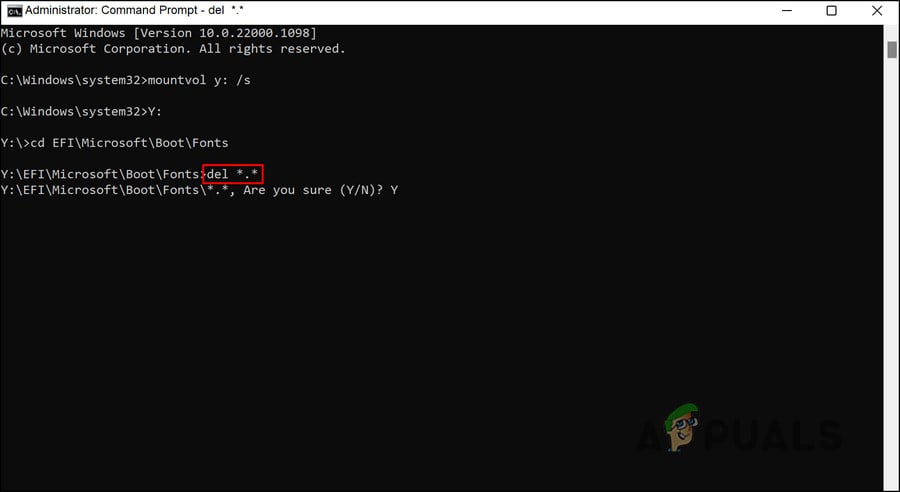
Delete the fonts folder - If asked to confirm the action, type Y and hit Enter.
You can now try installing the targeted update without any problems.
2nd Scenario: MBR Partition
If you have an MBR partition, the process will be slightly different and longer. Follow these steps to proceed:
- Press Win + R to open Run.
- Type diskmgmt.msc in Run and click Enter.
- Right-click on the partition marked as System Reservice.
- Choose Change Drive Letter and Paths and then click on Add.
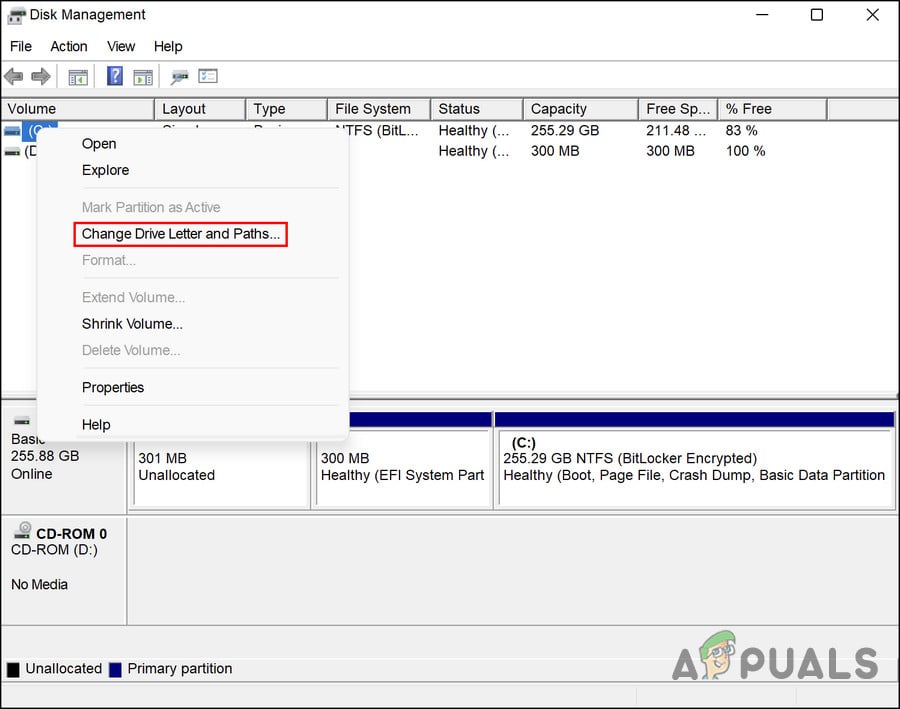
Change the drive letter and its path - Enter Y: as the driver letter and click OK.
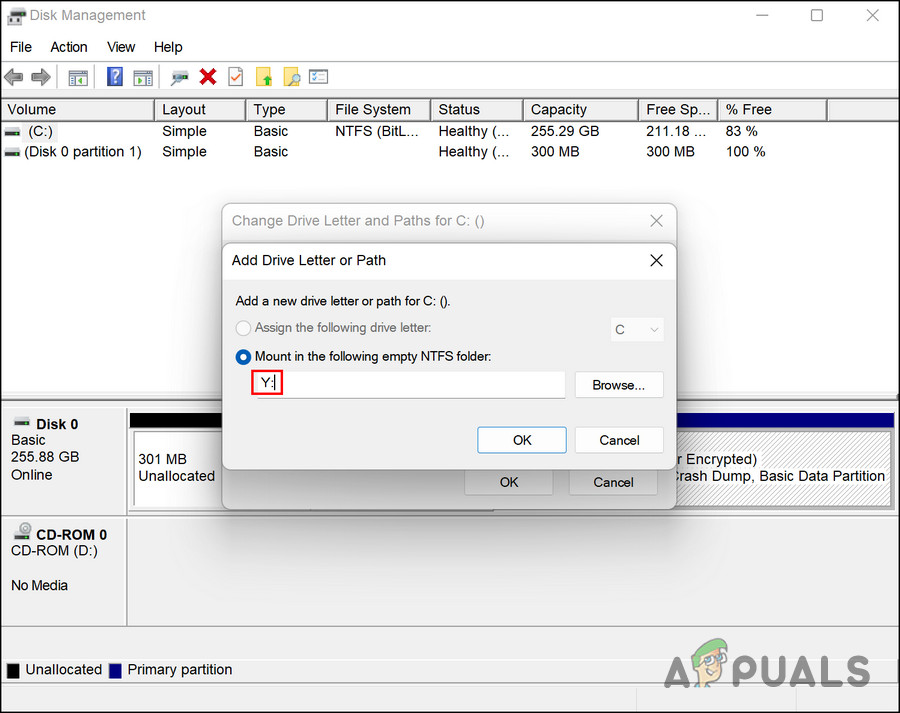
Enter a drive letter - Now, type cmd in the search area of the taskbar and click on Run as administrator.
- Click Yes in the User Account Prompt.
- Once you are inside the Command Prompt window, type Y: and click Enter. This will make you switch to that drive.
- Now, execute the following command to head over to the Fonts folder:
cd Boot\Fonts
- Next, execute this command:
takeown /d y /r /f .
- To backup the permission to the drive, execute the following command:
icacls Y:\* /save %systemdrive%\NTFSp.txt /c /t
- Type whoami and hit Enter. Note down the username.
- Then, execute this command:
icacls . /grant <username you got from whoami>:F /t
- Type del *.* to delete font files.
- To confirm the action, type Y and hit Enter.
Once this is done, you can restore the permissions of the drive by following these steps:
- In Command Prompt, execute the following command. If there are no successful files, then the command was executed incorrectly; you need to process some files before continuing.
icacls Y:\ /restore %systemdrive%\NTFSp.txt /c /t
- Execute the following code to adjust the ACL back to the System:
icacls . /grant system:f /t
- Using the following command, revert the drive’s ownership to System:
icacls Y: /setowner “SYSTEM” /t /c
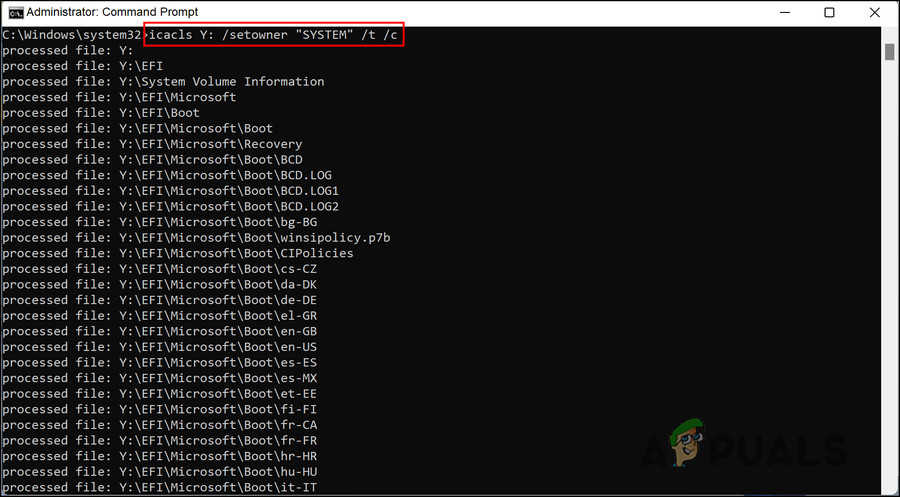
Revert drive’s ownership - Now, head back to Disk Management and refresh the data. This will confirm if the SRP finally has enough free space.
- If it does, right-click on the System Reserved Partition and choose Change Drive Letter and Paths.
- Click on the Y: drive and choose Remove.
- Finally, hit OK and close the Disk Management window.
Once this is done, you can try to install the update again. Hopefully, you will be able to do it without any issues this time.
2. Perform a Reset or a Repair Install
By this point, you have not found a viable solution, which suggests that the problem cannot be fixed using conventional troubleshooting methods. Moving forward, you have two options.
You can restore Windows to its default state if you want to give your system a fresh start. With this method, you will remove all the applications you installed yourself. It will restore your Windows to its state when you purchase it.
The second option is a repair installation, which replaces all Windows files with fresh copies. However, this will not affect your files or programs.
Generally, both methods are believed to solve the problem, so you can choose whichever method you prefer.


