How to Solve the Windows Update Error 0xc1900130?
The Windows Update Error Code 0xc1900130 occurs when the user tries to install a pending update using the automated WU component. This particular error code is signalling that the network connection between the client machine and the Windows Update server is somehow interrupted.

What’s causing the Windows Update Error Code 0xc1900130?
- 3rd party AV interference – As it turns out, an overprotective AV suite or firewall can be responsible for freezing the relations between the client machine and the Windows Update server. AVG is most commonly reported for facilitating the apparition of this error code. If this scenario is applicable, you should be able to fix the issue either by disabling the real-time protection while the update installation is taking place or by uninstalling the 3rd party suite altogether.
- Conflict between Intel RST Driver and Windows 10 – There’s one driver (iastorac.sys) file that is often reported for blocking communications with the update server. This Intel RST file is known to conflict with older Windows 10 builds, specifically with builds 1900 and older. In this case, you can fix the issue by renaming the iastora.sys driver, forcing your Windows installation to disregard it.
- Corrupted WU component – As it’s been confirmed, this particular error code can also occur due to a glitch or a corrupted dependency that ends up breaking the updating process. If this scenario is applicable, you should be able to resolve the issue by using the Automated WU agent to reset all relevant components or by doing it manually from an elevated CMD prompt.
- Different 3rd party conflict – It’s also possible that a recent system change caused by a partially incompatible driver or application ends up interfering with the updating component. In this case, you should be able to fix the issue by using the System Restore to restore your system to a healthy state when this problem was not occurring.
Method 1: Preventing the 3rd party interference (if applicable)
As it turns out, one of the most common culprits that will spawn this error code is AVG. We managed to identify a lot of users’ reports claiming that their free AVG installation was blocking the update from being installed.
Note: There might be other 3rd party AV suite that might also cause the same kind of behaviour.
Affected users have reported that they were finally able to install the update without getting the 0xc1900130 error only after they disabled the real-time protection. However, other users have confirmed that the issue only went away after they uninstall the security suite altogether.
If you’re using a 3rd party suite and you suspect that it might be responsible for this issue, you should start by disabling the real-time protection and seeing if the problem is persisting. With most security suites, you will be able to do this directly from the taskbar menu:
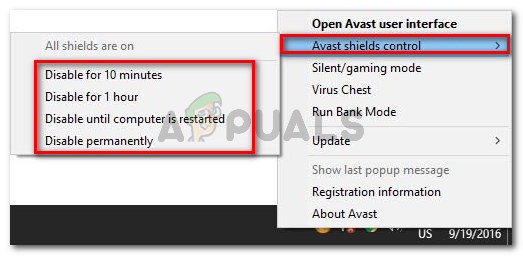
Once you do this, restart your computer and see if the issue is persisting by trying to installing the problematic update once again
If the 0xc1900130 error is still being triggered, proceed to uninstall the security suite altogether and ensure that you’re not leaving behind any leftover files that might still cause this type of behaviour. If you’re not exactly sure how to do this, follow this article (here) for step by step instructions on getting rid of your 3rd party security suite along with any leftover files.
In case this method wasn’t applicable or you followed it to no success, move down to the next potential fix down below.
Method 2: Renaming the iastorac.sys driver
As it turns out, the most common reason why this issue will occur in the first place is a software incompatibility between Microsoft and Intel. An issue with the iastorac.sys driver might end up effectively blocking the Windows Update component on Windows 10 PCs using Intel RST drivers.
If this scenario is applicable, you should be able to fix the problem by accessing the location of the conflicting driver iastorac.sys and renaming it with the ‘.old‘ extension to force your operating system to disregard it.
Several affected users have confirmed that after doing this and restarting their computer, they were finally able to install every pending update without issues.
Here’s a quick guide on doing this:
- Open File Explorer and ensure that extensions are visible by going to View and checking if the box associated with File name extensions is enabled. If it isn’t yet, enable it now.
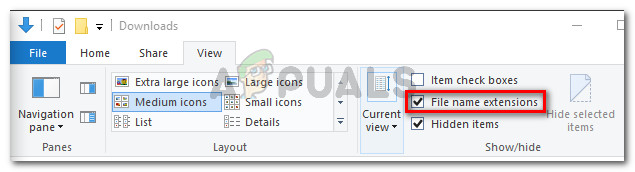
Enabling File Name Extensions from File Explorer - Next, navigate to the following location:
C:\Windows\System32\drivers
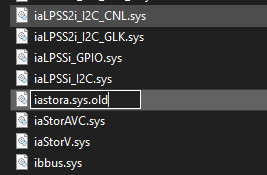
- Once you get to this location, scroll through the list of drivers and locate iastora.sys.
- When you manage to locate the correct driver, right-click on it and choose Rename from the context menu.
- Rename the iastora.sys to iastora.sys.old to force Windows to disregard it.
- At the UAC (User Account Control), click Yes to grant admin access to allow the editing to take place.
- Restart your computer and wait for the next startup to complete.
- Once the booting sequence is complete, attempt to install the problematic Windows Update again and see if the issue is now resolved.
If you’re still encountering the same Error Code 0xc1900130 when trying to install the update, move down to the next method below.
Method 3: Resetting the Windows Update component
As it’s been confirmed by several affected users, this issue can also occur due to some glitch or corrupted dependency that ends breaking the updating process altogether. This issue is much more common on Windows 8.1, but it can also occur on Windows 10.
If this scenario applies to your current situation, you should be able to fix the problem by resetting all relevant WU components that are involved in the updating process. When it comes to doing this, you have two ways forwards:
- Resetting WU via Automated WU agent
- Resetting WU manually via elevated CMD window
We’ve explained both methods below, so feel free to follow whichever guide you feel more comfortable with:
Resetting WU Via Automated WU agent
- Visit this official Microsoft Technet page (here) and click the Download button to download the Reset Windows Update Agent script.
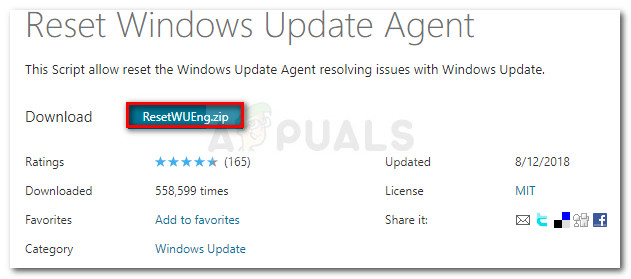
Download Windows Update Reset Agent - Once the archive is downloaded, use a utility like WinRar, WinZip or 7Zip to extract its contents.
- Next, double-click on ResetWUENG.exe file, click Yes at the UAC (User Account Prompt) to grant administrative privileges.
- Follow the on-screen prompts to run the script on your computer. Once the operation is complete, restart your computer and see if you can install the update after the next startup sequence is complete.
Resetting Windows Update manually via elevated CMD window
- Press Windows key + R to open up a Run dialogue box. Next, type ‘cmd’ and press Ctrl + Shift + Enter to open up an elevated CMD Prompt. Once you see the UAC (User Account Control), click Yes to grant administrative privileges.
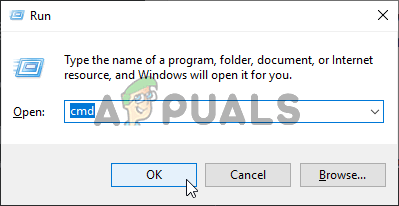
Running Command Prompt - Once you’re inside the elevated CMD prompt, type the following commands in order and press Enter after each command to stop all relevant Windows Update services:
net stop wuauserv
net stop cryptSvc
net stop bits
net stop msiserver
Note: Just so you understand what we’re doing, these commands will temporarily stop the Windows Update Services, MSI Installer, Cryptographic services, and BITS services.
- Once all relevant services are frozen, run the following commands to clear the two folders that are being used by the WU component (SoftwareDistribution and Catroot2):
ren C:\Windows\SoftwareDistribution SoftwareDistribution.old
ren C:\Windows\System32\catroot2 Catroot2.old
- Once the two folders have been removed, run the following commands and press Enter after each one to re-enable the previously disabled Windows services once again:
net start wuauserv
net start cryptSvc
net start bits
net start msiserver
- Restart your computer once again and see if the issue is resolved at the next computer startup.
If you’re still encountering the same 0xc1900130 error while trying to install a pending update, move down to the next potential fix below.
Method 4: Using system restore
If the Windows updating component only started breaking recently after a driver or 3rd party app installation, it’s very likely that whatever you install is currently interfering with your operating system ability to install new pending updates.
Several affected users have reported that in their case, iastorac.sys (a loaded driver) was blocking the installation of new updates. If this particular scenario is applicable, you should be able to fix the issue by using System Restore to restore your computer state to a healthy state when this conflict wasn’t occurring.
It’s essential to keep in mind that by default, all recent Windows versions (Windows 7, Windows 8.1 and Windows 10) are designed to save new restore snapshots regularly (at important system events). Unless you modified this default behaviour, you should have plenty of restore snapshots to choose from.
Note: Before you start following the instructions below, remember that any changes you made after the snapshot was created will be lost once you mount that snapshot using the System Restore utility. Any applications, games, or other system changes that you made during that time will be reverted.
If you prepared to go this step and you understand the consequences, start following the instructions below to use the System Restore utility:
- Open up a Run dialogue box by pressing Windows key + R. After you manage to get inside, type ‘rstrui’ and press Enter to open up the System Restore menu.
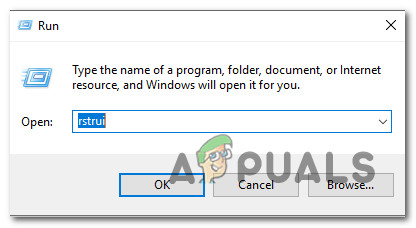
Opening the System Restore wizard via Run box - Next, once you’re at the initial System Restore screen, click Next to advance forward from the first menu.
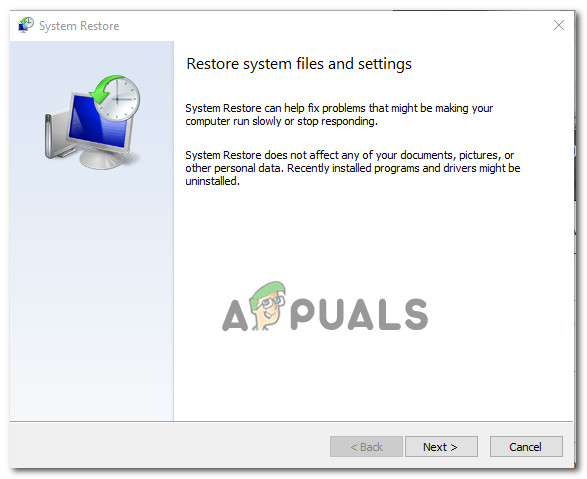
Using System Restore - Once you’re at the next screen, start the operation by checking the box associated with Show more restore points. Next, begin comparing the dates of each saved restore point and select the one that is older than the apparition of the issue.
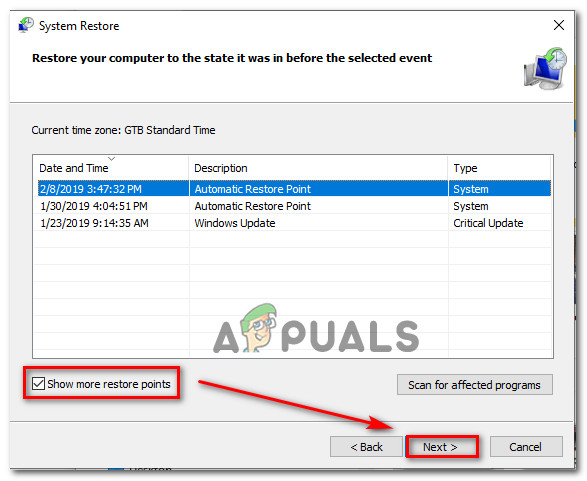
Restoring your system to a previous point in time - Once the correct system restore point is selected, click on Next o advance to the next menu.
- When you get this far, the utility is ready to go. All you need to do now is click on Finish to start this restoring procedure.
- During the next startup, the next old machine state will be enforced. Once the booting part is complete, attempt to install the update that was previously failing with the WU component and see if the issue is now resolved.
In case you’re still encountering the same Windows Update 0xc1900130 Error Code, move down to the next potential fix below.


Hi,
I followed your instructions in Method 2: Renaming the iastorac.sys driver but didn’t work and the computer doesn’t restart. I tried to solve by recoverying Windows but I couldn’t. What should I do?