How to Fix “The Windows RE Image was not found” on Windows?
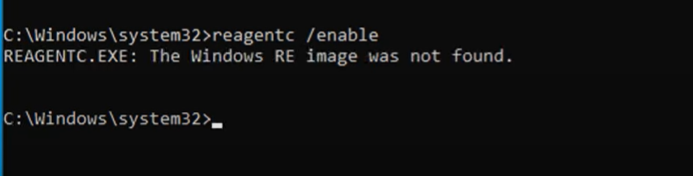
The Windows Recovery Environment (WinRE) is a tool designed to help reset or recover Windows. However, during the resetting process, you may encounter the error “Could not find the Recovery Environment.” This indicates that the RE image is corrupted or deleted from your system. If you try to enable the recovery environment using the reagentc.exe command in the command prompt, you might see the error message: “The Windows RE Image was not found.”
This error usually occurs when the winre.wim file is missing from the Windows recovery folder. The winre.wim file is essential for resetting, upgrading, or repairing your system.
In this article, we will explore how to retrieve this file and continue the reset process.
1. Run SFC and DISM
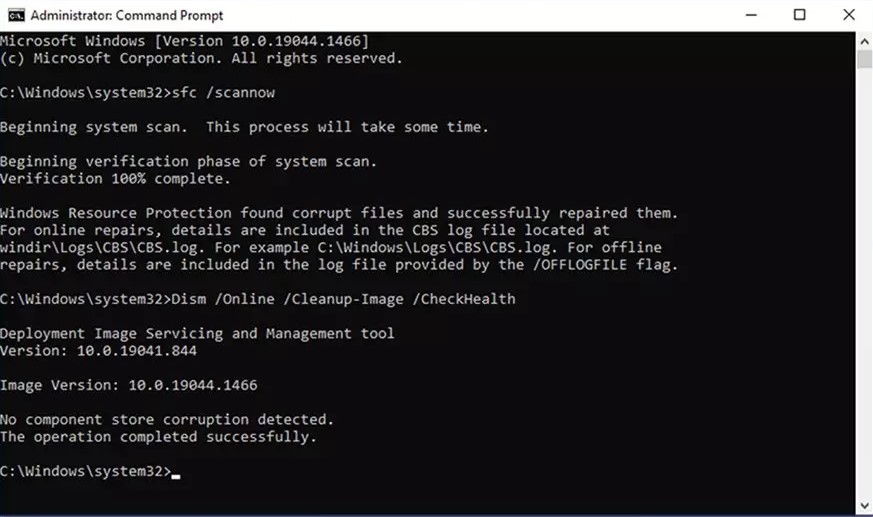
Since winre.wim is a critical system file, it is advisable to run the System File Checker (SFC) and Deployment Image Servicing and Management (DISM) utilities first. These tools will scan for, repair, and restore corrupted files. SFC focuses on restoring corrupted system files, while DISM addresses system-wide issues.
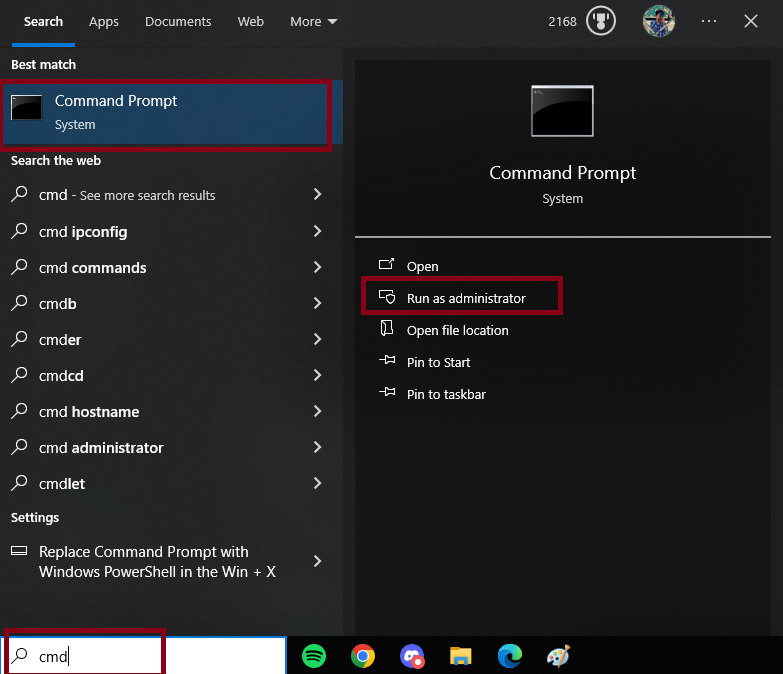
- Open the Search menu, type in cmd, and start the Command Prompt as an Administrator.
- Execute the following commands in the Command Prompt:
sfc /scannow
Dism /Online /Cleanup-Image /RestoreHealth
- After completion, close the Command Prompt and restart your PC.
2. Download the winre.wim File Manually
The error is triggered by the absence of the winre.wim file in the Windows recovery folder. To retrieve the file, you need to download the Windows ISO file and extract the winre.wim file using 7-zip. Follow the steps below:
Step 1. Download the Windows ISO file
To retrieve the Winre.wim file, first, download the Windows ISO file which contains the winre.wim file needed for the recovery folder. Detailed instructions on how to download the Windows 10 ISO and Windows 11 ISO can be found in our articles: how to download Windows 10 ISO and how to download Windows 11 ISO.
Step 2. Download 7-Zip
Unfortunately, you cannot extract files from a WIM or ESD file using WinRAR. Instead, download and install 7-Zip on your computer. You can download 7-Zip from their official website.
Step 3. Copy the winre.wim file
After downloading the ISO file and 7-Zip, proceed with the following steps:
- Right-click on the downloaded ISO file and select Open Archive using 7-Zip.
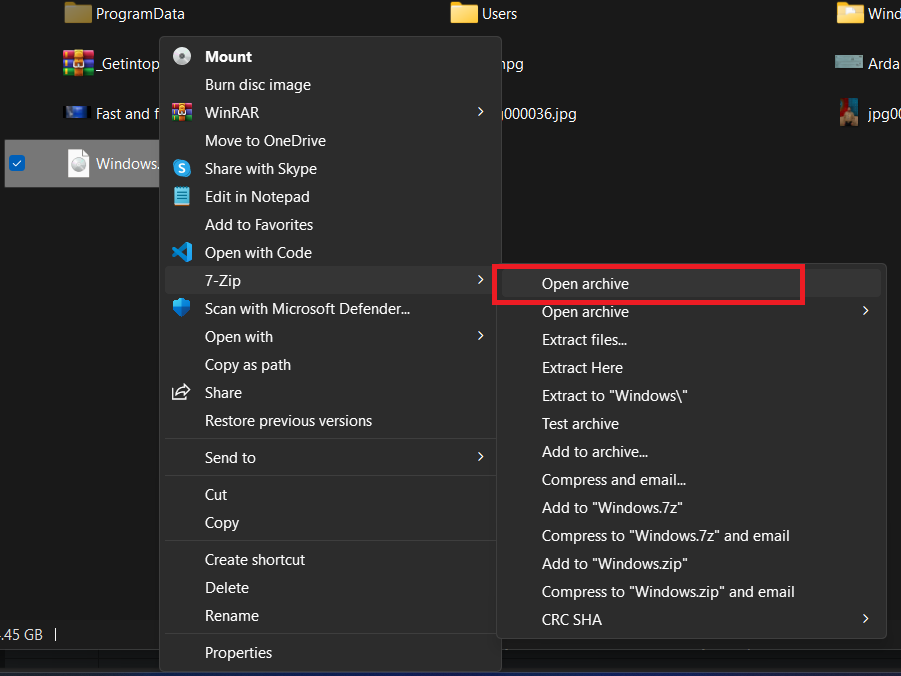
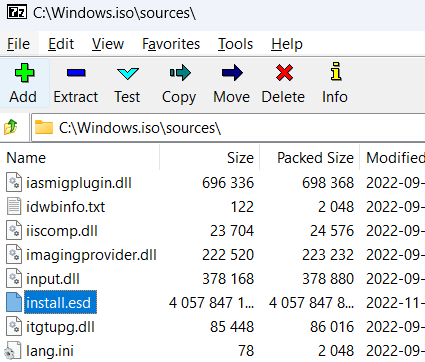
Opening ISO in 7-Zip - Navigate to the sources folder within the Windows ISO and locate the install.esd file.
- Double-click install.esd to view its contents. You will find folders designated for each version of Windows, such as Windows 10 Home, Windows 10 Pro, etc.
1 - Windows 10 Home

2 - Windows 10 Home N

3 - Windows 10 Home Single Language

4 - Windows 10 Education

5 - Windows 10 Education N

6 - Windows 10 Pro

7 - Windows 10 Pro N
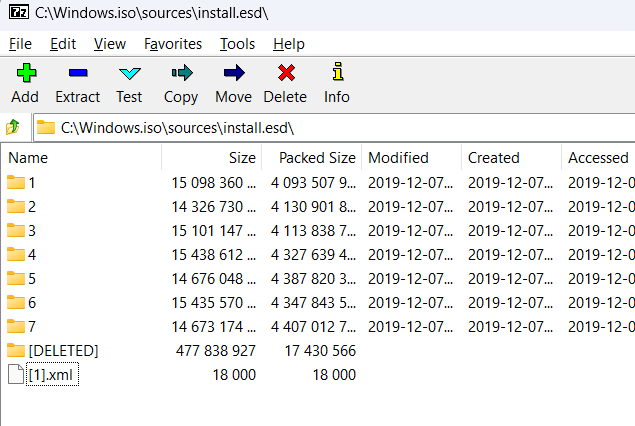
- Select the folder that corresponds to your Windows version.
- Navigate to Windows > System32 > Recovery.
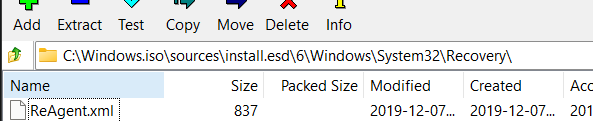
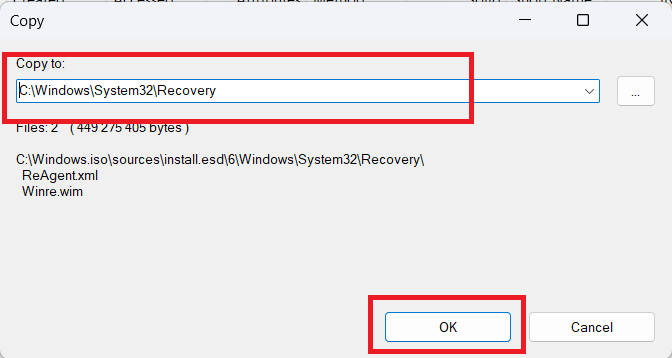
Opening the Recovery Folder in Install.esd - In the Recovery folder, locate the ‘ReAgent.xml‘ and ‘Winre.wim‘ files.
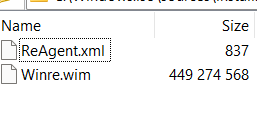
- Select both files, right-click, and choose Copy to, or press the F5 key.

- In the copy window, enter the following address and press OK.
C:\Windows\System32\Recovery
- If you encounter permission issues, change the destination to Desktop.
C:\Users\[Your-PC-Name]\Desktop
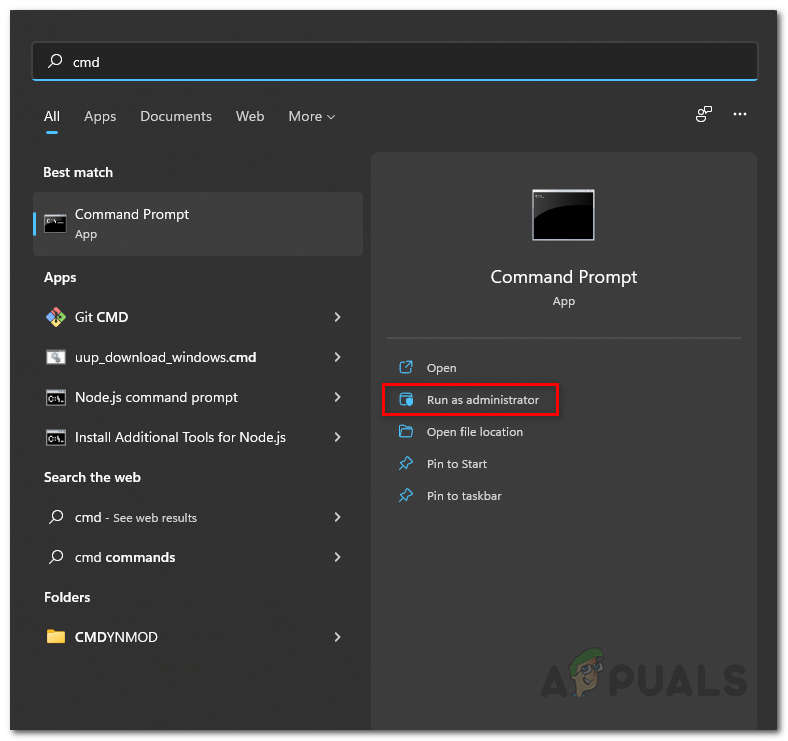
- If step 9 fails, open Command Prompt as Administrator and execute the following command to copy the Winre.wim file to the recovery folder.
copy C:\Users\[Your-PC-Name]\Desktop\Winre.wim C:\Windows\System32\Recovery
- Finally, press Windows + R, type cmd, and run Command Prompt as Administrator.
- Enter the following command:
reagentc /enable
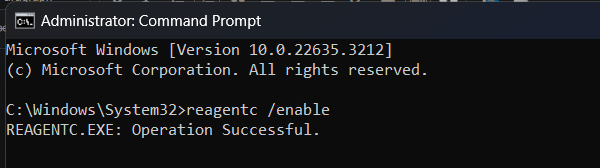
Once complete, restart your PC, and the issue should be resolved.
3. Reinstall Windows
If the issue persists and your aim is merely to reset Windows, you can perform a repair installation which will eliminate all third-party apps. For detailed instructions, refer to our article on how to repair install Windows.
Should that method fail, consider reinstalling Windows using a USB. Instructions for this can be found in our article on how to install windows.


