How to Fix Facial Recognition Not Available on Windows Hello?
Microsoft Hello gives you quick and easy access to your devices, apps, online services, and networks, allowing you to sign in with your face, fingerprint, iris, or a PIN. Recently, several users reported that they are unable to use the Facial Recognition feature of Windows Hello due to unknown reasons.
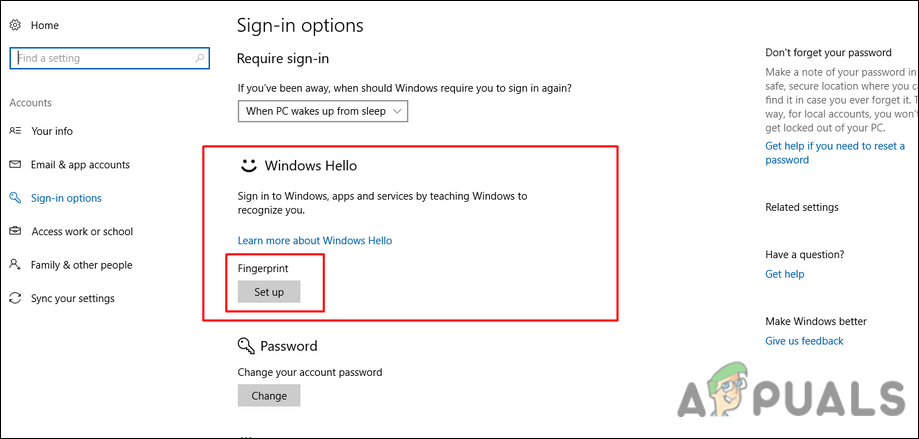
We had a look into the issue and discovered that it can be caused by a number of reasons including:
- Outdated or missing imaging and biometric device drivers – Windows Hello requires the appropriate imaging and biometric device drivers on a Windows device. If the relevant driver is not working properly, you are likely to face the issue at hand.
- Windows 10 is not updated – Some users have reported that simply switching to the latest version of Windows solved their Windows Hello issues.
- Corrupted system files – t’s possible that your system files have become infected with a corruption error, leading to the issue at hand.
Empty the NGC Folder
Ngc is where Windows 10 stores all information concerning your PIN settings. If you are countering PIN-related issues, such as Facial Recognition not being available, you can delete the Ngc folder to solve the issue. In this way, you will be able to delete all data related to your current PIN settings and proceed with a refresh.
- Open a Run dialog box by pressing Windows + R keys simultaneously on your keyboard.
- In the text field of the dialog box, type ‘C:\Windows\ServiceProfiles\LocalService\AppData\Local\Microsoft\NGC’ and hit OK.
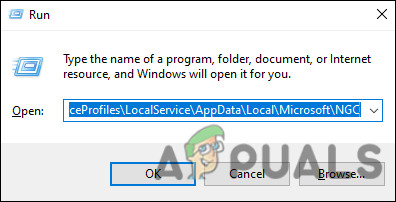
Launch NGC folder - Once you are inside the NGC folder, delete all its contents.
- Finally, restart your PC and check if doing so resolves the issue.
Modify Windows Registry
There is a chance that a Registry setting related to sign-in options on Windows is preventing you from using the Facial Recognition feature. The solution to this is simple, as all that you need to do is modify the relevant Registry setting.
However, before you proceed, make sure that you create a Registry backup, just to be safe in case anything goes wrong.
- Press Windows + R keys simultaneously on your keyboard to launch a Run dialog box.
- In the text field of the dialog box, type regedit and hit Enter to launch Windows Registry.
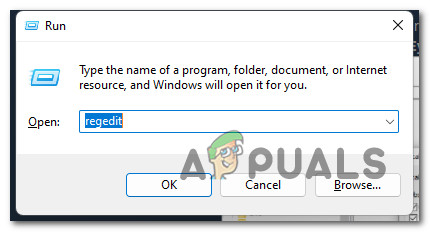
Open up the Regedit Editor - Once you are inside the Registry, navigate to the location mentioned below.
HKEY_LOCAL_MACHINE\SOFTWARE\Microsoft\PolicyManager\default\Settings\AllowSignInOptions
- Double-click on the AllowSignInOptions value and under Value data, type 1.
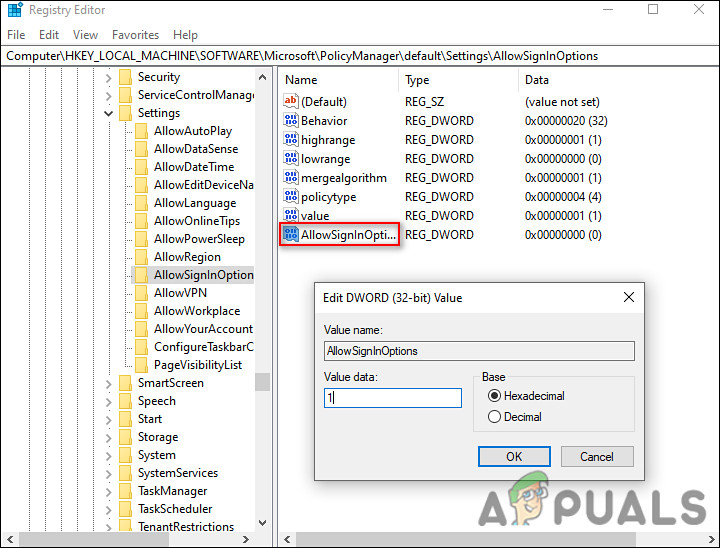
Modify Registry key related to Sign in options - Hit OK and then restart your PC.
Reset the Facial Recognition Option
You can also try resetting the Facial Recognition feature, as doing so will revert it to its original, error-free state, thus resolving the error in the process.
- Press Windows + I keys simultaneously on your keyboard to launch Windows Settings.
- In the Settings window, select Accounts from the left pane.
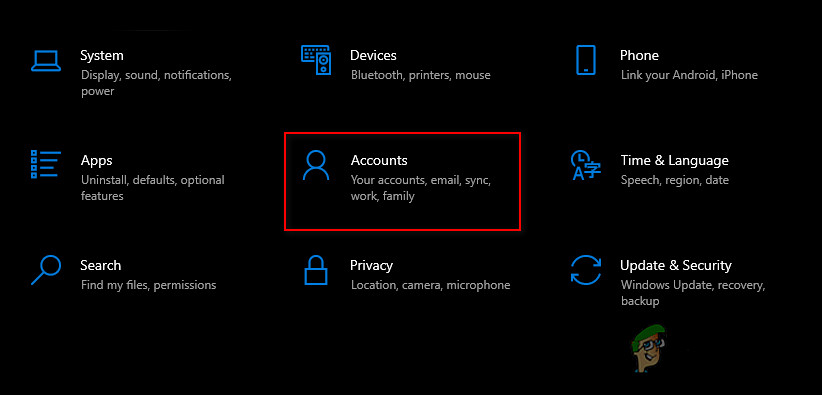
Access Account settings - Then, click on Sign-in options in the right side of the window.
- Select Windows Hello Face and click on Remove.

Remove Facial recognition feature - Next, click on Get Started and follow the on-screen instructions to proceed.
- Once you have added your details again, restart your PC.
- Upon reboot, check if doing so fixed the Facial Recognition issue.
Reinstall the Biometrics Driver
As discussed earlier, a corrupt Biometrics driver can also be the reason you are unable to use the Facial recognition feature on Windows 11. In this case, the best solution is to reinstall the drivers, as doing so will re-initialize the software associated with the device to an original and hopefully clean state.
- Type Device Manager in the search area of your taskbar and hit Open.
- In the Device Manager window, locate and expand Biometric devices.
- Right-click on Windows Hello face software and click on Uninstall device.
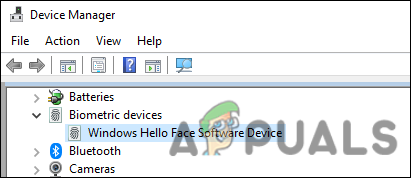
Uninstall Windows Hello software - Once the uninstallation is complete, restart your PC.
Perform a Repair Upgrade
Having come this far without a solution implies that conventional troubleshooting methods will not solve the Facial recognition issue.
If this scenario is applicable, then pretty much the only thing you can do is perform a repair upgrade. In a repair upgrade, the system files are repaired and the latest updates are installed. Hopefully, this will fix the issue once and for all.


