How to Fix Windows Asking for BitLocker Key to Sign-in?
Typically, Windows will request the BitLocker key when it notices unauthorized access or after you make certain changes in the hardware and software of the system, but recently users have reported that Windows is asking to provide the key every time they attempt to sign into Windows. This key consists of 48-digit numbers.
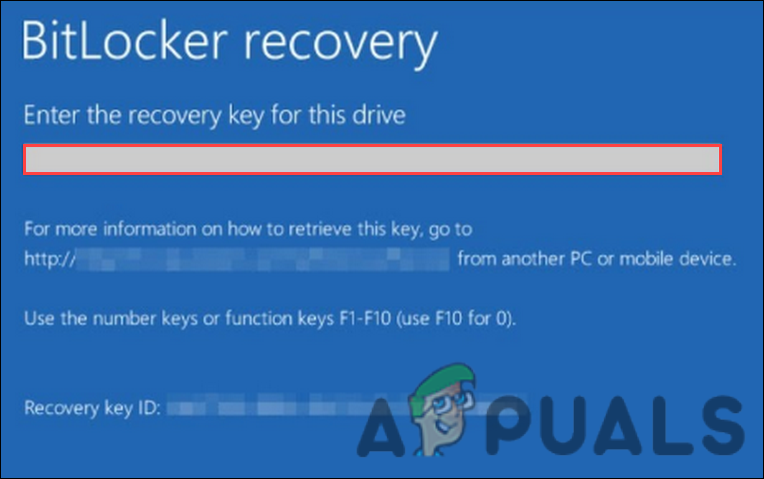
If Windows is requesting you To provide the BitLocker key, here are a few reasons as to how BitLocker might be Automatically enabled on your system:
- Your device meets the requirements of device encryption by the system automatically enabling BitLocker. when this happens, Windows automatically save you or elsewhere that they may have saved it in, such as the Notepadrecovery key in your Microsoft account.
- You are using a shared computer, the owner or administrator who has enabled device encryption for BitLocker. if this scenario is applicable, you can either find the key in the Microsoft account of the administrator or find it in an app they might have saved it in, such as Notepad.
- If you are using the computer provided by your organization or your school, then they may have enabled the device encryption. You can ask the organization for the respective key.
1. Look For Your BitLocker Key
The first troubleshooting method we recommend is looking for your BitLocker key. as we mentioned earlier it can be located in different areas depending upon the situation.
Here are some of the familiar places you can try finding your BitLocker key in:
- Your Microsoft Account – If you are not using a shared computer or your computer is not owned by any organization, then the best way to resolve the issue is to look for a better locket key in your Microsoft account. You might be facing the issue because your device meets the device encryption requirements by Windows. Use this link to look for the recovery key.
- If you activated BitLocker yourself, you might have saved the key on your notepad, your phone, and a USB flash drive in the form of a text file. if you saved it in a USB device, then plug the USB into your computer to allow the computer to read the text file.
- If you’re using a shared computer or a device provided by your organization, then approach the administrator and ask them to provide you with the BitLocker recovery key. Once they do that, You can save the key somewhere safe or disable device encryption by following the steps mentioned later in this guide.
2. Disable BitLocker (If You Can Log Into Windows)
If you can sign into Windows without any problems, then the best way to stop Windows from asking you for a BitLocker recovery key every time you try to log in is by disabling the BitLocker using the Control Panel.
This method works for both Windows 10 and Windows 11 users:
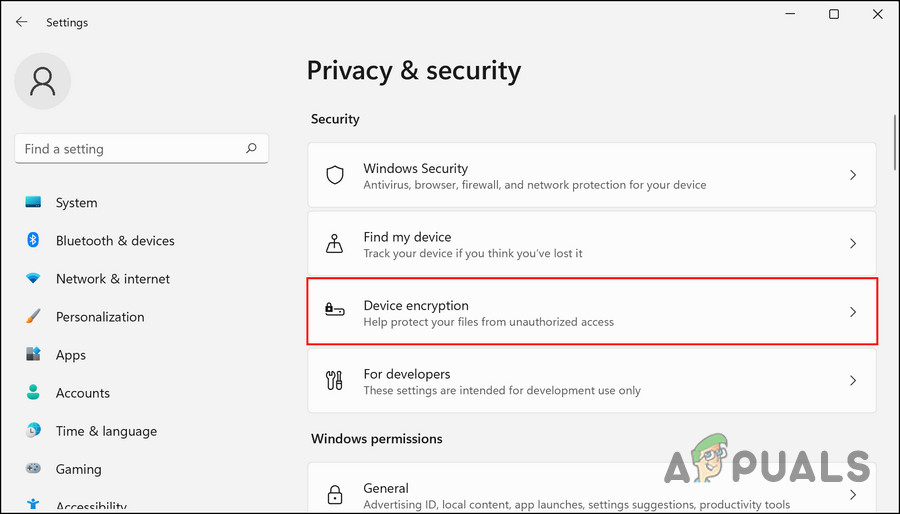
- Press Win + I keys together to open Settings.
- Choose Privacy & security from the left pane.
- Move to the right side of the window, head over to the Security section.
- Choose Device Encryption.
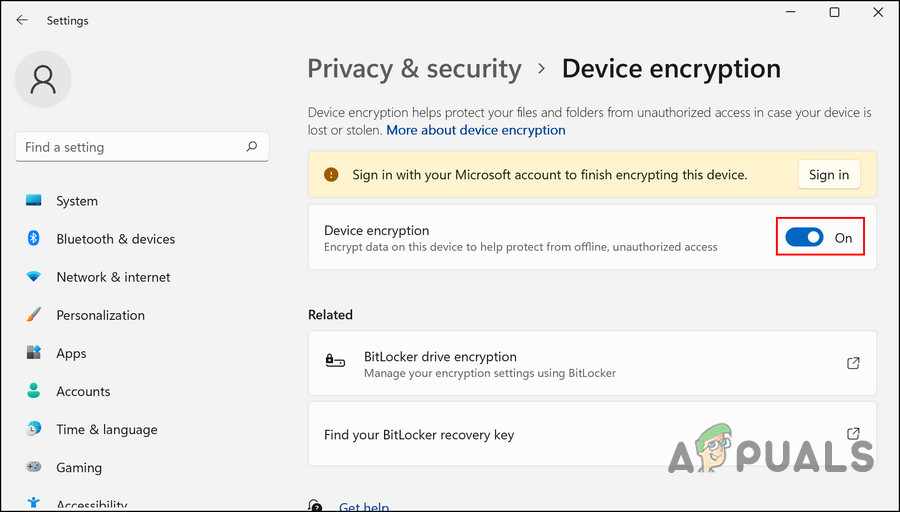
Access the device encryption of Windows - Disable the toggle for Device encryption.
- Click Yes in the User Account Control prompt.
- In the following window, click on the Bitlocker drive encryption option.
Disable Device Encryption - Disable it as well.
3. Unlock the Drive in WinRE Environment
In case you cannot use the BitLocker recovery key by following the steps mentioned above, you can also unlock the targeted drive in the recovery environment of Windows.
We will be booting in Windows using the Windows installation media in this method. Follow the steps mentioned below to proceed:
- Boot Windows using the installation media, whether in DVD or USB form.
- In the following window, click on Next.
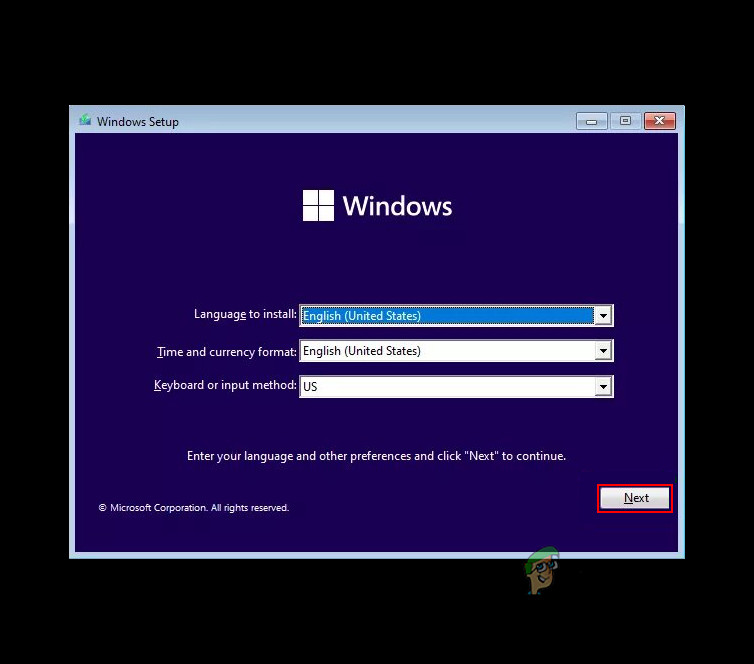
Click on the Next button - Now, choose Repair your computer.
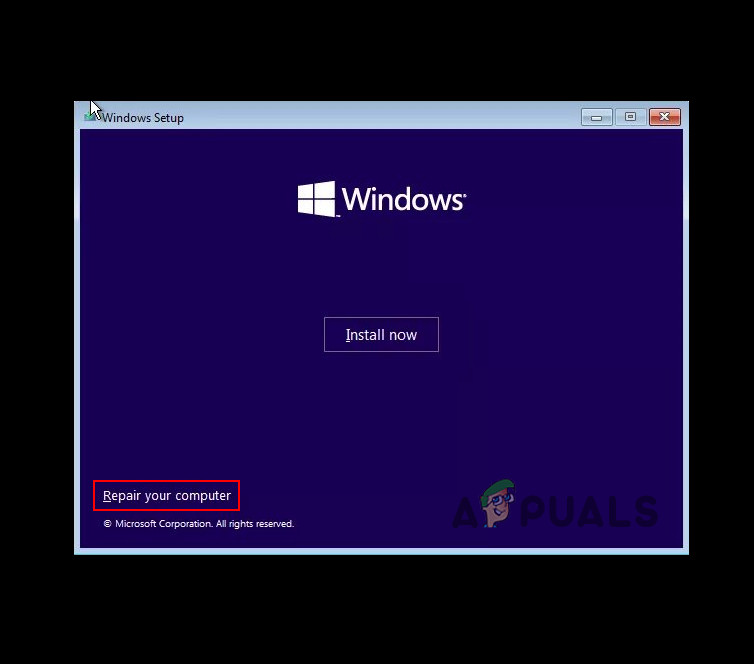
Choose to repair your computer - When asked for a recovery key, click on Skip this Drive.
- Next, choose Troubleshoot > Advanced options.
- Click on Command Prompt from the list of options available.
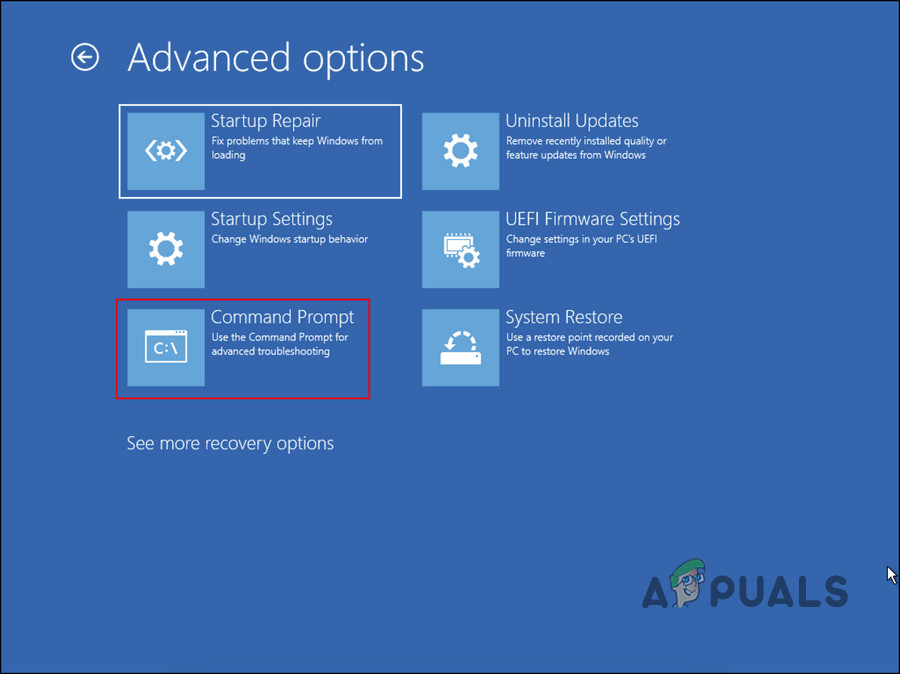
Access Command Prompt in the Advanced options - In the command prompt window, execute the following command. This command will list all the drives with their BitLocker status.
manage-bde -status
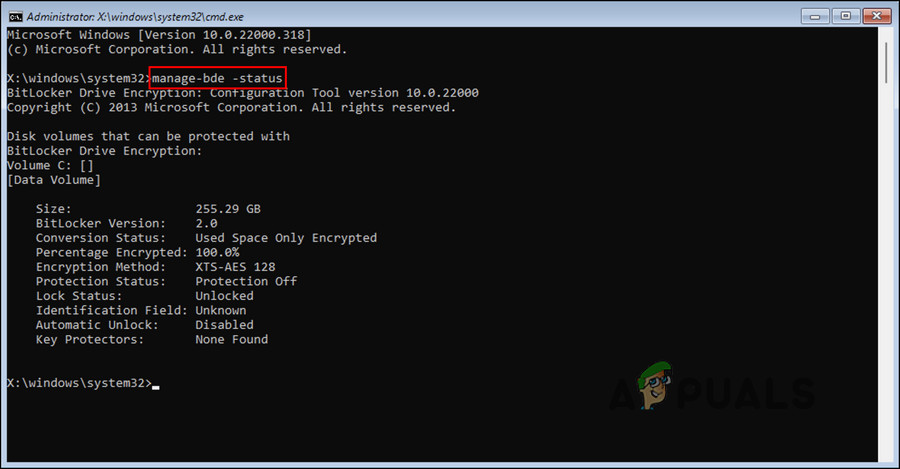
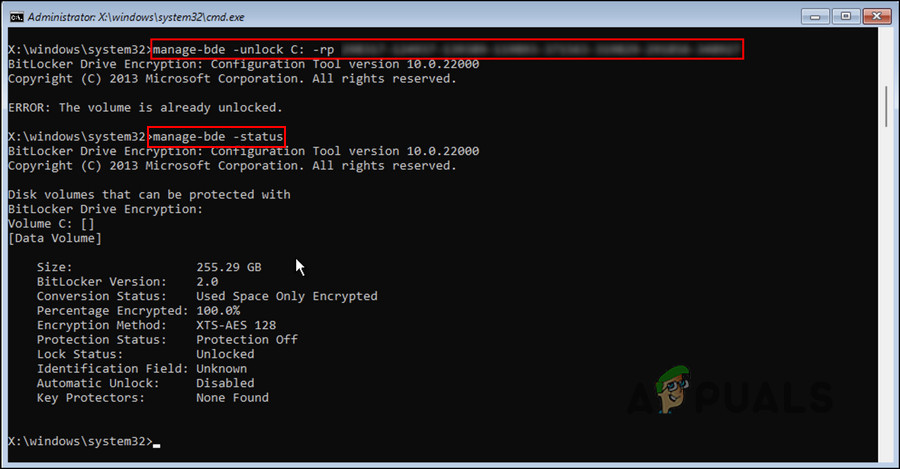
Execute the entered command - Once you have identified the drive letter of the encrypted drive, execute the command mentioned below. make sure you replace ‘Drive letter’ and ‘Recovery key’ with their respective counterparts.
manage-bde –unlock drive-letter: -rp 48-digit-numerical-recovery-key
- Once this command is executed execute the following command to ensure that the encryption status of the driver is 0%.
manage-bde -status
Check the encryption status of the drive - To disable the BitLocker encryption on the targeted drive, execute the following command:
Disable-BitLocker -MountPoint "drive-letter:"
- Next, execute this command:
manage-bde -off drive letter:
- Finally, execute the following command to make sure that the drive is completely decrypted:
manage-bde -status
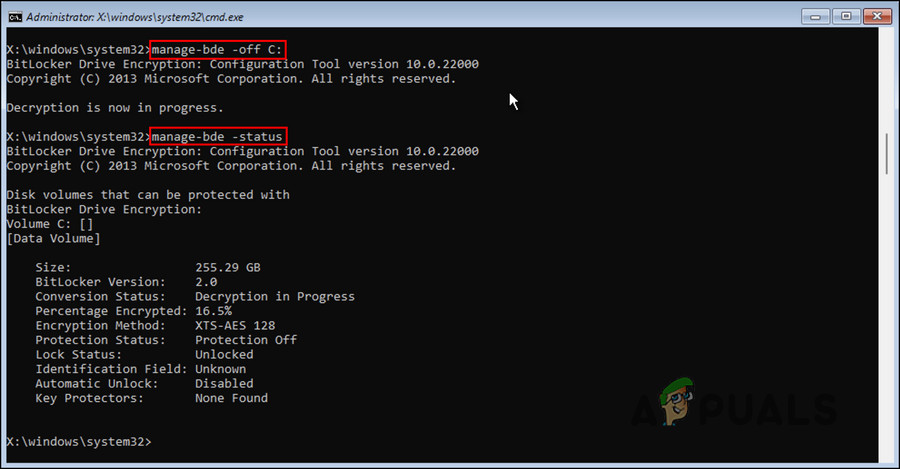
Check the status of the drive
You can now remove the Windows installation media and boot into Windows normally without the BitLocker issue.
4. Reset Your PC
Finally, if none of the methods mentioned about has managed to fix the issue for you, then you can proceed with deleting the encrypted drive entirely and reinstalling the Windows operating system. However, since this method involves removing a drive, all the data stored in that drive will be lost, and you will be starting from scratch.
If you want to proceed, follow these steps:
- Boot Windows using the installation media, whether in DVD or USB form.
- In the following window, click on Next.
- Now, choose Repair your computer.
- When asked for a recovery key, click on Skip this Drive.
- Next, choose Troubleshoot > Advanced options.
- Click on Command Prompt from the list of options available.
- In the Command Prompt window, execute the following command:
diskpart
- Now, execute the following command to view all the volumes on the system:
list volume
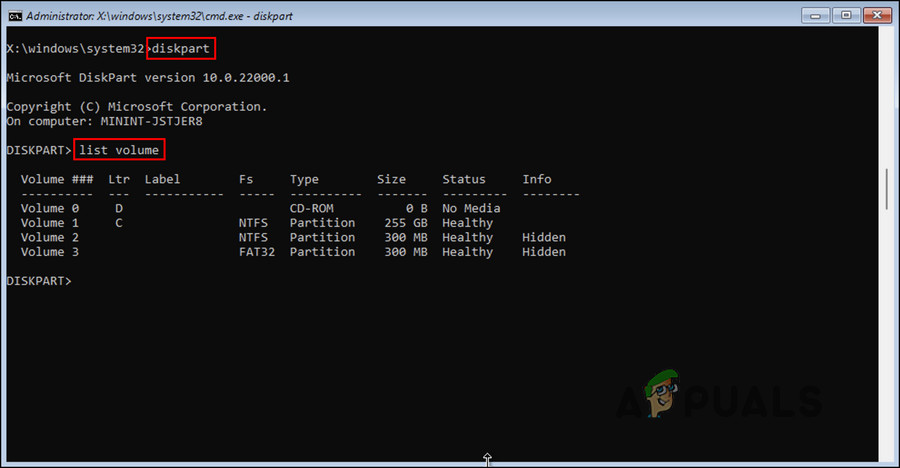
View the volumes in the system - Next, execute this command to pick the largest volume. Make sure you replace ‘Volume number’ with the number of the selected volume.
select volume number
- To delete the volume, execute this command:
delete volume override
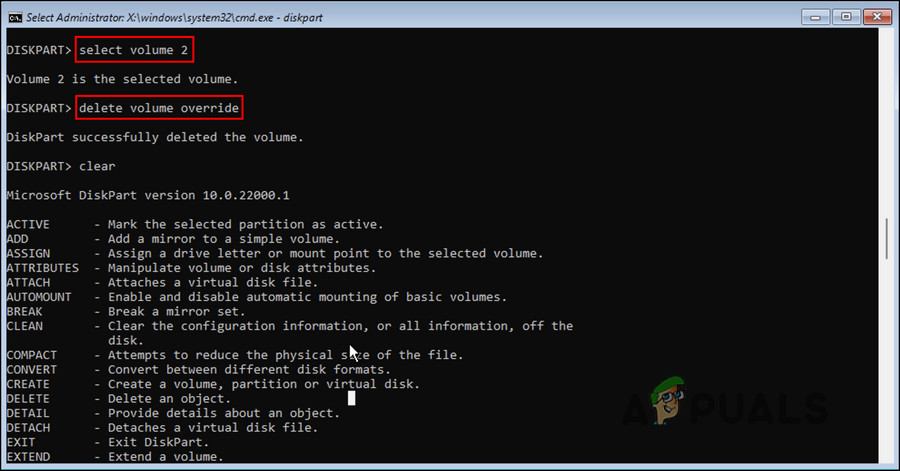
Remove the volume - Finally, type exit and hit Enter.
- Restart your PC with the installation media and perform a clean installation.
Hopefully, this will resolve the BitLocker issue once and for all.


1. In the search box type TPM.MSC.
2. Open TPM.MSC, but make sure you have admin privilege.
3. Verify that TPM show ” TPM Cannot be Found.
4. Launch PowerShell as admin and type Manage-bde -protectors -disable C: -rc 2 and then press enter.
5. Next, power down the desktop/laptop, unplugged the desktop/laptop for 15 seconds.
7. Next, re-enable BitLocker.