Windows 11 Mail App Not Syncing? Here’s How to Fix It
The default Windows 11 Mail client is not automatically syncing, according to some users. Oddly enough, the problem doesn’t seem to be limited to any particular email service provider; it has been reported to happen with Gmail, Yahoo, AOL, and even with business emails.
For some affected users, Windows Mail doesn’t appear to automatically fetch fresh emails, even when users have the client set to Fetch new messages as they arrive. However, manual synchronization works perfectly well.
Note: Some users are claiming that the manual synchronization is broken.
After we’ve investigated the issue properly, we realized that there are actually several different underlying causes why you can expect to deal with this issue on Windows 11.
Here’s a list of potential culprits:
- Common UWP inconsistency – As it turns out, you can expect to deal with this issue due to the same reason why most of the other native Windows 11 apps fail. A common inconsistency might be at the root of this issue. According to a lot of affected users, you can expect to fix this problem by running the Windows Store Apps troubleshooter and applying the recommended fix.
- Outdated Windows 11 Mail app – Another fairly common reason why you can expect to deal with this issue is an outdated Windows 11 Mail app that is failing to update automatically. Other users that were dealing with this same problem have confirmed that the issue was resolved after they forced the UWP app to update manually.
- Windows 11 Mail app is corrupted – Another reason why you can expect to see the auto syncing function fail is a scenario where the main Windows 11 Mail app is affected by corruption. This typically occurs after an unexpected system interruption while the system was updating the email app. To fix it, try resetting or repairing the app and move to reinstall it if the issue persists.
- System file corruption – Under certain circumstances, you can expect to deal with this issue in a scenario where a system dependency that’s being used by the Windows Mail app is corrupted. In this case, the best course of action is to perform a repair install or clean install procedure.
Now that we went over every potential cause that might trigger this issue, here’s a list of verified fixes that other affected users have successfully used to get to the bottom of the issue:
1. Run the Windows Apps Troubleshooter
It turns out that this problem is caused by the same problem that the majority of other native Windows 11 programs have. The cause of this problem can be frequent inconsistency. Numerous impacted customers claim that using the Windows Store Apps troubleshooter and implementing the suggested fix will solve this issue.
Note: Remember that the main store component and all native programs operating on the Universal Windows Platform (UWP) have the same set of requirements (Microsoft Store).
After a bad update or due to some other type of file corruption, you can anticipate that these shared dependencies will become corrupted and interfere with the app retrieval process. In these cases, running the Windows Apps Troubleshooter and letting the automated repair component handle the problem is the best course of action.
If a recognizable scenario is discovered, the Windows Apps Troubleshooter is a repair tool with a ton of automated repair options that can be applied.
Run the Windows App Troubleshooter if you haven’t previously, then follow the steps below to fix any shared dependencies by implementing the suggested fix:
- To open the Run dialog box, press the Windows key + R.
- To open the Troubleshooting tab of the Settings menu, put “ms-settings:troubleshoot” in the text box and press Enter.
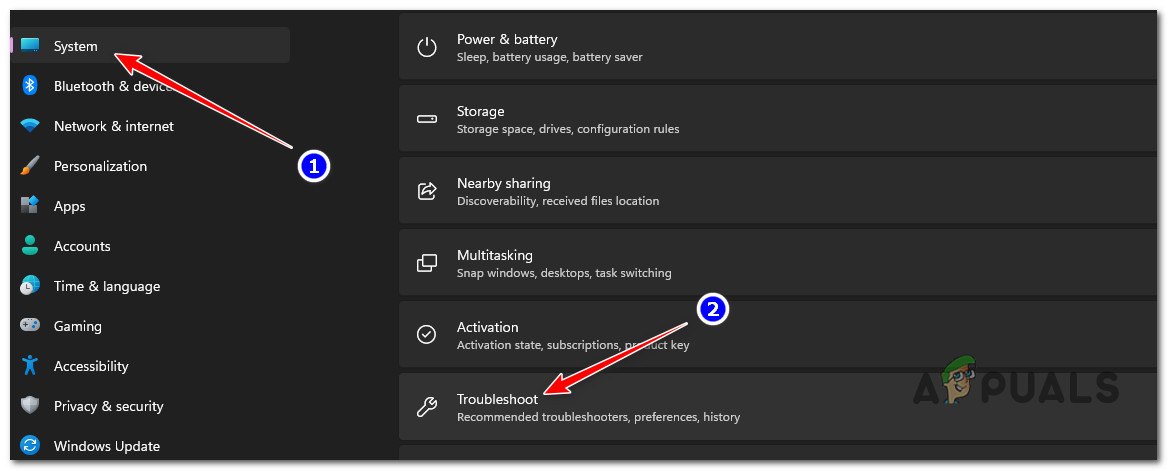
Accessing the Troubleshoot menu - Locate the Other troubleshooters option at the bottom of the Troubleshoot window’s right-hand pane.
- Select the Run button next to Windows Store Apps in the dedicated Other Troubleshooters menu by scrolling all the way to the bottom of the screen.
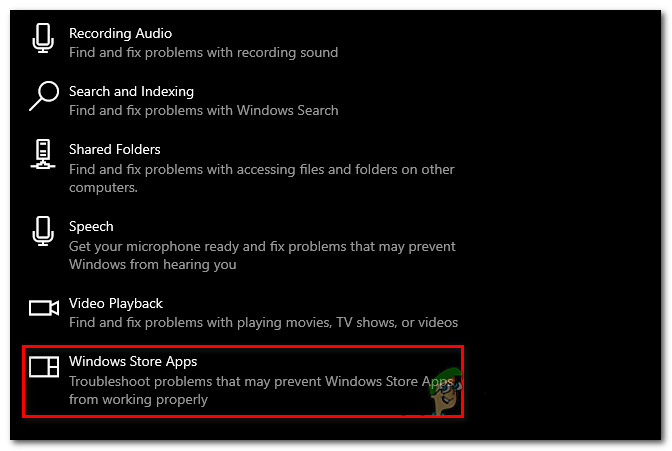
Run the Store Apps Troubleshooter - Once the Windows Store App troubleshooter has been launched, wait until the preliminary scan is complete to see if a workable solution has been discovered.
- If a fix is suggested, choose it and click “Apply this Fix.”
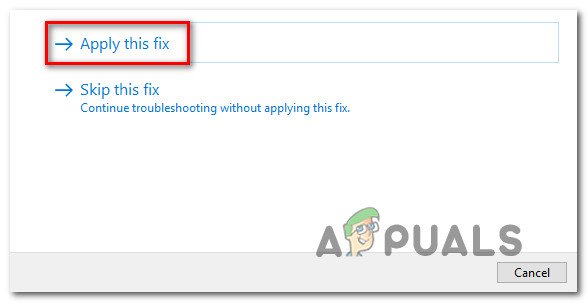
Applying this fix Note: You might need to follow a set of manual instructions in order to finish the task, depending on the type of repair mentioned.
- To check if the issue has been fixed, restart your Windows computer after the repair has been applied successfully.
Continue to the next technique below if you’re still having trouble getting the native Windows 11 mail program to sync automatically.
2. Update the Windows 11 Mail App
An old version of the Windows 11 Mail software that refuses to update automatically is another pretty frequent cause of this problem. Other customers who were experiencing the same issue have reported that it was resolved once they manually updated the UWP app.
Note: This method is typically reported to be effective in situations where you have pending Windows updates waiting to get installed on your PC. Our recommendation is to take the time to install every pending update before following the instructions below to update the Windows 11 mail app via the Microsoft Store:
Here’s a fast guide to update Windows Mail from the Microsoft Store provided below:
- Access the Microsoft Store by clicking the icon in the Taskbar or by typing “store” into the Start menu.
2. Select Downloads and Updates from the menu that appears in the top right corner of the screen.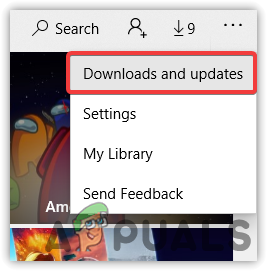
Accessing the Downloads and Updates tab - Select Mail and Calendar under Downloads and Updates, then wait for the upgrade to finish.
Note: You may also select Get Updates and wait for your entire collection of apps to be updated. - If the installation doesn’t start automatically after the download is finished, click the Get button.
- After the Windows Mail software has been updated, restart your computer and quit the Store.
- Go to check if the problem has been fixed and newly received emails in Windows Mail are synchronizing automatically after the next startup.
If the problem is still occurring, move down to the next method below.
3. Repair or Reset the Windows 11 Mail App
If none of the other solutions listed above have helped you, you should take into account the potential that you are dealing with damaged cached data, which is keeping the Mail app from properly syncing events.
Since the Calendar app and Mail app share the same dashboard, you will need to repair or reset both of them. Fortunately, as it has been confirmed by multiple concerned customers, you might be able to fix this problem by resetting the Windows 11 mail app via the official channels.
The steps listed below might help if you’re having this problem in Windows 11 and haven’t already tried repairing and resetting the Windows Email app:
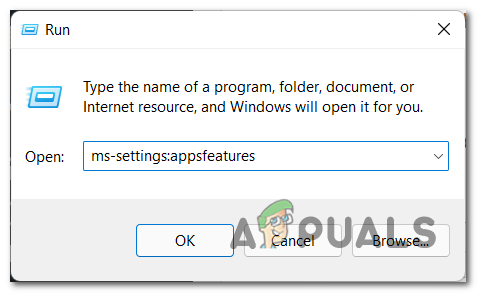
- To bring up the Run dialog box, press the Windows key + R. Then, on Windows 11, enter “ms-settings:appsfeatures” in the text box and click Enter to launch the Apps & Features tab of the Settings app.
Apps and Features menu Note: Click Yes to grant admin access if the UAC (User Account Control) window appears.
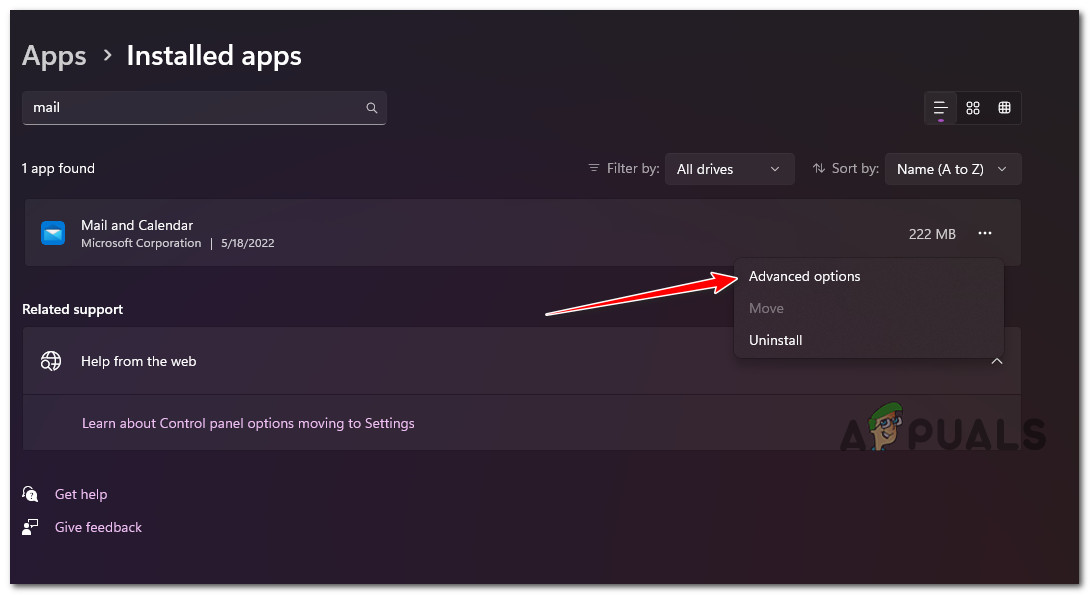
- After entering the Apps & Features screen, use the search bar to look for “mail” in the right-hand corner.
- Select Mail & Calendar from the search results, then, from the context menu that has appeared, select the Advanced settings hyperlink.
Open the Advanced Options menu - After entering the Mail and Calendar applications’ Advanced Options menus, go down to the Reset tab and press the Repair button.
- Click Repair once more at the confirmation screen and wait for the process to be finished before restarting your computer.
- Once the repair procedure is complete, click on the Reset button below and confirm by clicking on Reset once again.
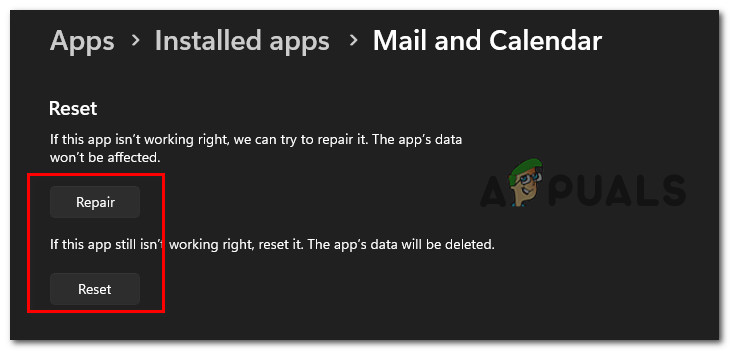
Repair and reset the Windows Mail app - Once both operations have been performed successfully, try syncing the Windows 11 mail app once more to check if the issue has been resolved.
Continue to the next suggested solution below if the issue is still present.
4. Reinstall the Windows 11 Mail & Calendar App
If the reset and repair procedure above didn’t produce the desired results, you should also try reinstalling the entire Mail and Calendar component from the Installed Apps tab of the Settings menu.
This operation has been confirmed to work for a lot of users that we’re encountering this problem on Windows 11 Home and Windows 11 PRO editions.
First, you need to uninstall the entire Mail & Calendar UWP app from the Apps menu, then restart before installing the component from the Microsoft Store.
Follow the instructions below for a step-by-step guide on how to do this:
- To bring up the Run dialog box, press the Windows key + R. Then, on Windows 11, enter “ms-settings:appsfeatures” in the text box and click Enter to launch the Apps & Features tab of the Settings app.
Apps and Features menu Note: Click Yes to grant admin access if the UAC (User Account Control) window appears.
- After entering the Apps & Features screen, use the search bar to look for “mail” in the right-hand corner.
- Select Mail & Calendar from the search results, then, from the context menu that has appeared, select the Advanced settings hyperlink.
Open the Advanced Options menu - After entering the Mail and Calendar applications’ Advanced Options menus, go down to the Uninstall tab and press the Uninstall button.
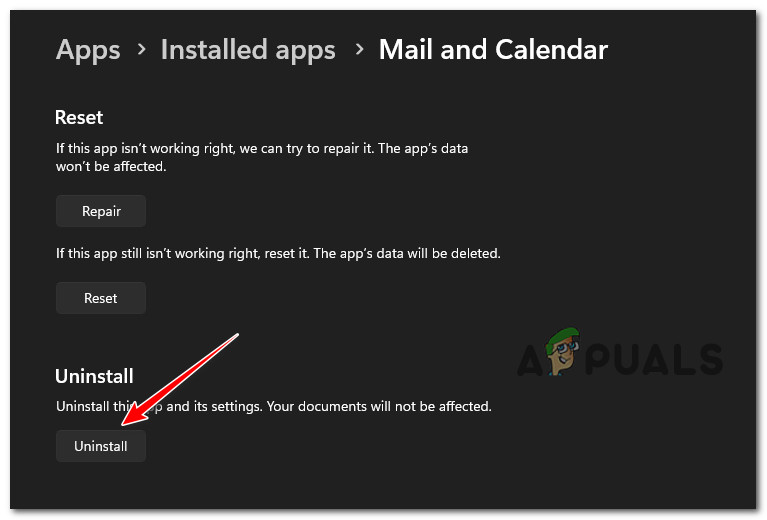
Uninstall the Mail & Calendar app - At the confirmation prompt, click Uninstall once again and wait until the uninstallation is complete.
- Once the Mail & Calendar app is uninstalled, reboot your PC and wait until the next startup is complete.
- After your PC boots back up, open the Microsoft Store and search for ‘calendar and mail‘.
- From the list of results, click on the Mail and Calendar app, then click on the dedicated Get button.
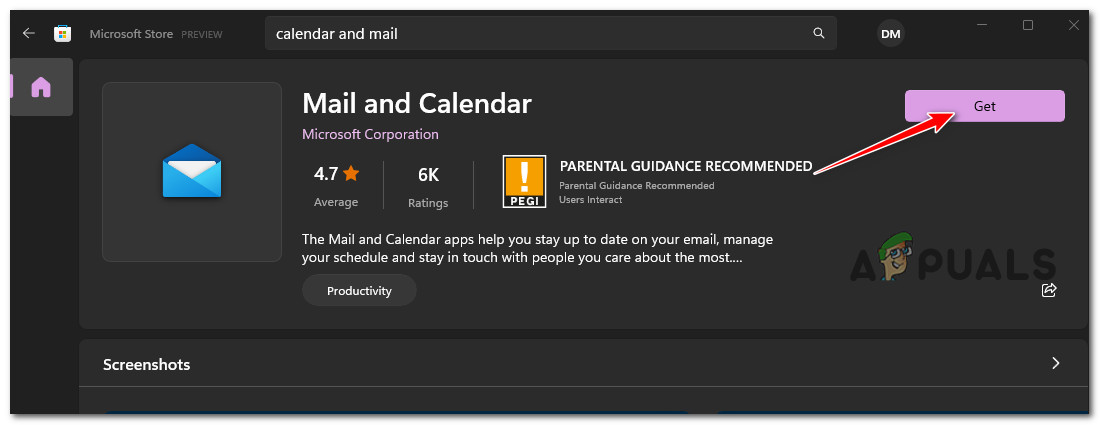
Open the Get button - Follow the on-screen instructions to complete the installation, then log in and connect with your account and check if the syncing problem has been resolved.
If the same kind of issue is still occurring, move down to the next method below.
5. Perform a repair install or clean install
If you’ve read this far, the issue you’re having is most likely the result of system file corruption, which cannot be fixed using standard techniques.
Refreshing every Windows component is the recommended course of action in this situation to solve the issue without performing a total OS reinstallation (including boot data).
There are two choices available:
- Repair Install – This process is more laborious and is also referred to as in-place repair. Although you must supply an installation medium, the benefit is that you can maintain all of your personal files—including music, movies, software, and even some user preferences—without having to make a backup beforehand.
- Clean installation – You may start it right from the menu in Windows 11 without using any installation disk. If you don’t back up your personal data before starting this process, you will lose it all.


