Windows 11 Cannot Install the Update KB5016629? Here is the Fix!
Microsoft launched the Windows update KB5016629 to tackle an issue with the Start menu on Windows 11. However, unlike other updates that install automatically in the background, users have been encountering certain problems with this update.
In the majority of cases, it fails to install for unknown reasons. Our team conducted research to get to the bottom of this, and discovered that you are likely to encounter issues with this particular update due to one or more of the following reasons:
- Malwarebytes application – In quite a few cases, the issue was caused by Malwarebytes, which was blocking the update from being installed due to a false security alarm. If you are using this program, disable it and then try installing the update.
- Real-Time Protection – This cause is similar to the first one we just discussed. The real-time protection feature of Windows can also block safe updates and programs from being installed on the system. You can disable this feature temporarily and then install the update.
- NET 3.5 Framework – In a few cases, the issue was also caused due to the NET 3.5 Framework on the system. If this framework is enabled on your Windows system, temporarily switch it off and check if that fixes the problem.
Now that you know about the potential causes, let’s have a look at the solutions that helped other affected users fix the underlying issue and install the KB5016629 update.
1. Disable Malwarebytes (If Applicable)
One of the most common reasons that prevent Windows from installing the KB5016629 update is Malwarebytes. Apparently, the application flags the update as a threat to the system due to a false alarm and blocks it entirely.
If you are using Malwarebytes, then the first thing you need to do in case of the error at hand is to disable the program temporarily. The same goes for any other security program that you may have installed on your system since that can do the same.
Here is how you can proceed:
- Right-click on the Malwarebytes icon in the system tray and uncheck the Malware protection option.
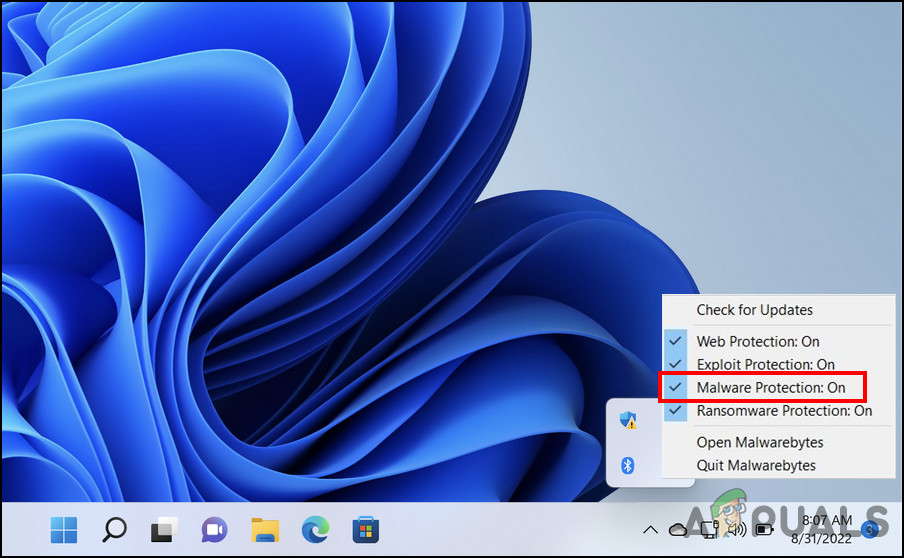
Disable malware protection - Next, choose Quit Malwarebytes from the context menu.
That’s it! You can disable other security programs in the same way. Simply right-click on their icon in the taskbar and choose Disable till the next restart. Once the KB5016629 update is installed, restart your PC to enable the program back.
Keeping these programs disabled for a long time is not recommended, since this can make your system vulnerable to security risks.
2. Disable NET 3.5 Framework
The .NET Framework is a proprietary software framework by Microsoft for Windows. It allows the developers to build and run C#, C++, F#, and Visual Basic programs.
In some cases, users reported that the issue under consideration was caused by the Net 3.5 framework, and was able to resolve the problem by disabling it. This is why, we suggest that you try disabling it as well, and see if that does the trick for you.
Here is all that you need to do:
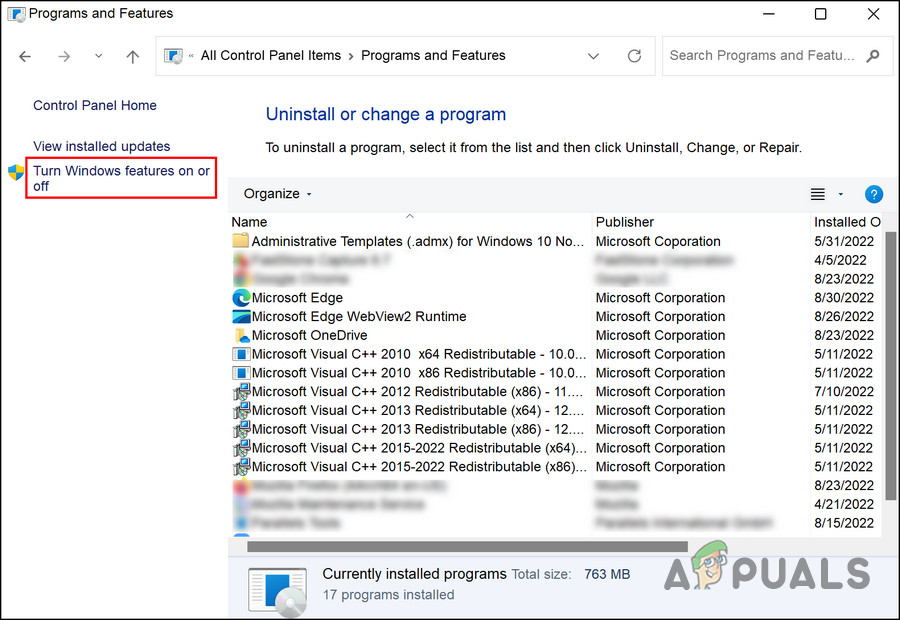
- Type Control Panel in Windows search and click Open.
- In the following window, choose Programs from the list of options available.
- Choose the Turn Windows feature on or off from the left pane.
Click on Turn Windows features on or off - Uncheck .NET Framework 3.5 and click OK to save the changes.
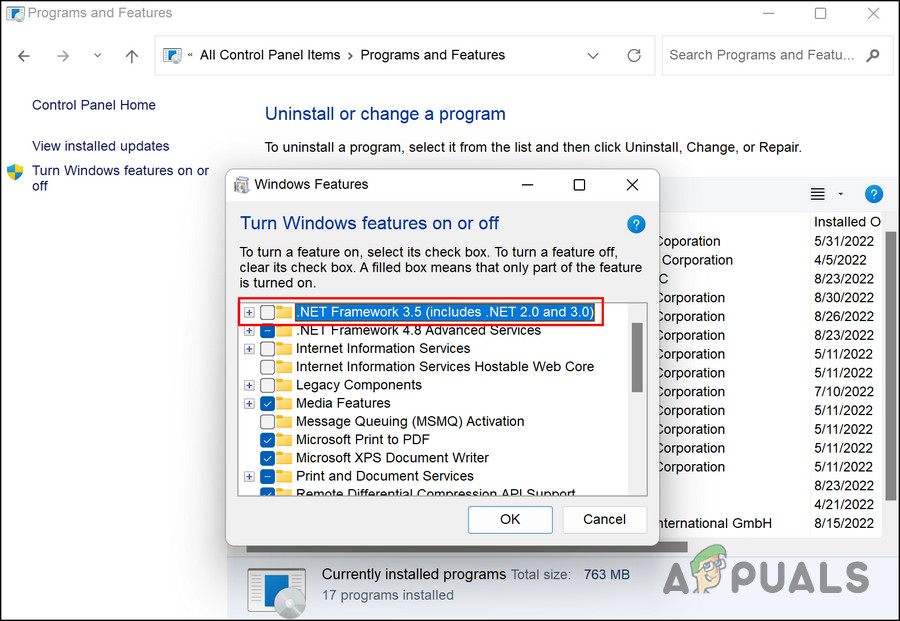
Disable .NET Framework 3.5
Once this is done, restart your PC and try installing the update again. If you manage to successfully install the update, you can enable the Net 3.5 framework again. Simply follow the steps listed above again and checkmark the .NET Framework 3.5 option.
3. Disable Real-Time Protection
This method is related to the first method we discussed in this guide. If you are not using any third-party security program on your system, then try disabling the real-time protection in Windows Defender.
Real-time protection is responsible for stopping malware from being installed on your system. However, like Malwarebytes, it too can block legitimate updates like KB5016629 from installing on your system after falsely considering them as faulty.
Here is how you disable the real-time protection feature:
- Press the Win + I keys to open Windows Settings.
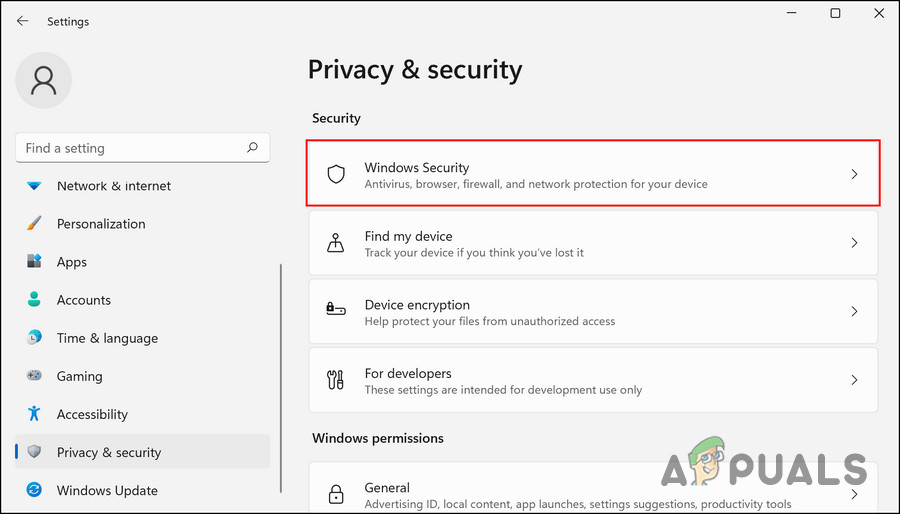
- In the following window, choose Privacy & security from the left pane.
- Now, click on Windows Security.
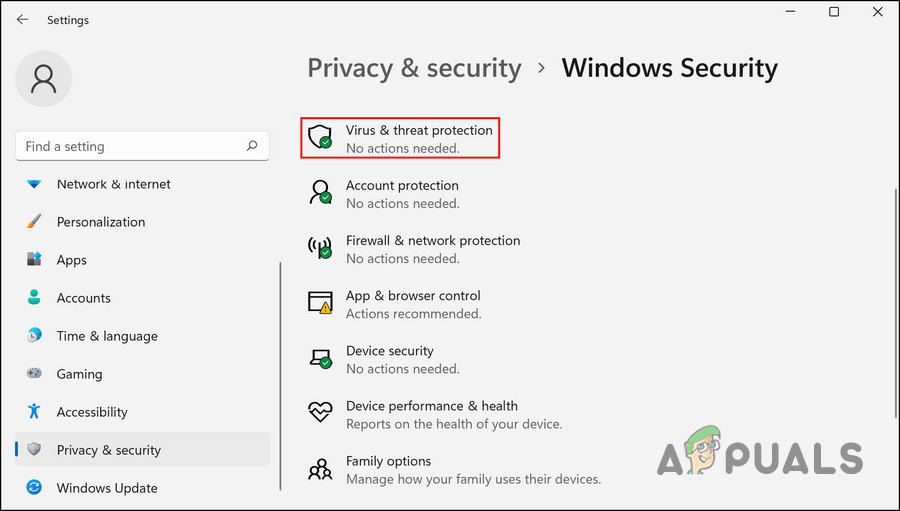
Choose Windows Security - Choose Virus & threat protection.
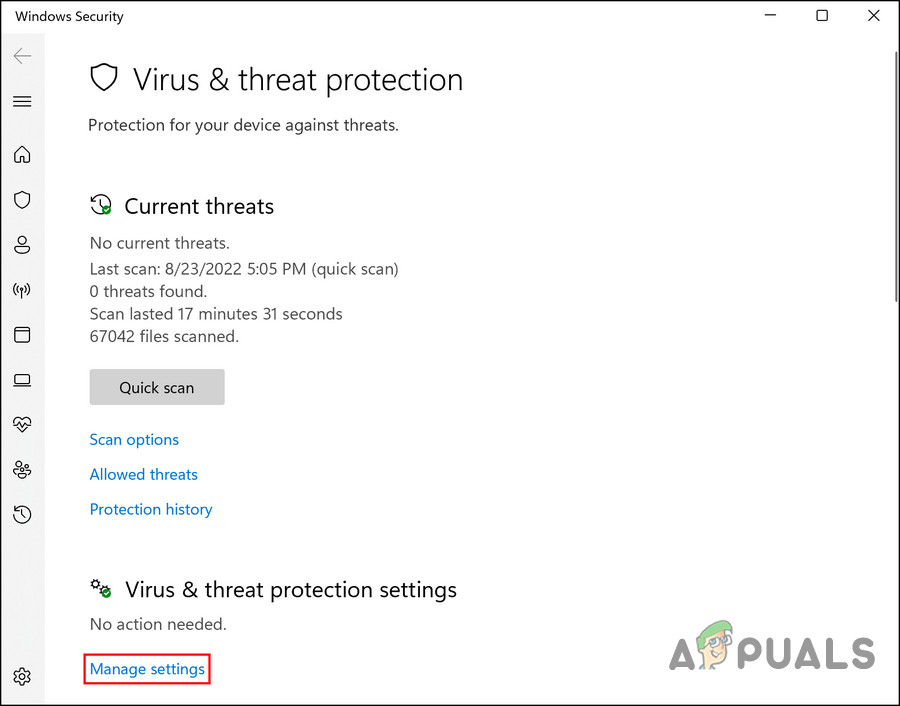
Click on Virus & threat protection - This will launch a Windows Security screen. Click the Manage settings hyperlink in it.
Click on Manage settings hyperlink - Next, turn the toggle off for Real-time protection.
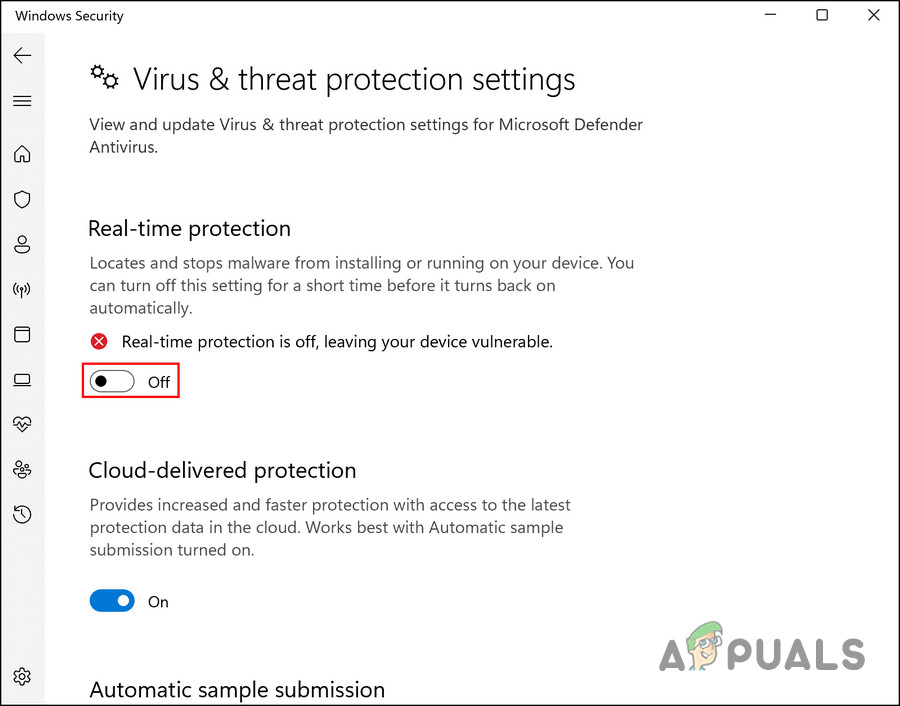
Disable Real-time protection
If you are having any trouble following these steps, then you can also disable this feature via Powershell to install the KB5016629. Here is how:
- Type Powershell in Windows search and click on Run as administrator.
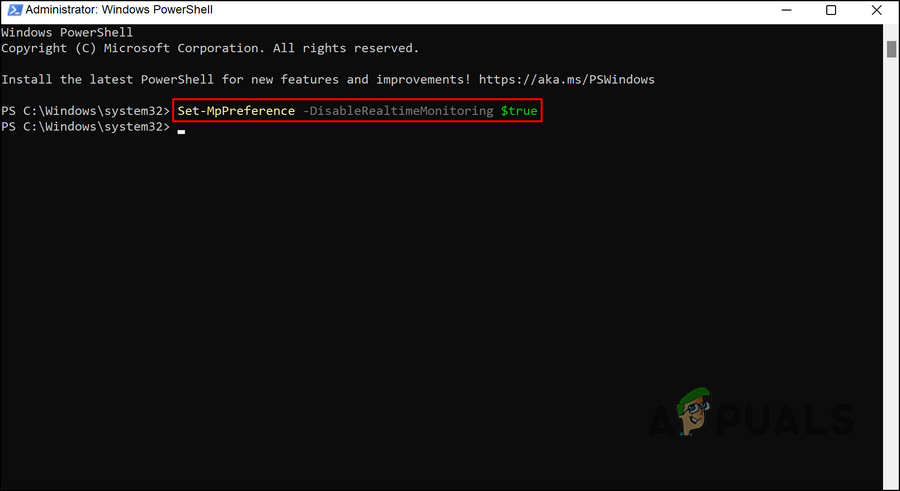
- Inside the Powershell window, type the command mentioned below and hit Enter to execute it:
Set-MpPreference -DisableRealtimeMonitoring $true
Disable real-time monitoring in Command Prompt
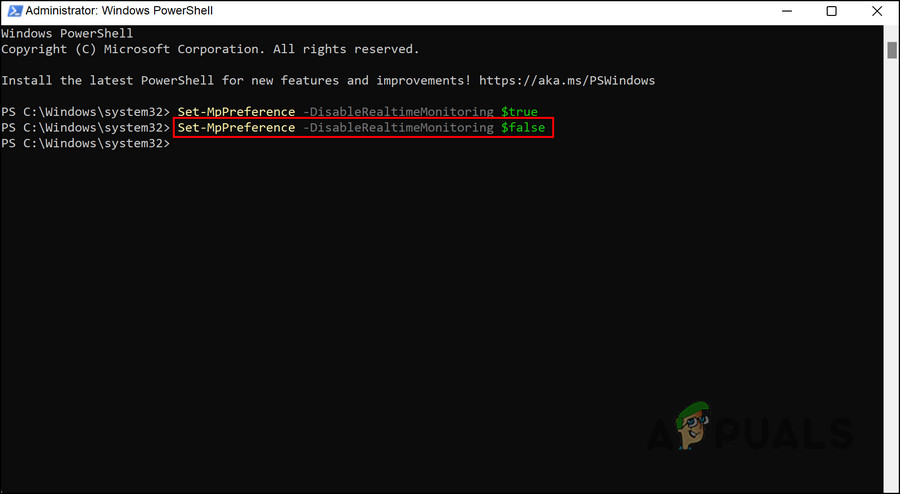
You can now attempt to install the update again and see if disabling this feature made any difference. Regardless, we highly recommend enabling the real-time protection feature back once you are done because it is crucial for the security of your system.
If you want to enable it back via Powershell as well, then execute the following command:
Set-MpPreference -DisableRealtimeMonitoring $false
4. Install the Update Manually
In the event that neither of these methods works for you or if you do not want to follow the steps, you can forcefully install it via the Microsoft Update Catalog by following these steps:
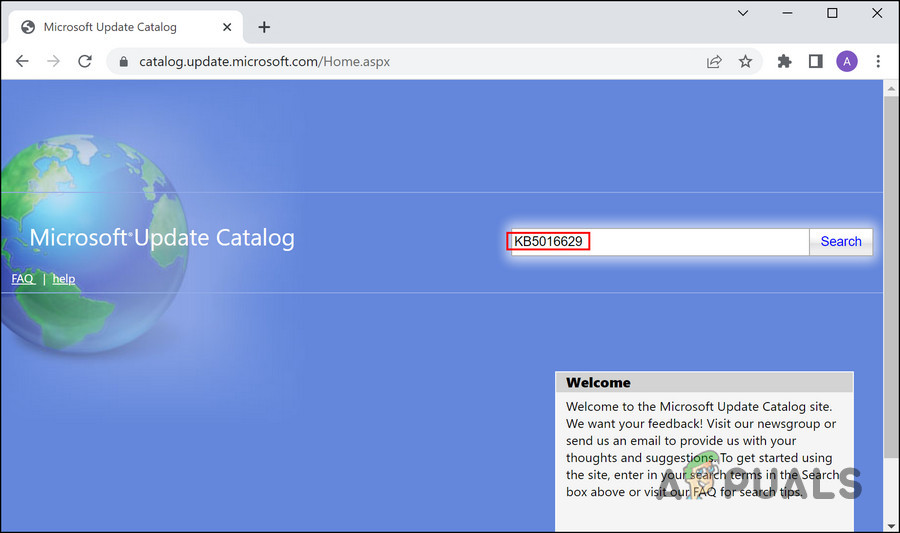
- Launch your browser and head over to the Microsoft Update Catalog.
- Type KB5016629 in the search bar on your screen and hit Enter.
Type the KB number in the Microsoft Update catalog - Locate the update you want to install according to your device and click on the Download button associated with it.
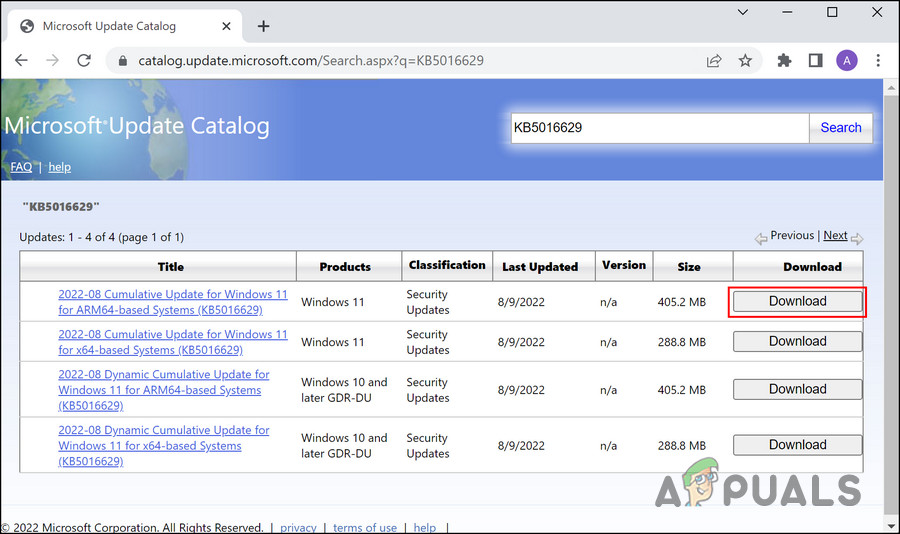
Click on the Download button - Once you have downloaded the file, run it and follow the instructions to complete the installation.
5. Upgrade via the Media Creation Tool
You can try installing the update directly through the Media Creation Tool as well. This fix was suggested by the official Microsoft team, so it is safe to say that it should fix the problem in no time.
Here is what you need to do:
- Launch your browser and navigate to the official download page for the Media Creation tool.
- In the download page, click on the Download Now button under Create Windows 10 installation media.
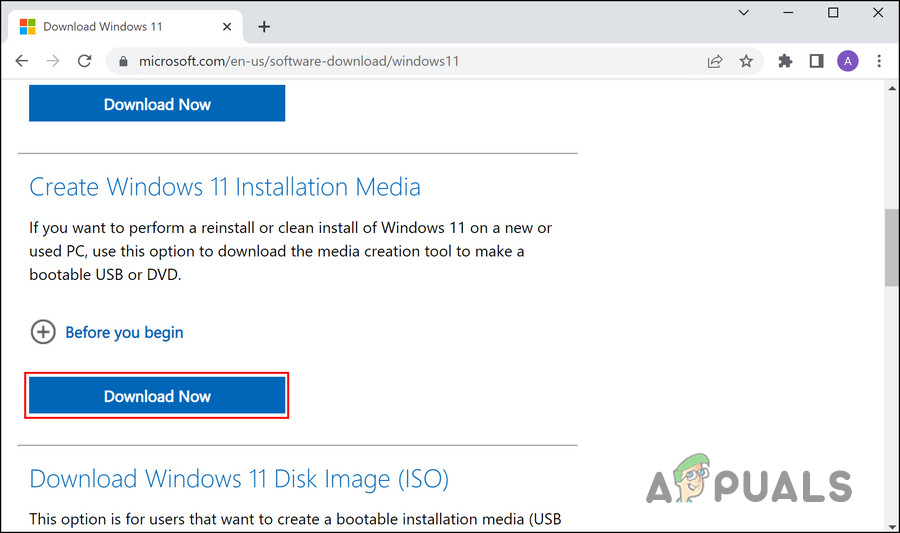
Click on the Download Now button - Once the file has been downloaded, double-click it to open it. Hit Yes in the User Account Control (UAC) prompt.
- On the next screen, click on the Accept button.
- After the initial scan, select Update this PC now and click Next.
- Wait for the Windows ISO to download, then click Accept. The Media Creation tool will upgrade your OS after every update is downloaded locally.
- Install all pending updates after you have downloaded them.
- Once the installation is complete, restart your PC.
Hopefully, this will successfully install the KB5016629 update on your computer.


