What Causes White Screen of Death in Windows? How to Fix?
The White Screen of Death issue often occurs when the Windows shell becomes corrupted. Windows uses the shell to provide a Graphical User Interface (GUI) for users, enabling them to interact with the operating system. Upon user login, the shell initiates explorer.exe to display the Start Menu, Taskbar, and Desktop. Consequently, when corruption occurs, Windows presents a White Screen of Death.
If you are continuously encountering the White Screen of Death error, follow each of the methods below to find the appropriate solution that corresponds to your situation and resolves your issue.
1. Restart Windows Explorer.exe.
Since Windows Explorer.exe plays a significant role in providing the Graphical User Interface (GUI), we will begin by restarting Windows Explorer, which could resolve your issue. To do so, please follow these steps:
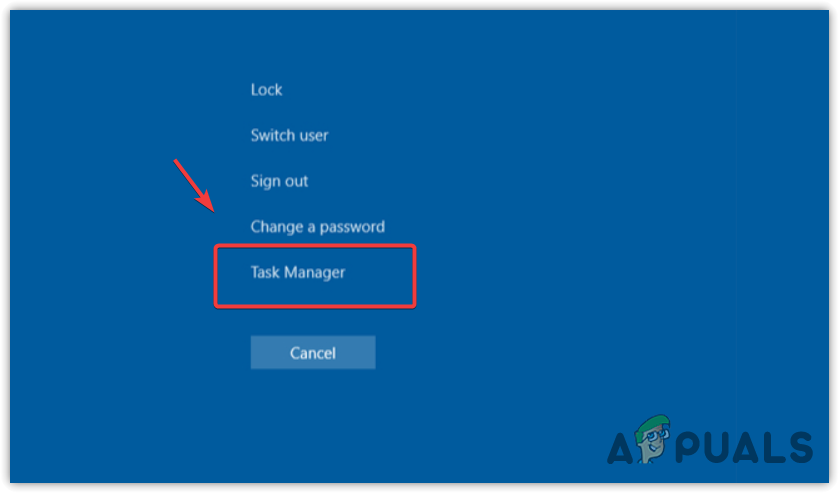
- Press Ctrl + Alt + Delete simultaneously and select Task Manager to open it.
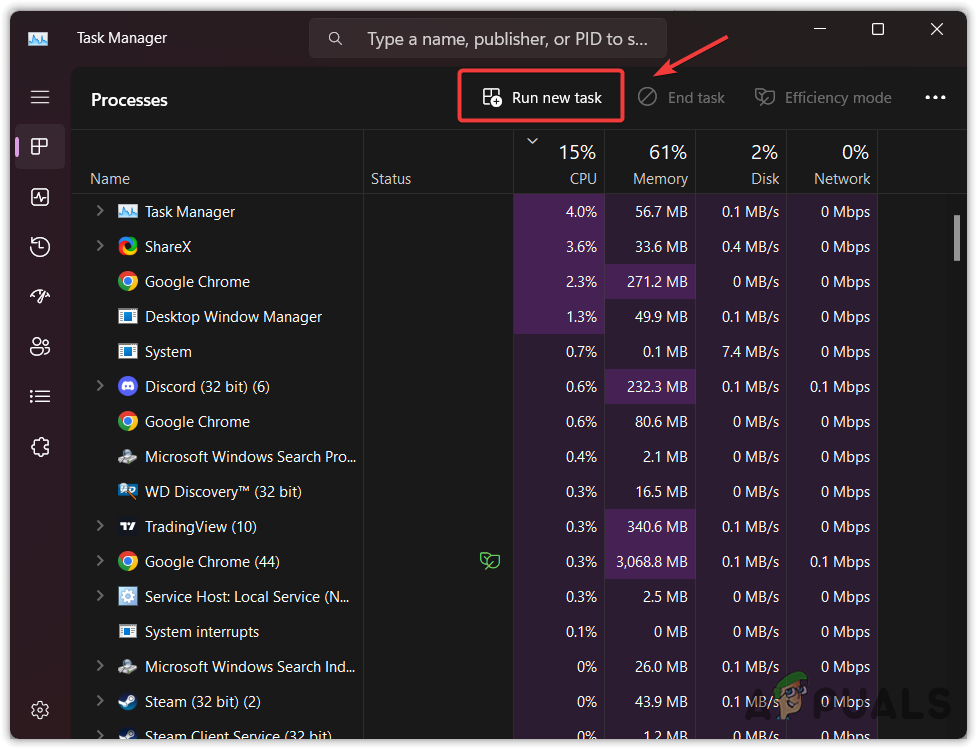
- Click ‘Run new task‘ from the top, or click File > Run new task if you have Windows 10.
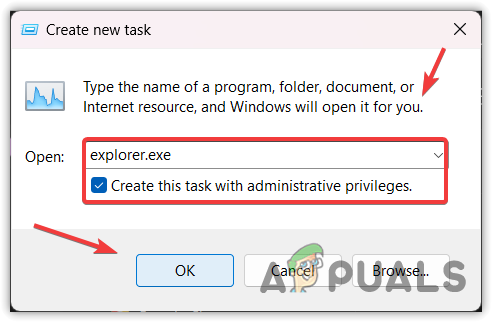
- Here type Explorer.exe in the box and click OK to start Explorer.exe.
2. Edit the Shell entry in the Registry Editor.
It is possible that the Shell entry, which is responsible for starting Explorer.exe, has been changed or deleted by a virus, malware, or any third-party application. Shell is a Windows program or component that is responsible for providing the interface of the start menu, desktop, and taskbar after login. Hence, try configuring the Shell entry correctly to fix this issue.
- Open Task Manager by pressing Ctrl + Alt + Delete and selecting the Task Manager option.
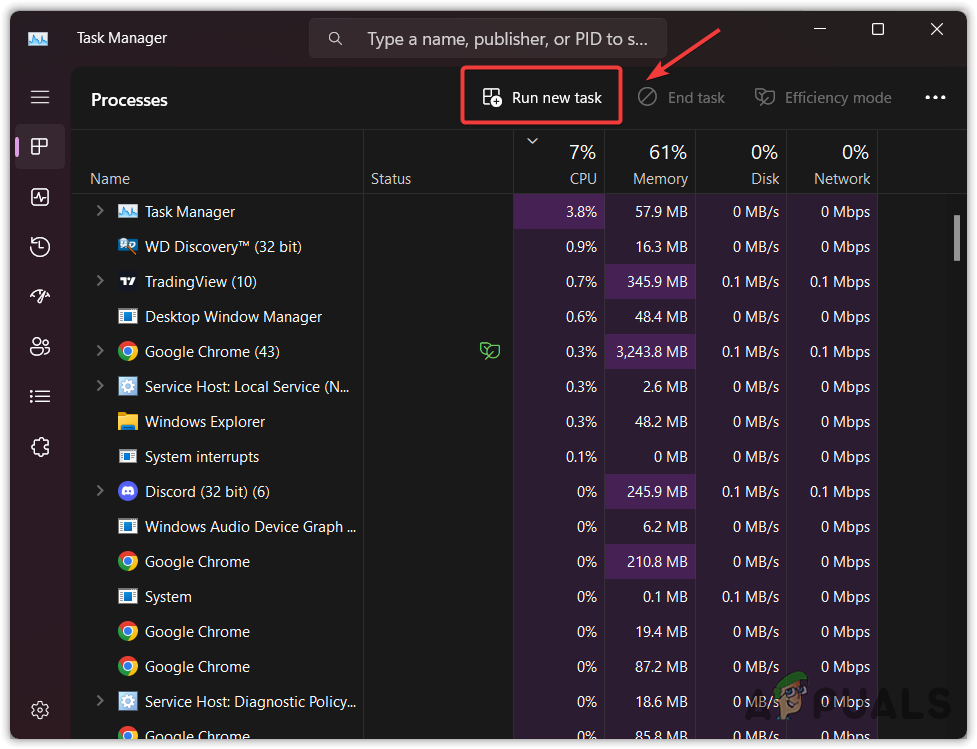
- Once it is opened, click Run new task.
- Select ‘Create this task with administrator privileges.’
- Type regedit and hit Enter to open the registry editor.
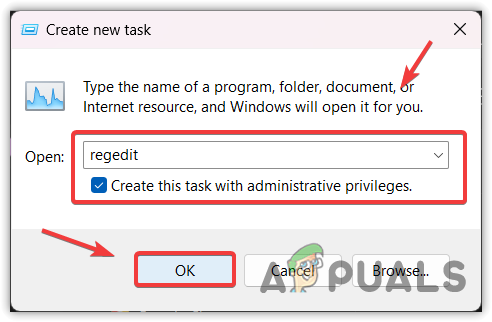
- Navigate to the following destination using the left pane.
Computer\HKEY_LOCAL_MACHINE\SOFTWARE\Microsoft\Windows NT\CurrentVersion\Winlogon
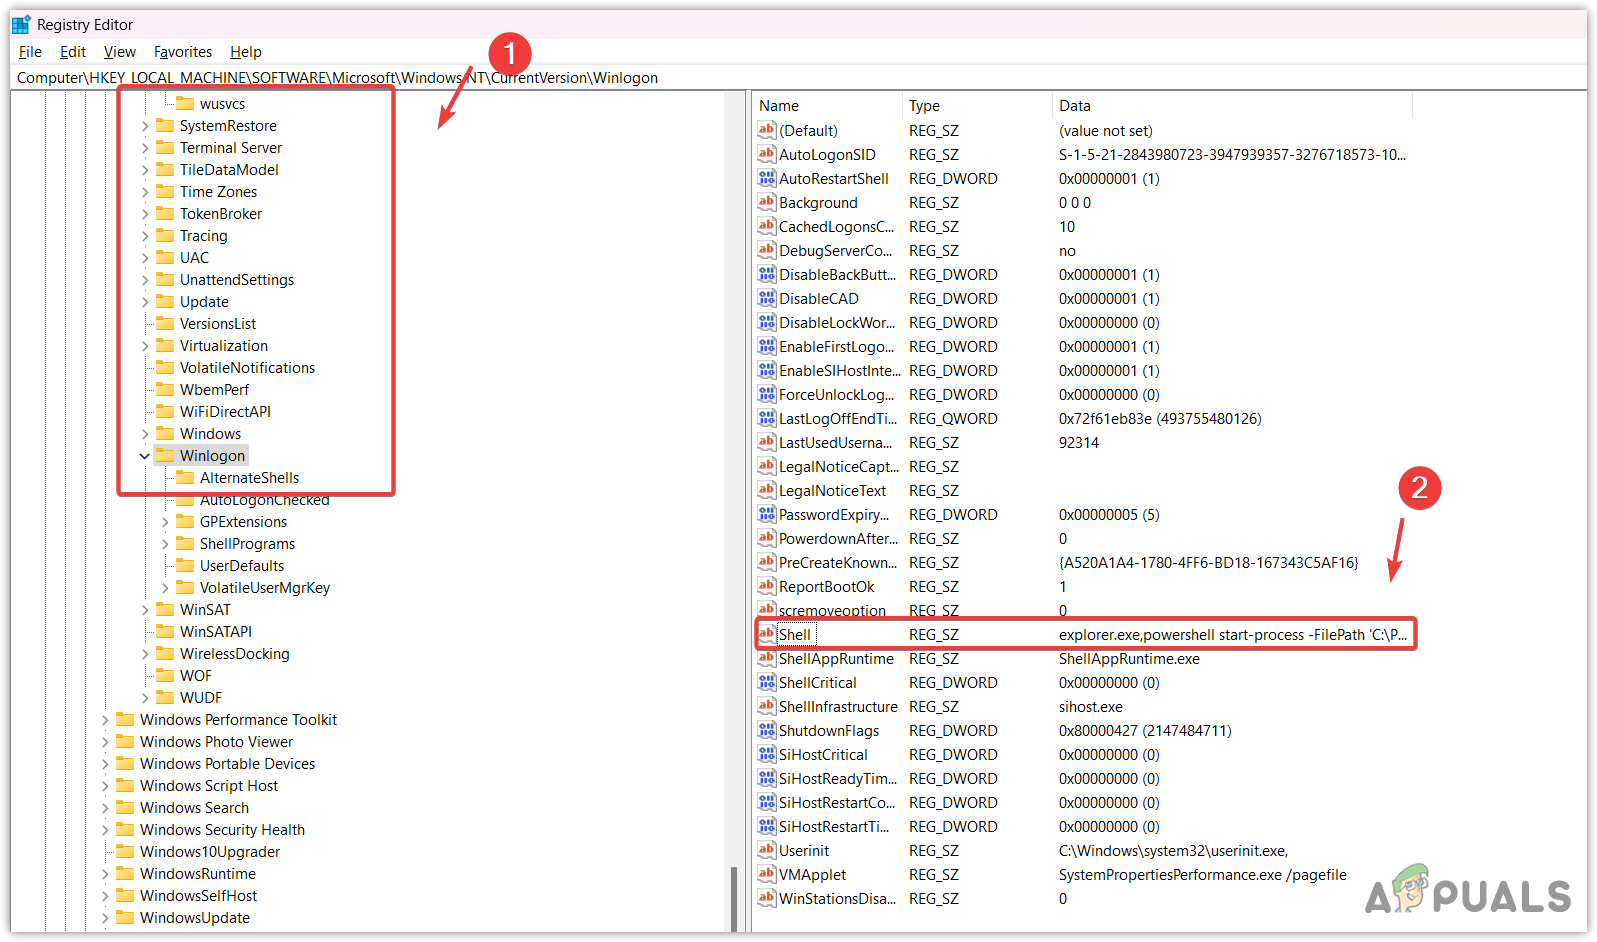
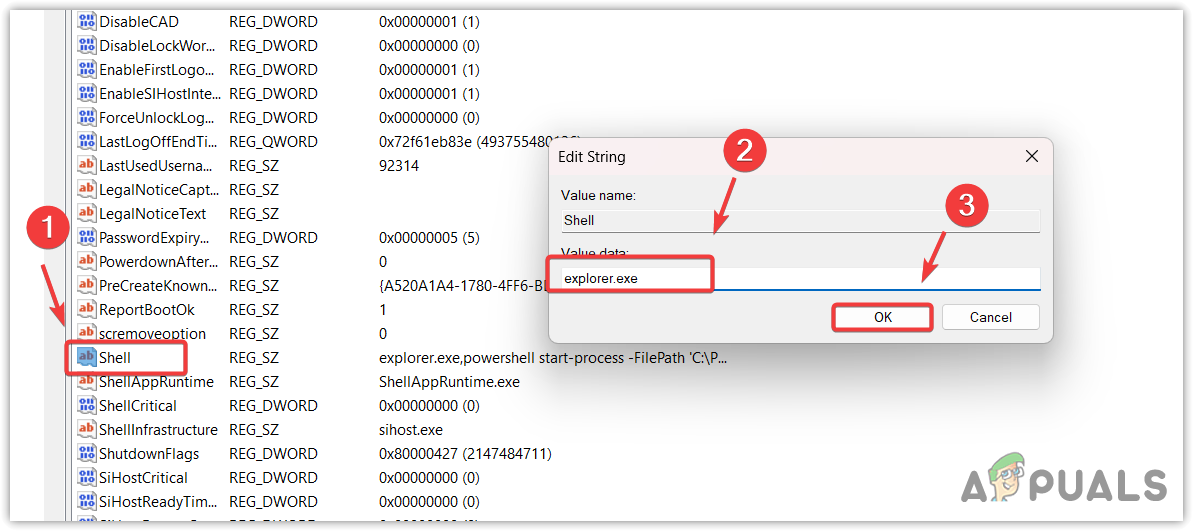
- In the right pane, look for the Shell registry entry. If you can find it, double-click on it and make sure its value data is set to explorer.exe. If not, change the Value Data to explorer.exe.
 If you cannot find the Shell entry, right-click the empty space, hover over New, and select String Value to create an entry.
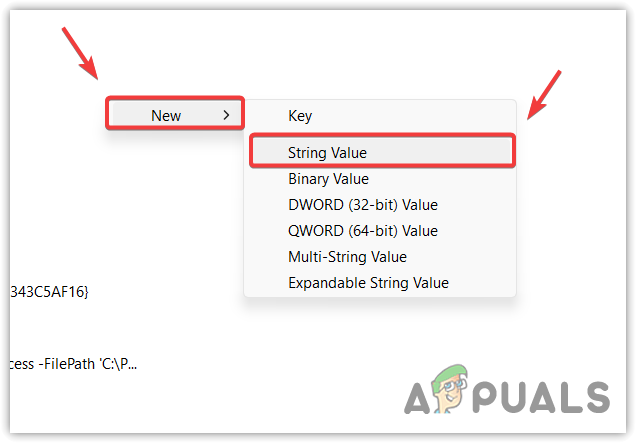
- Name it ‘Shell‘ and change its ‘Value data’ to ‘explorer.exe‘.
- Once finished, close the Registry Editor, locate Windows Explorer in the Task Manager, right-click on it, and select Restart.
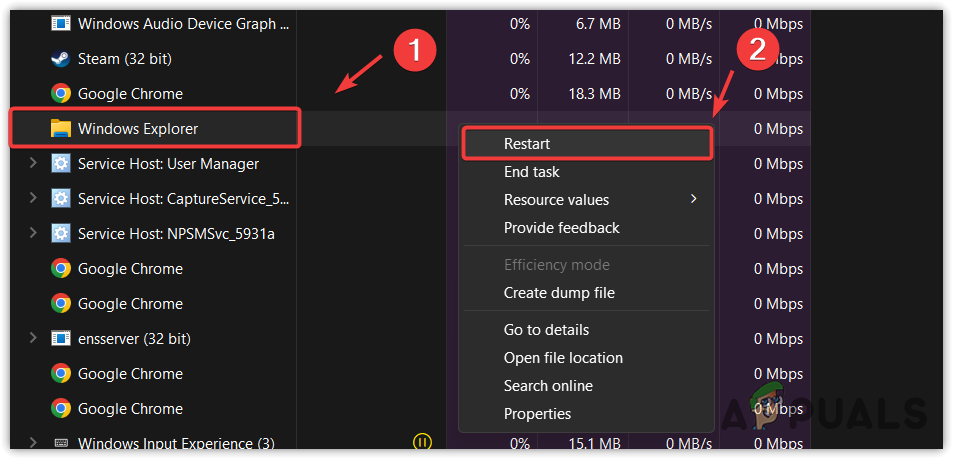
- Once completed, check if the issue is resolved. If not, try restarting the PC as well.
3. Reset the graphics driver.
Resetting the graphics driver often helps when the screen freezes and displays a white or black screen. Resetting the GPU driver means you are going to reload the graphics driver from the RAM, which can fix the White Screen of Death issue.
To do so, press the Win+Ctrl+Shift+B keys simultaneously. This is the easiest way to restart the GPU driver. Once you press all the keys at the same time, you will hear a beep, which indicates that your GPU driver has been reset.
4. Run ‘sfc /scannow’.
SFC, or System File Checker, is a command that is used to repair or restore corrupted system files. If corrupted system files are causing this issue, running this command can fix the error. Follow the instructions to run the SFC command.
- Navigate to the Task Manager by pressing Ctrl + Alt + Delete and selecting Task Manager.
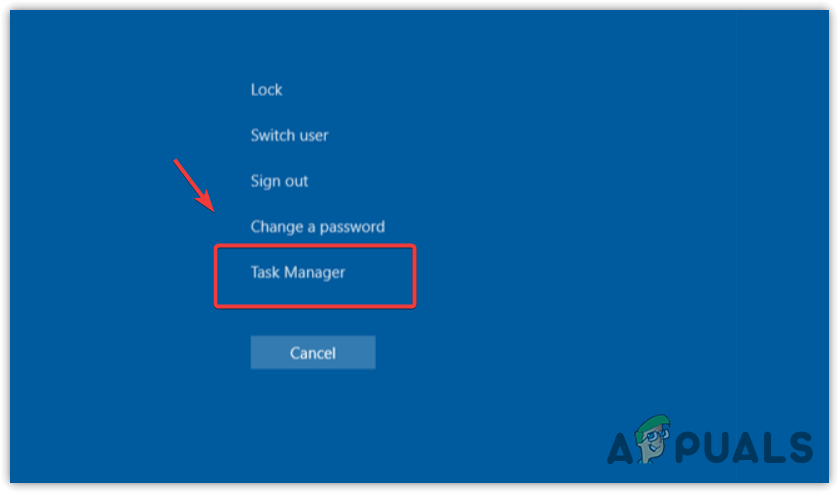
- Once it is opened, click “Run new task,” type “cmd,” and check the box that says “Create this task with administrator privileges.
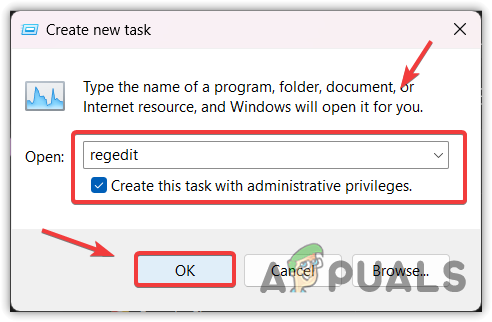
- Once completed, click “OK” to open the command prompt with administrator privileges.
- Here type sfc /scannow and hit Enter.
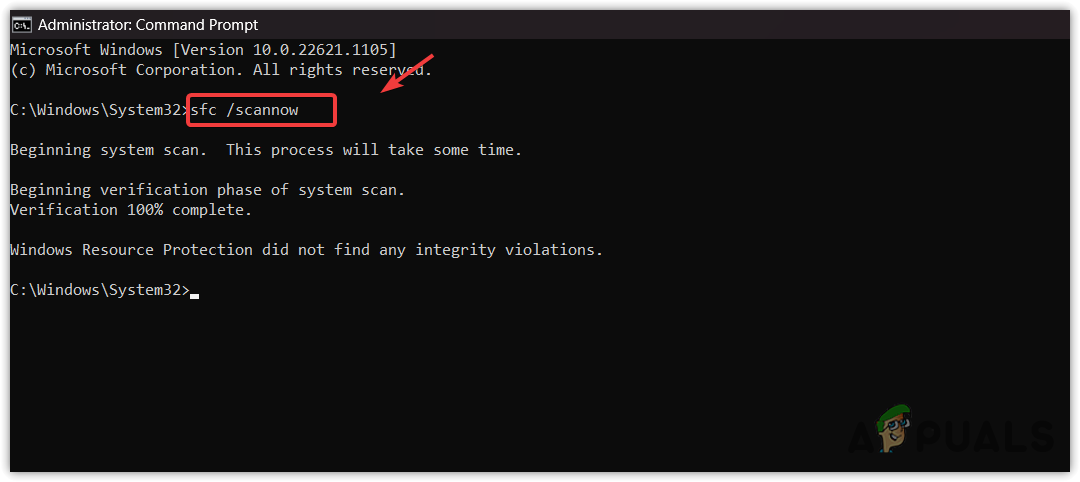
- Wait for the verification process to finish, then close the command prompt and restart Windows Explorer from the Task Manager to see if the issue is fixed or not.
5. Press Alt + Enter, or lower the graphics settings.
If you are getting a white screen while playing a specific game, you can try changing its graphics settings to low or try pressing Ctrl + Enter to exit from full screen. If Alt + Enter does not work, then manually go to the graphics settings and change them to low. Once done, check if your issue is resolved. If not, then follow the next methods.
6. Reinstall the graphics driver using DDU.
If the issue persists, you can reinstall the graphics driver, as the white screen of death issue can be a result of a corrupted graphics driver. There are two methods that you can use to reinstall graphics drivers: one is uninstalling drivers using DDU, and the other is uninstalling GPU drivers from the Device Manager.
6.1 Uninstall Drivers Using Device Manager.
You can use the device manager to uninstall GPU drivers.
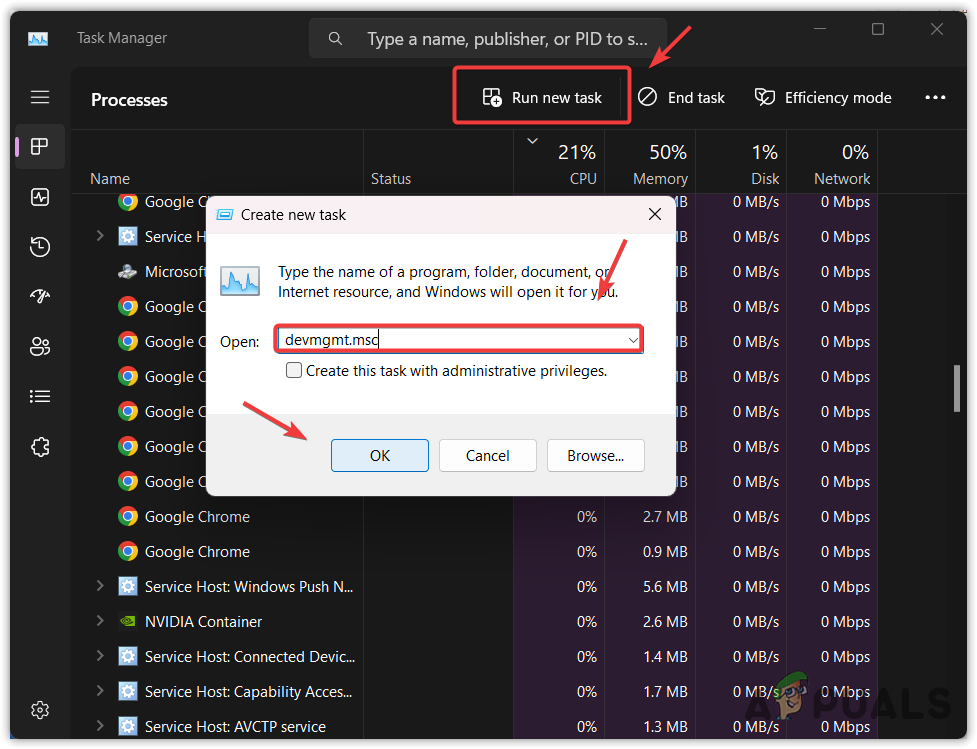
- For that, open the Task Manager by pressing Ctrl + Alt + Delete keys simultaneously and selecting ‘Task Manager’.
- Then, click “Run new task,” type “devmgmt.msc” in the search box, and click “OK” to open it.
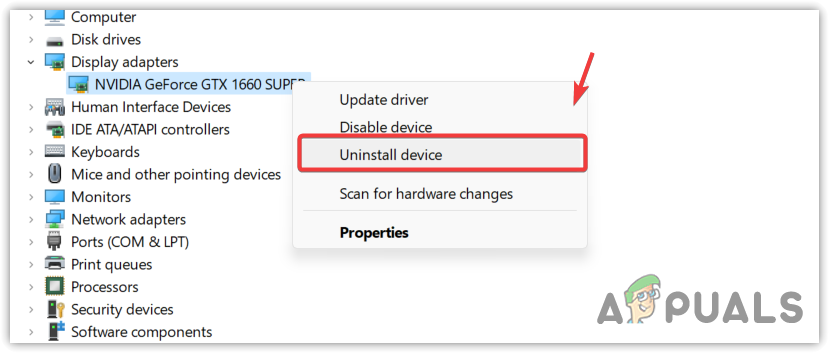
- Here right-click the GPU driver and select Uninstall device.
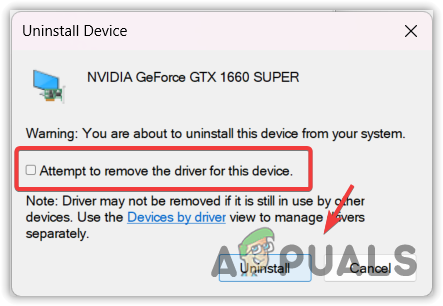
- Click ‘Attempt to remove the driver from this device‘ and click ‘Uninstall‘ to remove the driver.
- Once done, restart your computer and check if the issue is resolved. If not, try other solutions. Otherwise, download the GPU driver from the official manufacturer’s site.
6.2 Uninstall drivers using DDU.
This method requires access to Safe Mode to uninstall GPU drivers using DDU. Display Driver Uninstaller is an application that allows users to remove drivers completely from the computer, along with the associated registry files.
Follow the steps to access safe mode and proceed to wipe out the GPU drivers. However, if you cannot access safe mode, it means this issue is not occurring due to corrupted GPU drivers, as safe mode does not allow any GPU drivers to run or function. Therefore, try other methods to fix this issue.
- Turn off your system properly, then turn it back on.
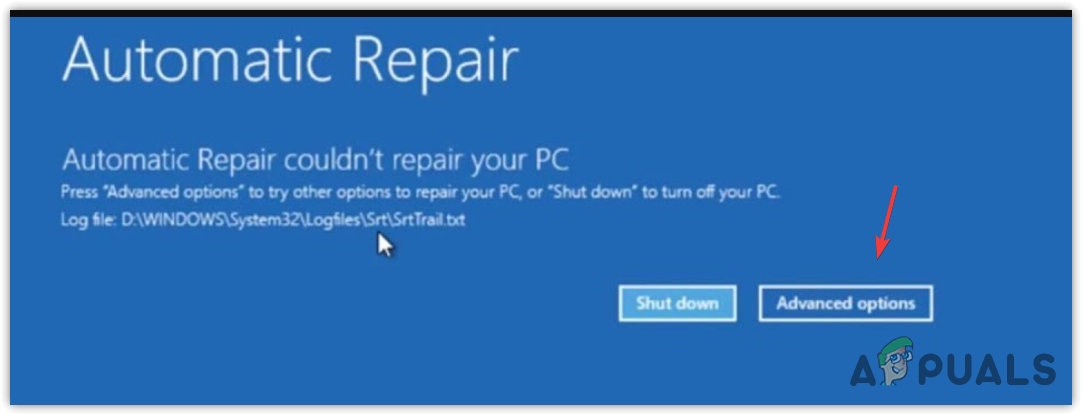
- Once you see the Windows logo, press the Power button to turn off the system. Repeat these steps until you see the Automatic Repair window.
- Once the automatic repair fails, click Advanced Options.
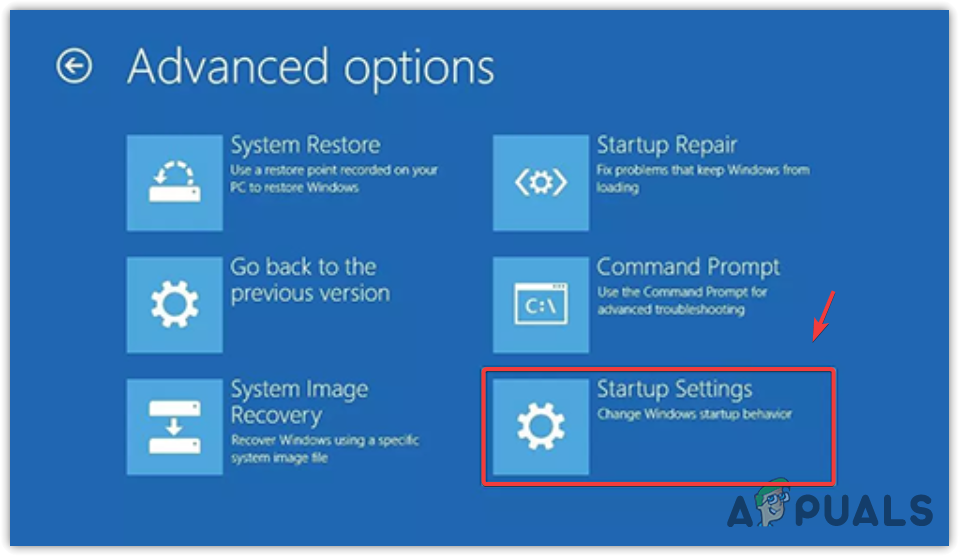
- Go to Troubleshoot > Advanced Options > Startup Settings.
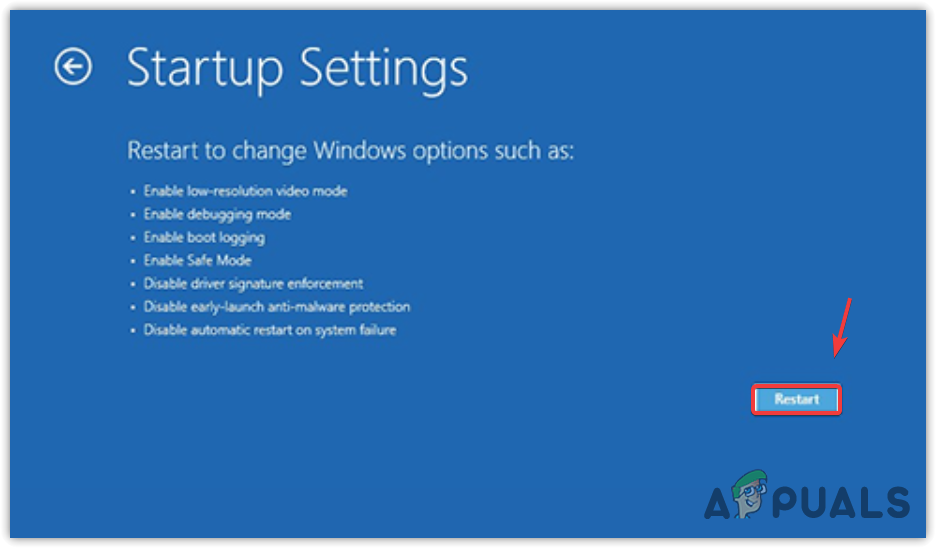
- Then, click Restart from the bottom right.
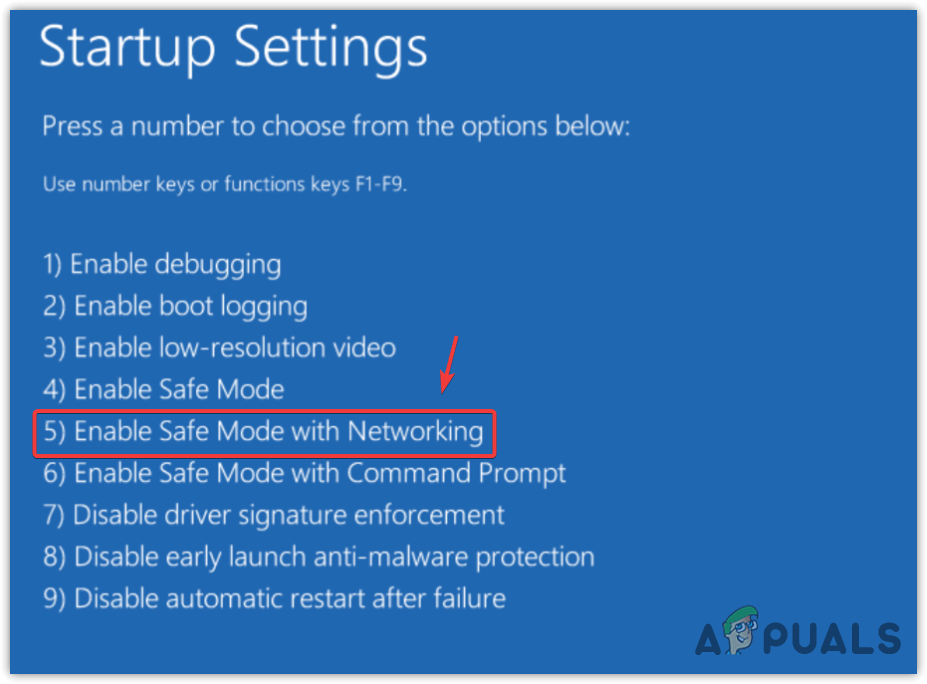
- Once your system restarts, press 5 or F5 to enable the safe mode with networking.
- Once you have successfully entered Safe Mode, it is now time to download Display Driver Uninstaller.
- Once you have downloaded it, extract the DDU Zip folder using WinRAR or 7Zip and navigate into it.
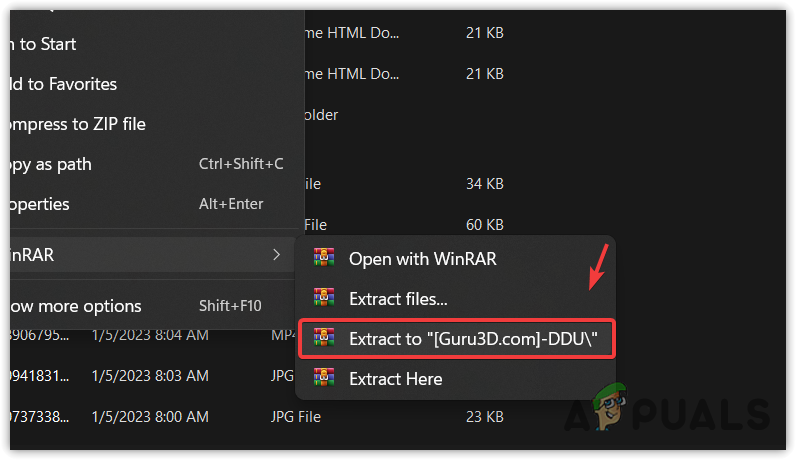
- Double-click the DDU 7 zip file, and then click Extract.
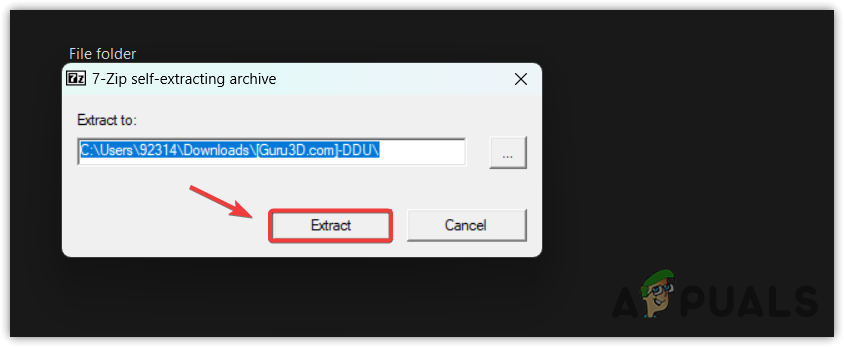
- Again, navigate to the folder and run the Display Driver Uninstaller.
- Select the Device and Device type according to your GPU.
- Then, click Clean and restart.
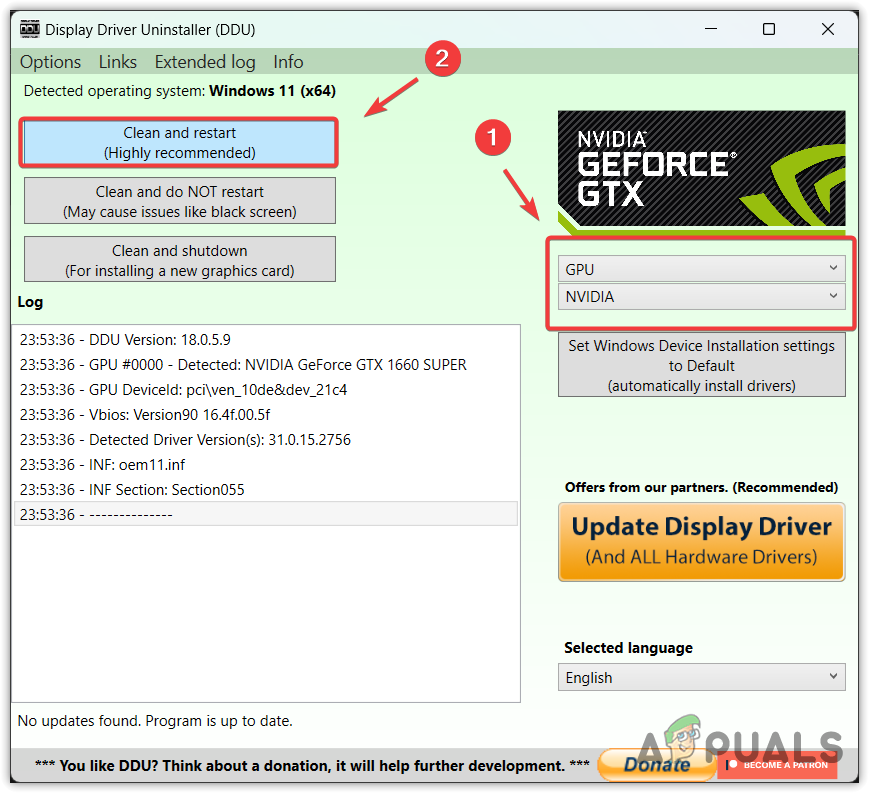
- Once your system restarts, check whether you are still encountering this issue. If not, then visit your GPU manufacturer’s website to download the graphics driver.
6.3 Install the GPU drivers.
- To install GPU drivers, head to the GPU manufacturer’s site.
- Download the GPU driver from there.
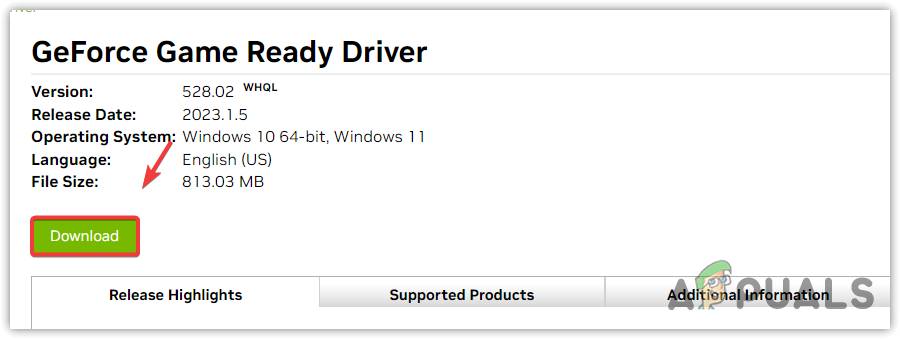
- Once it is downloaded, install the GPU driver by following the on-screen instructions.
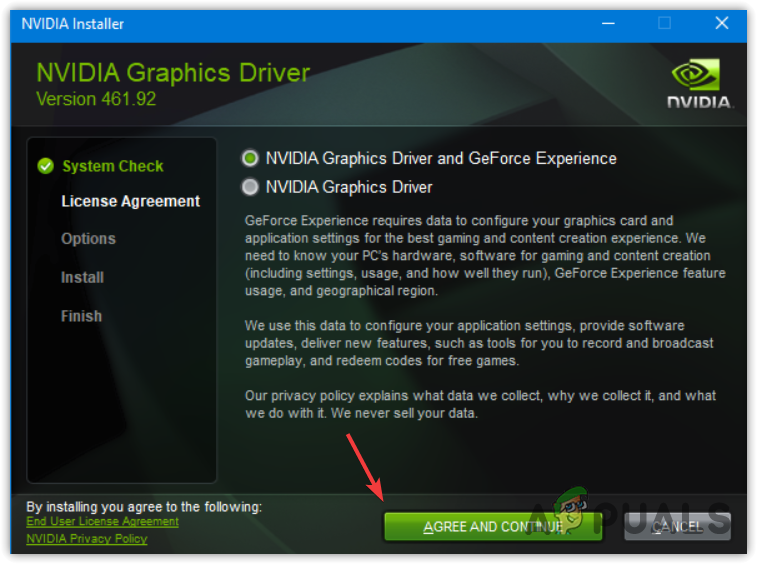
- Once complete, restart your Windows, and your issue should be fixed now.
7. Use a System Restore utility.
The System Restore utility allows users to restore the previous state of Windows. It is a troubleshooting utility that saves the current state into a restore point. If something adverse occurs with Windows files, drivers, and registry files, the user can revert to the previous version when everything was functioning properly.
To use a system restore utility, you need a restore point. If you have created one in the past, follow these steps. Otherwise, proceed to the following methods.
- Press Ctrl + Alt + Delete keys simultaneously and select Task Manager to navigate.
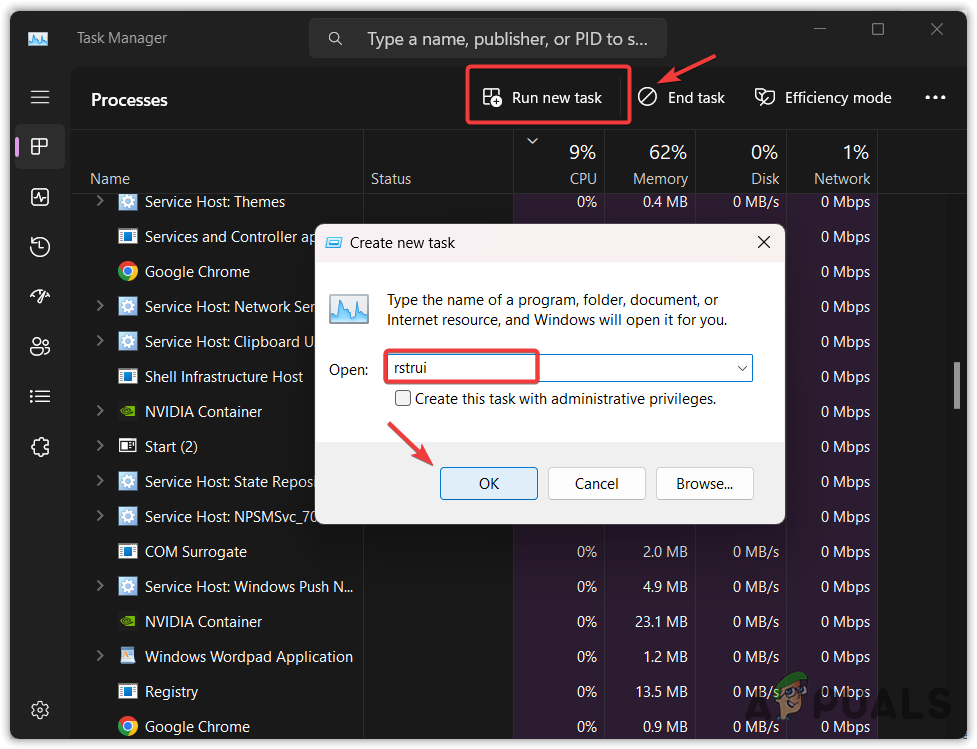
- Once the Task Manager is opened, click “Run New Task“, type “rstrui“, and click “OK” to run the utility.
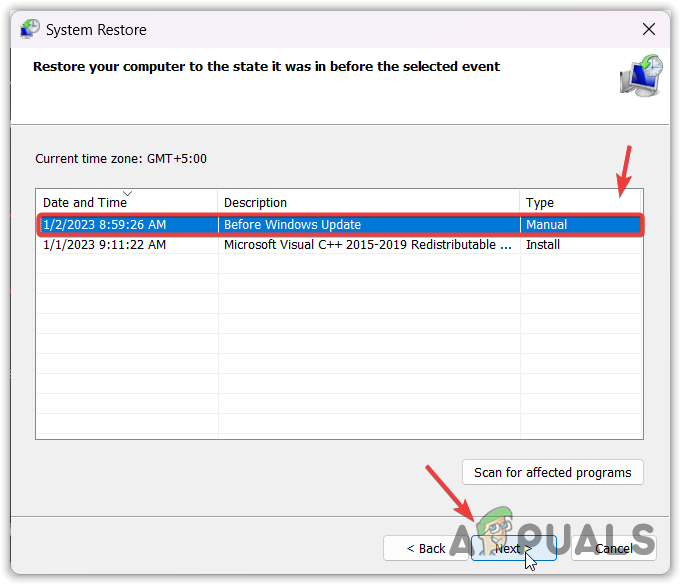
- Click “Next” and select a restore point, then click “Next” again.
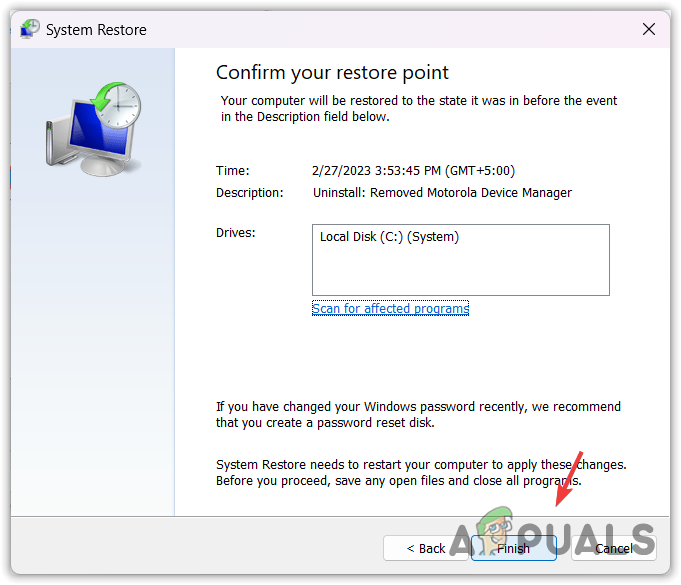
- Finally, click Finish to start the restore process.
8. Check for RAM.
Before we move on to resetting or reinstalling Windows, try checking the RAM connected to your computer. Resetting or reinstalling Windows might become complicated if you have a large amount of data to back up first.
So, if the white screen of death issue is caused by faulty RAM, changing or removing it will fix your problem. If you have multiple RAM modules connected, remove all except the last one, then check if you are still facing this issue. If not, connect the other RAM module and check for the issue. Repeat this process until you find the faulty RAM. If all the RAM modules are working properly, the issue must be due to a fault in your Windows or another hardware component.
9. Reset or reinstall Windows.
In the event that all solutions have failed to fix the white screen of death issue, you may need to try resetting or reinstalling Windows. You can visit the article to learn how to reinstall Windows. However, if you decide to reset Windows, which is essentially the same as reinstalling, follow these steps.
- Simply turn off your Windows device by holding the Power button.
- Once the system turns off, press the Power button to turn it on. Repeat this process at least 3 times to trigger an automatic repair.
- Wait for the automatic repair to fail. Then, click Advanced Options.
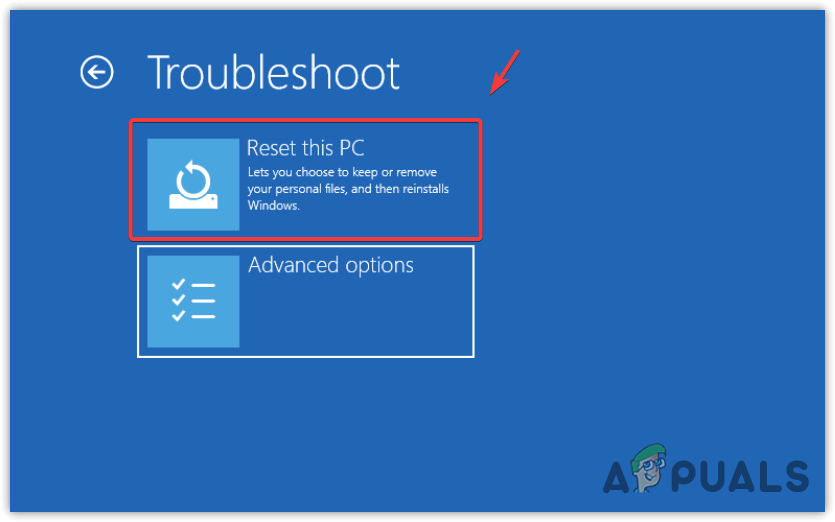
- Here click Troubleshoot, then click Reset this PC.
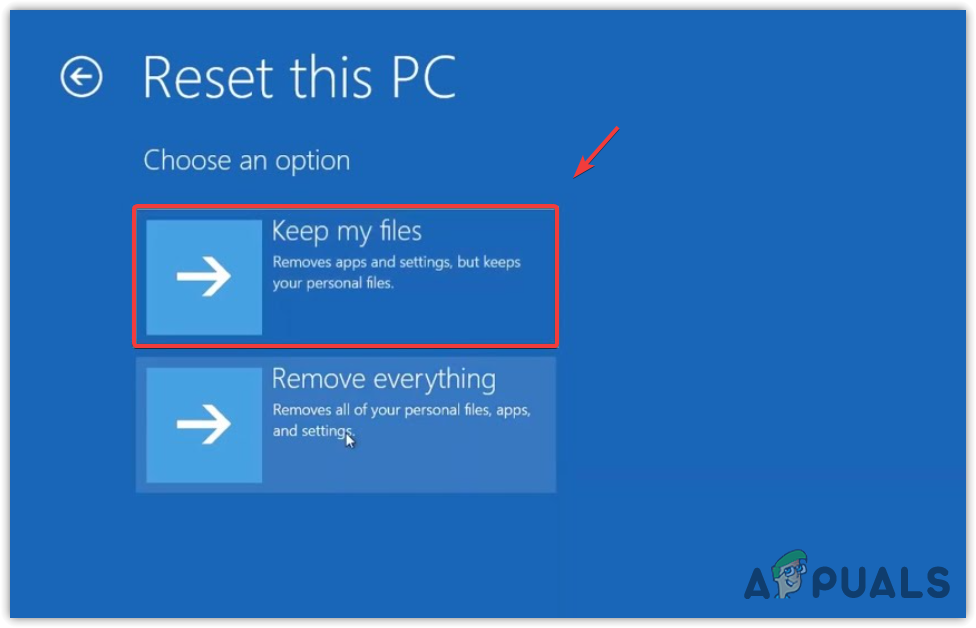
- Select Keep my files > Local Reinstall.
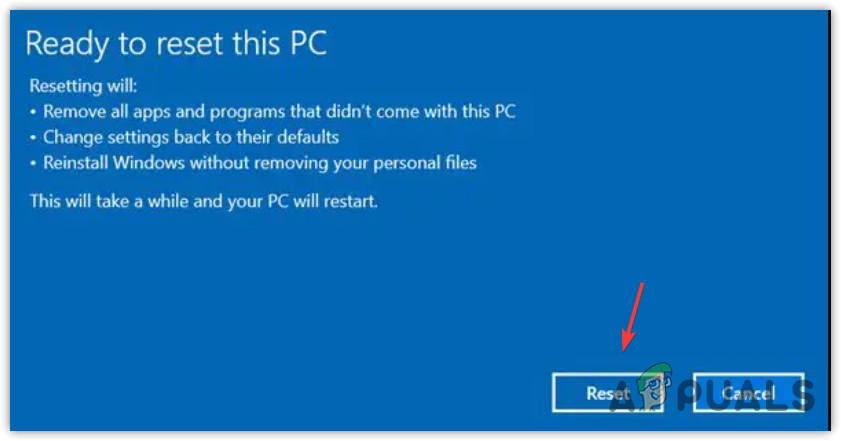
- Finally, click “Reset” to begin resetting your Windows.
- Once completed, your issue should be resolved. If not, then it must be due to a hardware problem, which requires diagnosis. Therefore, we recommend taking your system to the repair shop for proper evaluation.
-White Screen Of Death FAQs
There are various reasons for a white screen of death issue to appear. However, in most cases, this issue occurs when the Shell gets corrupted. Shell is a Windows program that runs Windows Explorer, which displays the Start Menu, desktop, and taskbar.
Go to Task Manager by pressing Ctrl + Alt + Delete keys. Then, click Run new task and type explorer.exe. Then, hit Enter to start the Windows Explorer.


