What is USOCLIENT.EXE and How to Disable it?
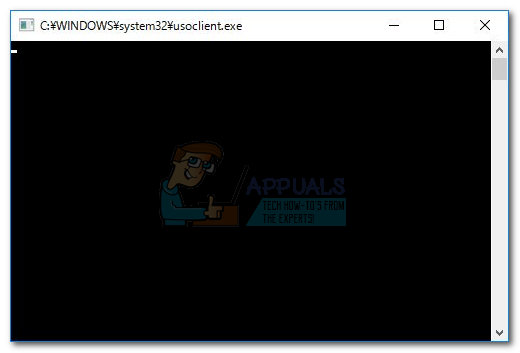
Most users get interested in the usoclient.exe process after noticing a brief CMD popup every time they start Windows 10. Because of this odd behavior, some users are confused about whether the UsoClient executable is a legitimate system process or a malware executable. The reason why you end up seeing the brief CMD prompt of UsoClient is that the process is called through Task Scheduler.
While a brief (under 1 second) uscoclient.exe CMD prompt is normal, there’s also a WU (Windows Update) bug that causes it to remain on the user’s screen indefinitely.
This article is meant as an explanatory guide to explain the purpose of the usoclient.exe client, how to distinguish security threat from legitimate component and how to disable the program altogether.
What is usoclient.exe?
The legitimate usoclient.exe is a genuine Windows Update (WU) component used to check for updates automatically. The acronym USO stands for Update Session Orchestrator and is the replacement for the Windows Update Agent on Windows 10. It’s the main purpose (similar to its predecessor), is to run tasks that scan, install or resume Windows updates.
Potential security threat
We weren’t able to identify any associated malware program capable of posing as the UsoClient executable. But looking at other similar scenarios, it’s entirely possible for a malware program to pose as system file with elevated privileges in order to avoid detected by security scans.
Luckily, we can easily verify this scenario by discovering the location of the UsoClient executable. To do this, open Task Manager (Ctrl + Shift + Esc) and locate the usoclient.exe by scrolling through the Processes list. Then, right-click on usoclient.exe and click on Open File Location.
If the revealed location is anywhere else than in C: / Windows / System32 /, there’s a high chance that your system is struggling with a system infection. In this case, it’s advisable to use a powerful scanner to remove the virus infection. If you don’t have one at the ready, consider using Malwarebytes to clean your system of malware infections.
If the revealed location was indeed in C: / Windows / System32 /, you can probably rest assured as you’re not dealing with a malware executable. But if you want even more peace of mind, you can still trigger a security scan on the executable in order to be sure. If you want to save time, upload just the executable to VirusTotal and let the software analyze it.
Is it ok to delete the UsoClient executable?
Deleting the usoclient.exe program is certainly not advisable since you might trigger unwanted behaviors. Even more, since it’s a system file commonly used by Windows, you’ll likely find that your OS will promptly recreate the file at the next startup.
A better solution would be to disable the program, or better yet, start by letting Windows Troubleshooter fix the bug that will cause the CMD prompt of UsoClient to cling on your screen indefinitely. Please follow the methods below in order until you encounter a fix that manages to remove the usoclient.exe CMD prompt.
Note: Keep in mind that if you end up disabling the usoclient.exe you’ll likely prevent your system from staying up to date with the latest updates.
Method 1: Running Windows Troubleshooter
Some users have reported managing to fix the issue by running the Windows Update troubleshooter. But keep in mind that this method is only effective you the usoclient.exe CMD prompt stays on-screen indefinitely.
Note: Completing the steps below will not disable the usoclient.exe – you will still be able to receive Windows updates. The fix is only aimed at resolving the bug that causes the usoclient.exe CMD prompt to remain on screen until closed manually.
Here’s a quick guide on how to resolve the bug with the Windows Update troubleshooter:
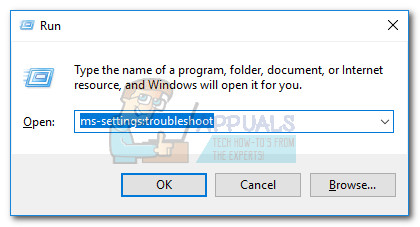
- Press Windows key + R to open up a Run window. Type or paste “ms-settings:troubleshoot” and hit Enter to open the Troubleshoot tab of Windows 10 Settings.
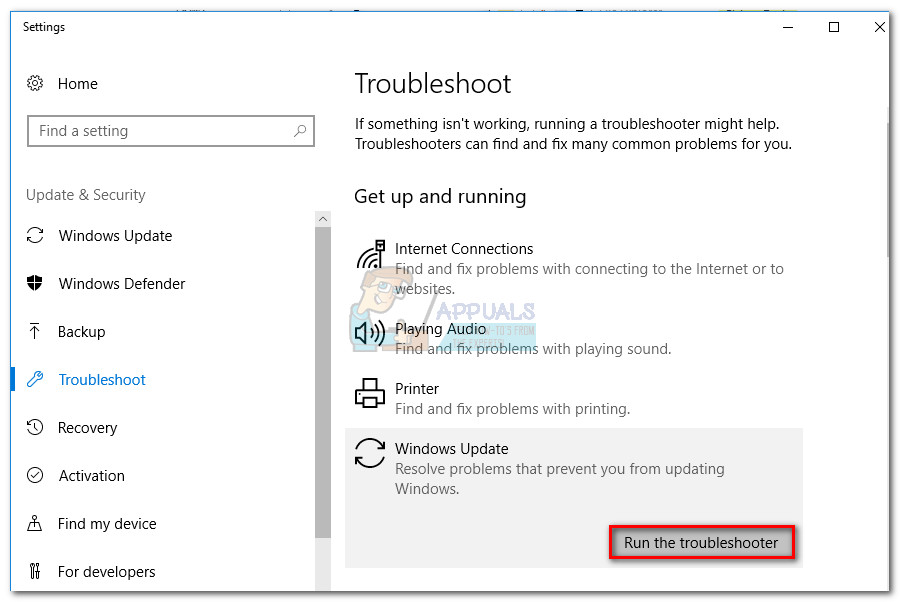
- In the Troubleshoot tab, click on Windows Update then choose Run the troubleshooter.
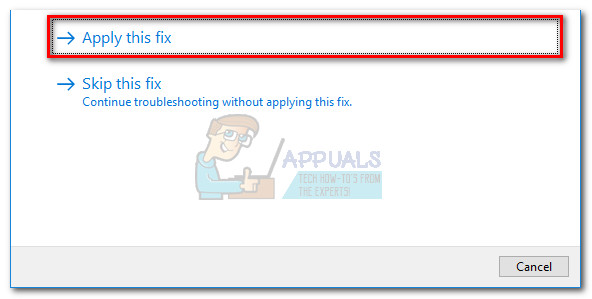
- Wait for the troubleshooting component to investigate for problems, then follow the on-screen prompts to trigger the repair strategies. You’ll probably have to click on Apply this fix. When the process is complete, restart your computer manually if not prompted to do so automatically.
If this method hasn’t resolved the issue or if you’re looking for a permanent fix to disable the UsoClient executable, continue with the other methods below.
Method 2: Disabling usoclient.exe from Task Scheduler
Although we certainly don’t recommend this without an apparent reason, it is possible to prevent the UsoClient.exe pop-up CMD prompt from appearing by disabling the process from the task scheduler
Here’s a quick guide to disabling the usoclient.exe pop up from the Task Scheduler:
- Press Windows key + R to open up a Run command. Type “taskshcd.msc” and hit Enter to open the task scheduler.
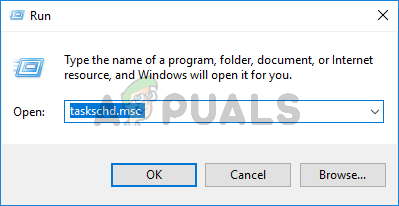
Type taskschd.msc in the Run to open Task Scheduler - In the task scheduler window, navigate to Task Scheduler Library > Microsoft > Windows > UpdateOrchestrator using the left pane.
- Once you open the UpdateOrchestrator folder, move over to the center pane and select the Schedule Scan task.
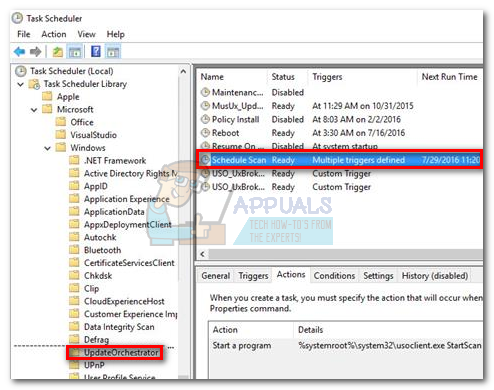
- With the Schedule Scan selected, move over to the right pane and click on Disable (under Selected item).
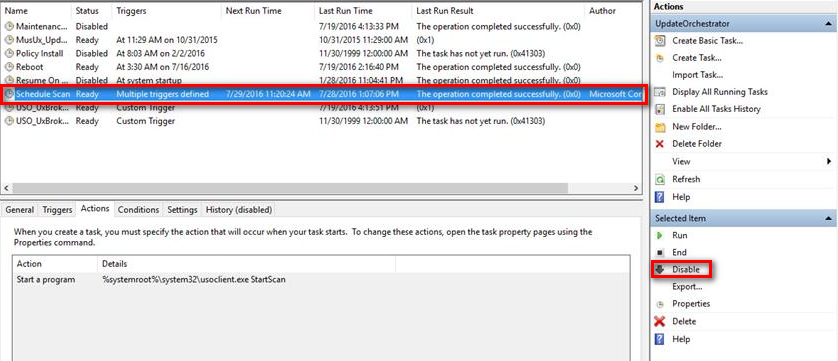
- Close the task scheduler and reboot your computer. At the next restart, you should notice that the UsoClient.exe CMD pop up no longer appears. But keep in mind that leaving this task disabled will not keep the WU (Windows Update) component informed with the latest available updates.
Note: In case you ever decide to resume the normal functionality of the Update Orchestrator component, reverse engineer the steps above and choose Enable at the last step to revert to the normal behavior.
If you cannot access the task scheduler from your Windows 10 version, disable the usoclient.exe using Method 3.
Method 3: Disabling usoclient.exe using Registry Editor
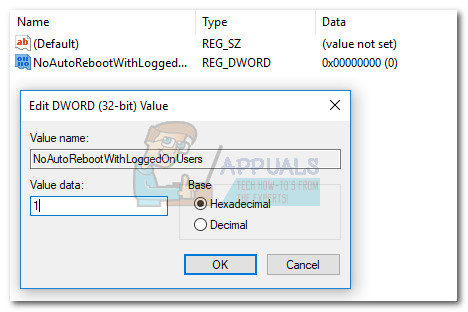
If the first method wasn’t applicable to your system, you can also use Registry Editor to prevent the usoclient.exe pop CMD pop up from ever bothering you again. This method involves creating a Dword 32-bit value called NoAutoRebootWithLoggedOnUsers in order to disable the auto-reboot feature of the UsoClient executable.
Here’s a quick guide on how to disable usoclient.exe from Registry Editor:
- Press Windows key + R to open up a Run window. Type “regedit” and hit Enter to open up the Registry Editor.
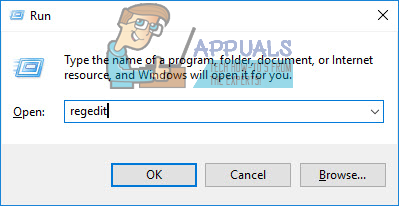
- In Registry Editor, use the left pane navigate to the following location.
HKEY_LOCAL_MACHINE \ SOFTWARE \ Policies \ Microsoft \ Windows \ WindowsUpdate\ AU.
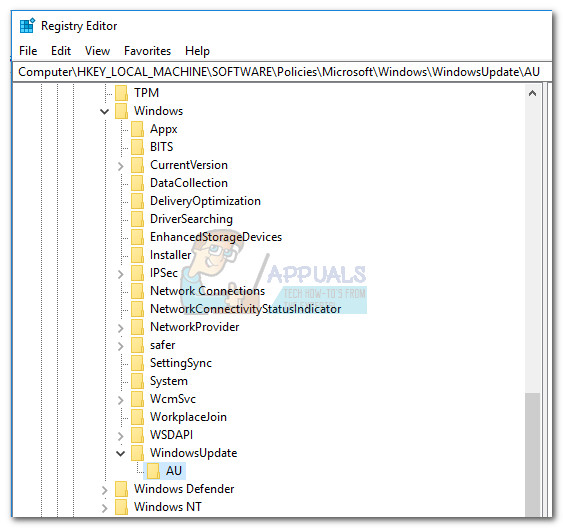
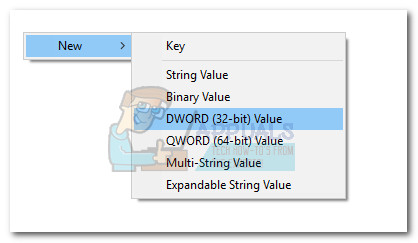
- With the AU folder selected, move over to the right panel and right-click on a free space and choose New > Dword (32-bit) Value. Then, rename the newly created value to NoAutoRebootWithLoggedOnUsers.
- Double-click on NoAutoRebootWithLoggedOnUsers and set it’s value to 1.
- Close Registry Editor and reboot your computer. The CMD pop-ups caused by usoclient.exe should no longer be visible after the restart.
In case you ever want to revert to the normal behavior, return to Registry Editor, navigate to HKEY_LOCAL_MACHINE \ SOFTWARE \ Policies \ Microsoft \ Windows \ WindowsUpdate\ AU and delete the NoAutoRebootWithLoggedOnUsers entry or set it’s value to 0.