What is oem42.inf and How to Uninstall It?
If you have a device that gives an oem42.inf (Device not configured) error or any other error with the oemnn.inf then do not worry. The error can be shown from the device manager with a yellow warning sign along with the name of the device or it might show up in the event viewer.
The oemnn.inf is nothing more than a 3rd party software or in this case a 3rd party driver for your device. The “oem” part is used by the Microsoft to identify the 3rd party driver software and the number after that is just a sequential number associated with it. So if you see errors or configuration issues related to oem42.inf or oem27.inf then that simply means that your 3rd party device driver have an issue and you need to either update or roll back the driver.
Since this is an issue with the device’s driver, it can easily be solved by downloading either the latest driver or rolling back to a previous one, in case the problem occurred after updating the driver, which was working. And if nothing else works, you can simply uninstall the driver and let the Windows install the driver itself.
Method 1: Install the latest driver
You can do this in two ways. Either do it manually or let the Windows find and update the latest driver version
Manually Update the Driver
Go to your device manufacturer’s website and look for the latest driver versions. Make sure the driver you are downloading is compatible with your Windows version.
Once downloaded, follow the steps given below
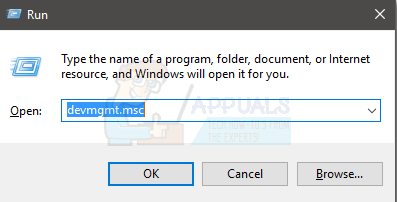
- Hold Windows Key and press R
- Type devmgmt.msc and press Enter
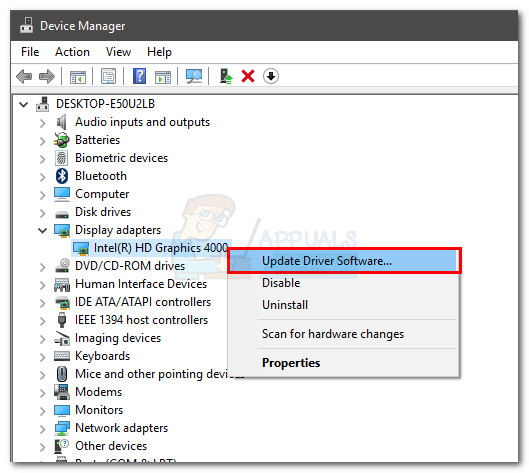
- Locate the device you are having issues with. You might see a yellow warning sign on it as well. Don’t forget to click the arrow on the left side of the devices to expand them further if you can’t find your device
- Right click the device and select Update Driver Software…
- Select Browse my computer for driver software
- Click Browse
Navigate to the location where you downloaded your driver and select it. Now select Next and follow the instructions on the screen. Once it is done, Reboot your computer and check if the error is still there.
Automatically Install the Driver
- Hold Windows Key and press R
- Type devmgmt.msc and press Enter
- Locate the device you are having issues with. You might see a yellow warning sign on it as well. Don’t forget to click the arrow on the left side of the devices to expand them further if you can’t find your device
- Right click the device and select Update Driver Software…

- Select Search automatically for an updated driver software
Now Windows will automatically search for an updated version and install the driver. Reboot your computer and check if the error is still there.
Method 2: Uninstalling and reinstalling the driver
Windows usually comes with a bunch of generic driver software as well. Uninstalling the driver software and letting Windows install the most compatible driver sometimes solves the problem.
Don’t forget to create a System Restore Point just in case you accidently mess up the drivers or uninstall the wrong one. Follow the steps given below to create a System Restore Point
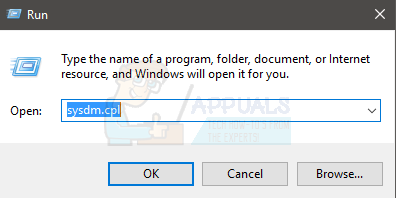
- Hold Windows Key and press R
- Type sysdm.cpl and press Enter
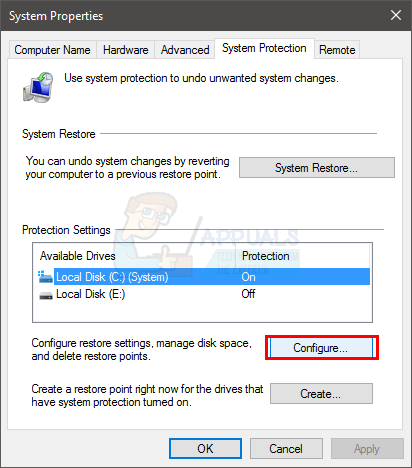
- Click System Protection tab
- Select the drive that you want to create a system restore point for (in this case C)
- Click If the create button is greyed out then that means you have System Protection turned off. Perform the following steps to enable it System Protection for the drive
- Click Configure
- Select Turn on System Protection (under Restore Settings section)
- Move the Max Usage slider to allocate memory for system restore points (make it around 5 GB)
- Click Apply then Ok
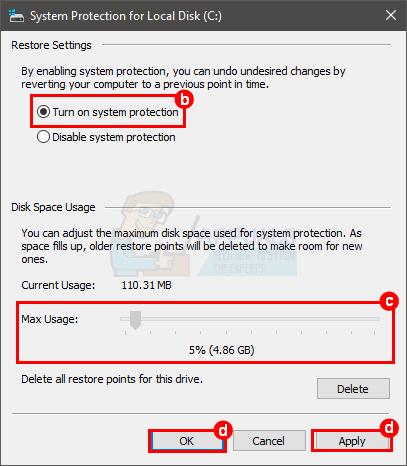
- Now click Create button (it should be clickable now)
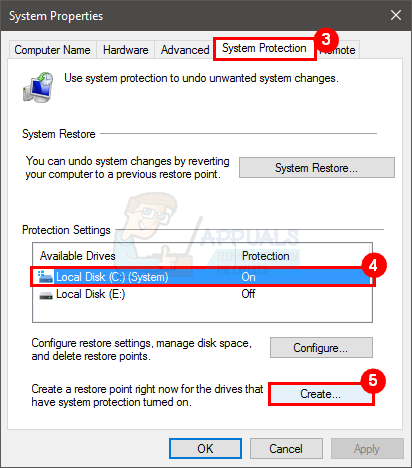
- Click Configure
- Give whatever name you would like to your restore point
- Click Create
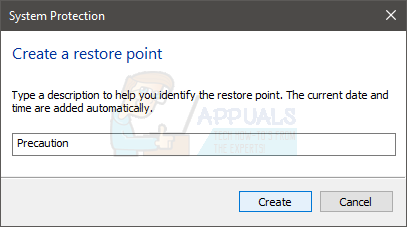
Wait for it to finish.
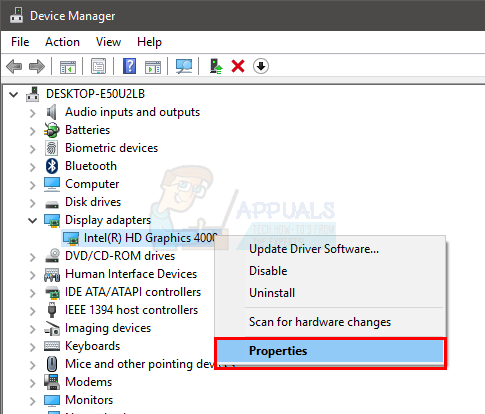
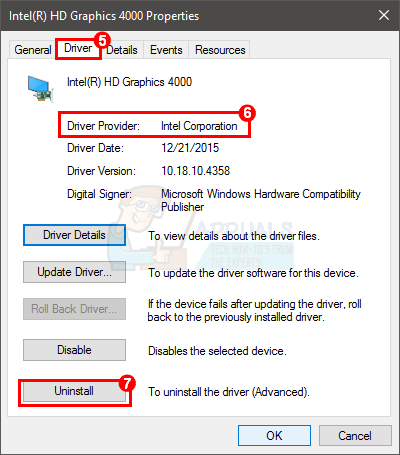
Now uninstall the driver (Before uninstalling, check the provider’s name of your driver as well).
- Hold Windows Key and press R
- Type devmgmt.msc and press Enter
- Locate the device you are having issues with. You might see a yellow warning sign on it as well. Don’t forget to click the arrow on the left side of the devices to expand them further if you can’t find your device
- Right click the device and select Properties
- Click Driver tab
- Look at the Driver Provider It should mention your manufacturer’s name.
- Click Uninstall and select Ok if asked.
Reboot your computer to let Windows install a generic driver for your device. Once rebooted, follow the steps from 1-6 and check the Driver Provider. It should be Microsoft now. Check if the issue still persists.
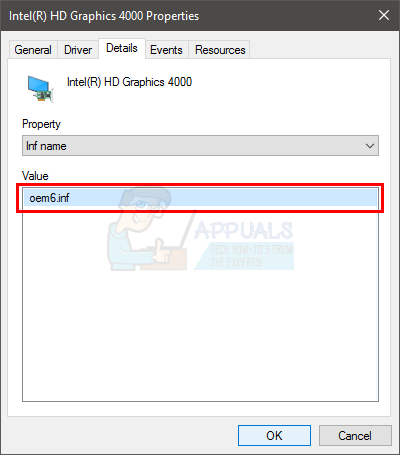
If the Driver Provider isn’t changed then you have to delete the driver package from the command prompt. But before doing that, perform these steps to extract the name of the driver you will be deleting
- Hold Windows Key and press R
- Type devmgmt.msc and press Enter
- Locate the device you are having issues with. You might see a yellow warning sign on it as well. Don’t forget to click the arrow on the left side of the devices to expand them further if you can’t find your device
- Right click the device and select Properties
- Click Details tab
- Select Inf Name from drop down list under Property

- You should be able to see a driver name something like “inf” where nn can be any number. Note this as you will be needing this again
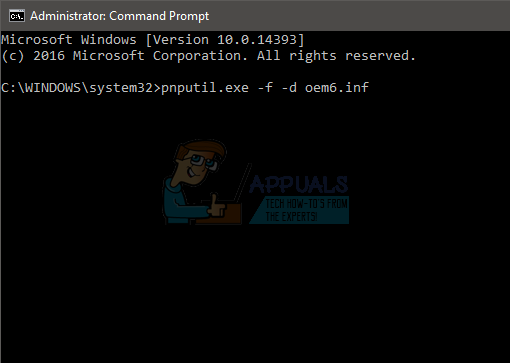
- Now close all windows
- Hold Windows Key and press X
- Select Command Prompt (Admin)
- Type exe -f -d oemnn.inf (replace nn with the number you found in step 7) and press Enter
- Perform steps from 1-4
- Click Driver tab
- Click Uninstall and select Ok if asked.
Now restart your computer and check if the Driver Provider has changed. Now it should be Microsoft and the problem should be solved.
Thank you very much Kevin. My Logitech G13 keyboard caused me grief for a few days sitting in other devices, gaming software could not detect its presence. Method 2 worked a charm.