How to Fix ‘WebView2 SDK/Edge’ Error on Windows 11
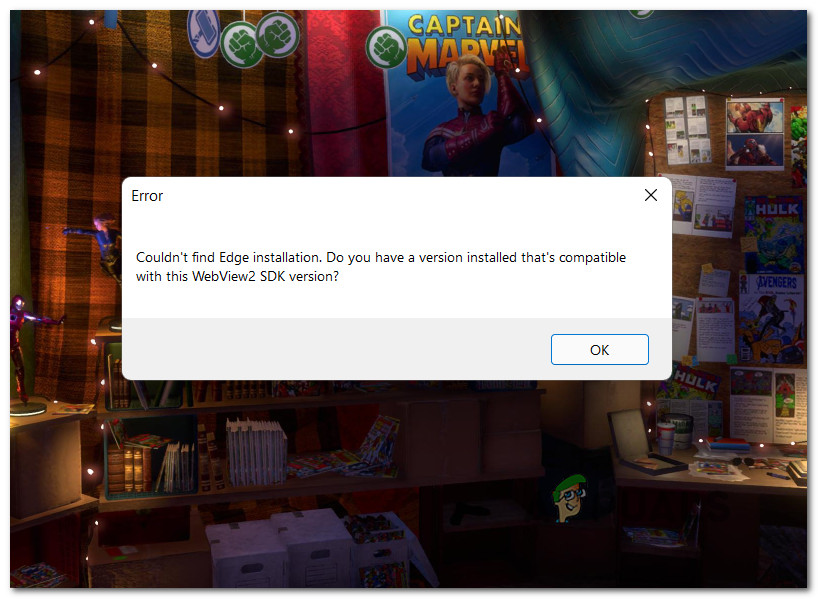
Some users that are currently on the Dev or Beta Windows 11 build are reporting a weird issue where they end up seeing a WebView2 SDK/Edge error (Couldn’t find Edge installation) whenever they log in with a user account on their PC.
After investigating this particular issue thoroughly, it turns out that there are several different scenarios that are known to cause this particular error on a Windows 11 PC. Here’s a shortlist of potential culprits that might cause the WebView2 SDK/Edge error:
- Missing WebView 2 Runtime installation – A lesser-known dependency that Microsoft Edge absolutely requires is the runtime environment for WebView 2. But as it turns out, certain actions (like updating your hardware drivers) might end up breaking your OS ability to utilize WebView 2. In this case, you can fix the issue by installing the WebView 2 runtime once again.
- Corrupted Microsoft Edge installation – As it turns out, this problem can also be caused by some type of file corruption that is affecting your current Microsoft Edge installation. This typically occurs after a security threat (most commonly a browser hijacker) is eliminated from Microsoft Edge. If this scenario is applicable, you should be able to fix the issue by repairing the Microsoft Edge installation.
Now that you are familiar with every potential scenario that might cause this error, follow the two methods below for instructions on how to fix the WebView2 SDK/Edge error (Couldn’t find Edge installation) error.
Install WebView 2 Runtime
The most important dependency that Microsoft Edge requires in order to start when called upon is the runtime environment for WebView 2. This package should be installed by default, by manual user intervention, or by some kind of system file corruption that can render your WebView installation unusable on your Windows 11 machine.
Note: WebView2 provides support for a lot of web-based features that are part of Microsoft 365. WebView2 is used as a rendering engine. You should have Webview2 installed by default if you are running on the latest version of Windows 11.
However, if WebView2 is missing from your Windows 11 installation for whatever reason, you can easily reinstall the runtime infrastructure from the official website.
Follow the instructions below for step by step instructions on downloading and installing WebView2 Runtime on a Windows 11 computer and fixing the WebView2 SDK/Edge error:
- From your favorite browses, navigate to the official download page of WebView 2.
- Once you’re on the correct page, go under Fixed Version and change the Select Version to the latest, then change the infrastructure to the OS infrastructure you’re currently using.
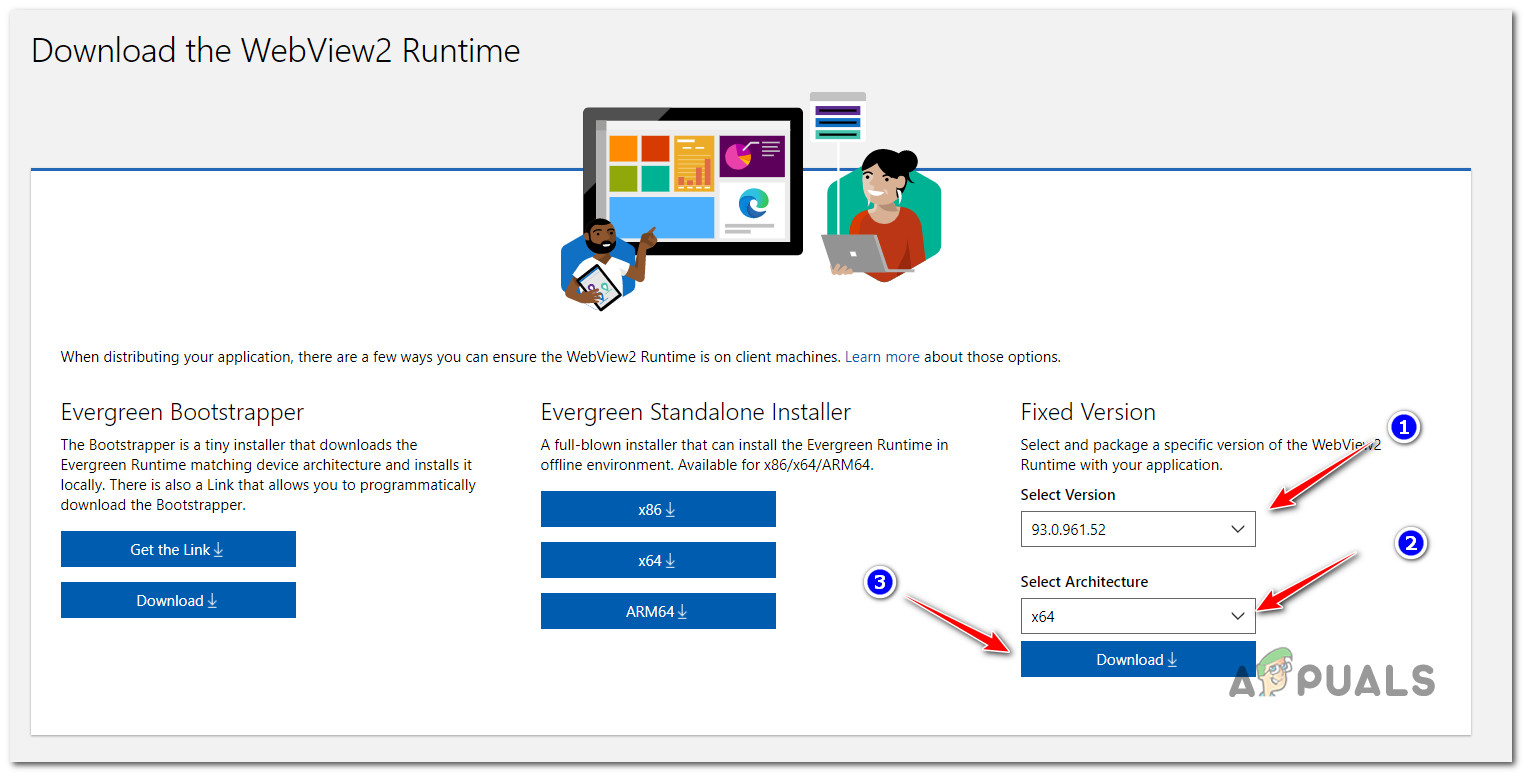
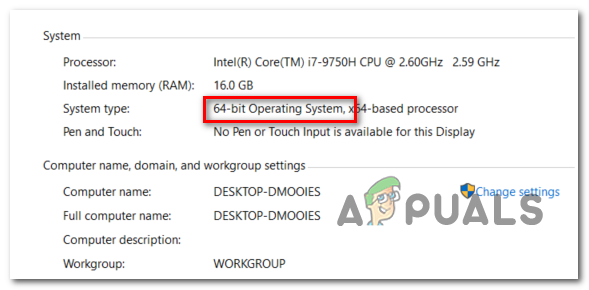
Downloading the correct fixed version of the WebView2 installer Note: If you don’t know your OS infrastructure, press Windows key + R, then type ‘systeminfo’ and press Enter. Next, once you’re inside the System info tab, access the System Summary page, scroll down to the System category and look under System type to discover your OS infrastructure.
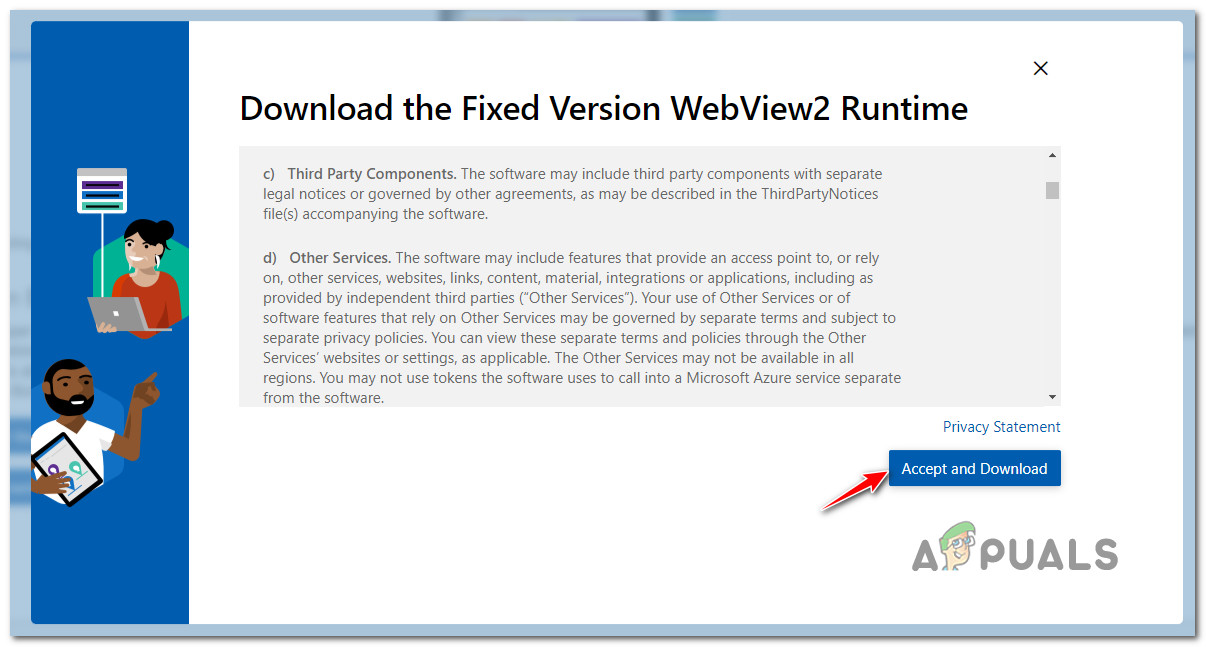
Checking OS architecture - At the next screen, accept the Terms of Licensing and commence the download by clicking on Accept and Download.
Downloading the latest WebView 2 version - Once the installer has been completely downloaded, double-click on it and click Yes at the User Account Prompt to grant admin access.
- Follow the on-screen instructions to complete the installation of WebView 2, then reboot your PC and see if the WebView2 SDK/Edge error is now fixed.
In case you’re still seeing the same kind of error when you try to sign in with your user account, move down to the next potential fix below.
Repair Microsoft Edge
If the first method did not work in your case, the issue is mostly related to some kind of corrupted dependency that ends up interfering with WebView2.
Fortunately, this kind of system file corruption can be fixed easily by using the Apps & Features screen to repair the entire Microsoft Edge installation.
This operation will successfully clear the cached data related to Microsoft Edge and refresh any associated dependency used by the built-in browser (including WebView2).
Follow the instructions below for a step by step guide on repairing the Microsoft Edge installation using the Apps & Features menu on Windows 11:
- Press Windows key + I to open up the Settings menu on Windows 11.
- Once you’re inside the Settings menu, use the vertical menu on the left to click on Apps.
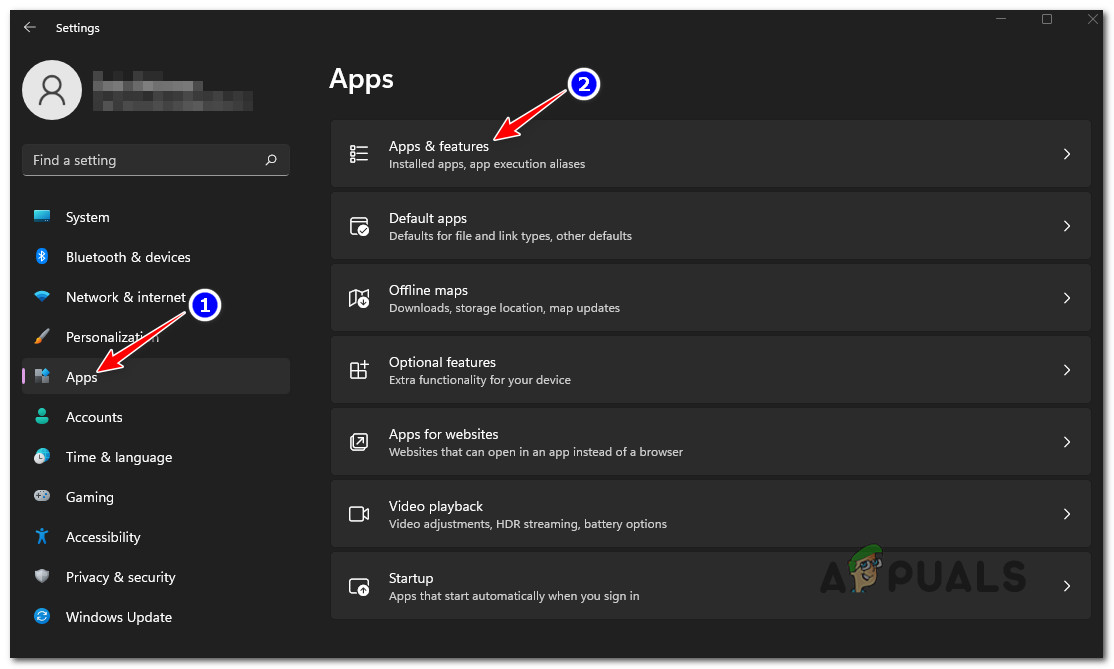
Accessing the Apps and Features menu Note: If the vertical menu is not visible by default, click on the action button (top-left corner) to make it visible.
- Next, move over to the Apps menu on the right and click on Apps & Features.
- Once you’re inside the Apps & Features menu, use the search function (under App list) to search for Microsoft Edge.
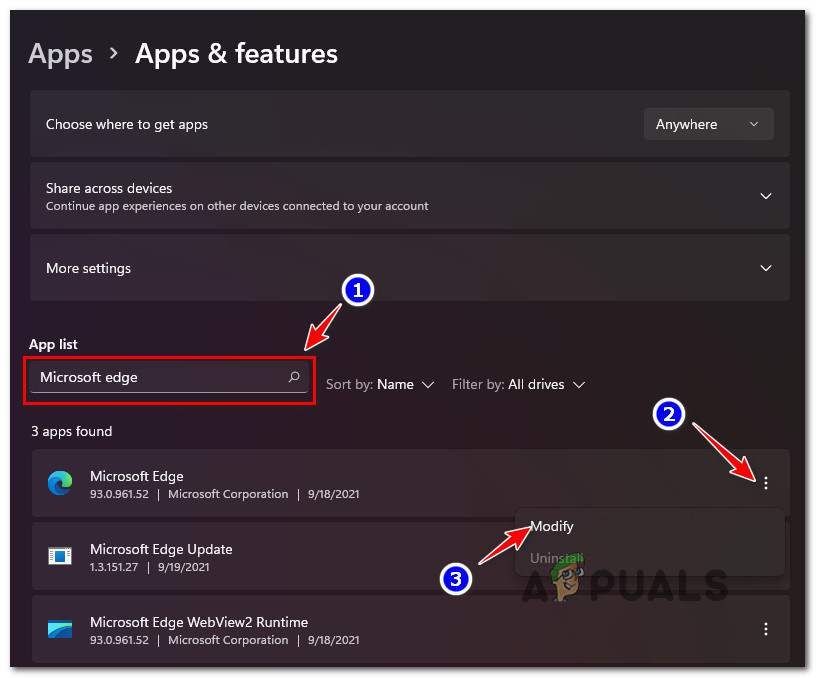
Microsoft Edge - Next, from the list of results, click on the three-dot (action icon) associated with Microsoft Edge, then click on Modify from the newly appeared context menu.
- When prompted by the User Account Control, click Yes to grant admin access.
- At the first screen (under Repair Microsoft Edge), click on Repair.
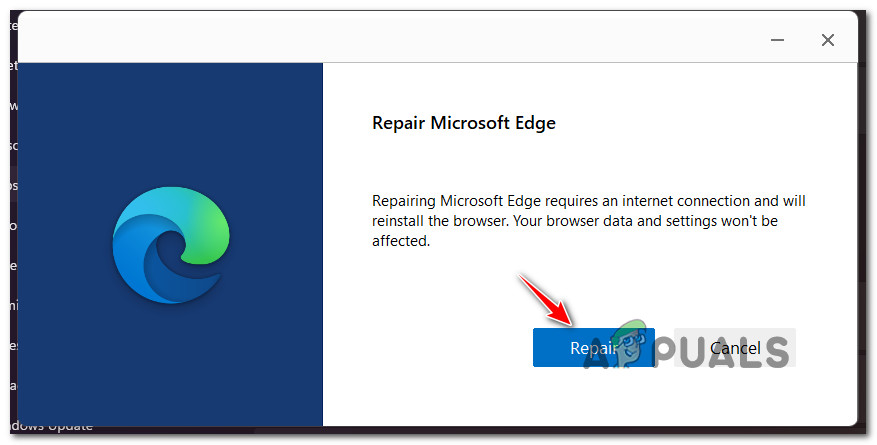
Repair Microsoft Edge Note: After you do this, the utility will re-download the latest version of Microsoft Edge, then install it over your current installation. The whole process should take several minutes tops.
- Once the repair process of Microsoft Edge is complete, click on Close, then reboot your PC and wait for the next startup to complete.
- See if the WebView2 SDK/Edge error is still occurring when you try to sign in with a user account.


