FIX: WebCam Not Working After Windows 10 Anniversay Update
The Windows 10 Anniversary Update has affected a number of built-in and external webcams where they have stopped working. It has mainly interfered with the applications where the user makes use of the WebCam such as Skype, Open Broadcaster Softwares and certain CCTV Programs. As of now, there is no official update or a patch released by Microsoft so the only solution is to amend the registry keys or roll back to the previous build.
Users have reported issues like Skype, won’t open the Camera or if it does then it’s black and crashes constantly OR the Camera App keeps popping with errors.
In this guide, i am going to list two methods one where you want to fix the issue via the Registry Method and second, where you want to roll back to a previous build and wait until Microsoft sorts this out.
Method 1: Change The Registry
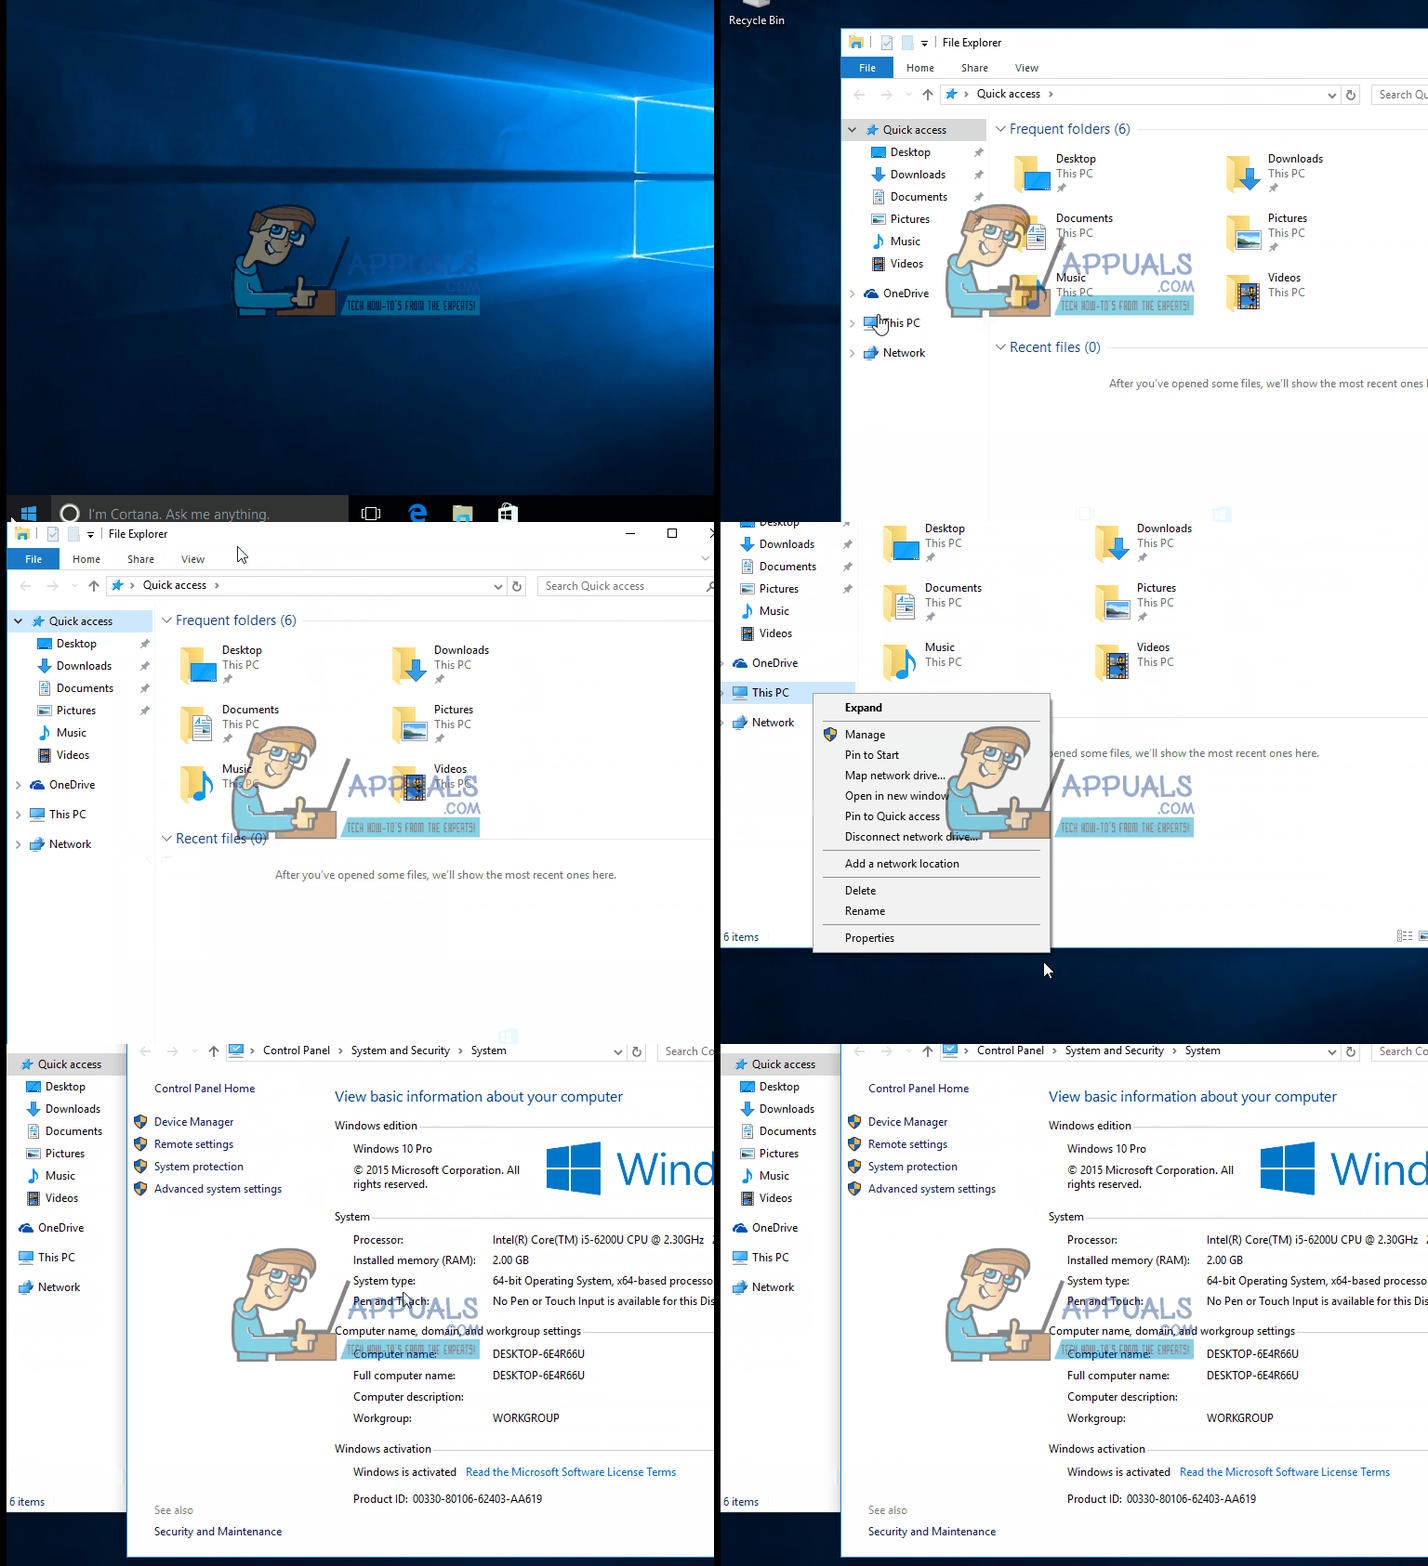
Before you change the Registry, check your system type if it’s a 32-bit system or a 64-bit. To do this, Hold the Windows Key and Press E. Right-click This PC from the left pane and choose Properties. Look at the System Type field and note down your system type.

If it’s a 32-bit System
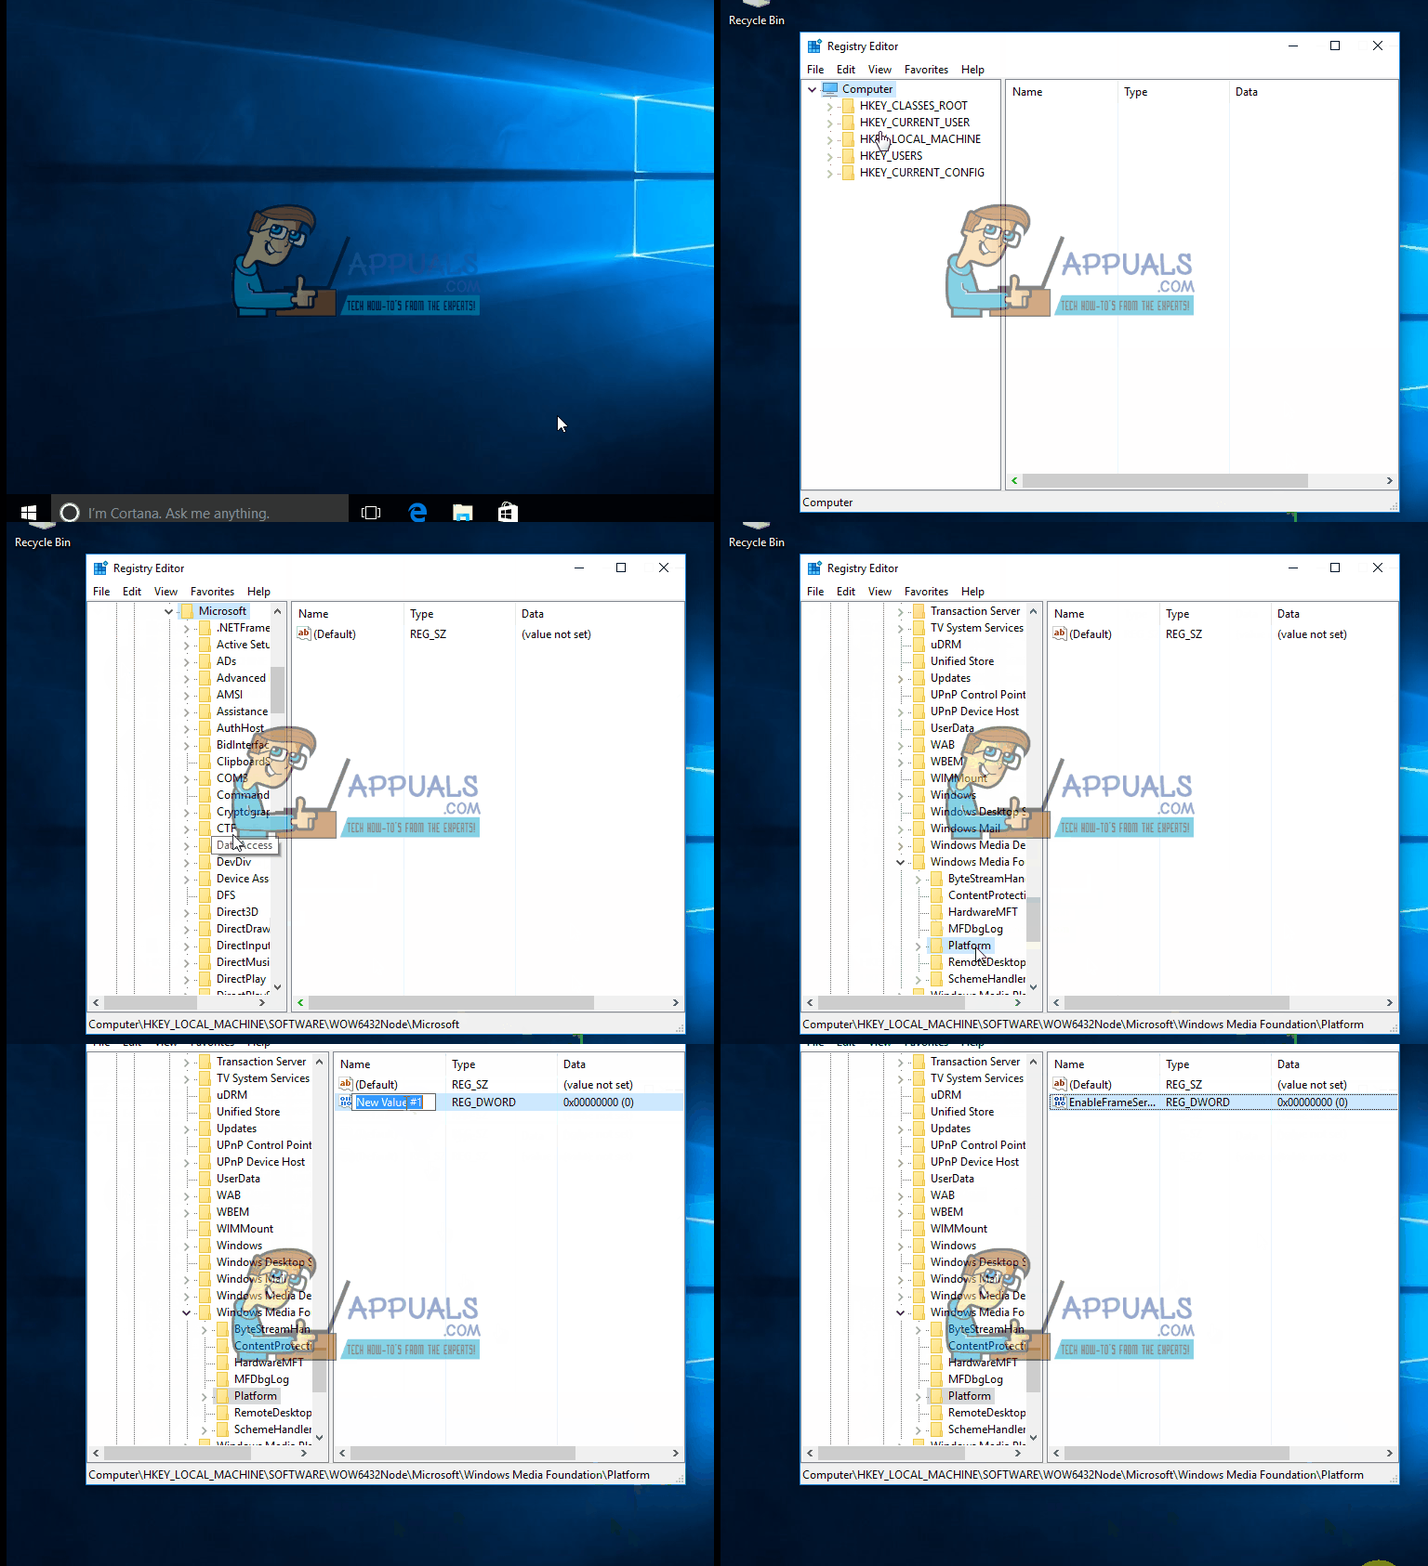
Hold the Windows Key and Press R. Type regedit and Click OK. Browse to
HKEY_LOCAL_MACHINE\SOFTWARE\Microsoft\Windows Media Foundation\Platform
Right click on the Platform subfolder from the right pane and choose New > DWORD (32-bit) Value.
Name the value “EnableFrameServerMode”. Double-click it and set the value to “0”.
If it’s a 64-bit System
Hold the Windows Key and Press R. Type regedit and Click OK. Browse to
HKEY_LOCAL_MACHINE\SOFTWARE\WOW6432Node\Microsoft\Windows Media Foundation\Platform
Right click on the Platform subfolder from the right pane and choose New > DWORD (32-bit) Value.
Name the value “EnableFrameServerMode”. Double-click it and set the value to “0”.

That’s it. Your WebCam (Internal or External) should now work fine.
Method 2: Roll Back to Previous Build
This method is for those who do not want to make the registry tweak. You can go back to the previous build, and try updating again in 2-3 months or when MS has released a patch for this bug.
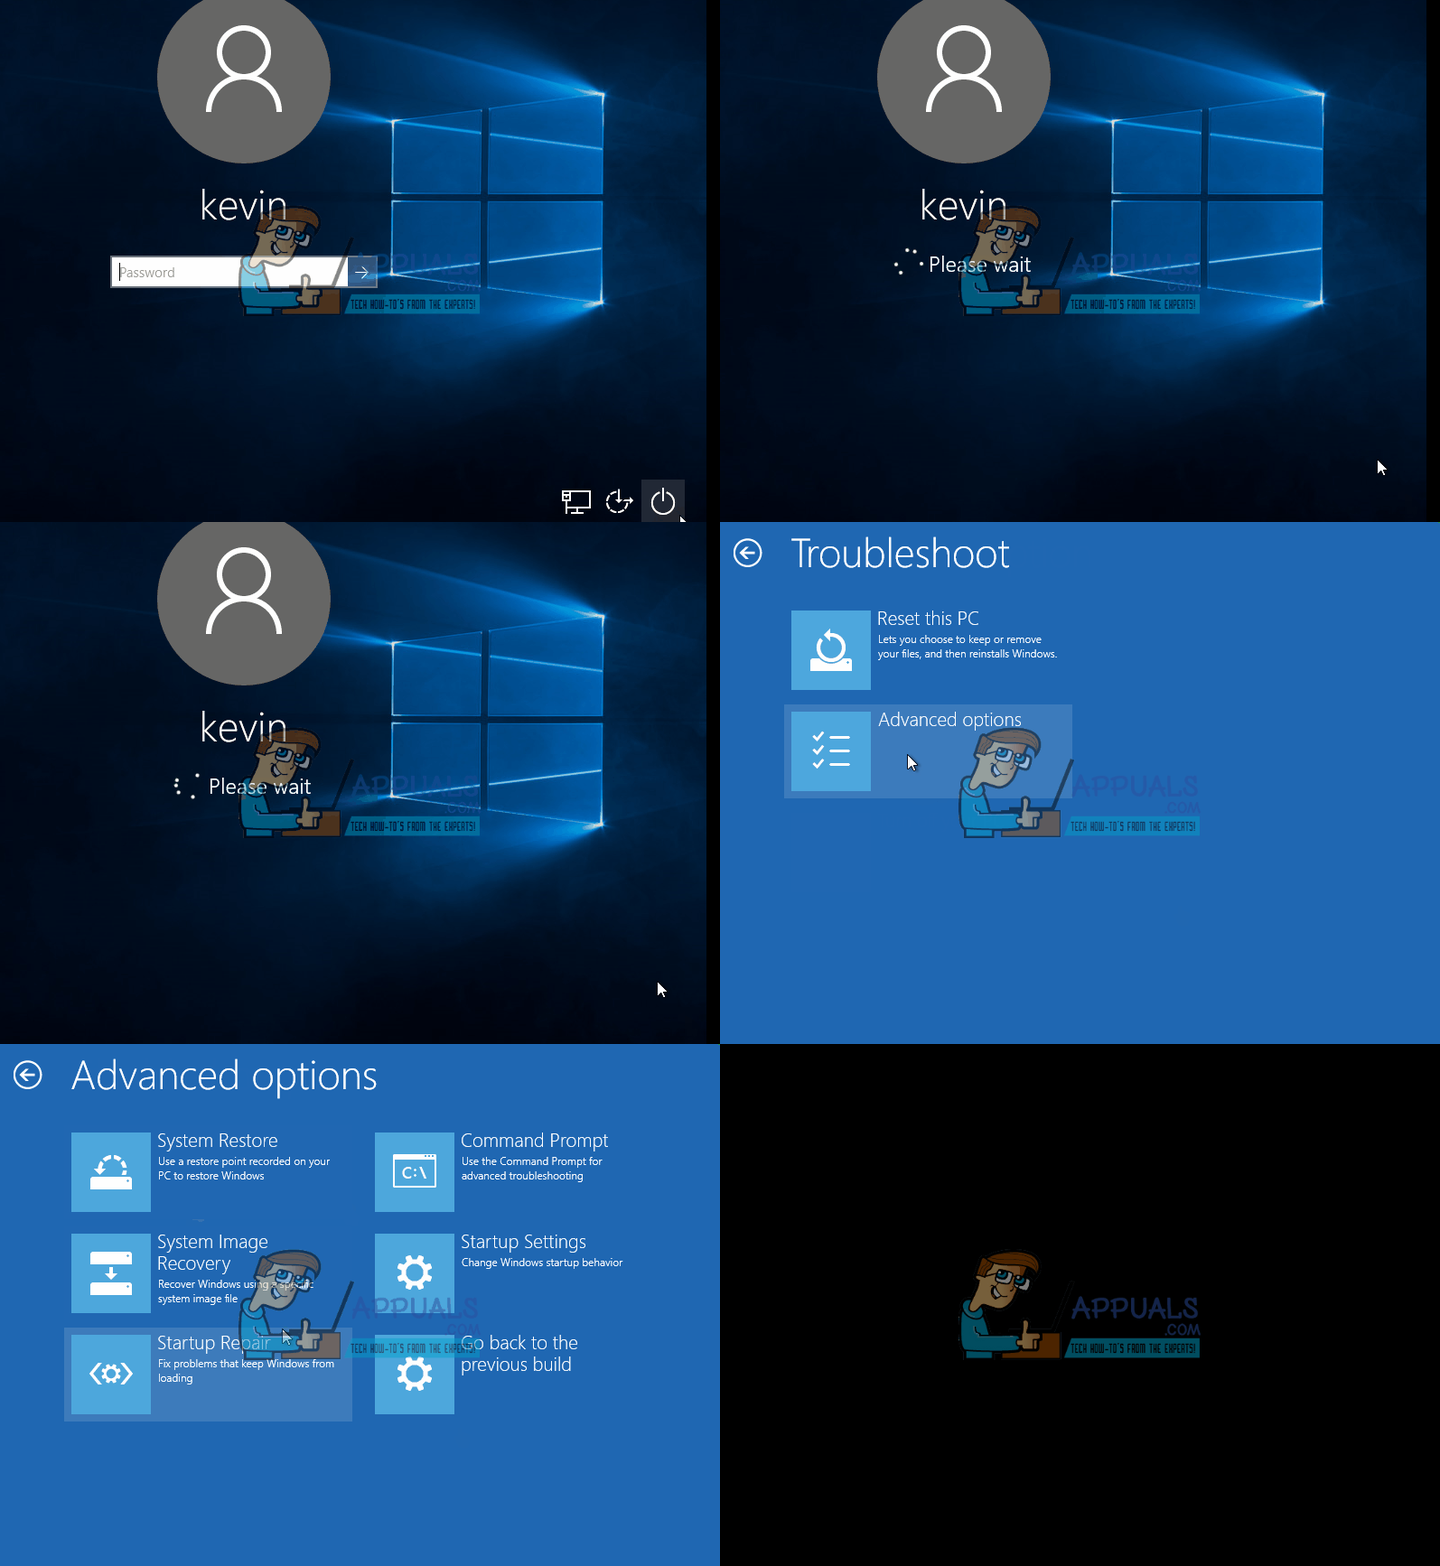
To do this, at the login screen HOLD the SHIFT key and click the Power (icon) located on the lower right corner. Whilst still Holding the SHIFT key choose Restart.
Once the System boots into the Advanced Mode, choose Troubleshoot and then choose Advanced Options. From Advanced Options, choose the option titled Go back to previous build.
After a few seconds, you will be asked to choose your User Account. Click on the User Account, key in your password and choose Continue. Once done, choose the option Go Back to Previous Build again.
