Fix: Wallpaper Disappearing After Final Major Update for Windows 7
As most Windows 7 users already know, Microsoft ended support for its most successful computer Operating System in January of 2020. On January 14th, Microsoft rolled out what was supposed to be the final roll-up of monthly security updates for Windows 7 in the form of the KB4534310 update. However, in spectacular Microsoft fashion, the tech giant ended up breaking one of Windows 7’s most used features with this final update – the ability to select a desktop background. For Windows 7 users who don’t use third-party desktop/dock programs, there’s not a lot they can do in the name of desktop personalization – there’s making the taskbar as translucent as they want, and setting a wallpaper of their own choosing.
Naturally, Windows 7 users hold the ability to grace their desktop with a wallpaper of their choosing quite dear. So when the KB4534310 update broke a function in the user32.dll file making it so any desktop backgrounds that were configured to use the Stretch option were replaced by a solid black background, users were understandably outraged. Much like how having a non-genuine copy of Windows prevents you from changing your desktop background and gives your desktop a permanent black background, this little hiccup does the same thing. If you’ve had your desktop background disappear and be replaced by a dour black background following the final security update for Windows 7, here are two solutions you can use to get your desktop background back:
Solution 1: Uninstall the KB4534310 Update
To combat issues exactly like this one caused by recently installed updates, Windows 7 allows you to manually uninstall selected updates. In order to uninstall the KB4534310 update, you need to:
- Press the Windows key to open the Start Menu.
- Search for “view installed updates“.
- Click on the search result titled View installed updates.
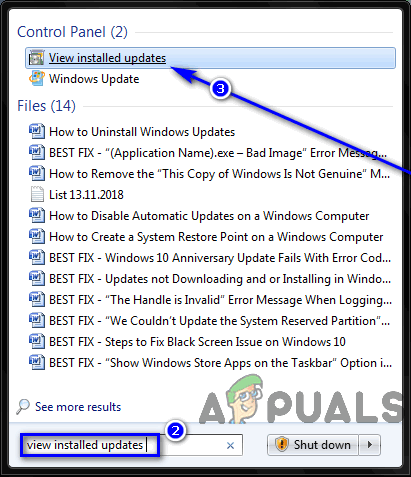
Search for “view installed updates” and click on View installed updates in the results - Type “KB4534310” into the Search Installed Updates field in the top-right.
- In the search results, click on Security Update for Microsoft Windows (KB4534310) to select it.
- Click on Uninstall.

Search for KB4534310, click on it to select it, and click on Uninstall - Follow the instructions provided by the uninstallation wizard all the way through to the end.
- Restart your computer.
When your computer boots up, you should have your desktop background back. Uninstalling update KB4534310 is the most efficient way to get rid of the underlying problem and take back control of your desktop background. However, be warned – update KB4534310 is a collection of security updates for your computer, and uninstalling it may leave your computer at risk. Users who would rather not make their computer any more vulnerable to threats are advised to use Solution 2 instead.
Solution 2: Switch to a Different Picture Position
Update KB4534310 only disables the Stretch picture position option. Even though Stretch is the best option available, there are still others, and switching to one of them will give you your desktop background back. In order to switch to a different picture position, you need to:
- Right-click on an empty space on your Desktop.
- Click on Personalize in the resulting context menu.
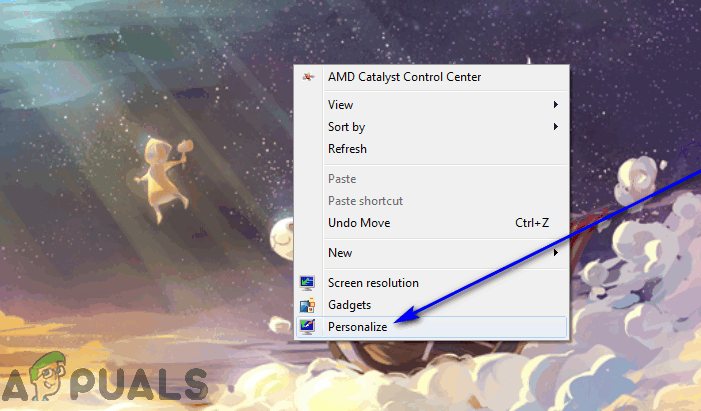
Right-click on your Desktop and click on Personalize - Click on Desktop Background. You will see that the background you had before the update is still selected, your computer simply isn’t displaying it on your desktop.
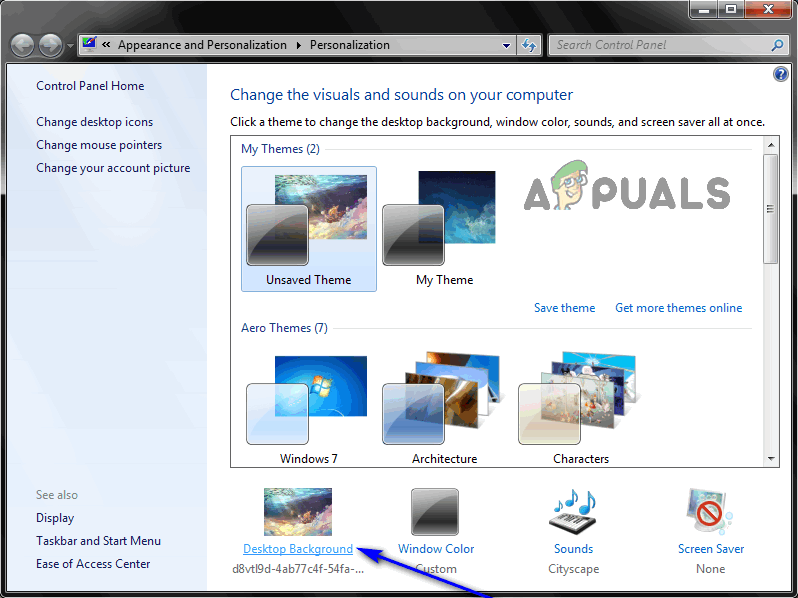
Click on Desktop Background - Open the dropdown menu under the Picture position option.
- Click on any one of the options in the dropdown menu other than Stretch to select it. You may choose whichever option best fits your needs, but we’ve found that the Fill and Fit options most closely preserve the integrity of desktop backgrounds.
Note: If you select the Fit option and your background is not the exact same resolution as the screen resolution you are using, your desktop background may have some black bars on the sides. If that is the case, going with the Fill option would be a better choice. - Click on Save Changes.
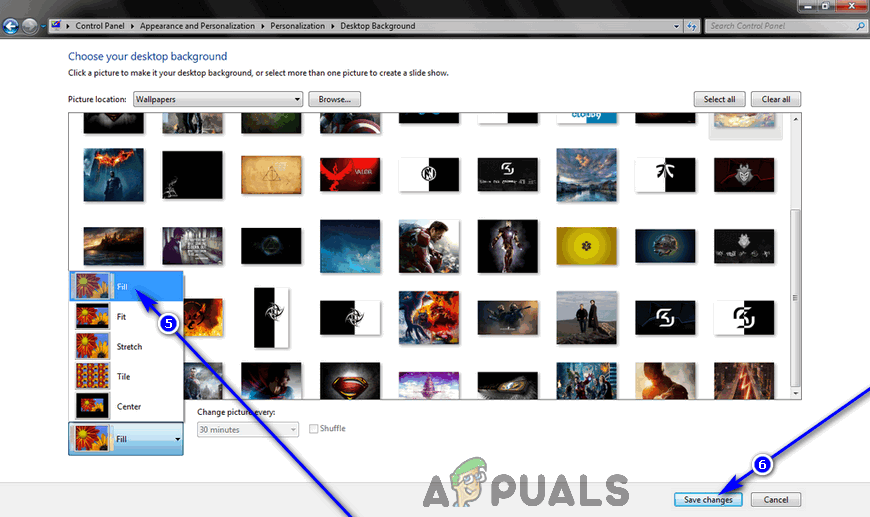
Click on a Picture Position option to select it, and click on Save Changes
You should now have your beloved desktop background back!


