How to Fix ‘Volume Control Not Working’ Issue in Windows 10/11?
The volume control wheel is an essential part of the Windows taskbar. Users can easily control the sound limit from there and go on with their work. However, the volume control in windows 10/11 stops working suddenly sometimes and does not respond. The wheel gets stuck at 100 or any other volume number and the users are unable to adjust it further.

In such scenarios, you have to control the sound from the Video player only. This is of course not the most convenient way for many people. This issue of volume control arises due to an outdated sound driver and a glitch in the audio services.
Restarting the audio services and updating the sound drivers from Device Manager should be your next steps to fix this problem. Including these two methods, below are a total of 9 solutions to eradicate the unresponsiveness of volume control.
1. Run the Audio Troubleshooter
The built-in Audio troubleshooter in Windows will solve most of your audio issues. Running this troubleshooter should be your first priority to fix the volume control. It will scan and detect the problem and then you can go on with the onscreen instructions to resolve it.
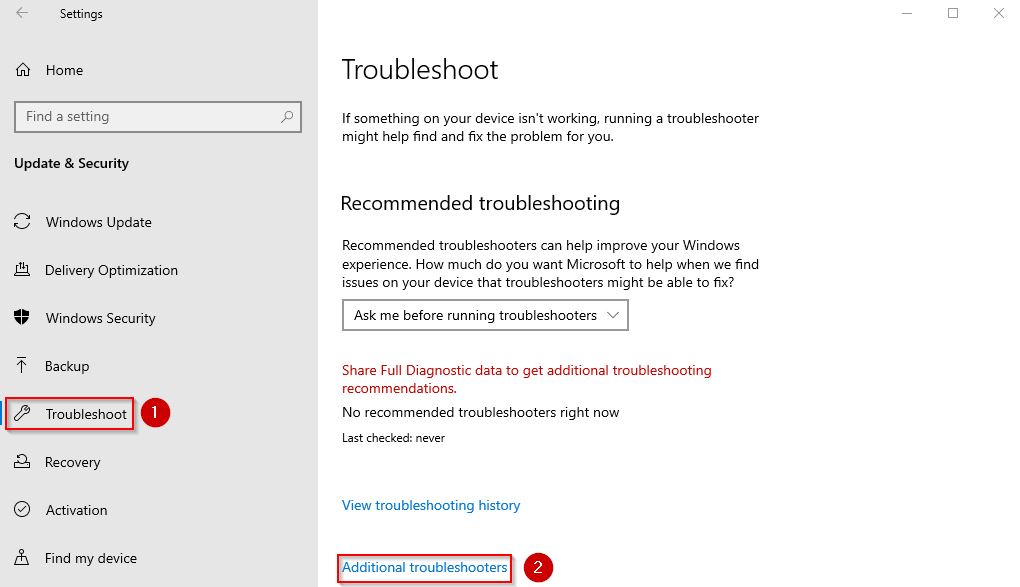
- Press the Win + I keys and type Settings.
- Now go to Updates & Security > Troubleshoot > Additional troubleshooters.
Windows Troubleshoot settings window
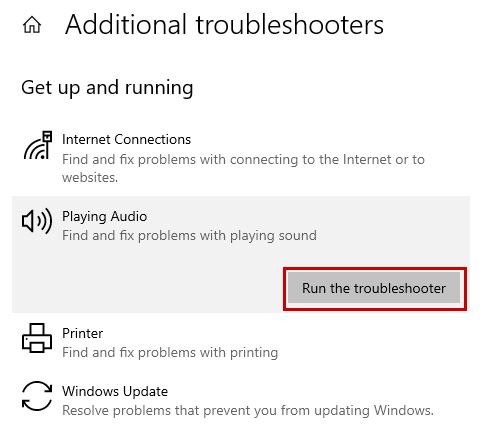
- Click on Playing Audio and then on Run this Troubleshooter.
Run the Playing Audio troubleshooter
- Wait for the scan to complete and the problem to be detected.
- Follow the directions given by the troubleshooter now and rectify the volume control.
2. Restart Audio Services
Windows audio services can stop responding sometimes temporarily due to a glitch or bug. Therefore, the users need to restart these services to give them a fresh kick-off. After the process is complete, your volume control should not lag and start working.
Here’s how to restart the audio services:
- Type Services in the Windows search bar.
- Click on the Services menu.
- From the list of services, scroll to Windows Audio.
- Right-click on it and left-click on Restart.

Restart Windows Audio service
- Now right-click again and go to Properties.
- In the General tab, there will be a Startup Type option.
- Select Automatic as the Startup Type.
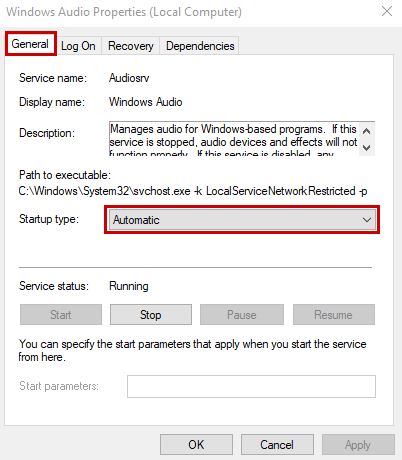
Select automatic startup for Windows Audio Service
- Click on Apply and OK.
- Repeat the same steps with the Windows Audio Endpoint Builder and Remote Procedure Call (RPC) services.
- Once done, see if you can change the volume with the volume control now or not.
3. Restart Windows Explorer
It can be that the problem is not with the audio functions but the Windows Explorer stops working and running properly itself. If this is the case, the volume control may be freezing due to this. You just have to simply restart Windows Explorer and it’ll start operating smoothly again.
Here’s how to do that:
- Press Ctrl + Alt + Dlt together to open Task Manager.
- Under the Processes tab, look for Windows Explorer.
- Right-click on it and then click on Restart.
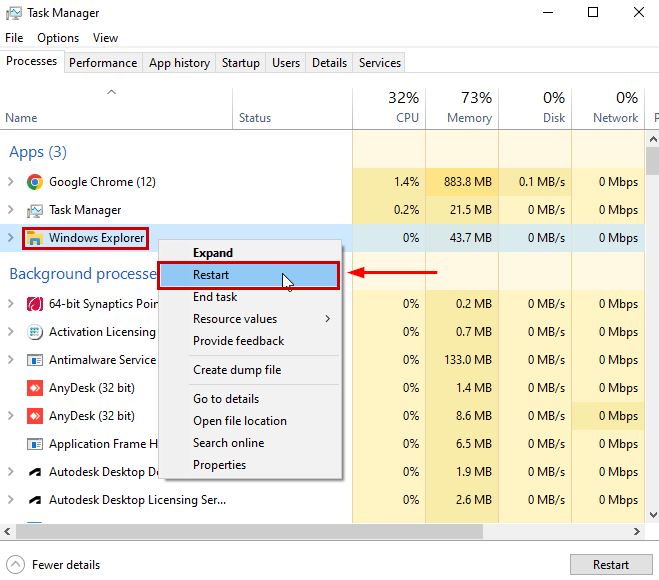
Restart Windows Explorer
- Wait for the Windows Explorer to start and show up again.
- Now check if you can use the volume controller.
4. Terminate the SndVol.exe process
The SndVol.exe process is responsible for controlling the system’s volume settings. The volume controller is linked with the same process as well. Now, SndVol.exe can stop running due to multiple reasons. It can be because of a virus or malfunction.
So all you have to do is simply restart this process by terminating it. The steps are really simple and as follows:
- Open Task Manager with Ctrl+Alt+Dlt.
- Look for SndVol.exe in the processes tab.
- Right-click on it and select End task.
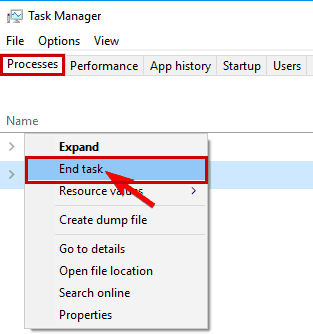
End SndVol.exe process
- Close the Task Manager.
- Now click on the volume control icon and see if it’s working now or not.
5. Update Sound Card Driver
If your sound card driver is outdated, the volume control wouldn’t run properly and also your system will fail to process any sound. To avoid such problems, we suggest updating your drivers after every new update drops to keep your system as efficient as possible.
Follow the steps below to update the audio driver on Windows:
- Open Run with Win + R and type devmgmt.msc.
- Expand the Sound, video, and gaming controllers tab.
- Select Update Driver Software after right-clicking on the audio driver.
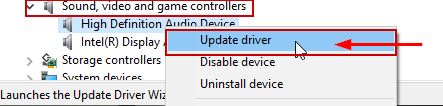
Update driver option
- Click on Search Automatically for Updated Driver Software.
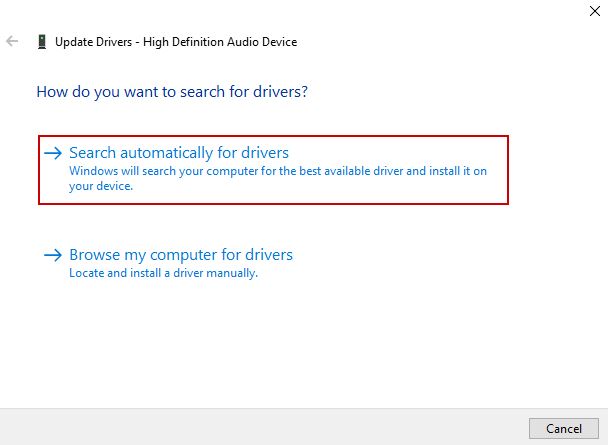
Search automatically for drivers option
- Wait for Windows to search for the updates and install them.
- Now restart your computer.
6. Reinstall the Audio Driver
If there are no updates for the driver, it is better to reinstall it. There are chances for the driver to get glitchy over a period of time. Therefore, reinstalling it will let go of any issues with the audio driver and ultimately fix the issue of the volume control not working.
- From the same Device Manager menu as in the method above, double-click on the Sound, video, and gaming controllers menu.
- Right-click on your sound card driver and click Uninstall.
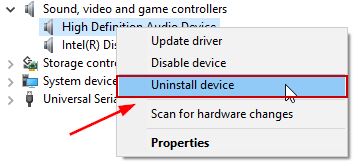
Uninstall device option
- Click on OK and wait for the uninstallation to finish.
- Next, click on Action and then click Scan for hardware changes.
- Now Windows will start installing the audio driver itself.
- Once done, see if you are able to use the volume controller now.
7. Enable Audio Manager for Start-up
The Audio Manager controls the audio driver and is also responsible for handling the volume on your computer. So, enabling the Audio Manager for start-up means that the service will begin as soon as you power on the PC. This will ensure the perfect operation of the volume controller.
- Open Task Manager and move to the Start-up tab.
- Right-click on Audio Manager and select Enable.
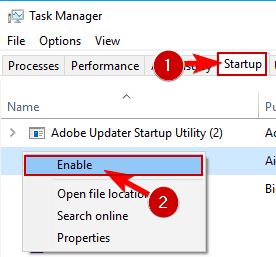
Enable Audio Manager in Startup
- Lastly, Restart your computer after closing the Task Manager.
8. Change your Speaker’s Properties
In this method, you need to change some properties of the audio device that you use with your PC. It can either be its in-built speaker or an external one. We’ll select any one speaker as the default and then tweak a few of its settings.
- Open the Control Panel and click on View by.
- Select Large Icons.
- Navigate to Sound > Playback.
- You’ll see every audio device here.
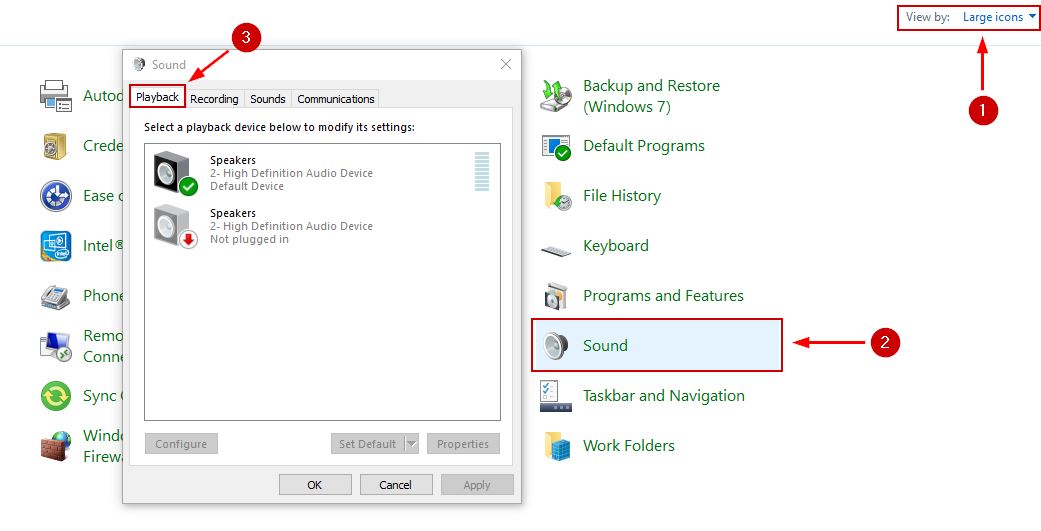
Sound Settings in Control Panel
- Right-click on your preferred speakers and click on Enable and Set as Default Device.
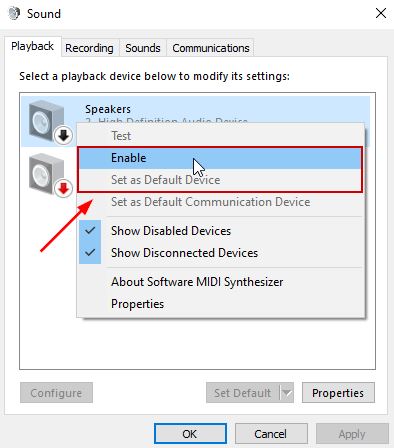
Enable and Set as Default Device options
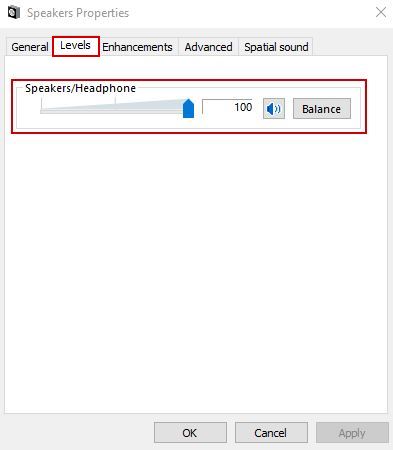
- Right-click on the speakers again and go to Properties.
- Go to the Levels tab and make sure the volume is at 100.
Levels tab in Speakers Properties
- Now go to the Advanced tab and tick mark the Allow application to take exclusive control of this device option.
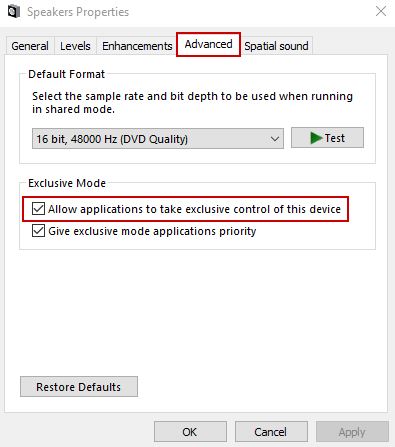
Advanced tab in Speakers Properties
- Click on Apply and OK and check whether the volume control is working now.
9. Reinstall ShellExperienceHost
The Windows Shell Experience Host is basically the graphical user interface (GUI) of Windows responsible for displaying the taskbar, desktop, icons, notifications, and the system tray containing the volume slider.
This can sometimes cause the issue due to improper functioning, so it is recommended to reinstall the package.
Here’s how to reinstall it using Windows PowerShell if the Shell Experience Host has stopped working:
- Type PowerShell in the Windows search bar.
- Select Run as administrator.
- Now paste the following command for reinstalling the ShellExperienceHost package:
Get-AppxPackage Microsoft.Windows.ShellExperienceHost | Foreach {Add-AppxPackage -DisableDevelopmentMode -Register “$($_.InstallLocation)\AppXManifest.xml”}
Windows Shell Experience Host reinstall command
- Wait a while until the reinstallation completes.
- Now restart your PC and start using the volume mixer.
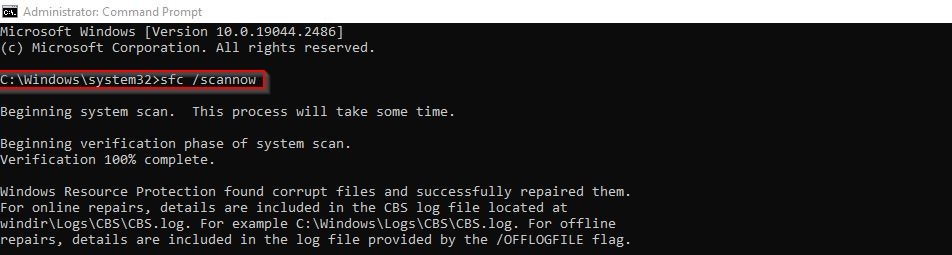
10. Run the SFC Scan
SFC scan determines and repairs any corrupt or error files in the system. As a result, if there’s any malware that is stopping the volume control from operating, this process will identify it and get rid of it.
Here’s how to run the SFC scan on Windows:
- Type CMD after pressing the Win + I keys.
- Select Run as administrator to open the command prompt.
- Now type the command as follows:
sfc /scannow
Windows SFC scan command
- Wait for the scan to complete and fix any problems.
- Finally, check if the volume control is now restored to functioning order or not.


