How to Fix VALORANT Stuck on 0.1KB/s While Installing or Updating
When trying to install or update VALORANT, the download often stops at 0.1KB/s, blocking progress even if the internet is stable. This means the game can’t download update files because of problems on the server or your device.
Common reasons include DNS settings errors, interference from firewalls or antivirus software, or slowed connections. Other reasons might be damaged game files or blocks from your internet service provider.
In this article, we will discuss different ways to solve this error.
1. Uninstall or Disable Third-Party Antivirus Software
Antivirus software protects your system but can sometimes wrongly identify VALORANT’s files or block its updates. Turning off or uninstalling third-party antivirus can remove this issue, allowing the game to download files without any problems.
- Press Win + R to open the Run window.
- Type appwiz.cpl and press Enter to open Programs & Features.
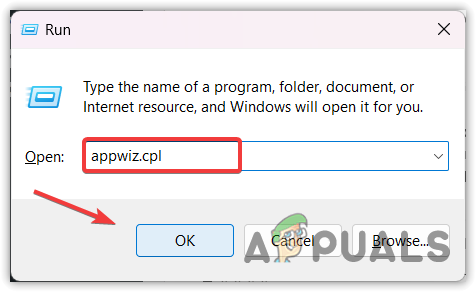
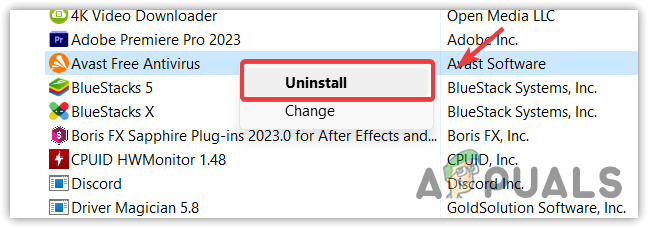
Opening Control Panel Program & Features - Right-click on your third-party antivirus software and select Uninstall.
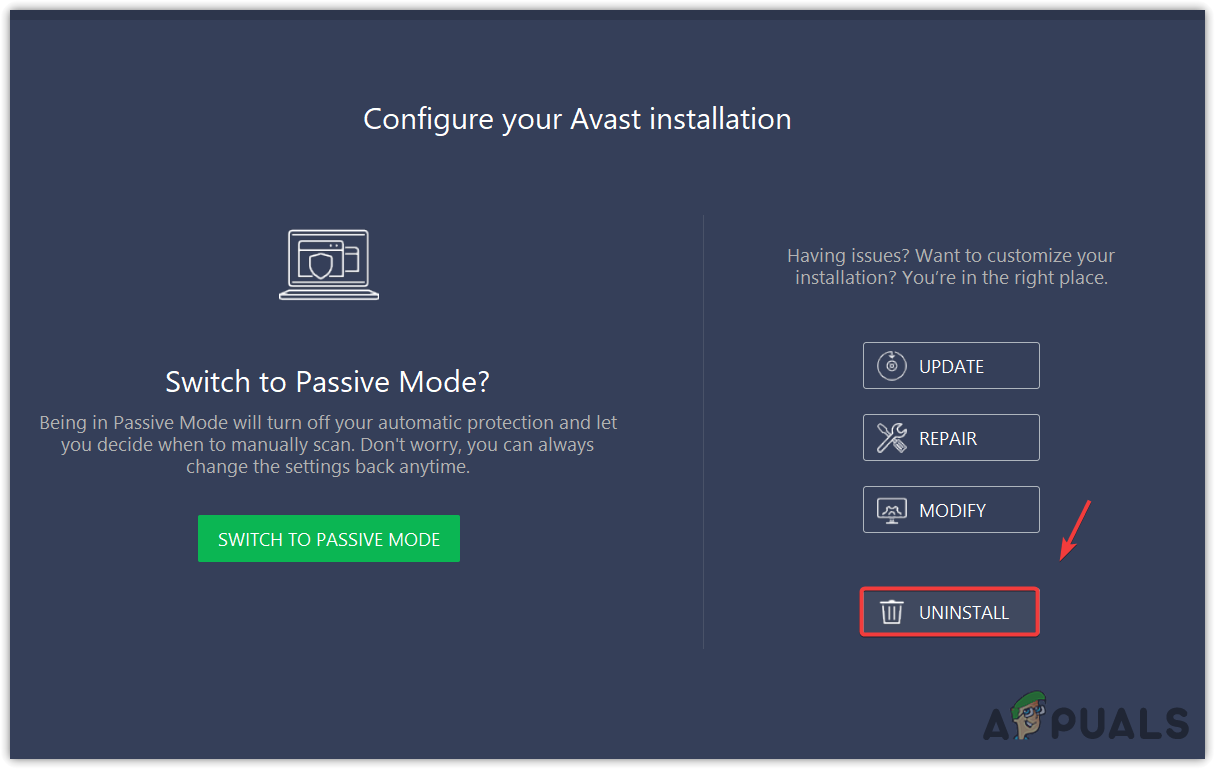
Uninstalling Avast Antivirus Software - In the antivirus setup window, click Uninstall.
- Check if the problem is resolved.
2. Switch to Google DNS
Switching to Google DNS can avoid problems with your ISP’s default DNS servers, which might be slow or struggle to connect to Riot’s servers. Google DNS is known for being reliable and fast, which can help stabilize the connection to VALORANT’s update servers and allow downloads to continue smoothly.
- Press Win + R, type ncpa.cpl, and press Enter to open Network Connections directly.
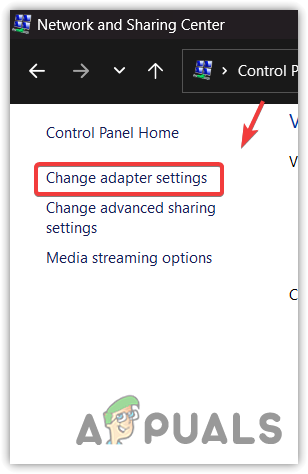
Opening Network Adapter settings to view Network Adapters - Right-click your network adapter and select Properties.
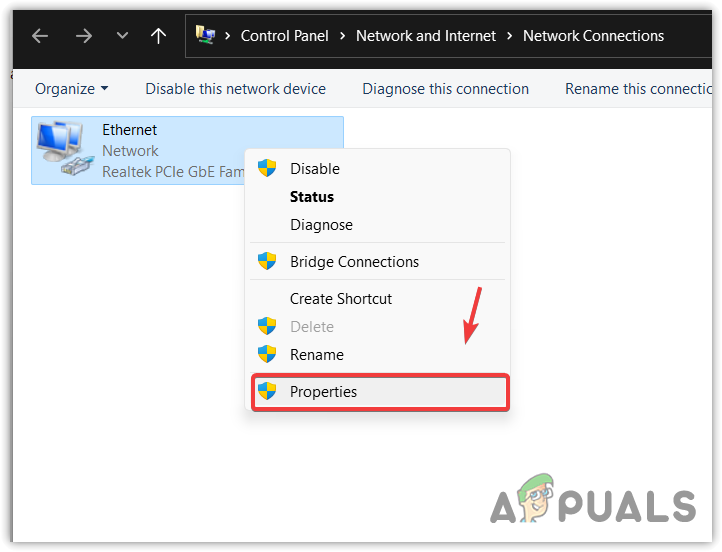
Opening Network Adapter Properties - Select Internet Protocol Version 4 (TCP/IPv4) and click Properties.
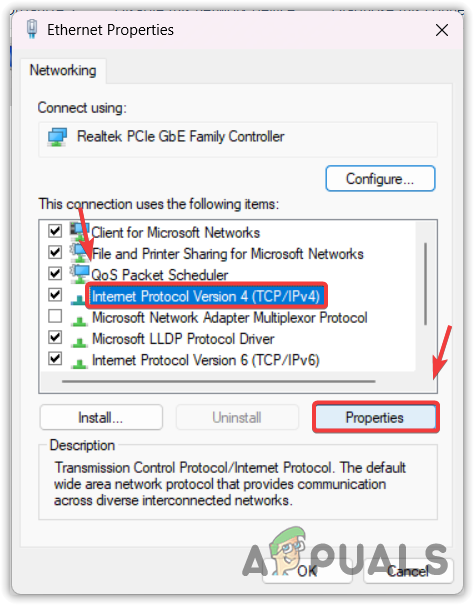
Navigating to Internet Protocol Version 4 properties - Select Use the following DNS server addresses and enter:
8.8.8.8
8.8.4.4
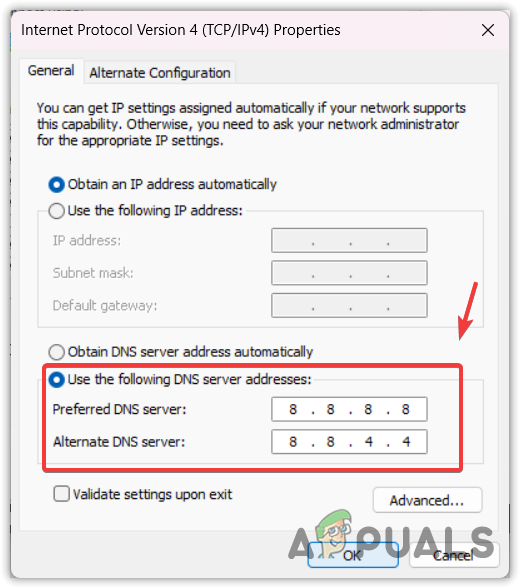
Switching DNS server to Google DNS server - Click OK to save changes.
- Check if the issue persists.
3. End Task on High Bandwidth-Consuming Apps
Closing apps that use a lot of internet, like streaming services or big downloads, helps improve the network speed for VALORANT updates. This reduces the competition for internet, allowing the game client to download files smoothly and quickly.
- Press Ctrl + Shift + Esc to quickly open Task Manager.
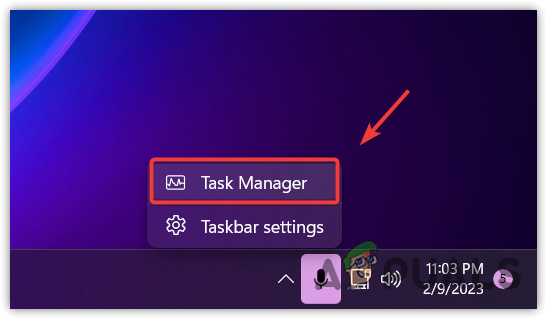
Opening Task Manager by clicking the taskbar - Select the Network tab to sort applications by network usage.
- Right-click any application consuming high bandwidth and select End Task.
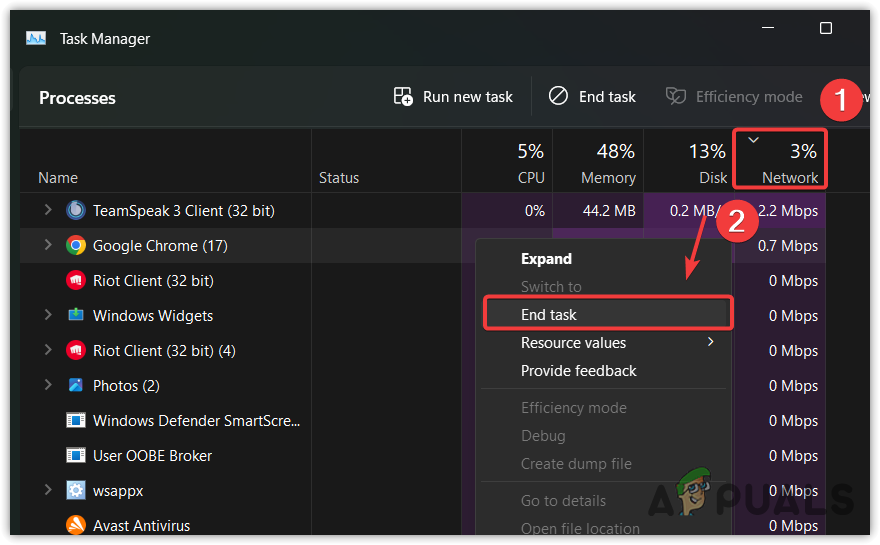
End Tasking unnecessary applications, consuming high network bandwidth - Check if VALORANT is still stuck at 0.1KB/s.
4. Change Riot Client Priority to High
Increasing the Riot Client’s priority makes sure your system gives it more resources. This can fix download speed issues caused by not enough system bandwidth. Setting it to “High” gives the client priority over other tasks, reducing interference and improving update speed.
- Press Ctrl + Shift + Esc to open Task Manager quickly.
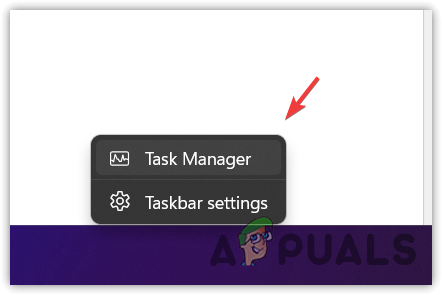
Opening Task Manager - Go to the Details tab.
- Right-click on RiotClientService.exe, hover over Set Priority, and select High.
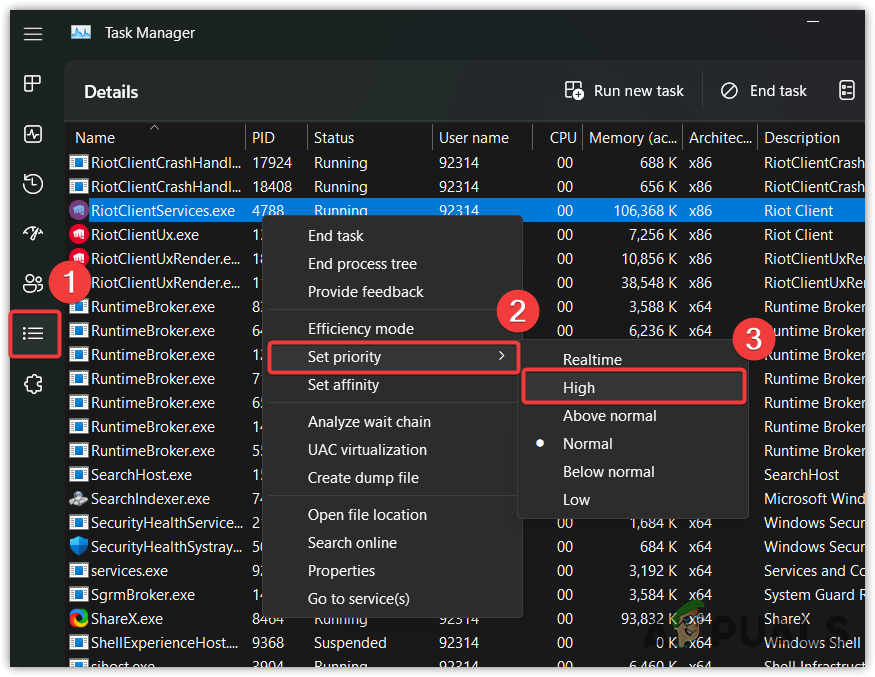
Changing Riot Client Priority to High - Repeat these steps for all Riot Client processes.
- Restart the Riot Client launcher and check if the issue is fixed.
5. Reset Network Settings
Sometimes, wrong network settings or old settings can quietly cause connection problems. Resetting network settings removes stored data, brings back default settings, and fixes issues that might stop VALORANT from downloading updates correctly. This step ensures a new, stable connection to Riot’s servers without any issues.
To learn more, visit How to Reset Network Settings.
- Press Win + R, type ms-settings:network-status, and press Enter to go directly to Network & Internet settings.
- Scroll down and click Network Reset, then click Reset Now. This will restart your computer and apply new network settings.
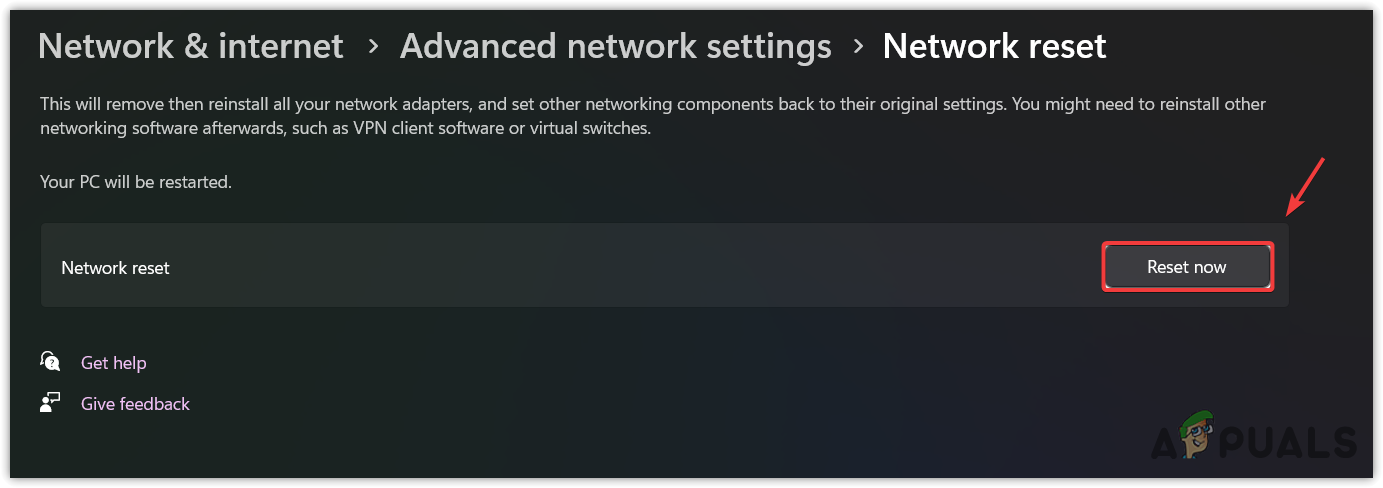
Resetting Network Settings - Once done, launch the Riot Client and check if your problem is resolved.
6. Disable IPv6 Protocol
Modern networks often use IPv6, but many apps, like VALORANT, mainly use IPv4 for stability. Turning off IPv6 can prevent compatibility problems that might disrupt the game’s downloads or updates. This change streamlines network routing, reducing potential problems and improving connection reliability during updates.
- Press Win + R, type ncpa.cpl, and press Enter to open Network Connections directly.
- Right-click on your network adapter and select Properties.
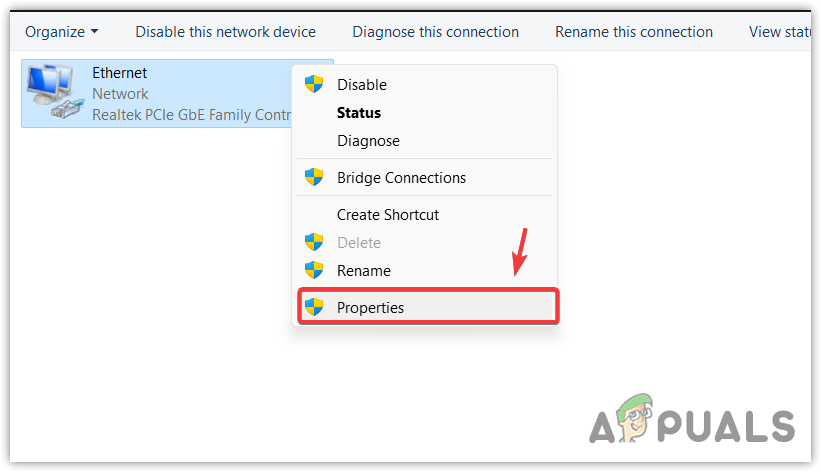
Opening Network Adapter Properties - Untick Internet Protocol Version 6 (TCP/IPv6), then click OK.
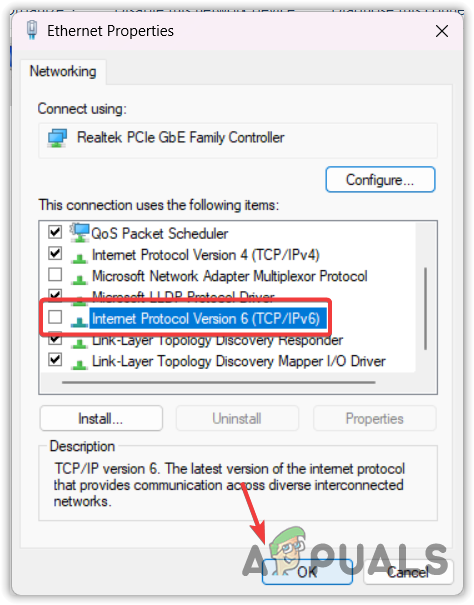
Disabling Internet Protocol Version 6 - Check if your problem is fixed.
7. Allow Riot Client through Firewall
Firewalls protect your system by blocking unknown or unauthorized apps. Letting the Riot Client through your firewall allows it to connect to Riot’s servers without issues, preventing download speed problems. This step removes obstacles and helps the client download and install updates smoothly.
- Press Win + R, type firewall.cpl, and press Enter to open Windows Defender Firewall directly.
- Click on Allow an app or feature through Windows Defender Firewall.
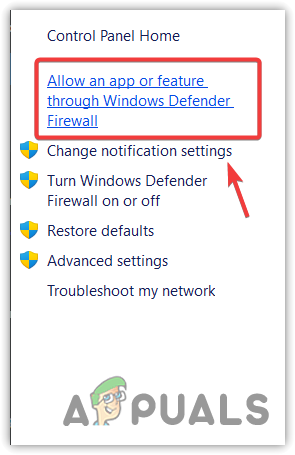
Opening Windows Firewall Settings - Click Change Settings, then find and check the Private and Public boxes for the Riot Client.
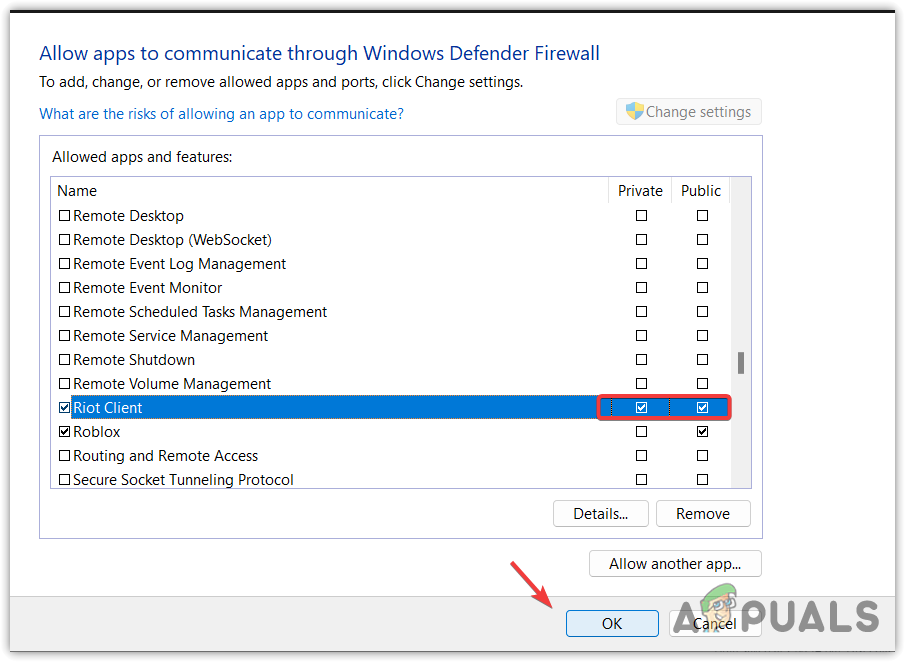
Allowing Riot Client from Windows Firewall Settings - If the Riot Client isn’t listed, click Allow another app, navigate to its location, select it, click Open, and then Add.
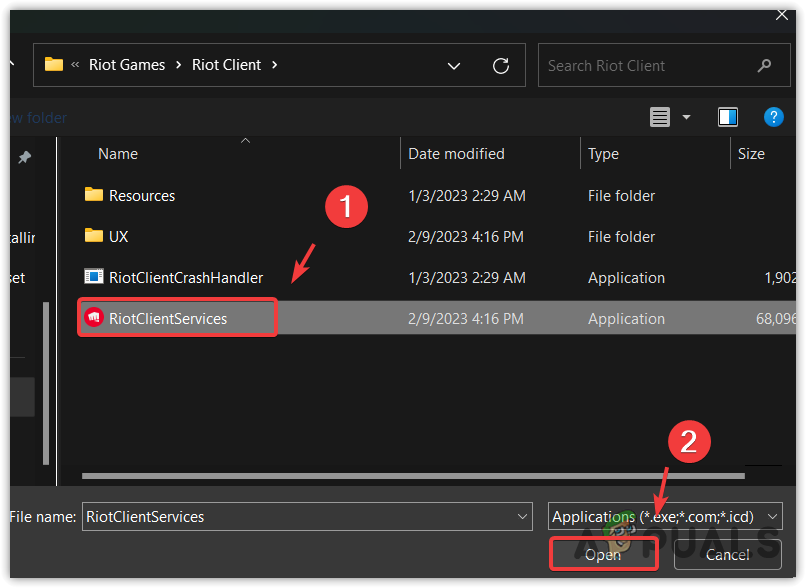
Adding Riot Client to Windows firewall settings - Close the window and launch the Riot Client launcher to check if the issue is resolved.
8. Use Mobile Data (if applicable)
Switching to mobile data can avoid problems with your main network, like slowdowns from your internet provider or blocked connections. This alternative helps you connect to Riot’s servers without issues, allowing the download or update to go smoothly.


