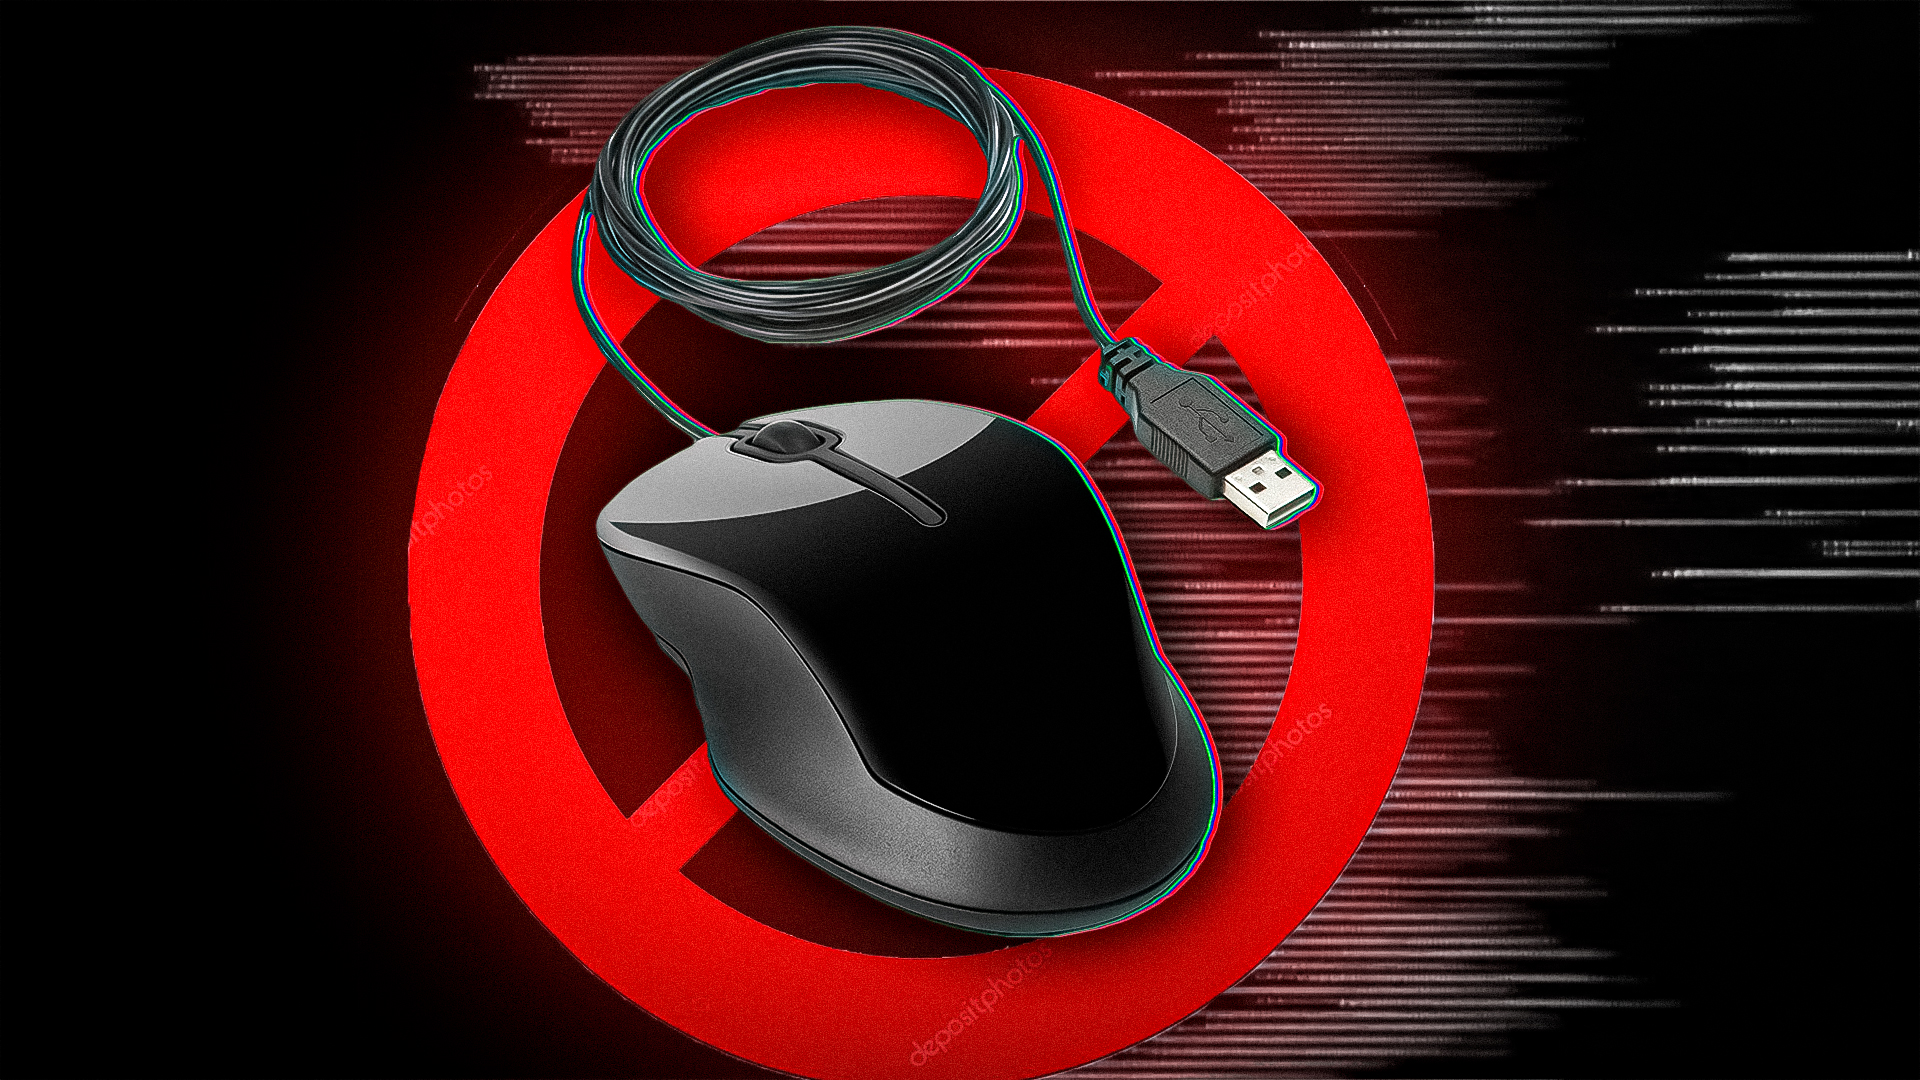
How to Fix Mouse Not Working Issue in Windows?
A non-responsive USB mouse can severely interrupt your workflow, making it impossible to navigate your system. This issue often occurs when Windows fails to recognize the mouse, typically due to a corrupted driver or hardware malfunction.
Common causes include USB port failures, outdated or incompatible drivers, and incorrect USB port power management settings. Before diving into technical troubleshooting, ensure the mouse is securely connected and properly powered.
This article is fully compatible with the keyboard, which means you don’t need a mouse to apply the following methods.
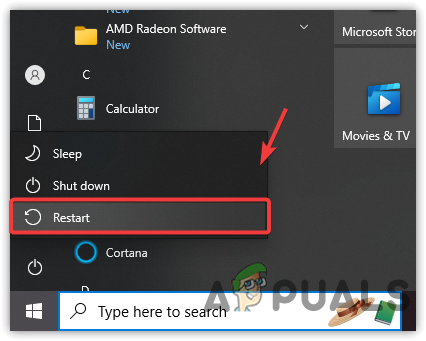
1. Restart your machine
The best way to start troubleshooting the USB mouse is to restart your computer because it could be possible that the USB ports are not able to receive power from the motherboard. Hence, the USB mouse stopped working suddenly. Therefore, try restarting the computer or a laptop by following these steps:
- Press Ctrl + Esc to open the Start Menu Window.
- Press Tab until you select the bottom left options.
- Then, press the down arrow key to select the Power button.
- Then, hit Enter to see the power options.
- Use the arrow keys to select the Shut down button.
- Then, press Enter to shut down your system.
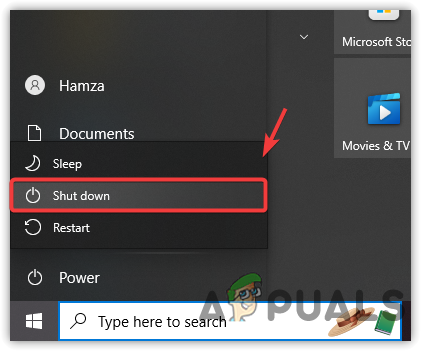
Shutting down the computer - Once your system is shut down, press the power button to turn on the system.
- Once done, check if the mouse starts working again.
2. Reinstall the USB mouse driver
If your USB mouse driver is not working or gets corrupted, you will encounter this issue. To resolve this, you need to reinstall the USB mouse driver. Windows has its own drivers for the mouse, keyboard, network adapters, and other input and output devices, so you don’t need to worry about installing the driver.
When you restart your computer after uninstalling the USB mouse driver, Windows will automatically detect and install the default USB mouse driver for your computer or laptop. To reinstall the USB mouse driver, follow these steps:
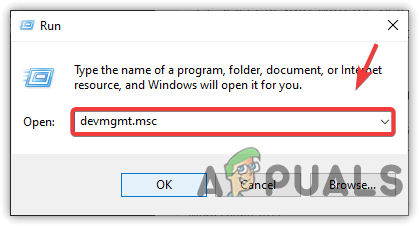
- Press the Win + R keys simultaneously to launch the Run Window.
- Type devmgmt.msc in the search box and hit Enter.

Opening Device Manager using the Run command - Press the Tab key to select the options in the device manager.
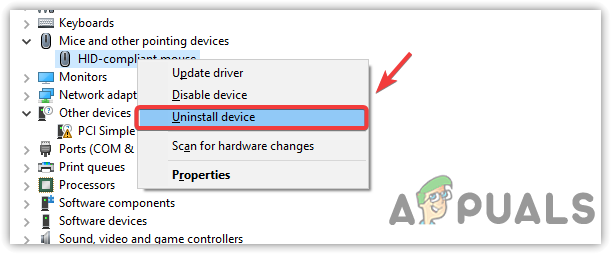
- Then, press the down arrow key until you reach the Mice and other pointing devices.
- Once you have selected the Mice and other pointing devices menu, press the Alt + Right arrow key to expand the group.
- Now, press the down arrow key to select the HID-compliant mouse.
- Press Shift + F10 to view the options.
- Select Uninstall device with the help of the down arrow key.
- Then press Enter to uninstall the driver.
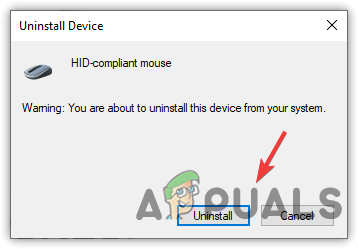
Selecting Uninstall device - Again press Enter to confirm.
Uninstalling Mouse device - Once done, press the Windows key.
- Then, press the Tab until you select the options on the left pane.
- Press the down arrow key to select the Power button.
- Press Enter to see the power options.
- Select Restart with the help of the arrow keys.
Restarting computer - Then, press Enter to restart your system.
3. Enable the USB mouse from the device manager
Your USB mouse might be disabled from the device manager. You need to open the device manager to check whether it is disabled or not. If it is disabled, you need to enable it to get your USB mouse working again.
- To open the device manager, press the Win + R keys together to open a Run Window.
- Enter devmgmt.msc in the search box, and press the Enter key.

Launching Device Manager - Once the device manager is opened, press Tab to select options in the device manager.
- Use the down arrow key to select Mice and other pointing devices.
- Once you have selected Mice and other pointing Devices, press the Alt + Right Arrow keys to expand the menu.
- Then, press the down arrow key to select the HID-compliant mouse driver, which is your USB mouse.
Opening Mouse driver properties - Press the Enter key to open the USB mouse properties.
- Then, press the Tab key until you select the Enable Device option.
- After that, press the Enter key to enable the device.
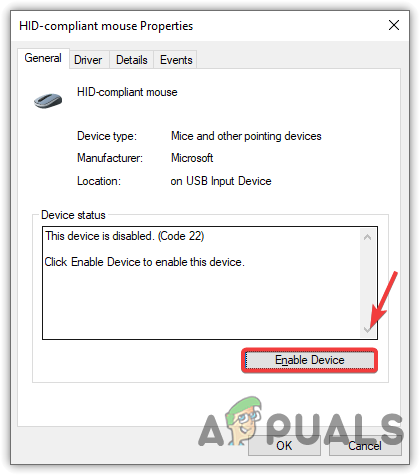
Enabling the Mouse driver from the device manager - Again press the Enter key to enable the USB mouse.

Enabling the Mouse driver by clicking Next - Once done, the issue should be fixed.
4. Change USB Power Management settings
Power management settings can be used to increase battery timing and save power. When you allow a device to turn off to save power, it will turn off, but just when a user signs out or puts a computer in sleep mode. However, in most cases, this option causes many devices to turn off when needed. Therefore, try disabling this option by following these steps:
- Open the Run Program by pressing the Win + R keys together.
- Then, type devmgmt.msc and press Enter to open the Device Manager.
Navigating to Device Manager - Once the device manager is opened, press the Tab key to select the computer name.
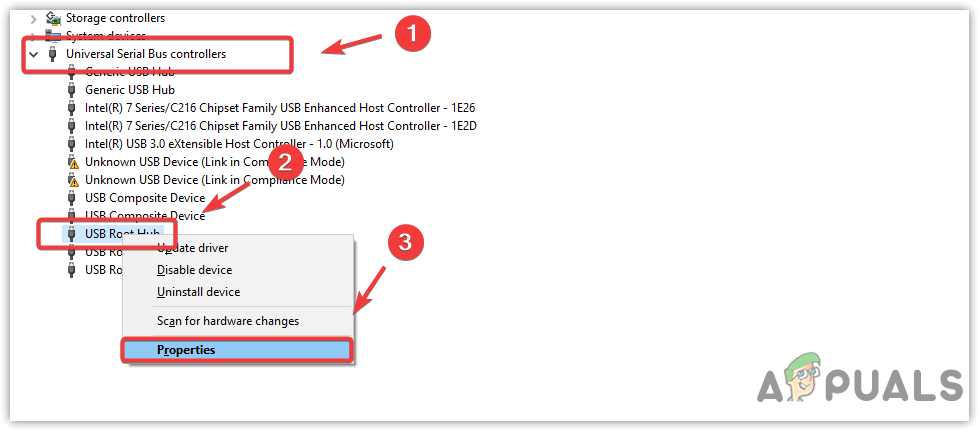
- Then, press the down arrow key to select the Universal Serial Bus controllers.
- Once you select, press the Alt + Right arrow key to expand the group.
- Now select the USB Root Hub by pressing the down arrow keys.
Note: You might not know which USB Root hub port is for your mouse. Try applying this method to all of them and ensure none of the USB Root Hub ports are disabled. - Press Shift + F10 to open the menu
- Select Properties by using the down arrow key
- Press Enter to open the device properties.
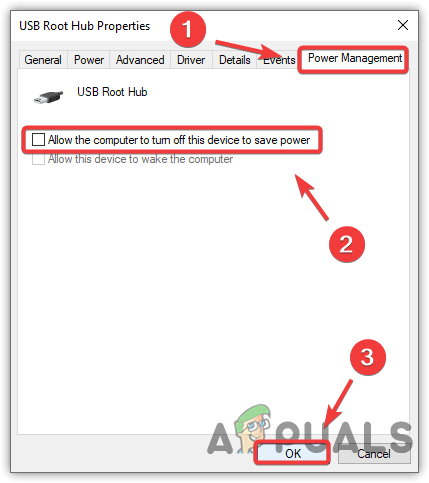
Navigating to USB Mouse port properties - Press the Tab until you select General from the top.
- Then, with the help of the right arrow key, select Power Management from the top.
- Then press Tab to select Allow the computer to turn off this device to save power.
- Press Ctrl + Space to deselect this option.
- Once done, press Tab to select OK.
- Press Enter to save the changes.
Changing Power Management Settings - Press Alt + F4 until you close all the Windows.
- Then, you will need to restart your computer. For that, press the Windows key to open the Start Menu.
- Press Tab until you select the options on the left pane.
- Then, with the help of the down arrow key, select the Power button.
- When the power button is selected, press Enter to see the power options.
- Select Restart by using the arrow keys.
- Then, press Enter to restart.

Restarting the computer for the changes to take effect - Once done, check if the issue is fixed.
5. Plug your USB mouse into another port
Another possible reason for your USB mouse to stop working suddenly is a faulty USB port. If the USB port stops working, your USB mouse won’t work either. Therefore, try changing the USB port to see if the issue persists or not. If it is fixed, that means the USB port was broken.
6. Check for hardware issue
If none of the methods have worked, then it is probably a hardware issue. You can confirm this by plugging the mouse into another computer or laptop. If it still doesn’t work, then you need to consider buying a new mouse.
Method 9.5 Exit out of any external game controller program. Shutting off dualshock 4 for windows made my mouse work 😀