How to Fix Update Error 0x800f0381 in Windows 10/11
The update error 0x800f0381 occurs when the users try to install the latest updates on their computers. It typically occurs while installing cumulative updates.

The following error code can be caused by a bunch of reasons, such as corruption errors within the system, the update itself being faulty, and incompatibility issues.
1. Run the Windows Update Troubleshooter
If you receive an error code when downloading or installing Windows updates, you can use the Update Troubleshooter tool to fix it. The utility was designed by Microsoft and checks the system for potential issues that are preventing updates from being installed.
Upon completion of the scan, it will let you know if any issues have been found. The troubleshooter will most likely also suggest fixes that can be applied directly from the program.
Here is how you can run it:
- Press the Win + I keys together to open Windows Settings.
- In the Settings window, navigate to System > Troubleshoot >Other troubleshooters.
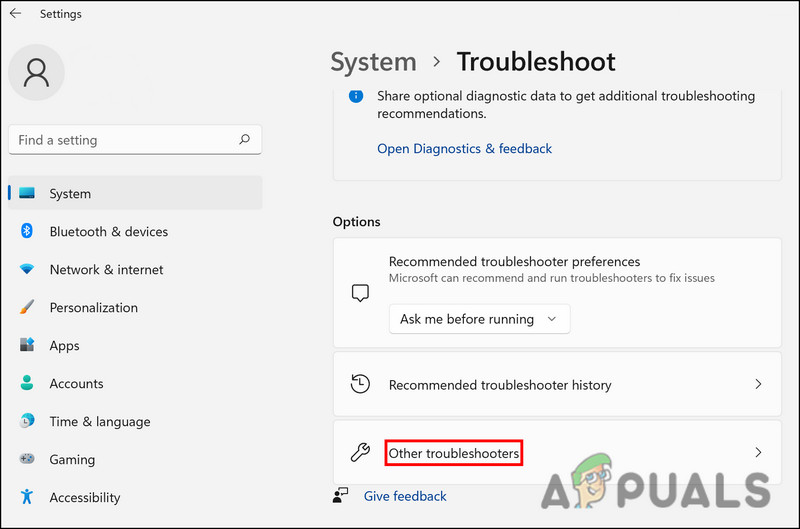
Click on Other troubleshooters - Head over to the Windows Update troubleshooter and click on the Run button. The troubleshooter should begin scanning.
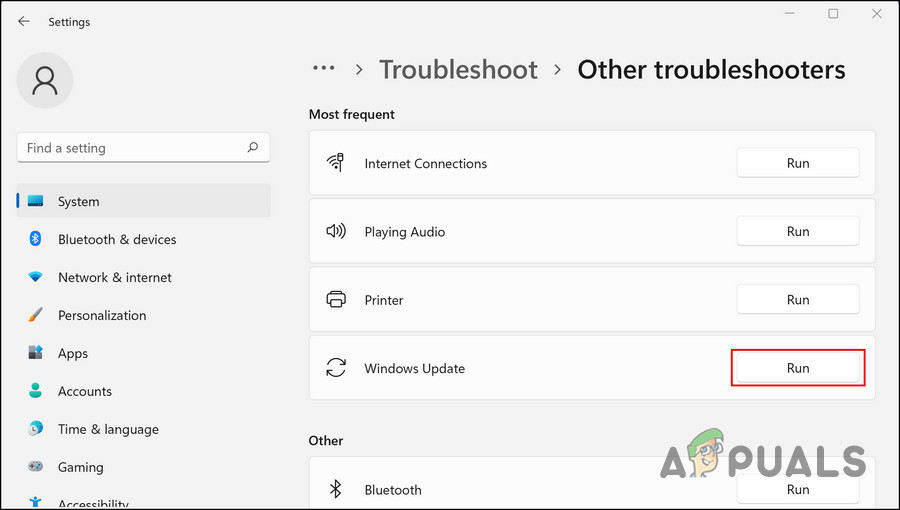
Run Windows Update Troubleshooter - Once the process is complete, check if any issues were identified by the tool.
- If it did, then click on Apply this fix to proceed with the solutions. Otherwise, click on the Close the troubleshooter option.
You may also want to run SFC and DISM while you’re at it, since they’re powerful troubleshooting utilities. The tools work by scanning the system files for errors via Command Prompt.
In case of any issues, both tools will resolve them without any significant input from you.
2. Reset the Windows Update Services and Cache
Installing updates requires the relevant services to be enabled and working correctly. If any of these services are acting up, you may have problems installing the update.
To resolve this issue, it is best to reset the required components and services to their default states. We have created a batch file for this purpose, which will use Command Prompt to perform these actions. All that you need to do is install the file and run it with administrative privileges.
Here is all that you need to do:
- Download the batch file by clicking on this link.
- Click on the Download anyway button.
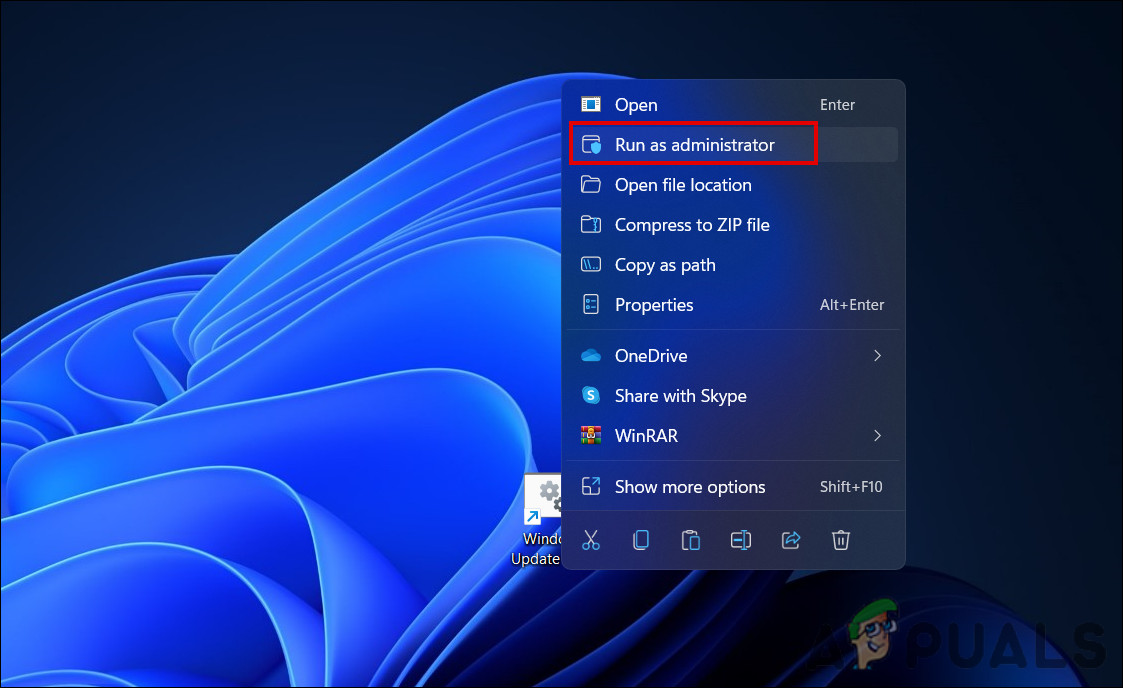
- Right-click on the file after it has been downloaded and choose Run as administrator.
Run the bat file as administrator - In the following security dialog, click on More info > Run anyways.

Run the bat file - Now, click Yes in the User Account Control prompt.
- Let the process finish now, and once done, restart your computer. Upon reboot, check if the issue is resolved upon reboot.
3. Install the Updates Manually
In some cases, the system fails to automatically install updates due to a corruption error. You can use the Microsoft Update Catalog to manually install targeted updates in this case. This platform allows you to install the updates directly on the system, skipping the download process.
The Microsoft Update Directory lists all the updates released by Microsoft, and you can install those that are required.
Follow these steps to proceed:
- Launch your browser and navigate to the Microsoft Update Catalog.
- In the search bar at the top, type in the KB number of the update you want to install.
- Click Enter.
- Your computer should now display a list of all the available updates. Click on the Download button for the one that is best suited to your device specifications.
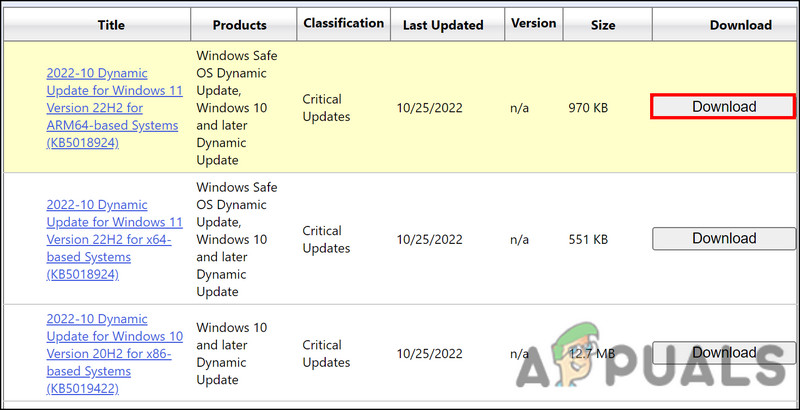
Click on the Download button - To install the update, click on the update file and follow the instructions on your screen.
Hopefully, you will be able to install the update without any problems.
4. Reset or Clean Install Windows
Lastly, you can try resetting or reinstalling Windows if none of the troubleshooting methods worked.
A Windows reset won’t wipe out your files or folders since Windows offers the option to keep them. Alternatively, if you want to proceed with a clean install, you should save your important files somewhere else, because it will wipe the system clean.
4.1 Reset Windows
To proceed with a reset, follow these steps:
- Press Win + I to open the Settings app.
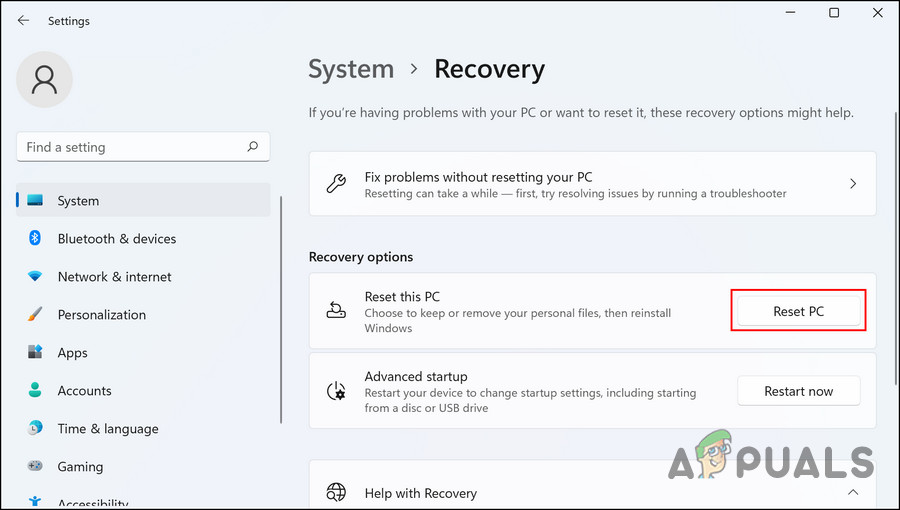
- In the left pane, select System, and on the right side, click Recovery.
- In the Recovery Options section, click Reset PC.
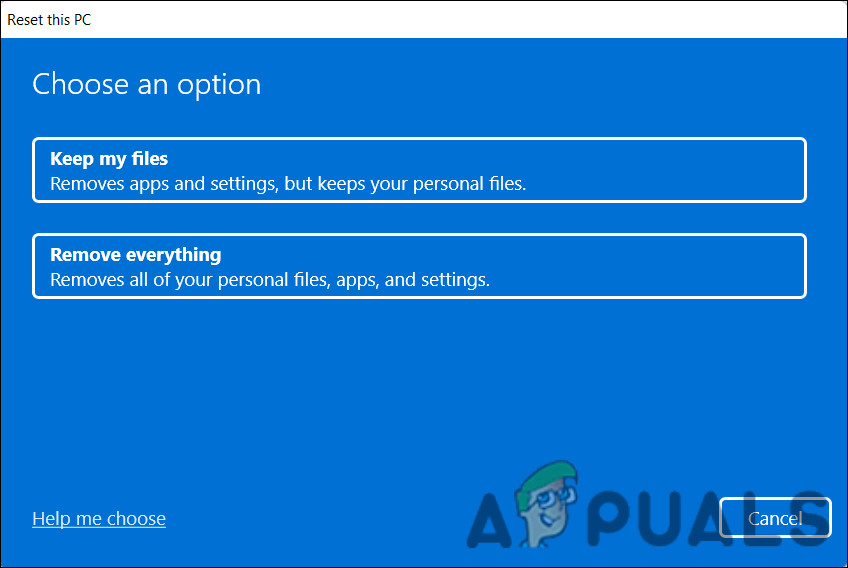
Click on the Reset PC button - Click Keep my files or Remove everything in the following Reset this PC window.
Choose if you want to keep your files or remove everything - After that, you will be prompted to choose how to reinstall Windows. You can either reinstall Windows locally or from Microsoft’s servers using the files on your computer. Choose one to proceed.
- To change any option that you previously selected, click the Change settings option and then click Next.
- Finally, click on the Reset button and wait for the system to reset.
4.2 Clean Install Windows
To proceed with a clean install, follow these steps:
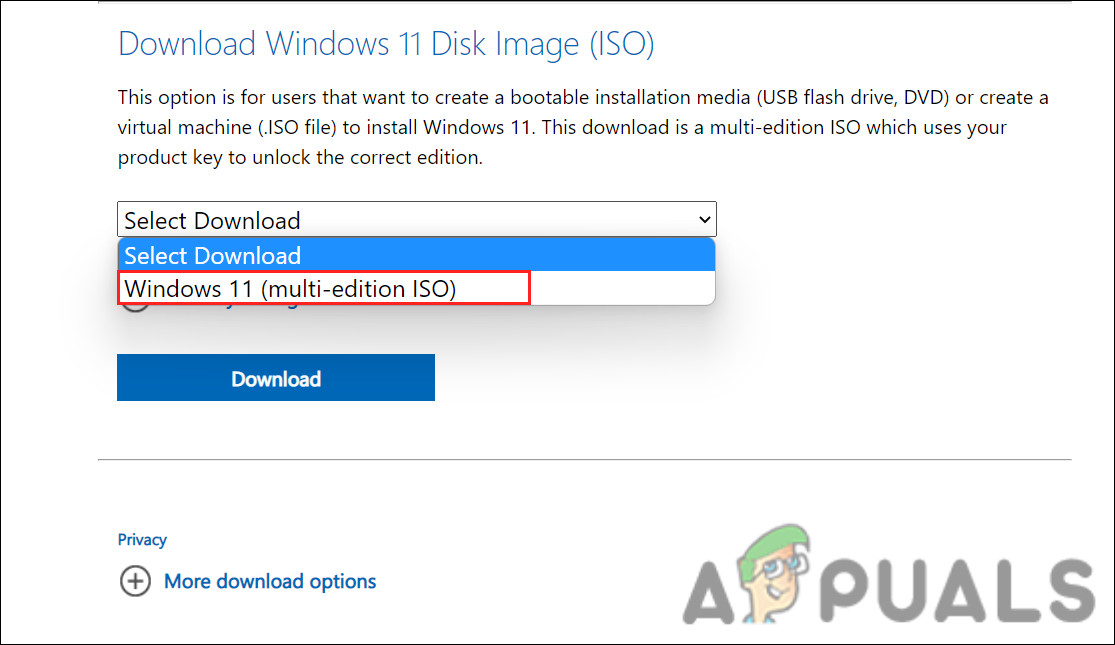
- Navigate to the official Microsoft Support team.
- Expand the drop-down menu associated with Download Windows 11 Disk Image (ISO) and click on Windows 11.
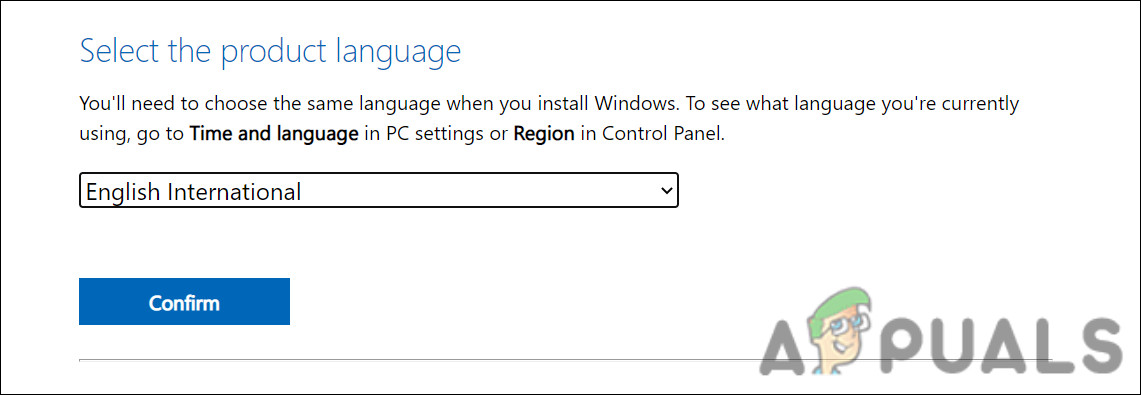
Choose Windows 11 ISO - Click Download, select a language, and then click on Confirm.
Choose a product language - Now, select Download again.
- After the download process is complete, right-click the downloaded file and select Mount.
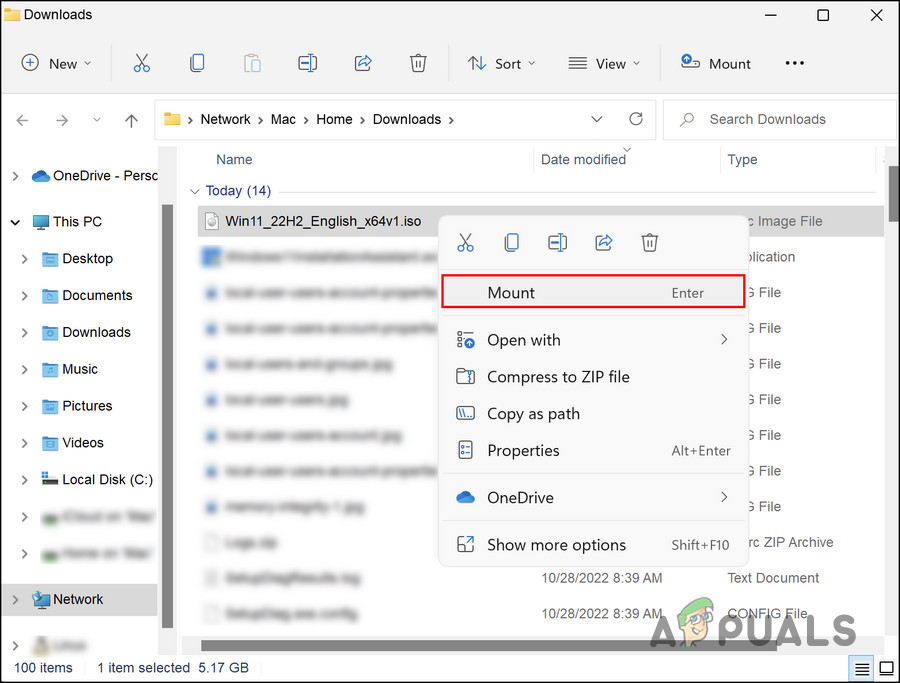
Choose Mount from the context menu - When finished, locate and double-click the Setup file. This will begin the installation process.
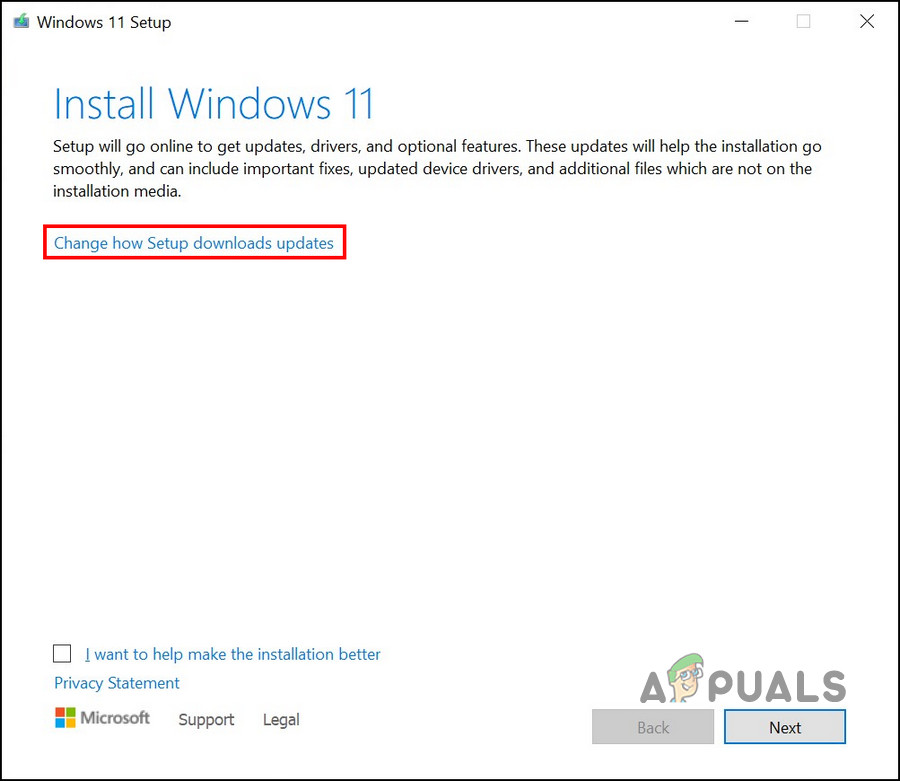
- Click on Change how Setup downloads updates and choose Not right now > Next > Accept.
Click on ‘Change how Setup downloads updates’ option - Now, click on Change what to keep > Nothing in the next dialog.

Click on Change what to keep - Click Next and then hit Install.
- In the out-of-the-box experience dialog, select your region.
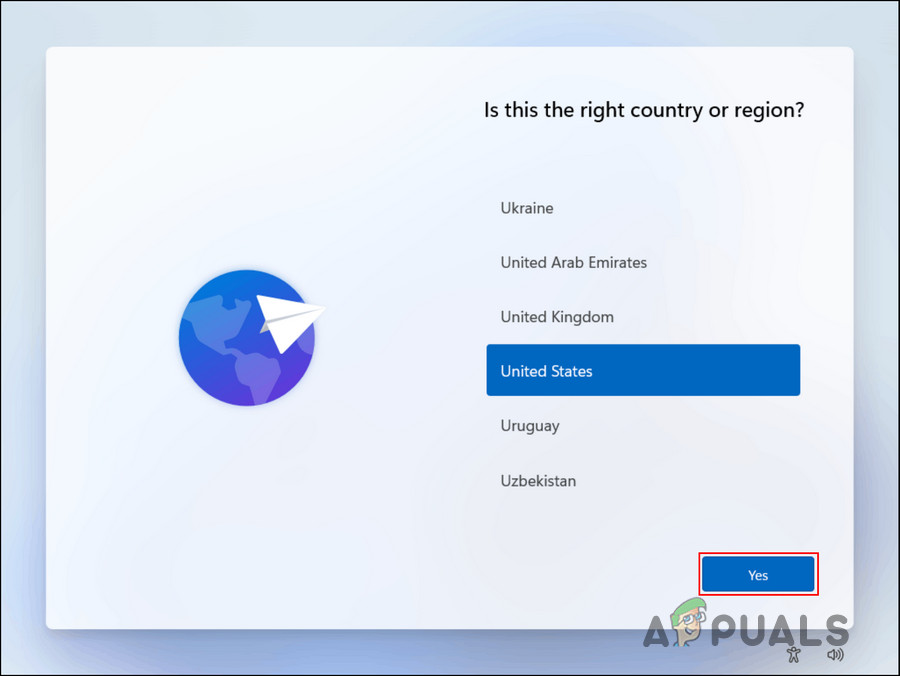
Choose a region and hit Next - Hit Yes.
- Now, choose a keyboard layout setting.
- Follow the instructions on the screen to proceed.
- You will then be prompted to sign in with your Microsoft account.
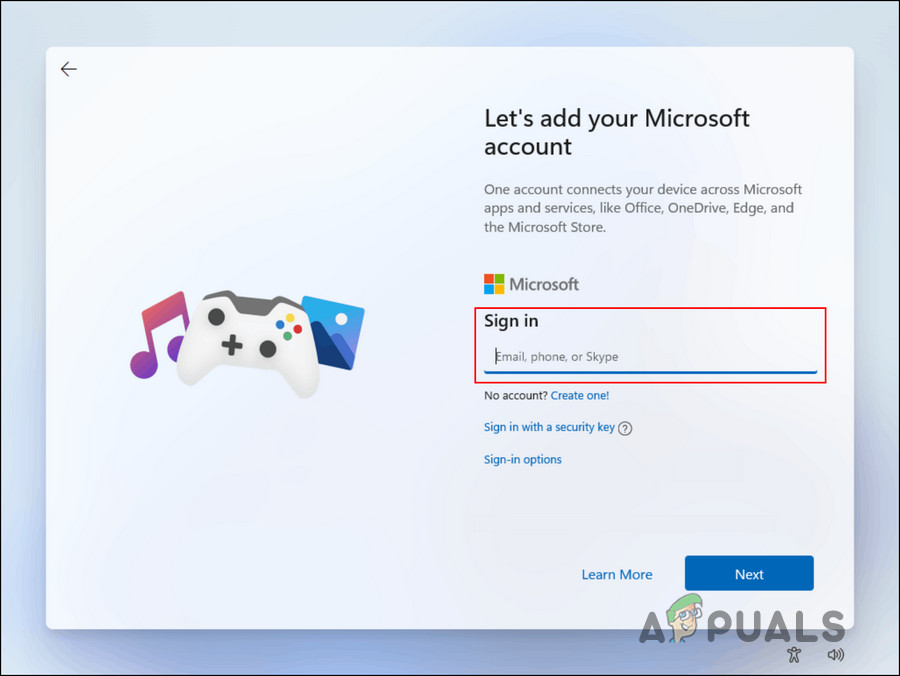
Sign into your Microsoft account - Follow the on-screen instructions to proceed.
- Click the Next button > View more options.
- Choose the Set up a new device option.
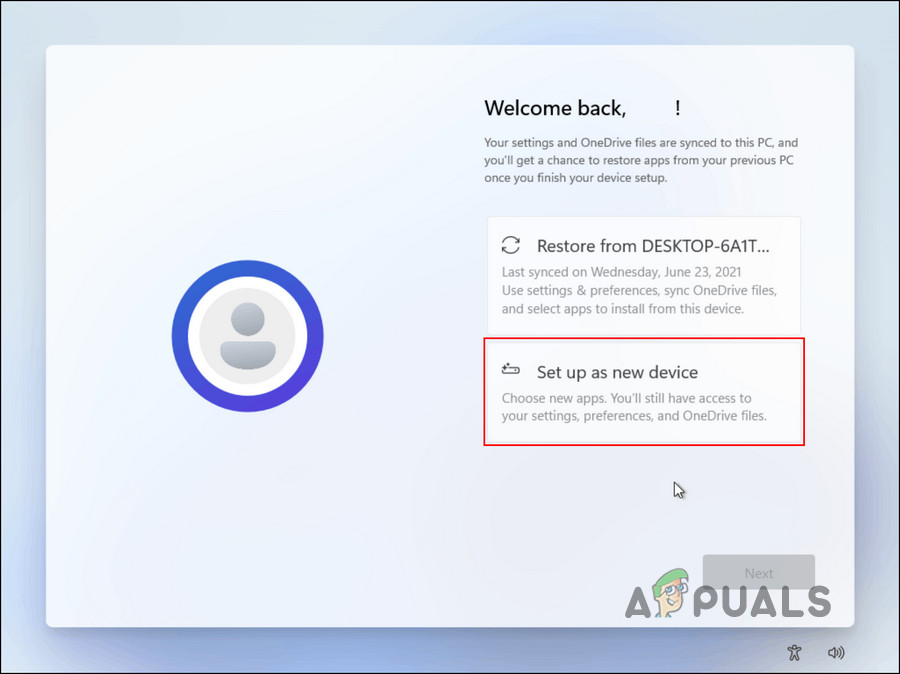
Click on the Set up a new device option - Click Next.
- Select the Create PIN button to create a new PIN.
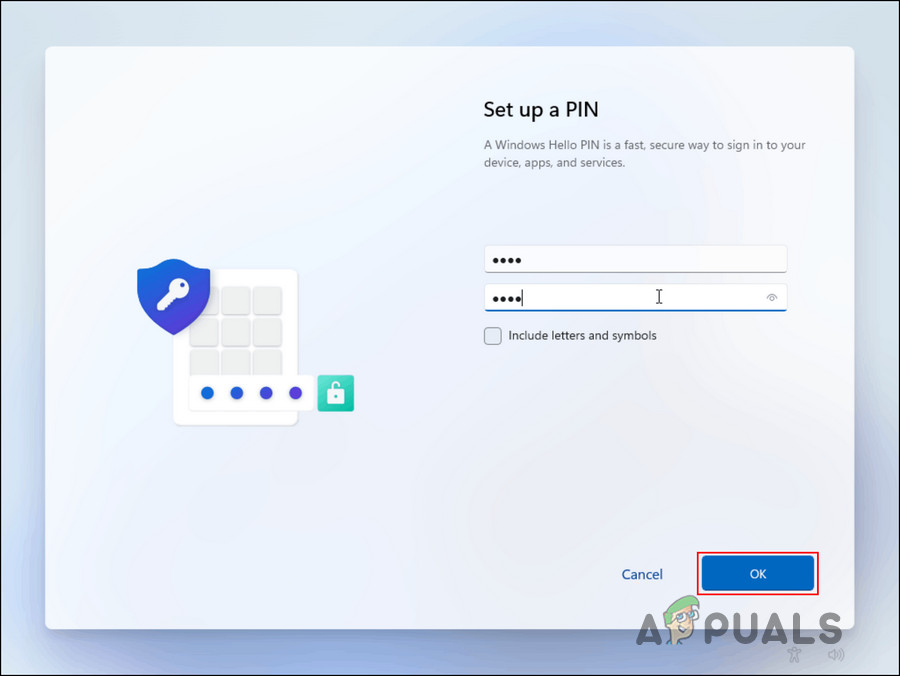
Set up a new PIN - Once done, click Next.
- Click Next in the following two dialogs.
- Choose Accept.
- In the next dialog, you’ll be able to customize your preferences. To skip, click on the Skip button.
- Now, select whether you want to automatically save the files to OneDrive.
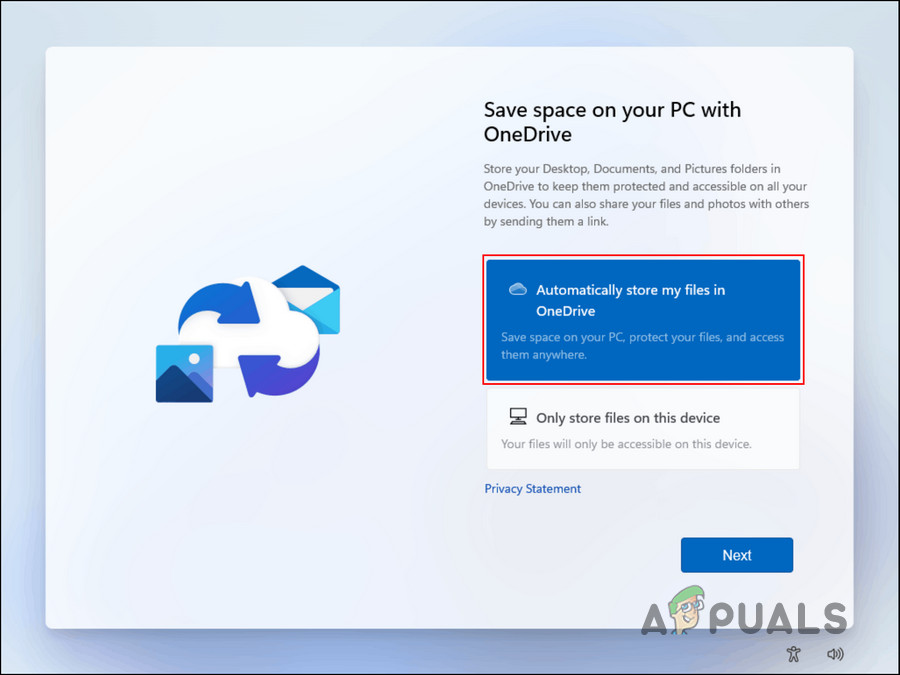
Choose if you want to save your files to OneDrive - Click Next > Decline > Skip for now.
A clean installation will then be started after this is completed.
5. Clean Install NVIDIA Driver (If Applicable)
This method is an extension of the one we discussed above. Several users noticed that after resetting/clean installing their Windows, the update issue is resolved but at the same time, the NVIDIA driver stops working.
To fix that problem, you can clean install the driver as well. Here is how:
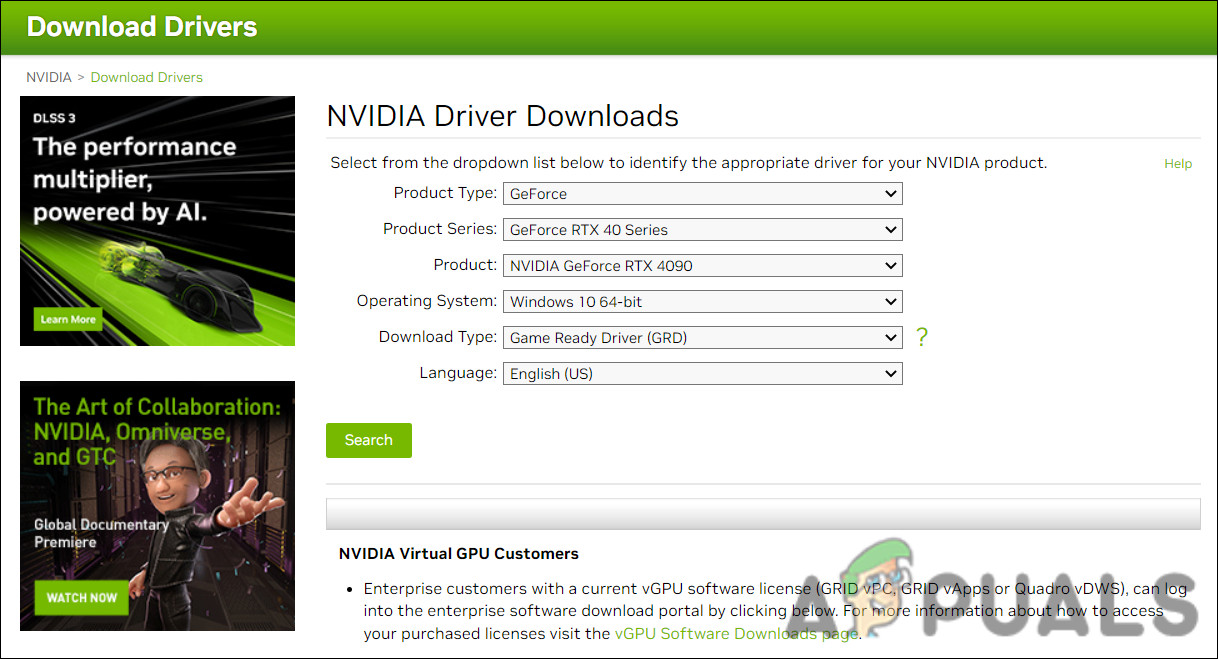
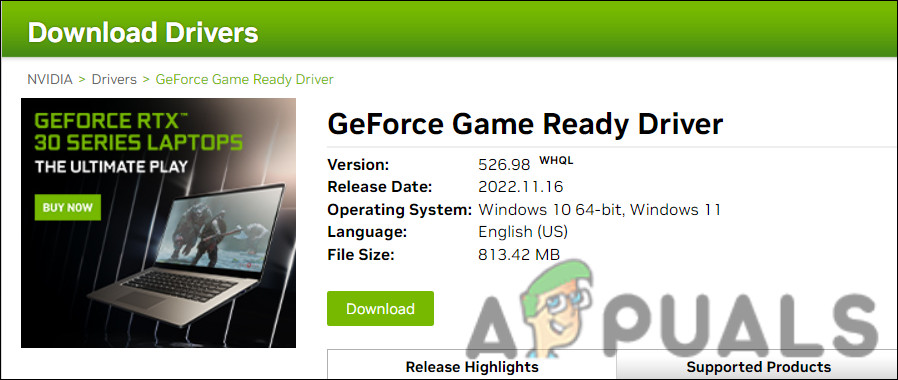
- Navigate to the NVIDIA Driver Downloads page.
- Choose the Product Type, Product Series, Product, Operating System, Download Type and Language, and then click on the Search button.
Search for the targeted driver - Click Download associated with the most appropriate result and wait for the process to complete.
Click on the Download button - Once the driver is downloaded, right-click on it and choose Run as administrator.
- Click Yes in the UAC prompt.
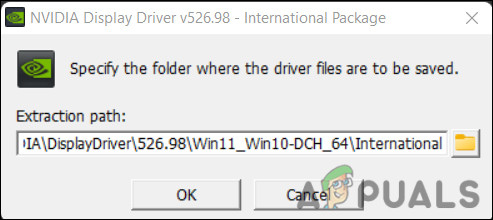
- You will be asked where you want to save the temporary driver files. Clicking on the OK button will give you the default path.
Pick a path - Select the components you wish to install, and then click AGREE AND CONTINUE.
- Choose Custom (Advanced) > NEXT.
- Now, click on Perform clean install > NEXT.
- After the installation is complete, reboot your computer to complete the process.


