How to Update BIOS on Any Motherboard?
BIOS (Basic Input/Output System) is low-level firmware stored on the motherboard that starts your computer, tests the hardware, and initializes the boot process before the operating system loads. It also manages communication between the OS and devices such as the keyboard, storage drives, and graphics card.

In addition, BIOS stores system configuration settings (for example, boot order and security options), allowing you to control how the hardware behaves before Windows loads. (On most modern PCs, this firmware is technically UEFI, but manufacturers still commonly refer to it as “BIOS”.)
Quick breakdown:
- Starts your computer and runs basic checks.
- Tests the hardware before the OS loads.
- Initializes the boot process and hands off to Windows.
- Stores settings like boot order and security options.
Why Should You Update BIOS?
Keeping the BIOS up to date is important because updates can add support for newer CPUs and RAM, improve stability, patch security issues, and fix bugs that may cause crashes or boot problems.
However, you should not update BIOS “just because an update exists”.
Only proceed when you need it (for example, CPU/RAM compatibility, stability fixes, or a security patch), and only if you are sure you are using the correct BIOS file for your exact motherboard model (including the correct revision, if your board has one).
Safety Notes Before Updating
Before you start (quick checklist):
- Do not turn off your PC during the BIOS update.
- Use a stable power source (or a UPS).
- Close unnecessary programs.
- Avoid updating during a power outage risk.
- If the screen goes black or the system restarts multiple times during the first boot after updating, do not interrupt it (this can be normal).
Below are step-by-step instructions to update BIOS on popular motherboards, including MSI, ASUS, Gigabyte, ASRock, Biostar, NZXT, Colorful, Maxsun, and more.
On this page:
How To Update BIOS On MSI Motherboards
MSI methods included:
- Method 1: M-Flash (Recommended)
- Method 2: Flash BIOS Button (Supported MSI Models)
Method 1: M-Flash (Recommended)
- Press the Windows key and search for System Information.

- Look for your motherboard’s model (and revision, if shown).

- Visit the official MSI support website and search for your exact motherboard model.

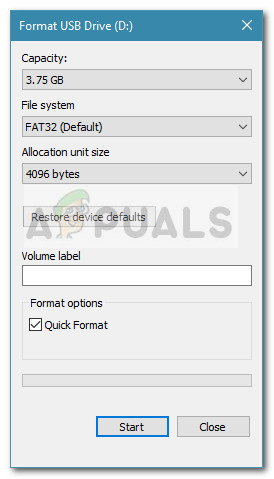
- Plug in your USB drive, then right-click it > Format > format it as FAT32.
- Extract the downloaded BIOS file, then copy it to the USB drive (formatted as FAT32).

- Restart your computer and press the DEL key repeatedly to enter the BIOS setup.
- Click M-FLASH from the BIOS menu.

- Click Yes to enter M-Flash mode.

- Once the system enters M-Flash mode, select the BIOS file from the USB drive.

- Confirm the update.

- Wait until the process completes and the system reboots automatically. Do not power off the PC even if the screen is blank for a short period.
Method 2: Flash BIOS Button (Supported MSI Models)
Some MSI motherboards include a Flash BIOS button, which can update the BIOS without installing a CPU, RAM, or graphics card. This is most useful when the system does not boot or when installing a new CPU that requires a newer BIOS.
- Download and extract the correct BIOS file for your motherboard.
- Rename the BIOS file as instructed by MSI (commonly MSI.ROM).

- Copy the file to a FAT32 formatted USB drive and plug it into the dedicated Flash BIOS USB port.

- Press the Flash BIOS button after plugging in the USB.

- Wait until the LED indicator stops blinking, which confirms the update is complete. Do not remove the USB while the LED is blinking.
How To Update BIOS On ASUS Motherboards
ASUS methods included:
- Method 1: ASUS EZ Flash 3 Utility
Method 1: ASUS EZ Flash 3 Utility
- Look up your motherboard’s model (for example, in System Information).
- Download the correct BIOS file for your motherboard from the ASUS support site.

- Extract the BIOS file.

- Open the BIOSRenamer tool to rename the BIOS file correctly.

- Press any key to rename the BIOS file.

- Format your USB drive as FAT32.

- Copy the renamed BIOS file to the USB drive.
- Restart your computer and keep pressing F2 or Del to enter the BIOS.
- Click Advanced Mode (F7).

- In Advanced Mode, open the Tool menu.

- Select ASUS EZ Flash 3 Utility.

- Select your USB drive and the BIOS file.

- Click Yes to proceed.

- Click Yes again to confirm the BIOS update.
- Your system will restart and the update process will begin.

How To Update BIOS On GIGABYTE Motherboards
GIGABYTE methods included:
- Method 1: BIOS From Windows (@BIOS)
- Method 2: Q-Flash (Recommended)
Method 1: BIOS From Windows (@BIOS)
Note: Updating from Windows can be more prone to interruption. If your motherboard supports Q-Flash, that method is often safer.
- Check your motherboard model in System Information.

- Go to the Gigabyte motherboard support page and open the page for your exact model (and revision, if applicable).
- Scroll down and click Utility.

- Download and install App Center and @BIOS (availability may vary depending on the page layout).

- Extract and install App Center.
- Your system may restart automatically after installation.
- Extract and install @BIOS.

- Download the latest BIOS file for your motherboard.

- Extract the BIOS file.
- Go to App Center > @BIOS > Update from file.

- Browse and select the extracted BIOS file.
- Confirm the update, and the BIOS will start updating automatically. Do not use the PC during the flash and avoid background tasks that could trigger a restart.
Method 2: Q-Flash (Recommended)
- Download the exact BIOS file for your motherboard (including revision, if your board has one).
- Extract the file and copy it to a USB flash drive formatted as FAT32.
- Restart your computer and boot into the BIOS.
- Click the Q-Flash option in BIOS.

- In the Task tab, click Update BIOS.

- In the File tab, select the USB drive and BIOS file, then click Next.

- Click Yes to update the BIOS.

- Press Start to begin updating the BIOS.

- Your PC will restart once the BIOS update is complete. Do not interrupt the first boot, even if it takes longer than usual.
How To Update BIOS On ASRock Motherboards
ASRock methods included:
- Method 1: Instant Flash
- Method 2: USB BIOS Flashback (Flashback Button/Port)
Method 1: Instant Flash
- Confirm your motherboard model in System Information.

System Information - Visit the official ASRock support page and download the latest BIOS for your exact motherboard model (including the correct revision, if listed).

- Extract the downloaded ZIP file.

- Format the USB flash drive as FAT32.

- Copy the BIOS file to the USB drive (formatted as FAT32).
- Restart your computer and press Del or F2 during boot to enter the BIOS setup.
- In BIOS, go to Instant Flash.

- The utility will list only compatible BIOS versions from your USB drive.
- Select the BIOS version you want to flash.
- Confirm and allow the BIOS to update. The system will restart when finished.

- After rebooting, enter BIOS again, load UEFI Defaults, then Save & Exit.

Method 2: USB BIOS Flashback (Flashback Button/Port)
- Download the latest BIOS for your ASRock motherboard.
- Extract it and rename the file to CREATIVE.ROM.

- Format a USB flash drive as FAT32 and copy the CREATIVE.ROM file to the USB drive.
- Plug the USB into the USB BIOS Flashback port.

- Press the BIOS Flashback switch for 3 seconds until the LED begins blinking.

- Wait for the LED to stop blinking. This signals that the BIOS update is complete. Do not remove the USB while the LED is blinking.
How To Update BIOS On Colorful Motherboards
Colorful motherboards may not offer as many update utilities as ASUS, MSI, or Gigabyte, but they still provide a straightforward BIOS upgrade process using the built-in flash utility in the BIOS menu.
- Visit the official Colorful support website and download the latest BIOS file for your exact motherboard model.

- Extract the downloaded ZIP file and copy the BIOS file to a USB flash drive formatted as FAT32.
- Restart your PC and press DEL or F2 to enter the BIOS setup.
- In the BIOS, look for BIOS Settings.

- Select the BIOS file from the USB drive.

- Click Quick Update, then click OK.

- Once the update is complete, restart your computer and boot normally. If the first boot takes longer than usual, do not interrupt it.
After Updating
If your system boots successfully, consider entering BIOS once to confirm settings such as boot order, XMP/EXPO, and fan curves (if you previously customized them). If the update resets settings, re-apply your preferred configuration and save changes.