How to: Uninstall Cygwin on Windows
Uninstalling software can be quite difficult on Windows, especially if you uninstall software which can’t be uninstalled simply by using the wizard or the uninstall utility. Some tools don’t provide these options and they need to be removed manually. This can be quite difficult at certain occasions, especially if you really need to remove the file as soon as possible if it’s infected with malicious software.
If the program you need to uninstall does not show up in Control Panel >> Programs and Features nor in the Settings >> Apps, you might need to find a different approach to the issue.
Uninstalling Cygwin
Cygwin is quite a popular tool used by some more advanced users and the software was released way back in 1995. It allowed its users to run Linux and UNIX applications within a UNIX-like interface, making it easier for them to test them out on a Windows PC. It’s an open source tool and it’s currently being maintained by Red Hat employees and various volunteers.

The real issue regarding this program is the fact that there is no way to uninstall it by any conventional means and you will have to perform some advanced operations in order to get rid of it.
Solution 1: Using Command Prompt
The real problem regarding the uninstallation of Cygwin is the fact that users often get the “permission denied” message when they try to delete Cygwin files and folders. We will avoid this problem. Using Command Prompt feels somewhat unsafe to inexperienced users but this is definitely one of the best ways to go because it’s rather easy to copy the following instructions and get the job done in no time.
- Stop any Cygwin services from running before you begin working on anything. Use the instructions located on their official FAQ to remove the services still running. The usual installed services are: sshd, cron, cygserver, inetd, apache, postgresql.
- If there are come Cygwin processes running in the background, terminate them using Windows Task Manager.
- Search for “cmd” or “Command Prompt”, right-click on it, and select Run as administrator.
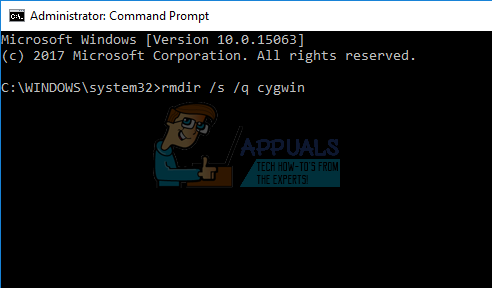
- Use the following command to gain ownership over the Cygwin folder in no time:
takeown /r /d y /f cygwin
- The next command is going to give everyone full access to the Cygwin folder so that you can delete it no matter which account you are using.
icacls cygwin /t /grant Everyone:F
- This last command is going to delete the entire folder along with all subfolders.
rmdir /s /q cygwin
- Delete everything that might have remained such as Start Menu and desktop shortcuts, etc.
- Delete everything in the Software\Cygwin folder in HKEY_LOCAL_MACHINE and HKEY-CURRENT-USER using regedit.
Solution 2: Deleting via Windows Explorer
The same process we described in Solution 1 can be done without the use of Command Prompt. However, a lot of users stumble upon the issue where they don’t receive permissions necessary to delete the Cygwin folder. Let’s find out how to resolve this.
- Repeat the steps 1 and 2 from Solution 1.
- Try deleting the folder where you installed Cygwin. If you manage to delete it immediately,:::::::::
- If you receive the “permission denied” message, you will need to add ownership off the folder to your account.
- If you are using Windows 10, right-click on the Cygwin folder and open Properties >> Security. Click on Advanced and you should see the “Owner:” on top with an account linked to it.
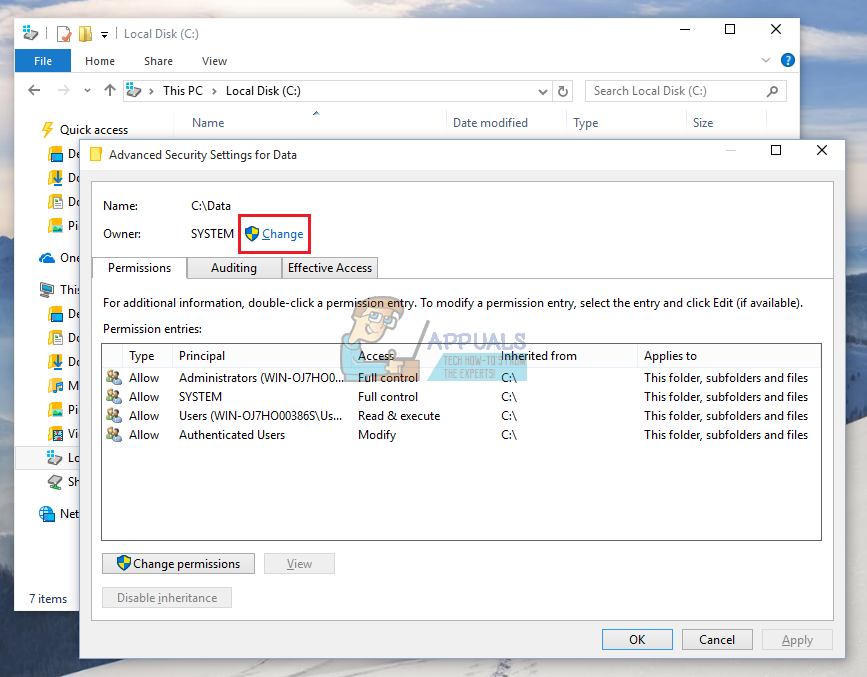
Click on “Change” and select the account you want to become the owner of the folder. After you click “OK”, you should check the box next to the “”Replace owner on subcontainers and objects” message in order to gain ownership over files and folders in the Cygwin folder.
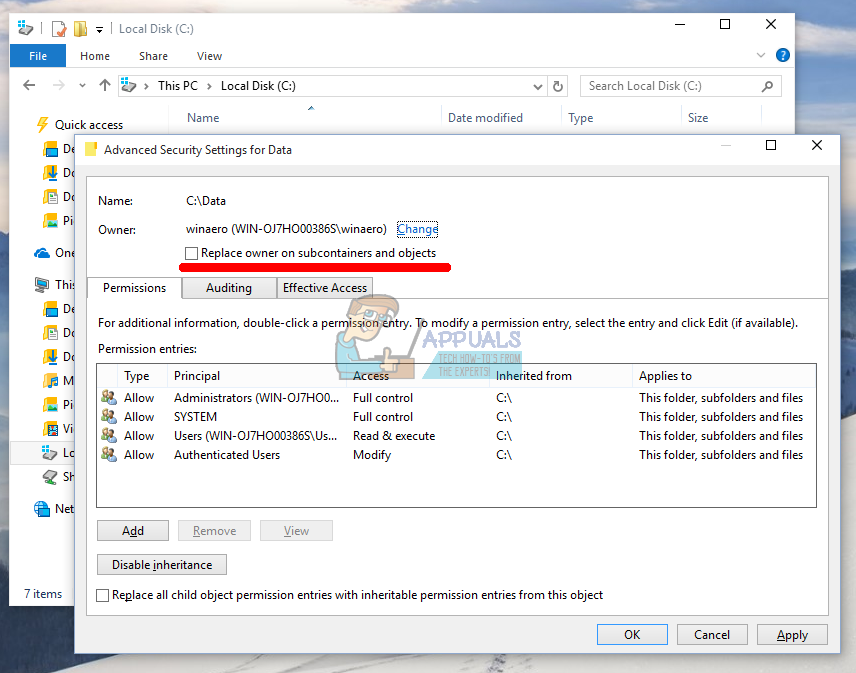
Additionally, you should set the Permissions to Full Control by clicking on “Add” while still in the Advanced settings. Click on Select a principle and choose the same account as you did for the Owner. Make sure this applies to subfolders and files inside as well.
- If you are using an older version of Windows or if Windows 10 won’t let you manage permissions, you will need to the same but after restarting Windows in Safe Mode.
- Continue with Steps 7 and 8 from Solution 1.