Fix: UAC “Yes” Button Missing in Windows
The “User Account Control (UAC) Yes button missing” issue happens when Windows requires administrator approval, but your current account cannot provide it.
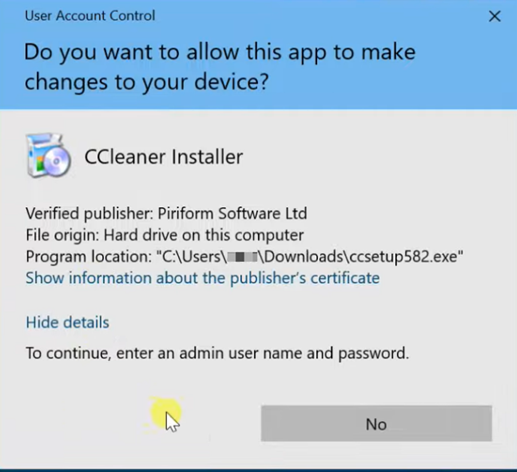
Most commonly, this occurs because you’re signed in with a standard (non-admin) account. In this case, Windows cannot show the normal Yes button unless an administrator account is available to approve the request.
Step 1: Enable the Built-in Administrator Account
If no accessible administrator account is available, Windows cannot approve elevation requests. Enabling the built-in Administrator account restores a working admin profile.
Important: This requires that you can access an admin-capable environment (either another admin account or valid admin credentials).
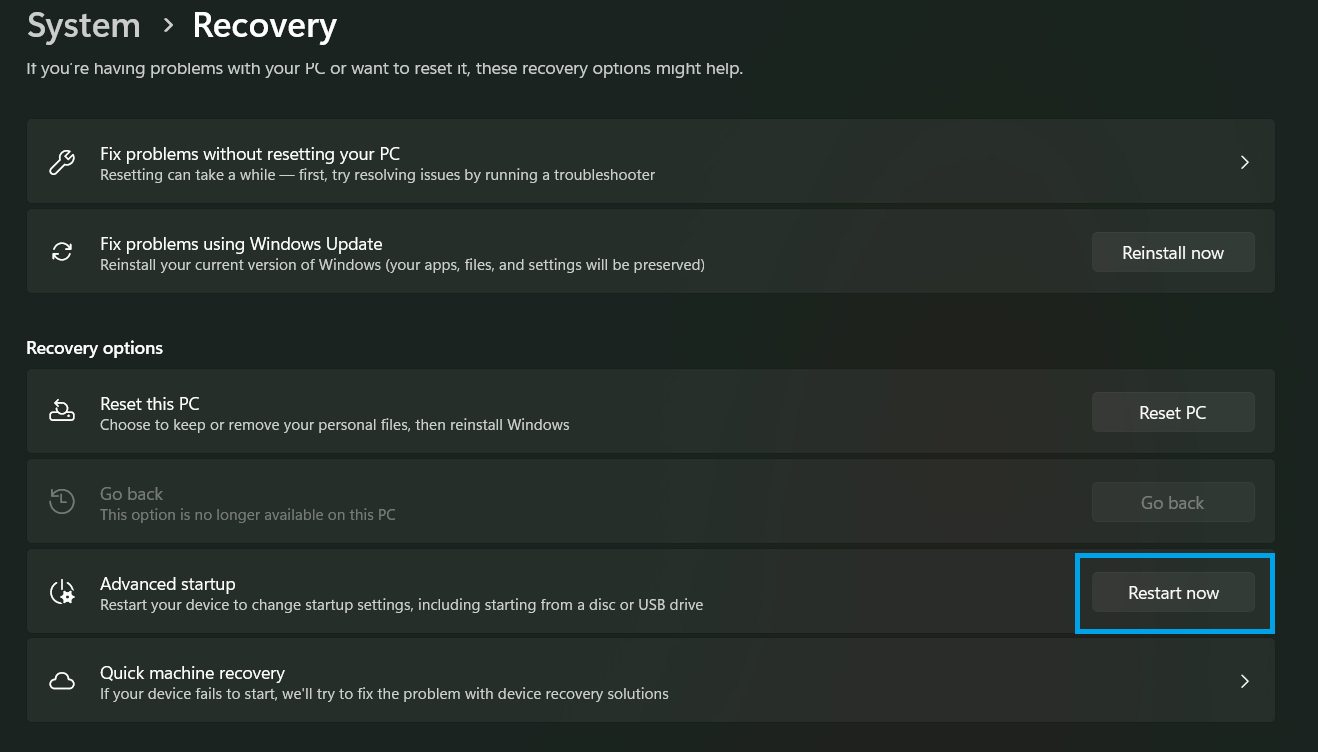
- Press Windows + I → Go to System → Recovery.
- Click Restart now next to Advanced startup.
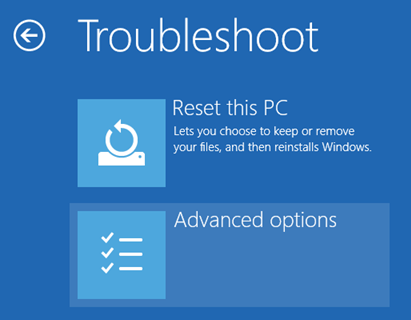
- After restart, go to Troubleshoot → Advanced options.
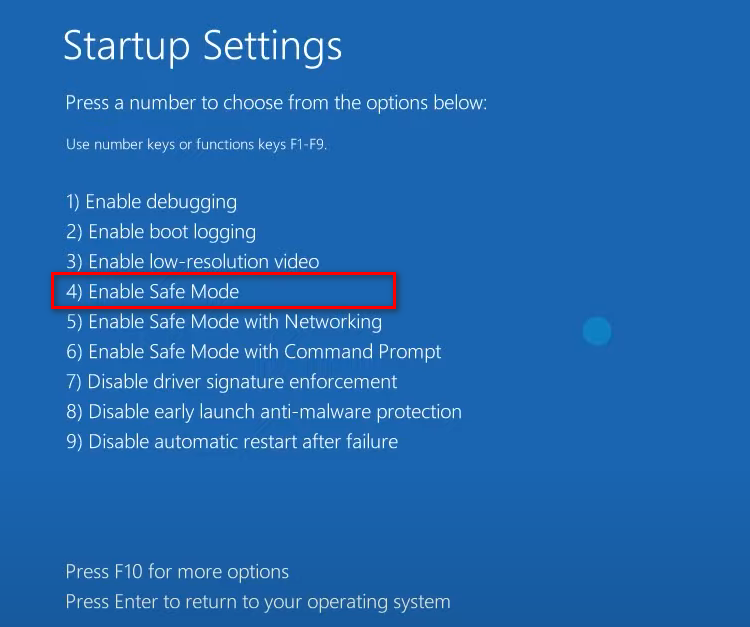
- Select Startup Settings.
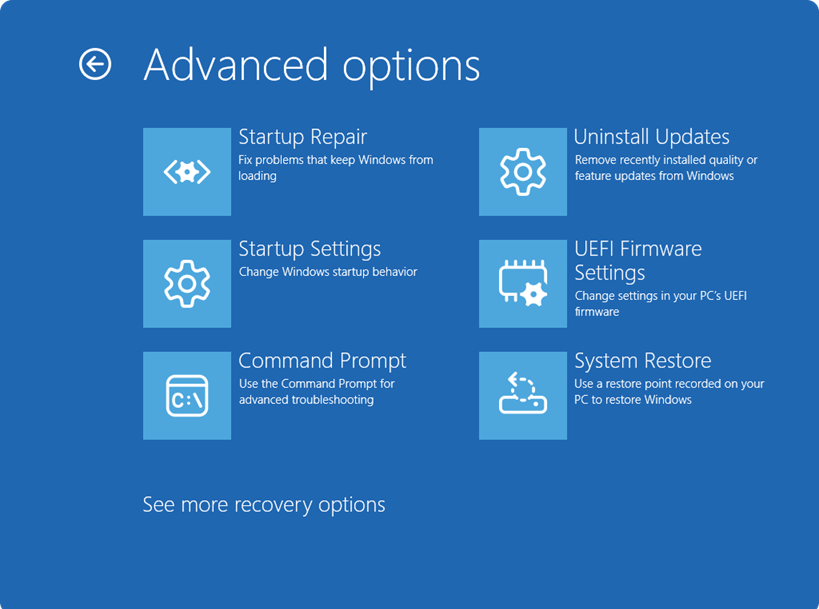
- Press F4 to boot into Safe Mode.
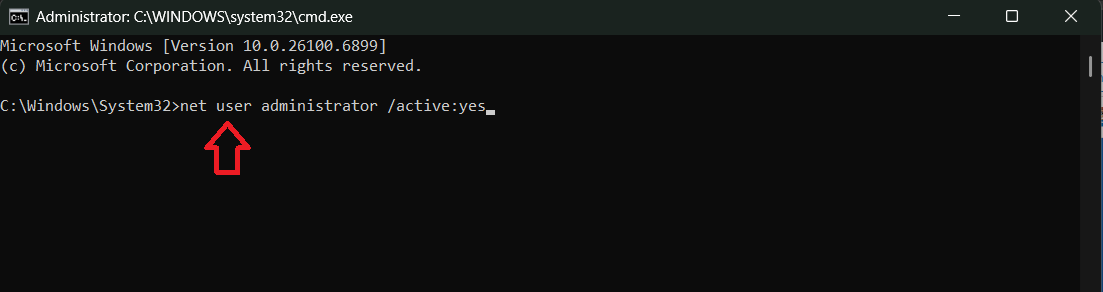
- Once inside Safe Mode, open Command Prompt as administrator (Win + R → type cmd → press Ctrl + Shift + Enter).
- If prompted, enter administrator credentials.
- Run:
net user administrator /active:yes
- Restart your computer.
You should now see an account named Administrator on the sign-in screen.
Step 2: Sign into the Built-in Administrator
Log into the Administrator account you just enabled. This account has full system privileges and can approve UAC prompts.

Now that you have proper admin access, you can permanently fix your original user profile.
Step 3: Give Your Main Account Administrator Rights
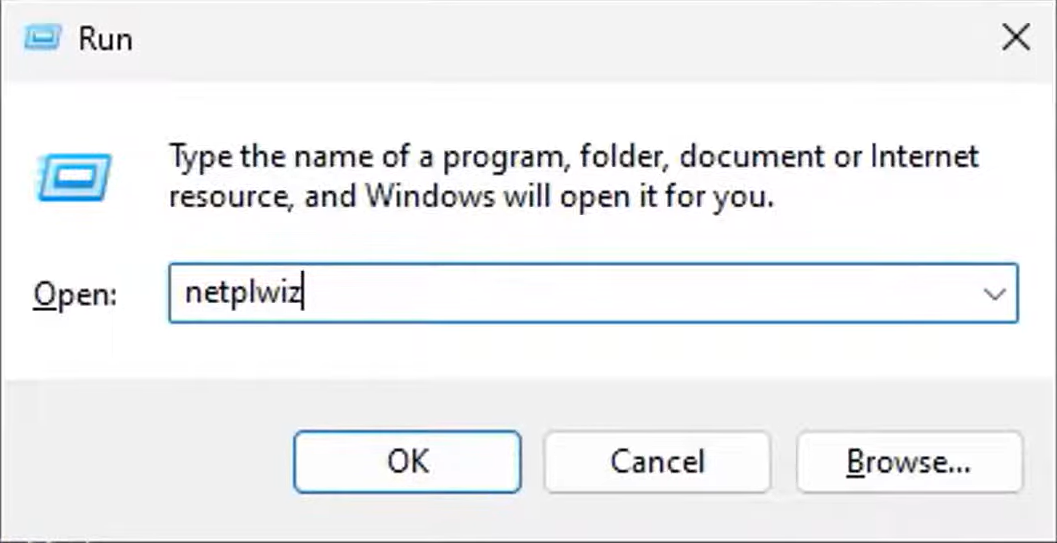
- While signed in as Administrator, press Win + R.
- Type netplwiz and press Enter.
- Select your main user profile.
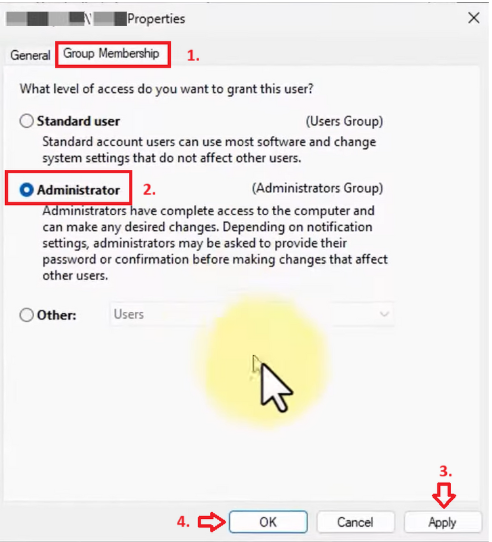
- Click Properties → Go to Group Membership.
- Select Administrator.
- Click Apply → OK.
- Restart your PC.
After rebooting and signing back into your original account, the Yes button should now appear normally in UAC prompts.
Step 4: Disable the Built-in Administrator (Security Step)
For security reasons, you should disable the built-in Administrator after fixing your account.
- Sign into your now-admin main account.
- Open Command Prompt as administrator.
- Run:
net user administrator /active:no
This prevents misuse of the built-in account.
Step 5: If This Is a Work/School Device
If the device is managed (Domain / Entra ID / MDM), policies may prevent elevation entirely.
Signs include:
- “Some settings are managed by your organization”
- A work/school account connected under Settings → Accounts
In that case, you must contact IT. Local changes may be blocked by design.
Step 6: Last Resort, Reset or Reinstall Windows (Personal PCs Only)
If no administrator account is accessible and policies prevent elevation, the only remaining solution on a personal PC is to reset or reinstall Windows.
Backup important files first, then follow this guide: Clean Install Windows 11