[Fix] The application was unable to start correctly (0xc0000005)
The application was unable to start correctly
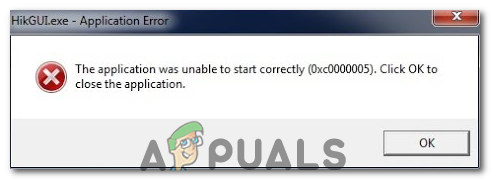
The application was unable to start correctly (0xc0000005). Click OK to close the application. This error usually occurs with internet browsers, but it is not confined to them. Any application within Windows can stop responding due to this error. Therefore, it needs to be fixed in order to restore the essential software back to working condition.
What Causes the 0xc0000005 Error on Windows?
There are a number of known reasons causing this error to disrupt the operations of various software in Windows 10. One of those reasons, considered a major cause, is a third-party antivirus program causing conflicts with executable files and influencing their operations. On the other hand, registries can become corrupted due to malware and viruses, causing the programs to behave abnormally. Sometimes, faulty hardware drivers can also be the culprit causing this error.
Solutions to Fix Windows 10 Error 0xc0000005
Based on the reasons mentioned above, the solutions are straightforward. Therefore, go through the following methods to get rid of this frustrating error message.
1. Fixing the Antivirus Program.
Antivirus programs can influence the executable files of a number of programs. Therefore, in order to fix this problem, you are required to disable the third-party antivirus program to check whether it was the culprit or not. Please note that disabling antivirus programs can result in some serious threats to your computer when connected to the internet.
You can also rely on Windows’ own security software, i.e., Windows Defender. It has the same functionality as any other antivirus. You can disable the antivirus by navigating to its settings and turning the shield off.

After it is disabled, check for the error again. If it still persists, move to the next method.
2. Fixing registries.
The registry is the central database of Windows that is constantly being used by your PC to help it read various files and settings needed to run. Registries can become corrupted due to damage to certain files required to keep everything in place. Therefore, most experts recommend that you make sure to back up your registry and store this backup on a conventional USB stick, so you can restore your registry to its previous state in case of corruption. However, if you didn’t back up your registry, follow these steps to fix the registry in order to resolve the error 0xc0000005.
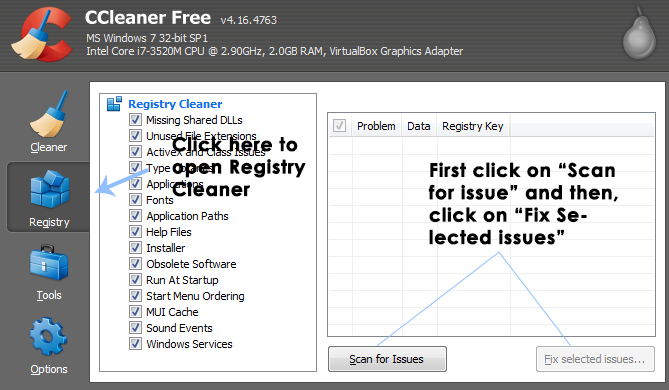
1. Download the registry cleaner software from this link.
2. After it has been downloaded, install it using the recommended settings. Open the software once the installation process is complete.
3. On the interface, click the Registry tab located on the left pane, and then click the button labeled Scan for Issues. This will initiate a search for errors in the registry. Once the search is complete, the Fix Selected Issue button will be activated. Click on this button to resolve all identified problems.
3. Fixing Faulty Drivers
Drivers are the software programs that help a computer communicate with the hardware attached to it. So, when they are damaged, the hardware tends to cause glitches. Fixing these faulty drivers can benefit you in a number of ways. Follow the steps below.
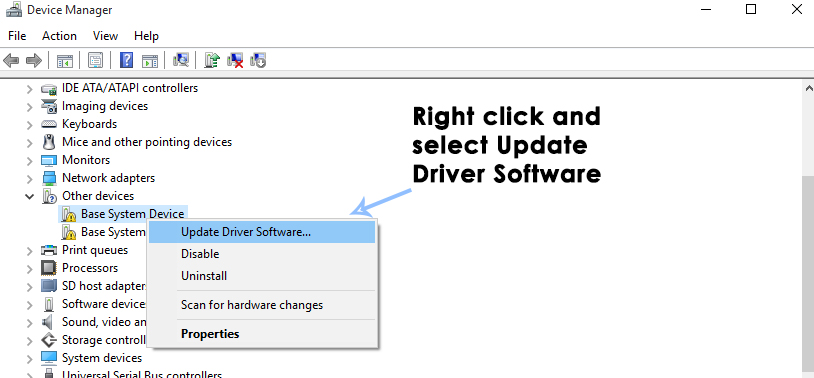
1. Open the Device Manager by pressing Win + X and selecting it from the list.
2. Inside the Device Manager, scroll down to see if there is any hardware with a yellow mark. If there is, right-click on it and select “Update Driver Software.” If you have installed drivers recently, reinstall those drivers as well.
3. In the window that appears afterwards, click on ‘Search automatically for updated driver software’ to allow it to search and install drivers automatically. If you have downloaded the drivers manually, click on the option below to browse and install them. Once the process is complete, check for any errors.

4. Fix the BCD.
This method is to be carried out by users at their own risk. It worked for some and did not for others. After performing the steps in this guide, you will also need to reactivate Windows.
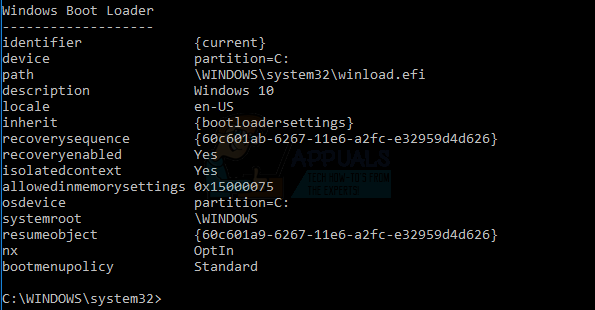
- Hold the Windows Key and press X. Choose Command Prompt (Admin).
- Type “bcdedit” and press ENTER. If your Windows Boot Loader Path is xOsload.exe, then you need to remove some files and repair your BCD. You can see this in the PATH field after executing the “bcdedit” command.
- Once completed, execute the following commands below. Some may return “not found,” but ignore the errors and proceed until the last command. Ensure that you press the ENTER key after each command.
Del D:\Windows\System32\xOsload.exe
Del D:\Windows\System32\xNtKrnl.exe
Del D:\Windows\System32\Drivers\oem-drv64.sys
attrib c:\boot\bcd -h -r -s
ren c:\boot\bcd bcd.old
bootrec /rebuildbcd
5. Check for Windows Updates.
Windows Updates often contain fixes for various bugs and glitches, but they are also notorious for giving rise to new issues on people’s computers. However, in this step, we will be checking for any updates to your Operating System, as Microsoft frequently patches any problems resulting from their updates. To do so, please follow the guide below.
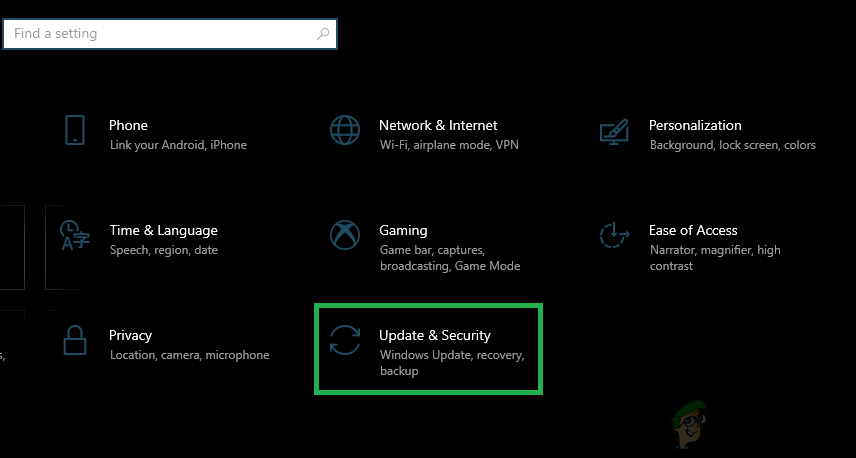
- Press “Windows” + “I” to open Windows settings.
- In the settings, click on the “Updates and Security” option, and from the left side, select the “Windows Update” option.

Open Windows Settings and Click Update & Security To Check For Updates - On the next screen, click on the “Check for Updates” option, and it will automatically prompt Windows to check for any available updates.
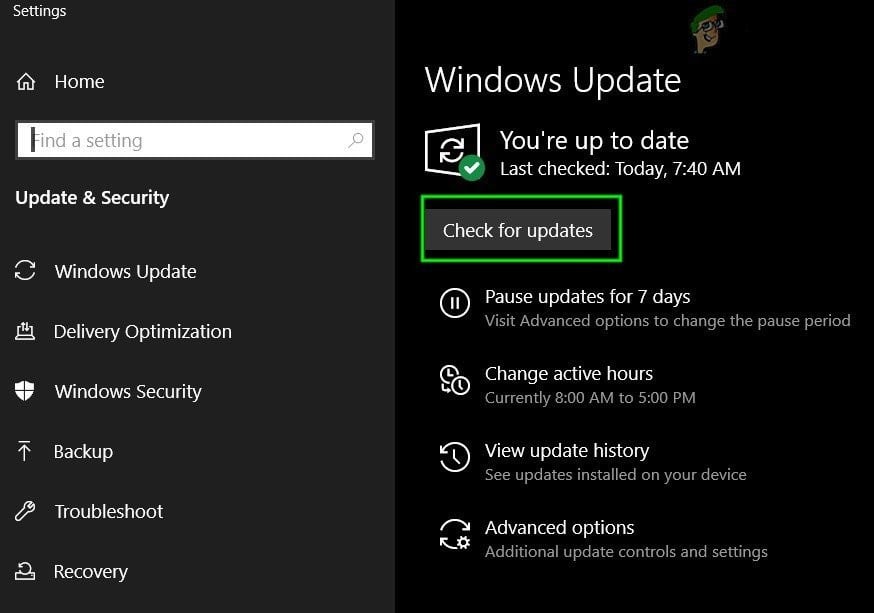
Check For Updates in Windows Update - After the update check is complete, click on the “Download” button to initiate the download and installation of new updates on your computer.
- After installing these updates, check to see if doing so has fixed the issue on your computer.
6. Restoring the Computer.
If you have just started experiencing this issue, it might be triggered by a faulty driver installation or even a rogue application that you may have recently installed on your computer. Therefore, in this step, we will revert the state of the computer to an earlier date, and hopefully, this should resolve the issue if it was caused by the aforementioned reasons. To do this:
- Press “Windows” + “R” to open the Run prompt.
- Type “rstrui” and press “Enter” to open the restore management window.
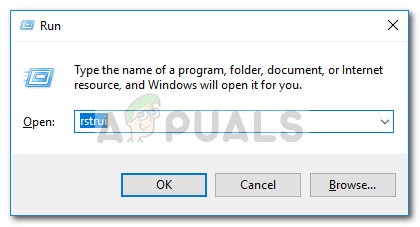
Run dialog: rstrui - Click on “Next” and check the “Show More Restore Points” option.

- Select a restore point from the list that was created before the date when this issue started occurring.
- Click on “Next” again and follow the on-screen instructions to revert everything back to the selected date.
- After the restore has been completed, check to see if the issue still persists.
7. Enable the firewall.
In some cases, it is possible that the error is being triggered because the application is suspicious, or at least marked as suspicious, and the Windows Firewall is not running on your computer to validate this suspicion. Therefore, in this step, we will ensure that the Windows Firewall is enabled in order to eliminate this error. To do this:
- Press “Windows” + “R” to open the Run prompt.
- Type “Control Panel” and press “Enter” to launch the classic Control Panel interface.
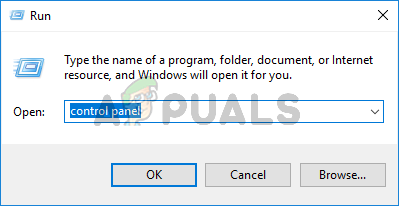
Typing Control Panel in Run to Open Control Panel - In the Control Panel, click on the “View By:” option and select the “Large Icons” button.
- After making this selection, click on the “Windows Defender Firewall” option to launch the Firewall, and then select “Turn Windows Defender Firewall On or Off.

Opening Windows Defender Firewall from Control Panel - Ensure that you check the “Turn on Windows Defender Firewall” box for both available options to activate the Firewall.
- After making this selection, save your changes and close the window.
- After doing so, check to see if the issue still persists.
8. Run an SFC scan.
In some situations, you might have installed a bad driver on your computer, or at some point, due to a storage failure, some system files or drivers may have been corrupted. Therefore, in this step, we will run a complete system scan to identify any drivers that are missing signatures or to fix any abnormalities in the system files. To do so:
- Press “Windows” + “R” to open the Run prompt.
- Type “cmd” and then press “Shift” + “Ctrl” + “Enter” to provide admin permissions. Running the Command Prompt.

Running the Command Prompt - Type the following command inside the command prompt and press “Enter” to execute it.
sfc /scannow
- Let the computer scan for any broken or corrupted items, and it should automatically replace them with working ones.
- Check to see if doing so fixes the error message.
9. Disabling Data Execution Prevention.
Data Execution Prevention is a program that prevents certain programs or executables from running on your computer because it suspects they might be viruses. Due to this prevention, sometimes, as a false alarm, legitimate applications may also face issues while trying to run on your computer. Therefore, in this step, we will be disabling this setting from the system configuration panel. To do this:
- Press ‘Windows’ + ‘R’ to open the Run prompt.
- Type “Control Panel” and press “Enter” to launch the classic control panel interface.
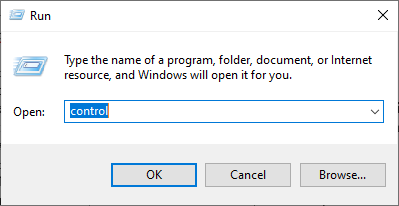
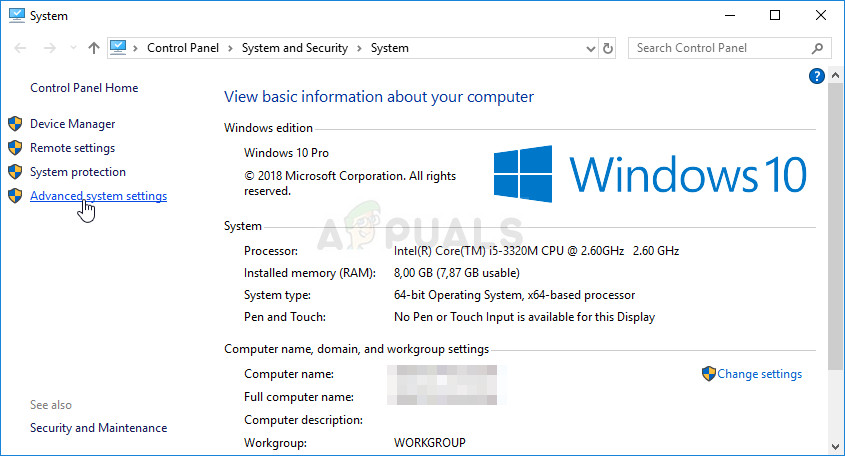
Accessing the Classic Control Panel interface - Inside the Control Panel, click on the “View By:” icon and then select the “Large Icons” option.
- After selecting “Large Icons,” choose the “System” option.
- Click on the “Advanced System Settings” option on the left side of the screen.
- In the Advanced System Settings, click on the “Advanced” tab at the top.
- In the Advanced tab, click on the “Settings” option under the “Performance” heading.
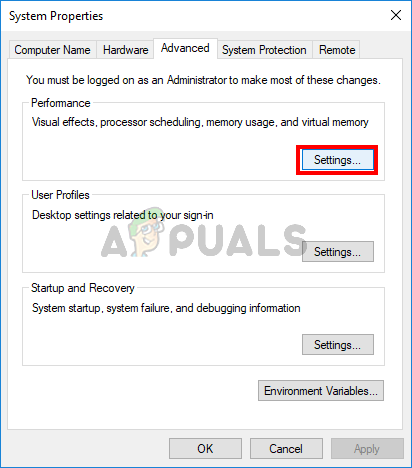
Advanced Performance Settings - In the next window that opens, click on the “Data Execution Prevention” tab, and then select the “Turn on DEP for all programs except those I select” option.
- After that, click on the “Add” option and select the executable of the application with which you are facing issues.
- This way, that application will no longer fall under the jurisdiction of the DEP program.
- Check to see if doing so has resolved the issue.
If the above process is unable to fix the issue, it might be because the executable is not the only one being affected by the DEP program. Sometimes, the DEP might actually be preventing a group of executables from running on the computer. To counter this, we will disable DEP completely.
Disabling DEP completely cannot be done through any Windows setting; it needs to be done manually through the command prompt. Remember to take this step as a last resort, as it can, in some cases, make your computer more vulnerable to viruses and malware attacks. To disable DEP through the command prompt:
- Press “Windows” + “R” to open the Run prompt.
- Inside the Run prompt, type “cmd,” and then press “Shift” + “Ctrl” + “Enter” to launch in Admin mode.
Running the Command Prompt - Inside the command prompt, type the following command and press “Enter” to execute it on your computer.
bcdedit.exe /set {current} nx AlwaysOff - Once the command has been executed, run the application you want to use and check to see if the error message still persists.
10. Disable the firewall and Windows Defender.
In some situations, the executable that you want to run on the computer might actually be blocked by the firewall, preventing it from making contact with its servers. Therefore, we will need to allow the executable through our firewall for both public and private networks, which should resolve the issue if the firewall is indeed the cause.
In addition to that, sometimes Windows Defender may prevent the application from running on your computer because its local files may be suspicious and not properly signed. This could be due to a false alarm as well, so we will be disabling Windows Defender for the application by adding an exclusion. To do that, follow these steps:
- Press the “Windows” key + “R” to launch the Run prompt.
- Type “Control Panel” and press “Enter” to launch the classic control panel interface.
Accessing the Classic Control Panel interface - Click on the “View by:” button, select “Large Icons,” and then click on the Windows Defender Firewall option.
- Select the “Allow an app or feature through the Firewall” button in the left pane, then click on the “Change Settings” button, and accept the prompt.
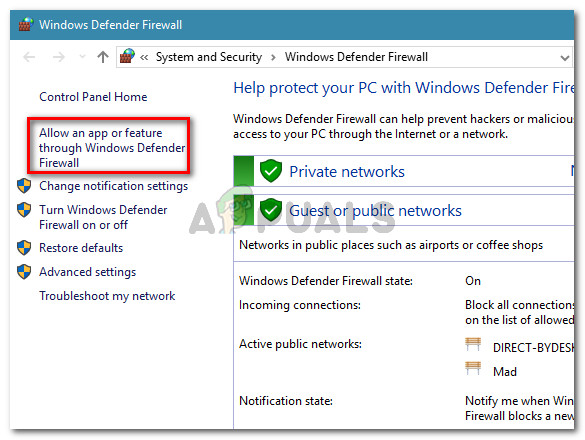
Click on Allow an app or feature through Windows Defender Firewall - From here, make sure that you check both the “Public” and “Private” options for the application and its entries.
- Save your changes and exit the window.
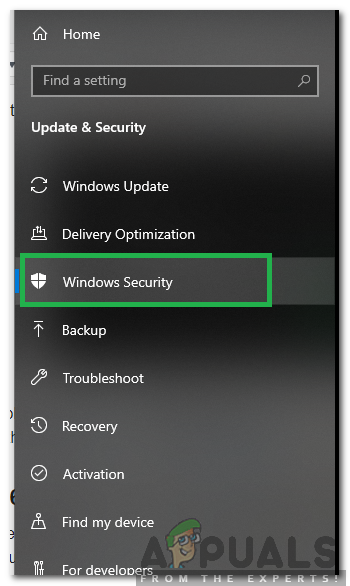
- After that, press “Windows” + “I” to launch the settings and click on the “Update and Security” option.

Update and Security in Windows Settings - From the left pane, click on the “Windows Security” button, and then click on the “Virus and Threat Protection” button.
- Select the “Manage Settings” button under the Virus and Threat Protection Settings heading.
- Scroll down and click on the “Add or Remove Exclusions” button in the next window.
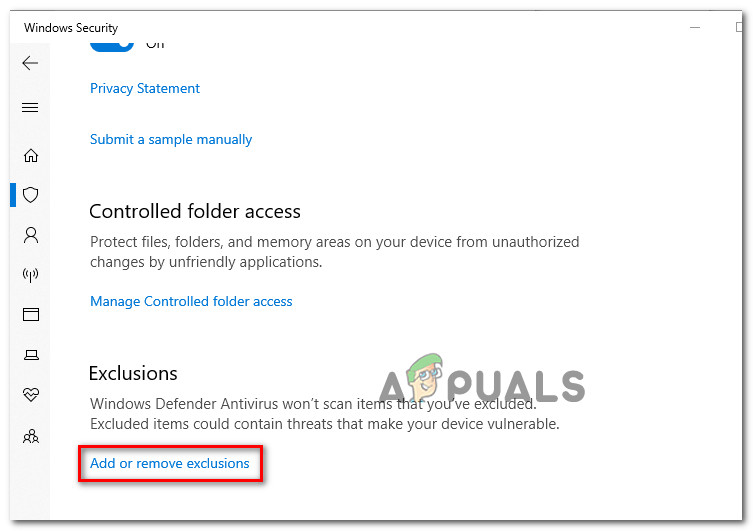
Accessing the Exclusions menu of Windows Security - Click on the “Add an Exclusion” option and select “Folder” from the file type.
- Make sure to specify the folder of the application experiencing the issue, and exit this window after saving your changes.
- Check and see if doing so has fixed the error message.
11. Reinstall Firefox.
If you are receiving this error while trying to launch Firefox, it may be occurring because the application has not been installed properly on your computer. Therefore, in this step, we will launch the app management window, uninstall Firefox, and then reinstall it completely by downloading it from the Firefox website. To do this:
- Press “Windows” + “R” to open the Run prompt.
- Type “appwiz.cpl” and press “Enter” to open the app management window.

Typing in “appwiz.cpl” in the Run prompt - In the app management window, scroll down and right-click on the “Firefox” application.
- Select ‘Uninstall’ from the list and then follow the on-screen instructions to remove the software from your computer.
- Repeat this step for all instances and bundled applications of the software installed on your computer.
- Make sure to disable any third-party antivirus software at this point to ensure smooth installation.
- Head on over to the Mozilla website and click on the download button.

Clicking on the Download button - Click on the downloaded executable, and install it on your computer by following the on-screen instructions.
- Check to see if doing so has fixed the error message on your computer.
12. Scanning for malware.
In some cases, it is possible that the computer has acquired malware, which prevents the user from running all system functions on their computer. Therefore, in this step, we will use the default Windows Defender to thoroughly scan our computer for any viruses or malware that might have found their way onto our computer. To do this:
- Press the “Windows” and “I” keys simultaneously on your PC to open the Settings tab.
- Navigate to the “Update & Security” option, and then click on the “Windows Security” button in the left tab.
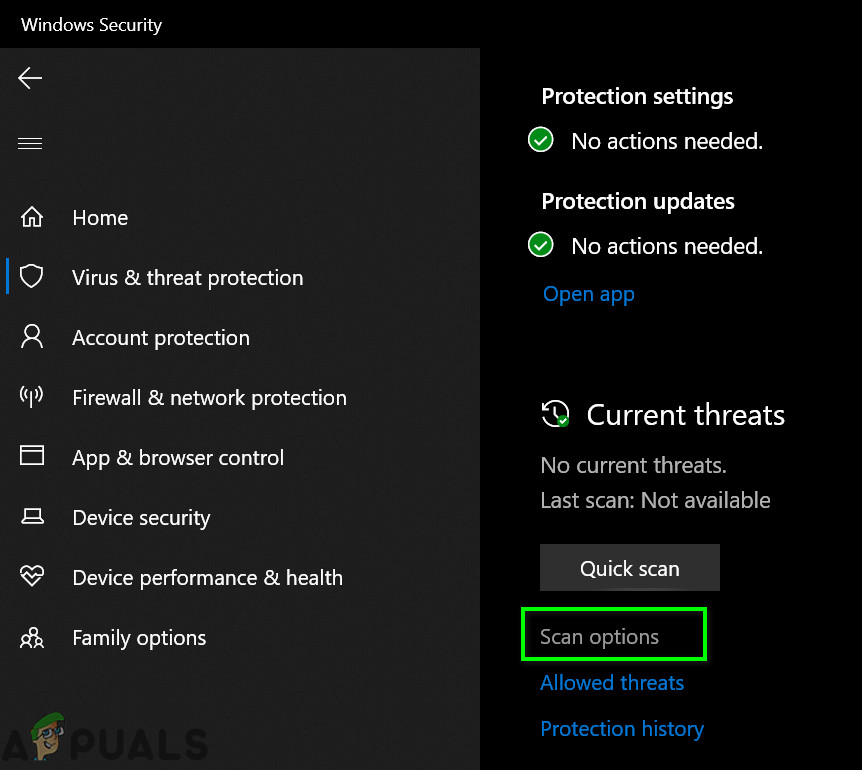
Selecting Windows Security from the left pane - After that, click on the “Open Windows Security” button and select the “Virus and Threat Protection” option.
- After that, click on the “Scan Options” button below the “Quick Scan” window.
Open Scan Options of Windows Defender - Click on the “Full Scan” option, and then press the “Scan Now” button.
- Wait for a few seconds while this process completes, and then finally check if the error is resolved now.
Microsoft Security Scanner is an additional tool that you can use to test the system for viruses and malware, as sometimes the default tool is unable to perform the scan properly. Therefore, in this step, if the issue still hasn’t been resolved, we will use the Microsoft Security Scanner to further ensure there are no issues.
- Launch your browser and download the Microsoft Security Scanner from here.
- After downloading the executable, run it on your computer and let it install.
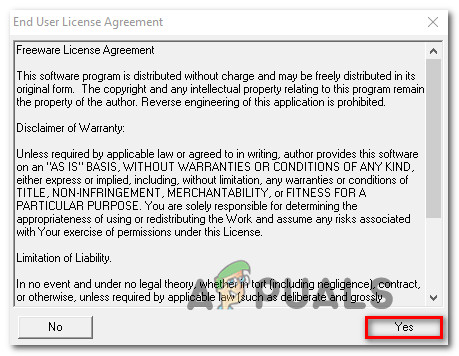
- Accept the License Agreement terms and click on ‘Next’.
Accepting the User Agreement - Select “Full Scan” and click on “Next.
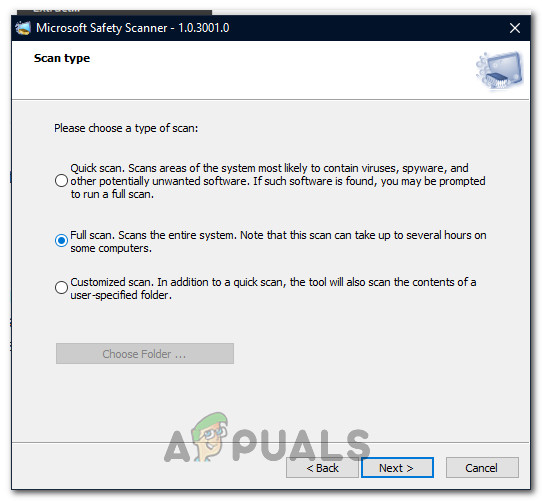
Initiating the Full Scan - After you opt for a full scan, the software will begin scanning your entire computer to search for any malware or viruses that might have disguised themselves as normal executables or applications.
- After this scan is finished, check to see if the error message still persists.
13. Install missing drivers.
It is possible that in some situations, your device may be missing certain drivers, which could trigger this particular issue on your computer. Therefore, we will check for any missing drivers and then verify whether the error is fixed. To do this, please follow the guide below.
- Download Driver Easy on your computer.

Download Driver Easy - Run the downloaded executable and install the software on your computer.
- Run the check and see if there are any missing drivers on your computer.
- Install the missing drivers, and then either manually or automatically install them using the software.
- After installing all the missing drivers, check to see if the issue still persists.
14. Reconfigure the registry.
It is possible that in some cases, you have not properly configured all the registry settings, or you have unknowingly configured something incorrectly. Therefore, in this step, we will reconfigure our Registry to fix a certain key that sometimes, if misconfigured, causes this particular error on Windows. To do this, follow the guide below.
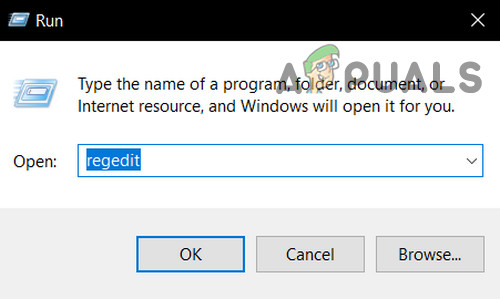
- Press “Windows” + “R” to open the Run prompt.
- Type in “regedit” and press “Enter” to launch the Registry Editor.
Open Regedit - Inside the Registry Editor, navigate to the following location.
HKLM\SOFTWARE\Microsoft\Windows NT\CurrentVersion\Windows\AppInit_Dlls
- Double-click on the “LoadAppInit_DLLs” entry on the right side of the screen.
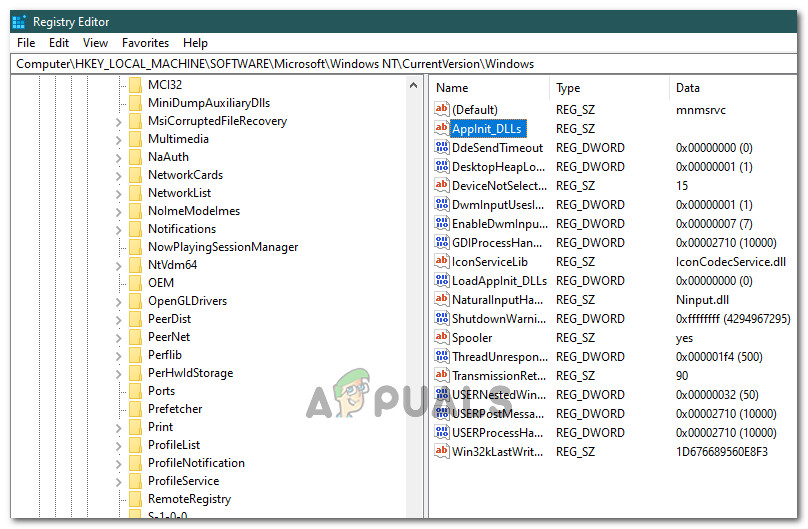
Clicking on the Option - Change the value of this registry from “1” to “0”.
- Save your changes and exit the registry editor.
- Check to see if doing so has fixed the error.
15. Update disk drivers.
In some cases, the disk drivers used to control your storage and other disks installed on the computer may be outdated, thus triggering the error. Therefore, in this step, we will first open the Device Management window and update these drivers. To do so, follow the steps mentioned below.
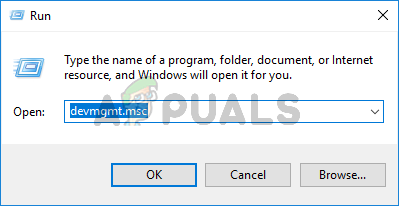
- Press ‘Windows’ + ‘R’ to open the Run prompt.
- Type in “Devmgmt.msc” and press “Enter” to launch the Device Management window.
Type devmgmt.msc and Press Enter to Open Device Manager - In the Device Manager, double-click on the “Disk Drives” option to expand it.
- Right-click on the storage device listed and select the “Update Driver” option.
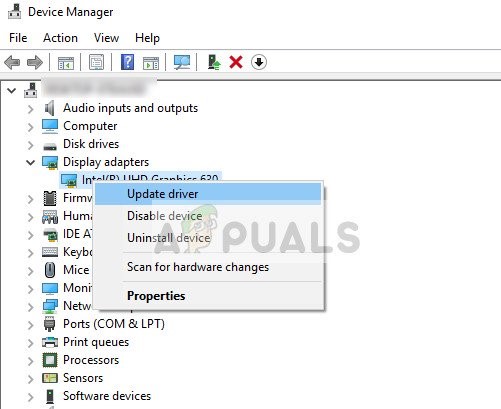
Update Driver in Device Manager - Select the “Search Automatically for Drivers” option and let the setup proceed.
- If any drivers are available, Windows will automatically check for them and install them on your computer.
- Check to see if doing so has fixed the issue.
16. Disabling Automatic Updates and Uninstalling Updates.
In some cases, it is possible that this error stems from a faulty update installation. Microsoft is notorious for pushing out updates that are not properly customized to work with all hardware combinations, often breaking things instead of improving them. Therefore, we should ensure that the recent update is not installed on our computer.
In order to do this, we must first disable automatic updates on our computer and then uninstall the recently installed updates. Make sure to back up any important data that you don’t want to lose, just in case this goes poorly.
- Press “Windows” + “R” to open the Run prompt.
- Type in “service.msc” and press “Enter.

Opening services by typing “services.msc” in the RUN command. - Scroll through the list and double-click on the “Windows Update” service.
- Click on the “Stop” button, and then click on the “Startup Type” dropdown.
- Select “Disabled” from the list, and then select the “Apply” button from the window.
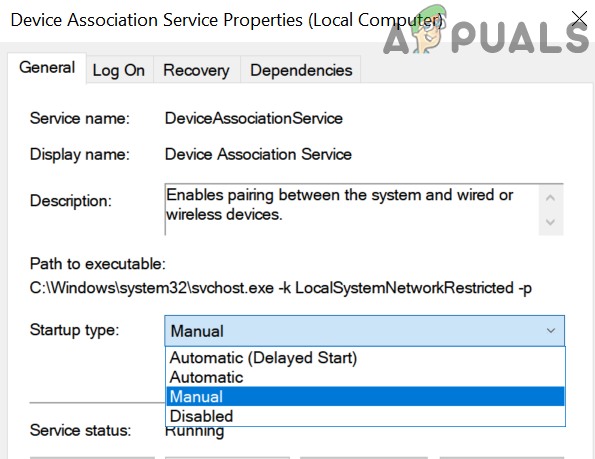
Change Startup Type to Disabled - Click on “OK” to close this window.
- Check to see if doing so has stopped your computer from updating.
After stopping the computer from updating, we will now uninstall the recent updates that have been installed on your computer. To do that:
- Press the “Windows” + “I” buttons to open the settings.
- In Settings, click on the “Update and Security” option, and then select the “Windows Update” button from the left pane.
Clicking on the “Update and Security” option - In the Windows Update, click on the “View Update History” option.
- In the Update History, click on the “Uninstall Updates” option, and it should take you to the uninstallation screen where all the recently installed updates will be listed.

Locate KB4100347 and/or KB4457128 Updates and Select Uninstall to Delete These Updates - From the list, right-click on the update that was recently installed and caused this error on your computer.
- Right-click on this update and select the “Uninstall” button to remove it completely from the computer.
- Follow through with the on-screen instructions.
- Check to see if uninstalling has fixed this issue.
Additional fixes:
- In addition to some of the recommendations given above, you should try to check if there are any bad memory modules (RAM) installed on your computer, as they can be a cause of this issue.
- Also, make sure to check if you haven’t overclocked your RAM beyond its recommended limit. If you have done so, try returning it to factory defaults and see if that resolves your issue.
Thanks! (:D) Not work! (;( ; :@