How to Fix the System Restore is Initializing Loop on Windows?
This error typically occurs while attempting to use Windows System Restore to revert the system to a previous state. The most common cause of the “System Restore is Initializing…” loop is damaged system files, which can prevent the System Restore process from completing as expected.

Additional factors contributing to this issue include bad sectors on the hard disk, problematic restore points, or temporary issues with disk space that hinder the restoration process. It is crucial to understand that while System Restore is a powerful tool for recovering from system errors and changes, its effectiveness depends greatly on the integrity of system files and the availability of disk space.
Users experiencing this issue should understand that patience is crucial; the process can take longer than expected due to the volume of data being processed.
If the restore process remains stuck on “initializing” for more than 2 hours, consider a simple restart (press and hold the power button for a few seconds) and attempt the restoration process again. If you find yourself stuck in the same loop, follow the solutions provided below.
1. Performing System Restore in Safe Mode
The restoration process may be interfered with by third-party programs. Booting in Safe Mode temporarily disables such programs and may enable the restore process to proceed without obstructions.
- If your system is off, turn it on. If it’s on, restart it.
- As soon as the Windows logo appears (or just after the computer’s BIOS post has completed), forcefully shut down the computer by holding the power button until it turns off.
- Repeat this process 2-3 times. On the third attempt, Windows should recognize that the normal startup is failing and will automatically attempt to enter WinRE. Your system will restart into WinRE (Windows Recovery Environment).
- Select Troubleshoot to see advanced options.

- Follow these options: Advanced options > Startup Settings > Restart.

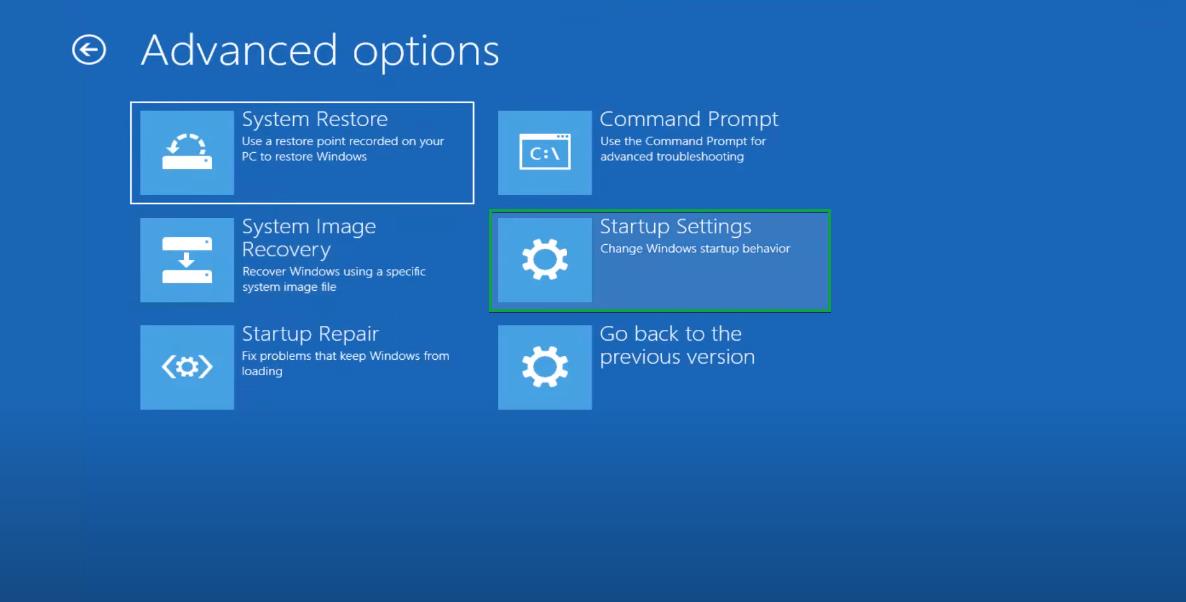
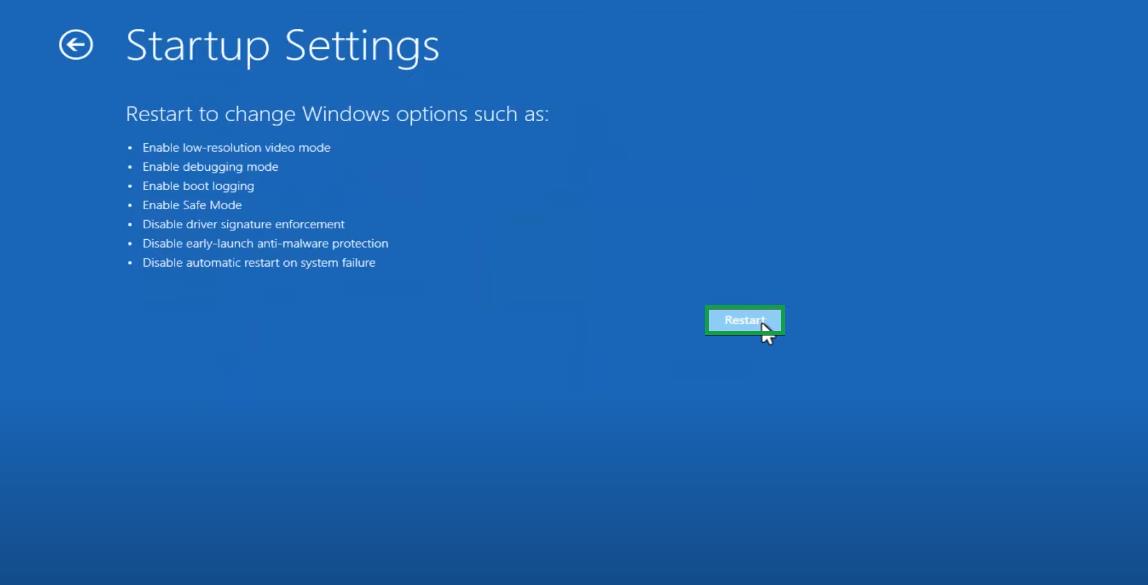
- When the list of startup options appears, press “4” or “F4” to initiate Safe Mode.
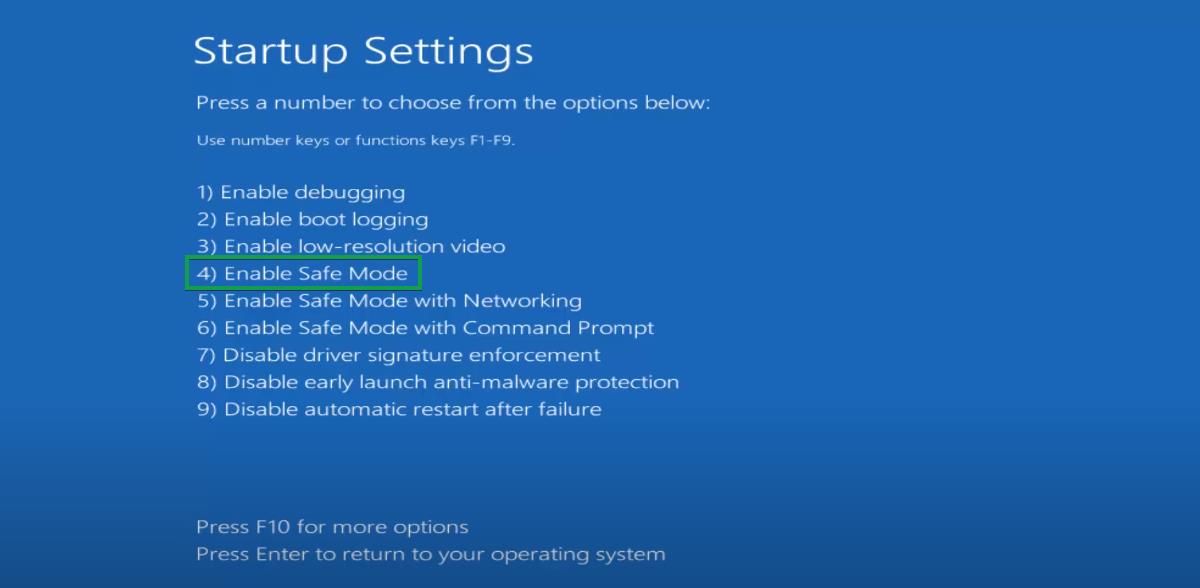
- Once the system boots in Safe Mode, attempt performing the System Restore again.
2. Use the SFC Tool to Repair Missing or Corrupted System Files
The System File Checker (SFC) tool scans and automatically repairs damaged or corrupt system files, including important boot files that may cause System Restore to fail. Employing SFC could resolve this problem.
- Type “cmd” in the Windows search bar.
- Open Command Prompt with elevated privileges by selecting “Run as administrator”.
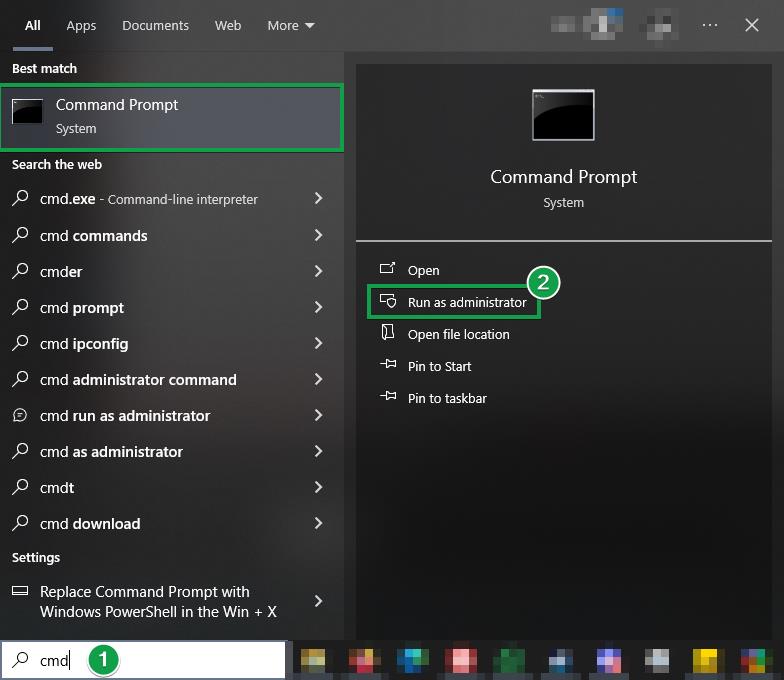
- First, execute the following command: DISM.exe /Online /Cleanup-image /Restorehealth. This ensures that the system file check can operate effectively.
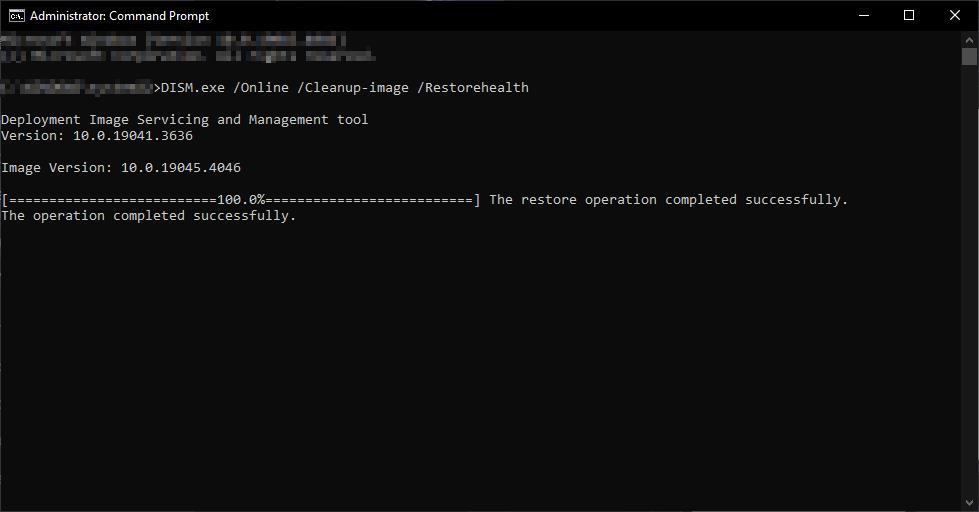
- Next, run sfc /scannow to detect and repair corrupt files.

- When the verification is complete, review the scan results and close the command prompt.
- Determine whether this resolved the System Restore issue.
3. Check the Status of Volume Shadow Copy
Volume Shadow Copy Service (VSS) is critical for backup and other processes. If VSS is disabled, it will need to be manually enabled for backups and System Restore to function correctly.
- Type “services” into the Windows search bar.
- Access the Services panel.
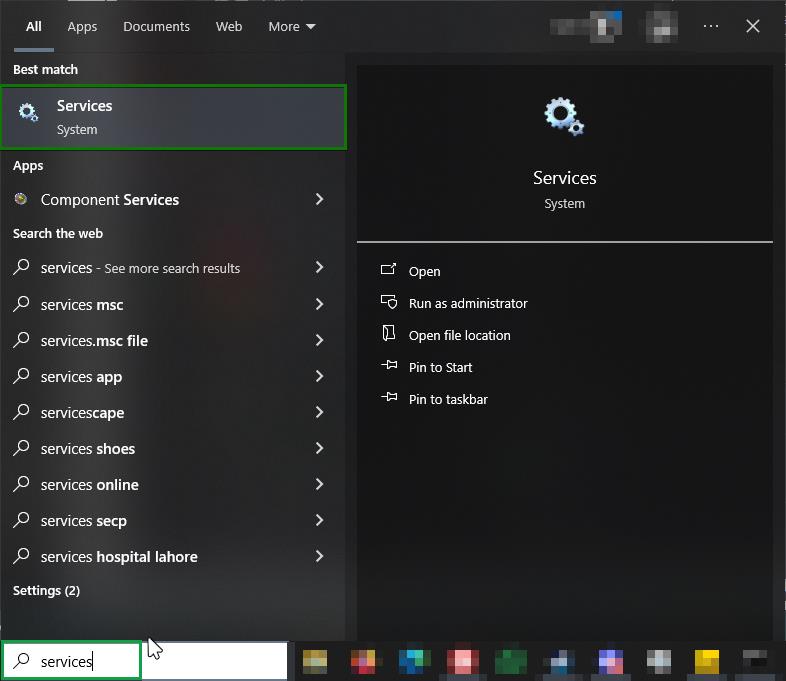
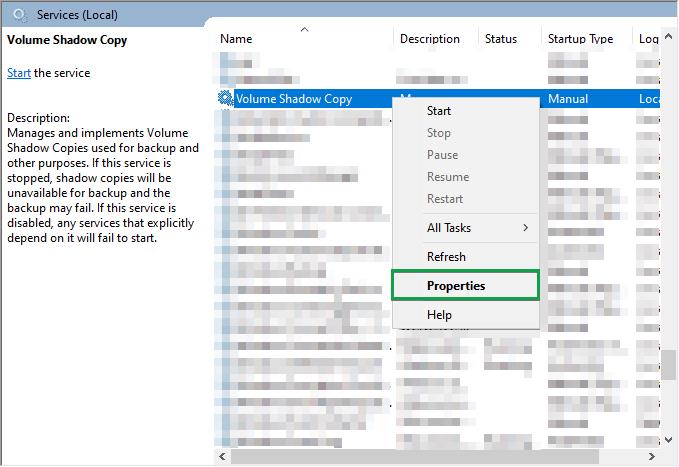
- Look for “Volume Shadow Copy” or press “V” on your keyboard for a faster search.
- Right-click on “Volume Shadow Copy” and choose “Properties”.
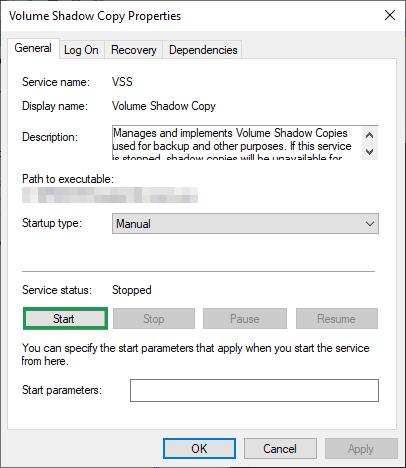
- If the Service status indicates that it is stopped, click “Start” to enable the service.
- Attempt to run System Restore again to check if the issue is fixed.
If all solutions fail and the problem persists, the restore point itself might be corrupt. In such cases, selecting a different restore point or resetting Windows—although at the cost of losing your data—might be necessary to bring your system back to optimal condition.


