How to Fix ‘System’ Process Taking Massive Amounts of RAM on Windows 10
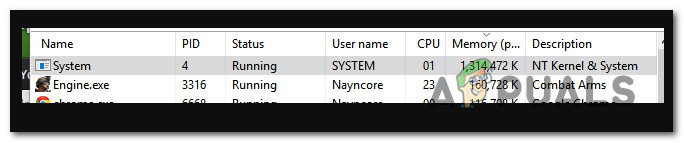
Some Windows 10 users are reporting that most of their available RAM is taken up by System (NT Kernel & System). Most affected users are reporting that this issue is occurring even when their PC is in idle mode.
After investigating this particular issue, it turns out that there are several different underlying causes that might be causing this on a Windows 10 computer. Here’s a list of potential culprits that might be responsible for this high RAM resource usage:
- Outdated Windows 10 build – On Windows 10, there is a certain but (commonly referred to as superfetch glitch) that fills the RAM with unnecessary app data that never clears. Fortunately, Microsoft has already resolved this issue via a hotfix, so all you need to do is install every available Windows update for your particular Windows 10 version.
- OS Mismanagement of RAM resources – Where there are generally very rare cases where you are capable of handling memory management better than your OS, there are certain situations where you can bring the RAM usage of the System down significantly by disabling the Sysmain (former Superfetch) feature in order to stop your system from occupying your free RAM with preloaded apps.
- System File Corruption – Another possibility that might ultimately cause this behavior is system file corruption that is affecting your system’s ability to use and clear RAM data. In this case, the easiest and most effective thing you can do is reset every Windows component with a procedure like clean installing or repair install.
Now that you know the most frequent instances that will cause this behavior, here’s a list of verified methods that other affected users have successfully used to fix the high resource usage of System (NT Kernel & System):
Method 1: Updating your Windows 10 build to the latest version
As it turns out, one of the most common instances with the potential of causing this System behavior is a Superfetch bug feature that was already resolved by Microsoft via a hotfix.
Several affected users that were dealing with the same issue have confirmed that the problem was no longer occurring after they installed every pending Windows 10 update and restarted their computer.
If you’re looking for specific instructions, follow the steps below to use the Windows Update tab inside the Settings app to install every pending Windows 10 update:
- Start by press Windows key + R to open up a Run dialog box. Next, type ”ms-settings:windowsupdate’ and press Enter to open up the Windows Update tab of the Settings app.
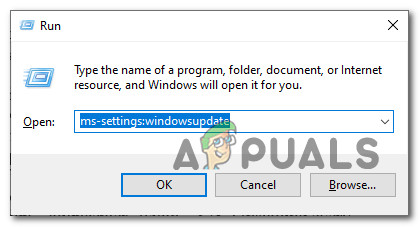
Opening the Windows Update screen on Windows 10 (via Run box) - Inside the Windows update screen, go ahead and click on Check for updates. Next, follow the on-screen prompts to install every Windows update that is currently scheduled to be installed.
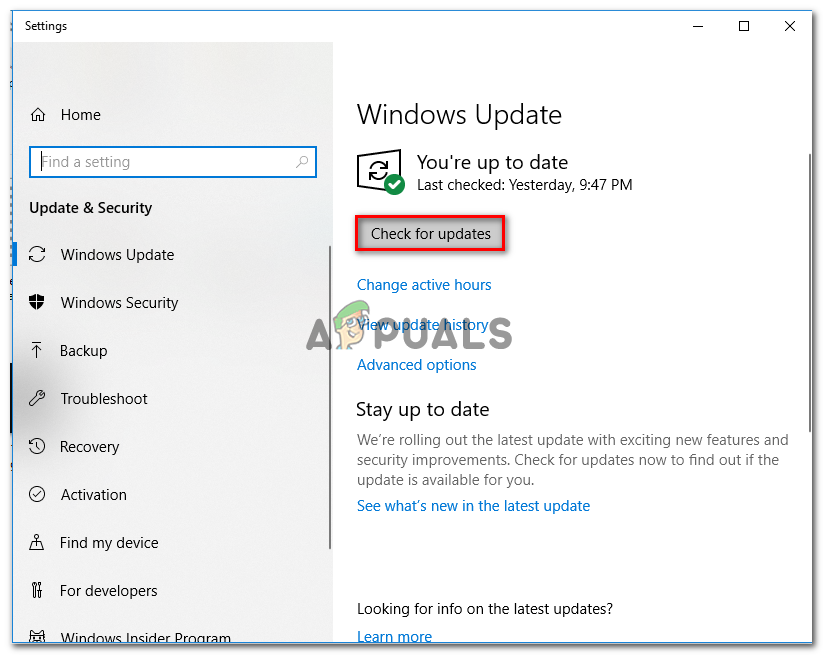
Install Windows Update Note: Install every type of update including cumulative and security updates, not just important ones.
- Keep in mind that if you have a lot of pending updates, you will be prompted to restart before every update is installed. In this case, restart as instructed, but make sure to return to this screen at the next startup and finish the installation of the rest of the updates.
- Once every pending update is installed, reboot your computer again and see if the usage of the System process has gone down significantly.
In case the same kind of issue is still occurring, move down to the next potential fix below.
Method 2: Disabling Sysmain
If you’ve ensured that you are updated to the latest Windows 10 build, your next step should be to take a look at the Sysmain service.
Sysmain was previously known as Superfetch and it’s responsible for maintaining and improving system performance over time. It does this by preloading apps you frequently use into RAM so there is basically no loading time (similarly to what Android is doing).
However, the drawback of this is that if you’re working with a small amount of RAM, this feature might end up taking a huge chunk of your available RAM resources.
If you find yourself in this particular scenario, you should be able to fix the problem swiftly by using the Services screen to disable this feature completely.
Note: Disabling Sysmain will make the loading times of your apps bigger, but it will free up a lot of valuable RAM.
If you understand the consequences of Sysmain and you still want to do it, follow one of the sub guides below to disable Sysmain (depending on your preferred approach):
- A. Disabling Sysmain via Services Screen
- B. Disabling Sysmain via Registry Editor
- C. Disabling Sysmain via Command Prompt
A. Disabling Sysmain via Services Screen
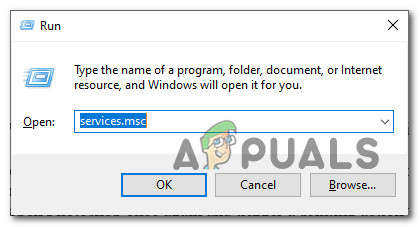
- Press Windows key + R to open up a Run dialog box. Next, inside the text box, type ‘services.msc’ and press Enter to open up the Services screen. When you’re prompted by the UAC (User Account Control), click Yes to grant admin access.
Accessing the Services screen - Once you’re inside the Services screen, scroll down through the list of available services from the right-hand pane and locate the one named Sysmain.
- When you see it, right-click on it and choose Properties from the context menu that just appeared.
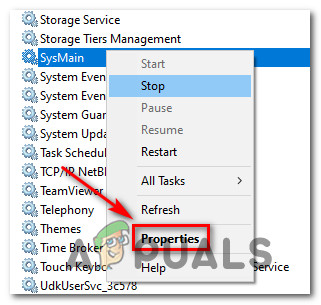
Accessing the Properties screen of Sysmain - Inside the Properties screen of SysMain, click on the General tab, then set the Startup type to Disabled by using the associated drop-down menu. Then, click on Stop if the service is already running.
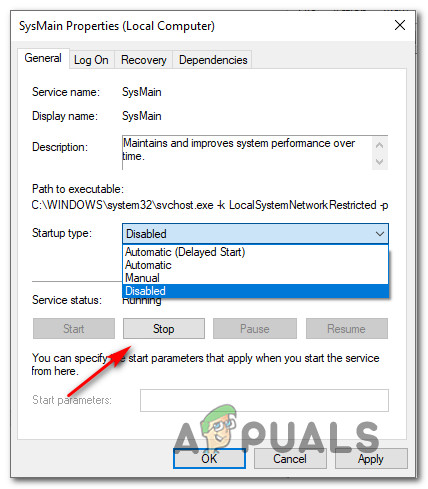
Stopping the sysmain service - Click Apply to save the changes, then close the Services screen and restart your computer. Once the next startup is complete, you should not experience the same kind of resource usage by System.
B. Disabling Sysmain via Registry Editor
- Press Windows key + R to open up a Run dialog box. Next, inside the text box, type ‘regedit’ and press Ctrl + Shift + Enter to open up the Registry Editor with admin access. When prompted by the UAC (User Account Control), click Yes to grant admin access.
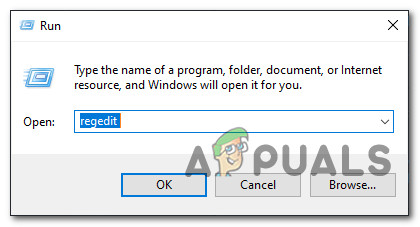
Opening the Registry Editor - Once you’re inside the Registry Editor, navigate to the following location:
HKEY_LOCAL_MACHINE \ System \ CurrentControlSet \ Services \ SysMain
Note: You can either get to this location manually or you can paste the location directly into the navigation bar at the top and press Enter to get there instantly.
- After you arrive at the correct location, click on the Symain key to select it, then move over to the right-hand pane and double-click on the Start Dword value.
- Finally, set the value data of Start to 4 and the Base to Hexadecimal before clicking on Ok to save the changes.
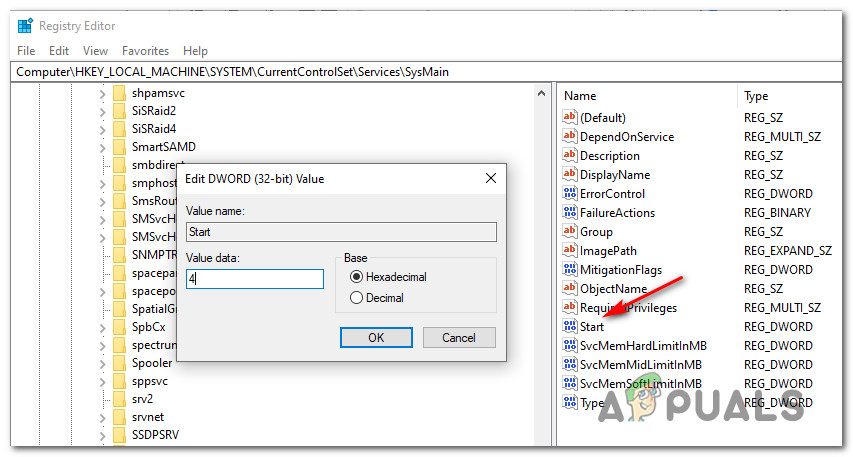
Disabling the SysMain service - Close Registry Editor and restart your computer to make these changes permanent.
C. Disabling Sysmain via Command Prompt
- Press Windows key + R to open up a Run dialog box. Next, type ‘cmd’ inside the text box and press Ctrl + Shift + Enter to open up an elevated Command prompt window.
Opening a CMD window Note: When you’re prompted by the UAC (User Account Control) window, click Yes to grant admin access.
- Once you’re inside the elevated Command Prompt, type the following commands and press Enter after each one to effectively disable SysMain:
sc stop "SysMain"
sc config "SysMain" start=disabled
- After both commands have been successfully processed, restart your computer and see if the problem is now fixed and the System RAM usage goes down.
If the same issue is still occurring, move down to the next potential fix below.
Method 3: Reset every Windows Component
In case none of the methods (updating your Windows version or disabling Sysmain) have brought the RAM usage of System down, you should seriously take into consideration that you might be dealing a case of system file corruption.
Several affected users that were also encountering this problem have reported that usage only went down after refreshing every relevant OS component.
If you find yourself in a scenario like this, the only thing you can do is reset every relevant Windows component and eliminate every potentially corrupted element – When it comes to doing this, you have two ways forward:
- Clean Install – Go for this approach if you’re looking for a quick fix that can be deployed without the need of using compatible Windows installation media. You can deploy a clean install procedure directly from the GUI menu of your Windows installation, but keep in mind that unless you back up your data in advance, you will lose any personal data that’s currently stored on the OS drive.
- Repair Install – If you have any important information on the OS drive that you plan on keeping, a repair install should be the way to go for you, even if the procedure is a bit tedious. You’ll need to use compatible installation media, but you will be able to keep your personal files, installed applications, games, and even some user preferences rooted on the OS drive.


