How To Fix Strict or Moderate NAT in COD Vanguard?
When your NAT status in Call of Duty Vanguard is Moderate or Strict, it signifies the connection between your computer and the game servers is not optimal. In most cases, the NAT status can be associated with the proper ports being closed in your network settings.
Call of Duty Vanguard, like any other game out there, uses specific ports to establish a connection with the game server. Ports play a vital role as they provide a door for any connection to your computer.
A NAT status of Strict or Moderate is not optimal, and you might face some difficulties while trying to play the game with such a connection. To be specific, players have encountered issues with joining a friend’s lobby or inviting friends to a lobby, for that matter. On top of that, searching for games can also be problematic in such a scenario.
This article will walk you through several methods to help you fix the mentioned issue, as it has helped other players. However, before we begin, it is vital to know the causes of the said issue. Therefore, let us start with that.
Now that we have gone through the possible causes of the mentioned issue, let us get started with the different methods to help you resolve it.
1. Allow COD Vanguard through Windows Firewall
The first thing you should do when encountering the said problem is to ensure that the game is on the whitelist of the Windows Defender Firewall. The Windows Defender Firewall is a crucial component of the Windows operating system, as all incoming and outgoing connections must go through the firewall. The firewall serves as a security agent that safeguards you against unknown connections.
If COD Vanguard is not allowed through the Windows Firewall, you will have to add it to the list of allowed apps manually. By doing this, the Windows Defender Firewall will allow all the links the game needs to make for a smoother experience. You can do this very quickly via the Control Panel. Follow the instructions given down below to do this:
- First, open up the Control Panel by searching for it in the Start Menu.
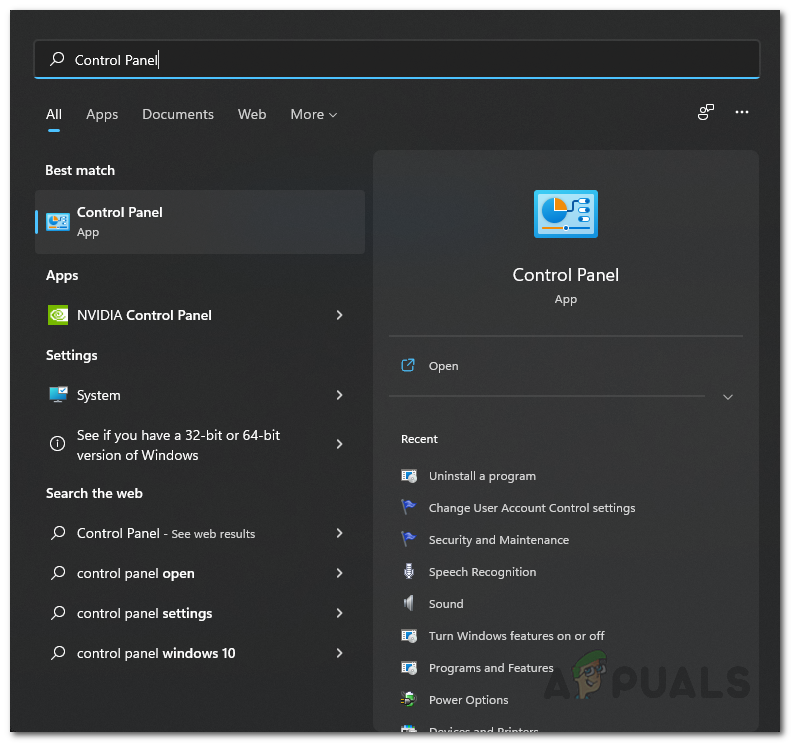
Opening up Control Panel - Once the Control Panel window is open, navigate System and Security.
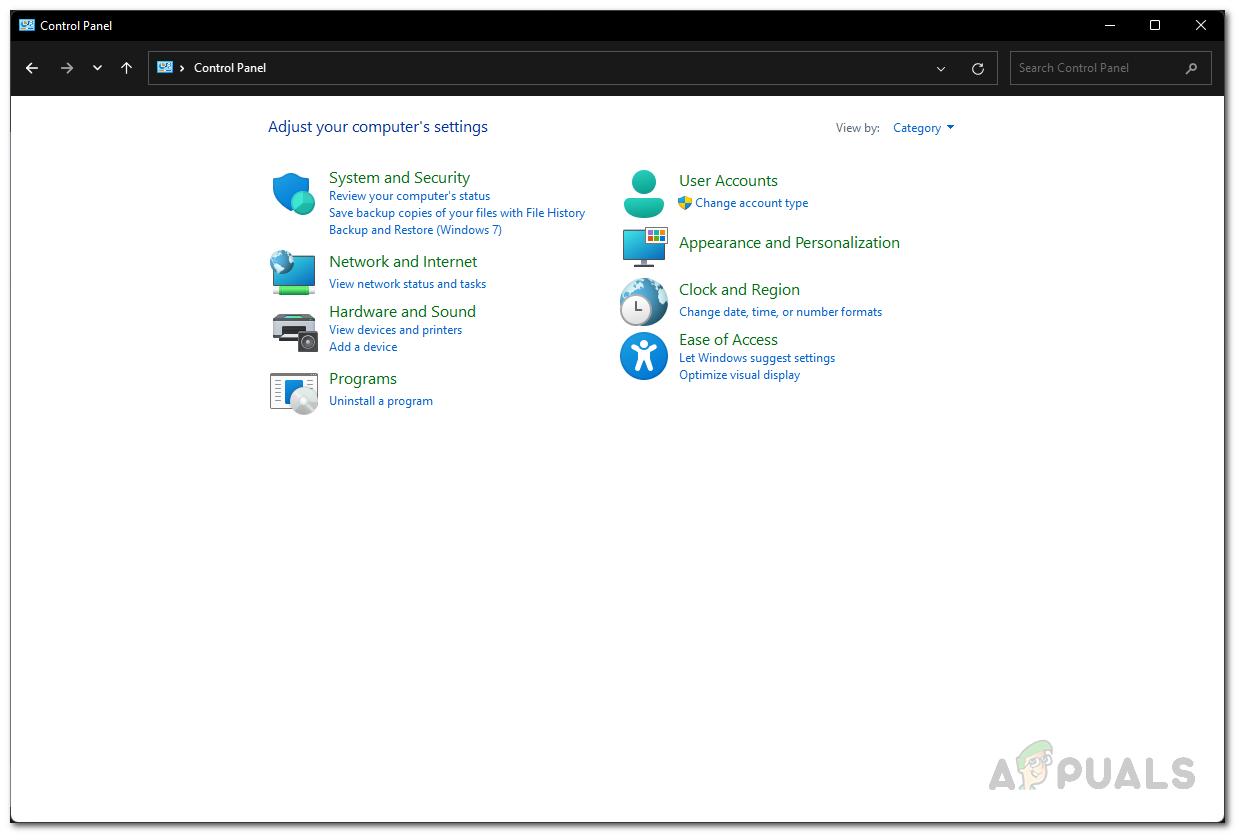
Control Panel - There, click on the Windows Defender Firewall option provided.
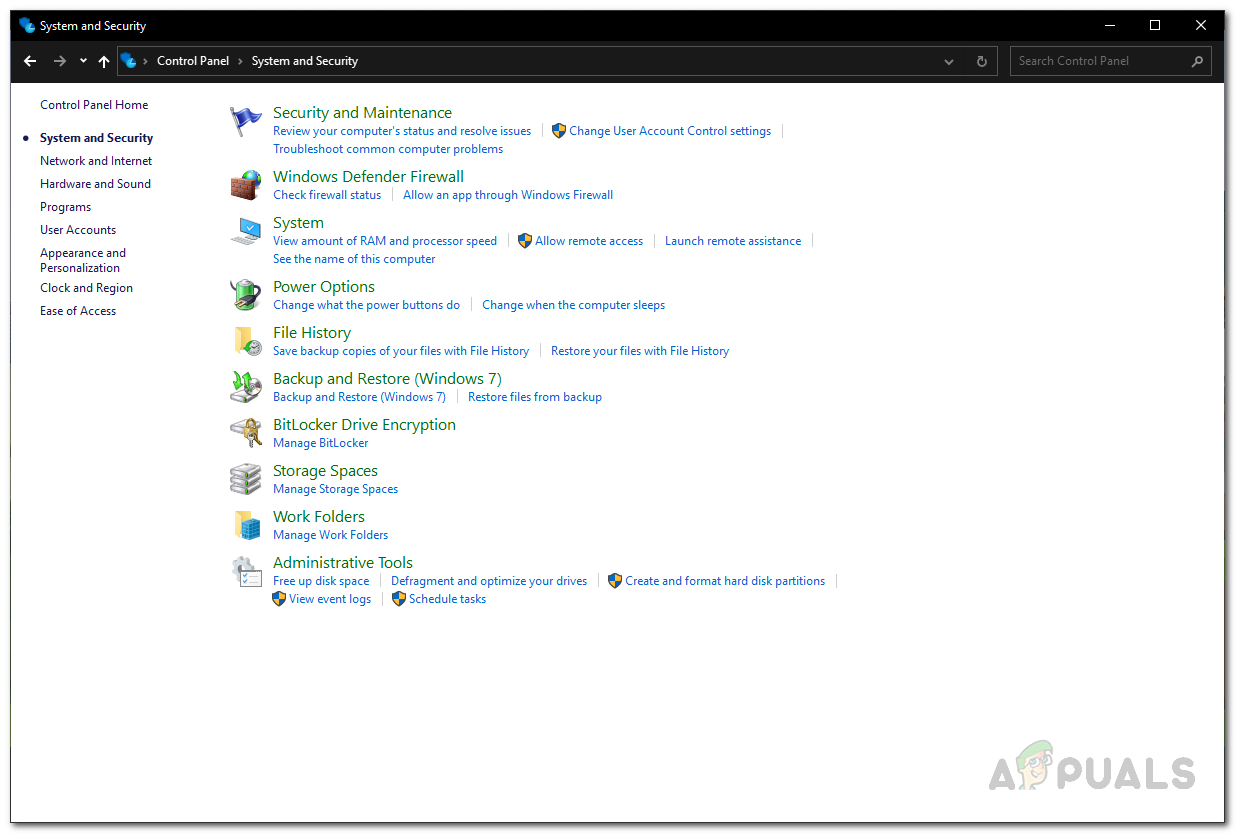
Navigating to Windows Defender Firewall - Now, on the left-hand side, click on the Allow an app or feature through Windows Defender Firewall option provided.
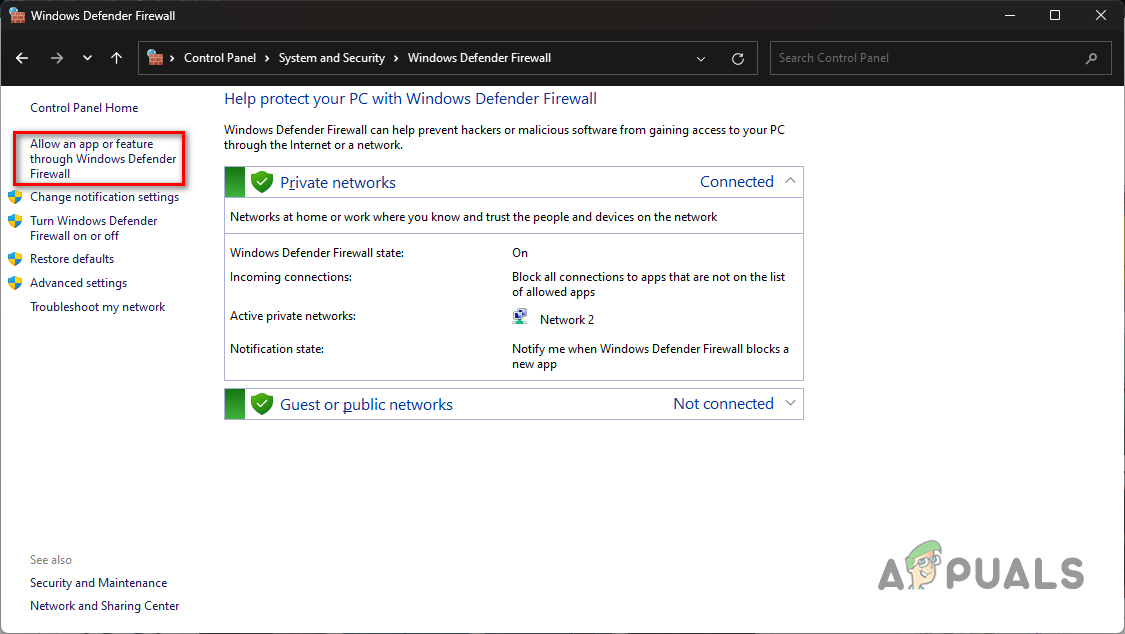
Allow an App through Windows Defender Firewall - This will take you to a list of apps allowed through your firewall. If you do not see COD Vanguard in the list, you will need to add it manually.
- To do that, click on the Allow another app button provided.
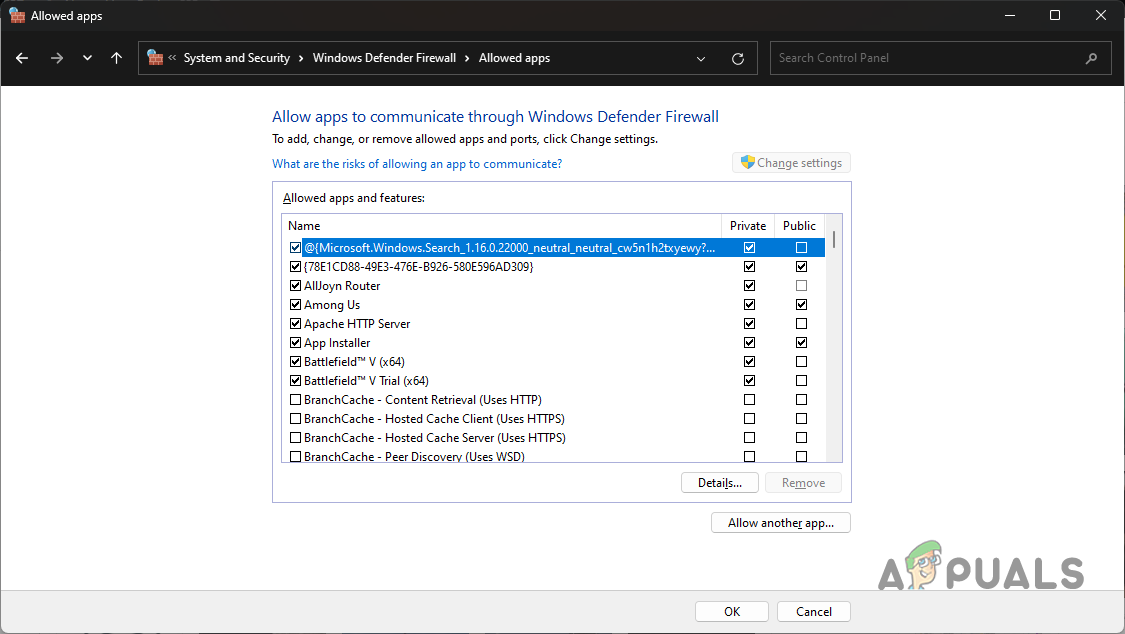
Windows Defender Firewall Allowed Apps - On the follow-up dialog box, click on the Browse button.
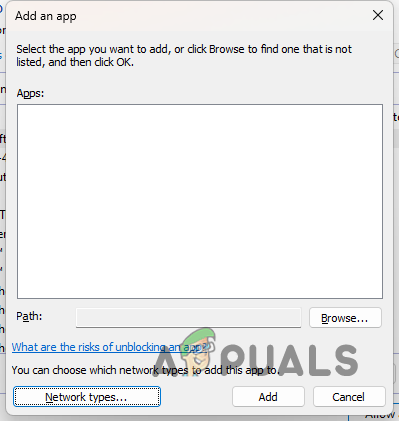
Adding App to Windows Defender Firewall - Then, navigate to the game’s installation directory and choose the vanguard.exe file.
- Follow it up by clicking the Network types button.
- Make sure both the Public and Private checkboxes are ticked on the following dialog box. Click OK.
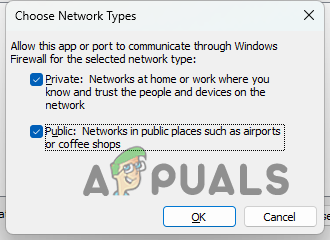
Setting Network Types for App - Finally, click on the Add button to allow Vanguard through the firewall.
- See if your NAT status is different now.
2. Remove Previous COD Port Forwards
Port forwarding or port mapping is helpful when certain video games cannot work correctly. If you are unaware, your router has some ports open by default. However, most ports are not open, and you must open them manually. In such a scenario, you will have to open the ports the application requires manually.
Some users have reported that they could resolve the issue by removing the ports previously forwarded in the router settings for other Call of Duty games, such as Cold War. If this applies to you, head into your router settings and remove any previous port forwarding, you may have done for other COD games. Once you are through with that, make sure to restart your router. See if that resolves the issue.
3. Manually Open Ports for COD Vanguard
If removing the previously opened ports did not work out for you, you will have to open the ports required by Call of Duty Vanguard manually. The specific ports may differ depending on the platform you are playing the game on. However, do not fret; we will mention all that information below.
The procedure for this can vary slightly depending on the brand of your router. However, most of it should be straightforward. Follow the instructions down below to open the ports:
- First, open up your router’s default gateway in a browser tab. This is usually 192.168.1.1 or 192.168.0.1.
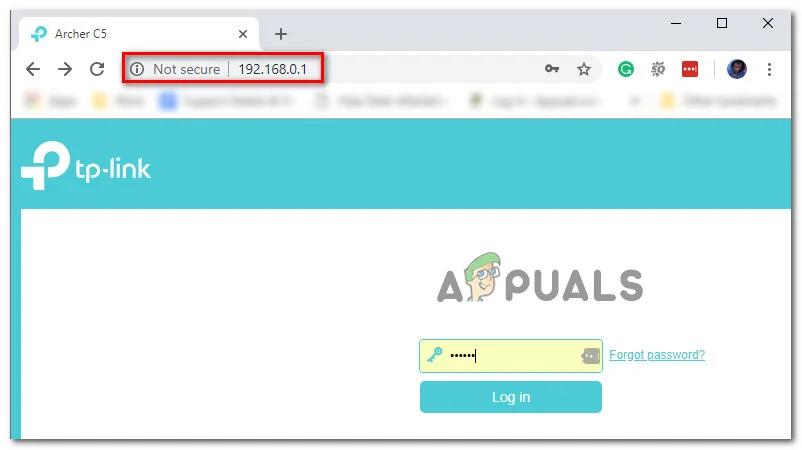
Accessing Router Settings - To access the settings, you will have to log in. These credentials are available on the back side of your router. Therefore, if you are unsure about the password, you can get it from there.
- After logging in, you will need to head to Advanced settings. The location of this option may vary depending on the brand of your router.
- Under Advanced settings, make your way to NAT Forwarding.
- After that, click on the Virtual Servers option on the left-hand side.
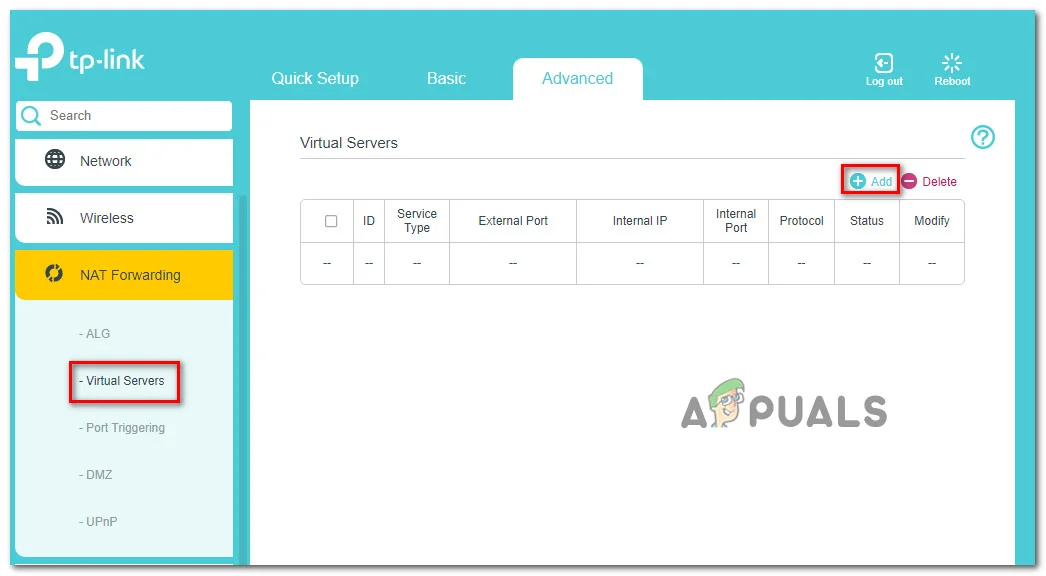
Port Forwarding - To open a port, click on the Add button.
- Now, depending on the platform you use to play COD Vanguard, the ports can slightly differ. Use the below information to open the ports for your respective platform.

Vanguard Ports for Different Platforms - After doing all that, launch Call of Duty Vanguard again to see if the problem still exists.
4. Disable UPnP
Universal Plug and Play is a network protocol that allows the devices in your network to discover each other automatically. This prevents you from the hassle of manual intervention or configuration.
Some users have reported that they managed to solve the problem for themselves by disabling the UPnP protocol. You can do this via the router settings page that you accessed earlier. As with port forwarding, the procedure of disabling UPnP depends on the brand of the router that you are using. This is something that you will find in the Advanced settings menu.
If you cannot locate it, simply head to Google and search for disabling UPnP on your respective router brand. After disabling UPnP, open up the game to see if the NAT status has changed.
5. Use DMZ
Finally, if none of the methods above has resolved the problem, you can try putting your computer or console in DMZ as a last resort. We would not recommend this, but it is still an option for the last hope. If you are unaware, DMZ or Dematerialized Zone is a subnet of your network exposed to the internet. This includes security risks that you must be willing to undertake.
To do this, you will need to have a static IP address. Once you have a static IP address, you can add that to DMZ in your router settings. You can usually find the DMZ option under NAT Forwarding in most cases, so that is where you should look right off the bat. If you do not have a static IP address, you can choose to set a static IP address for your device. Or, you can go through the trouble of adding your device to DMZ on each restart.
If that doesn’t work for you as well, it means that you are behind a carrier-graded NAT; in that case, you will have to contact your ISP to get this issue resolved.


